Post an actionable message card to an Office 365 group
Create an actionable message card
Let's start by creating an actionable message card. We'll start with something simple, just a basic card with an HttpPOST action and an OpenUri action. We'll use the Actionable Messages Designer to design the card.
Important
Office connectors only support the legacy MessageCard format for cards. They do not support the Adaptive Card format.
Go to Actionable Message Designer and paste in the following JSON:
{
  "@context": "https://schema.org/extensions",
  "@type": "MessageCard",
  "themeColor": "0072C6",
  "title": "Visit the Outlook Dev Portal",
  "text": "Click **Learn More** to learn more about Actionable Messages!",
  "potentialAction": [
    {
      "@type": "ActionCard",
      "name": "Send Feedback",
      "inputs": [
        {
          "@type": "TextInput",
          "id": "feedback",
          "isMultiline": true,
          "title": "Let us know what you think about Actionable Messages"
        }
      ],
      "actions": [
        {
          "@type": "HttpPOST",
          "name": "Send Feedback",
          "isPrimary": true,
          "target": "http://..."
        }
      ]
    },
    {
      "@type": "OpenUri",
      "name": "Learn More",
      "targets": [
        { "os": "default", "uri": "https://learn.microsoft.com/outlook/actionable-messages" }
      ]
    }
  ]
}
Feel free to experiment with this simple example in the Actionable Message Designer. You can see the message card reference for details on the available fields. Once you have a card you're happy with, you can move on to sending it.
Sending actionable messages via Office connectors
Connectors use webhooks to create Connector Card messages within an Office 365 group. Developers can create these cards by sending an HTTP request with a simple JSON payload to an Office 365 group webhook address. Let's try posting some basic cards to a group.
You'll need an Microsoft 365 subscription to proceed. If you don't have a Microsoft 365 subscription, you might qualify for one through the Microsoft 365 Developer Program; for details, see the FAQ. Alternatively, you can sign up for a 1-month free trial or purchase a Microsoft 365 plan.
Get a connector webhook URL for a Microsoft 365 Group
Sign in to Outlook on the web at https://outlook.office.com.
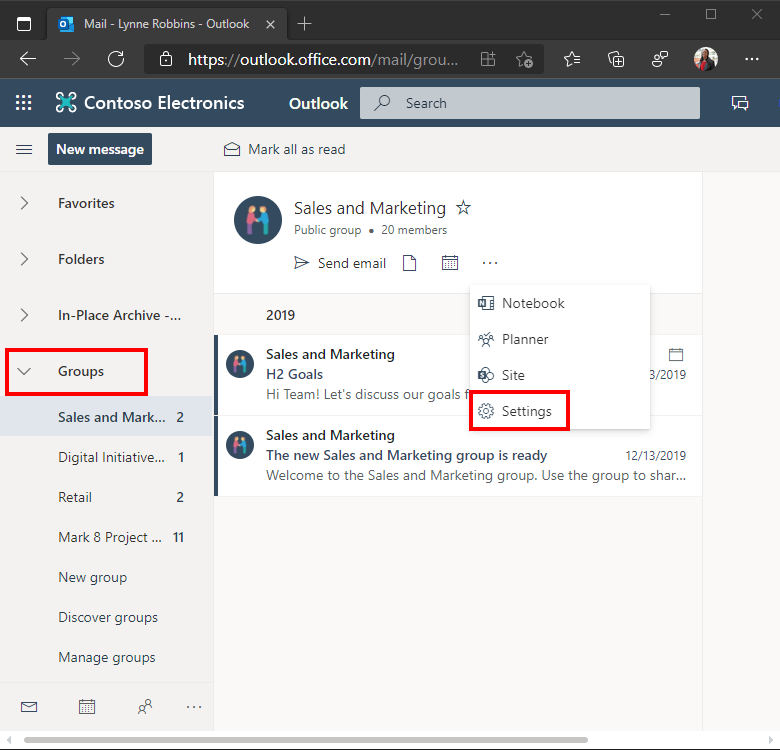
In the folder list, select a group under the Groups section. In the group's menu, select the ellipses (...), then select Settings.
In the Group Settings pane, select Connectors.
Locate and select the Incoming Webhook connector in the list of available connectors.
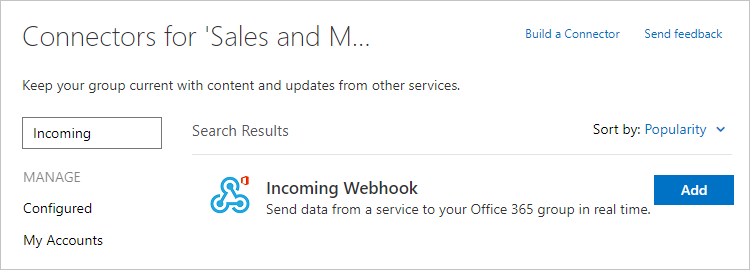
Enter a name for this connector and choose Create.
Copy the webhook URL that is displayed and save it. Choose Done.
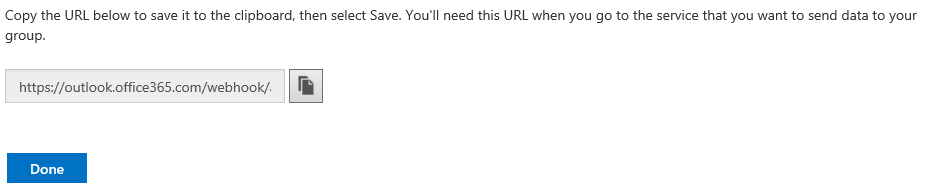
The webhook URL should look similar to the following:
https://outlook.office365.com/webhook/a1269812-6d10-44b1-abc5-b84f93580ba0@9e7b80c7-d1eb-4b52-8582-76f921e416d9/IncomingWebhook/3fdd6767bae44ac58e5995547d66a4e4/f332c8d9-3397-4ac5-957b-b8e3fc465a8c
Send the message
Use Postman to post an actionable message payload to the webhook URL. Open Postman. Create a new tab if needed and configure the tab as follows:
Click the GET and change to POST.
In the text box labeled
Enter request URLpaste the webhook URL.Click Body underneath the URL, then select the raw option.
Click Text and change to JSON (application/json).
Enter the message card JSON in the text area below.
The Postman window should look like this when you are done:
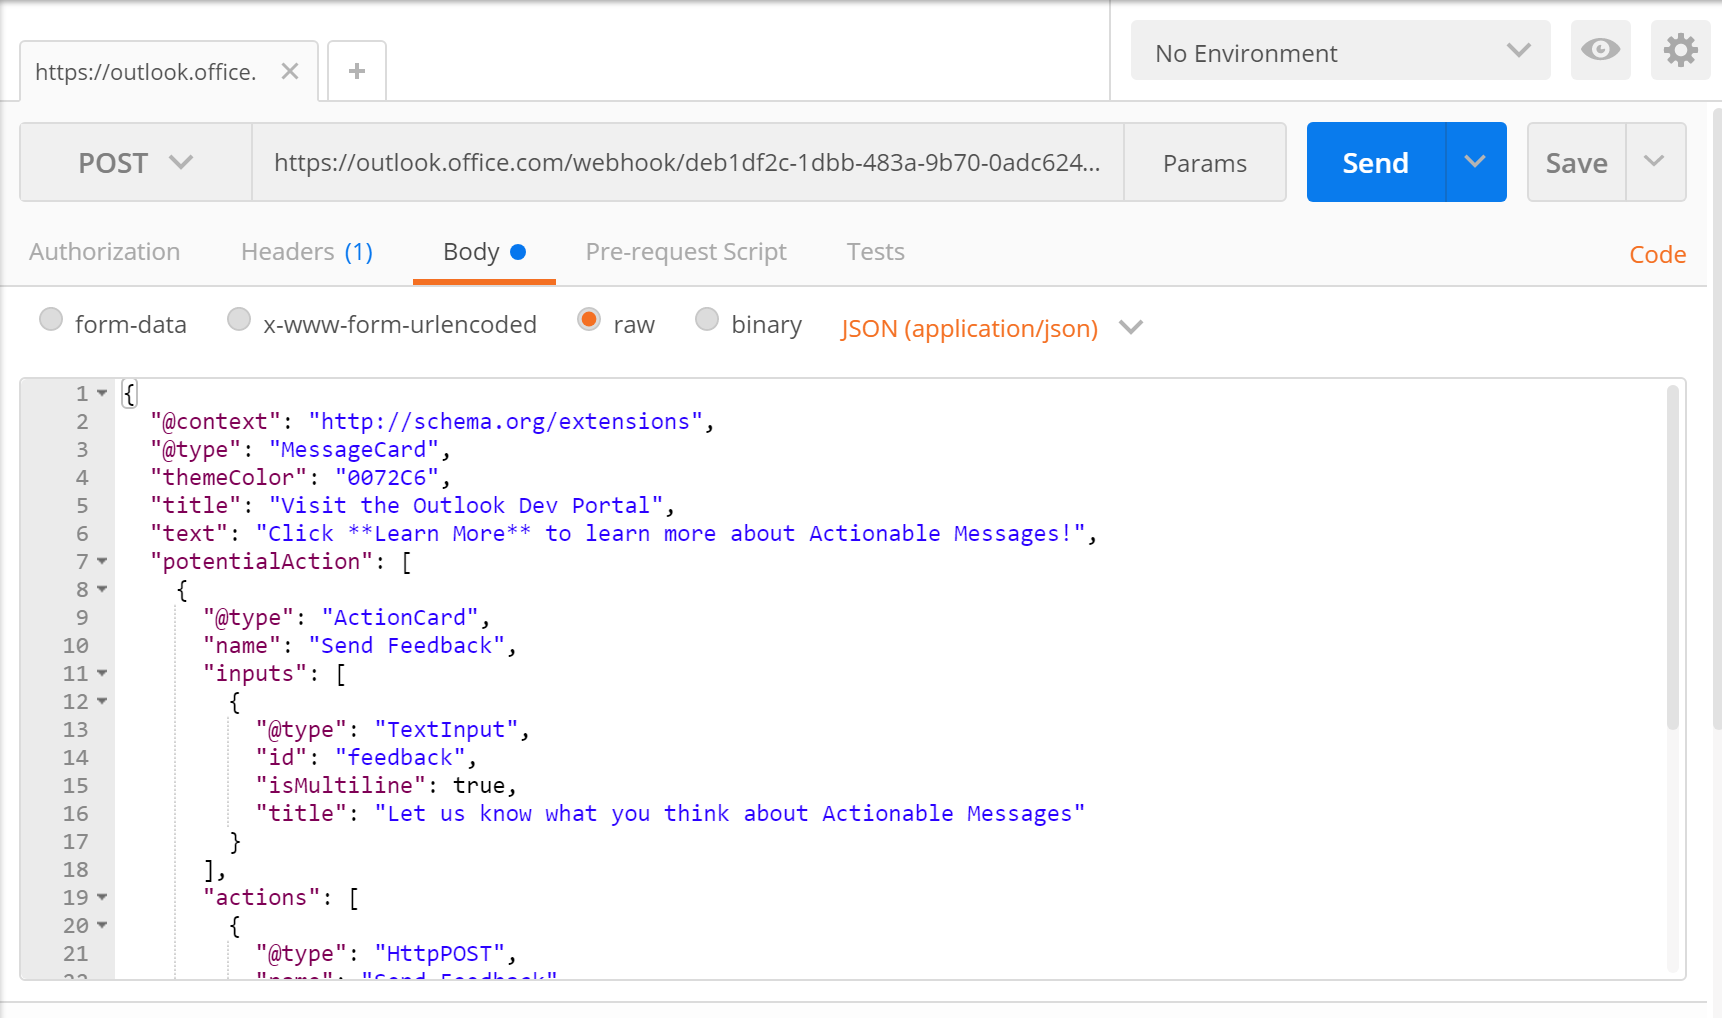
Click Send to post the message.
Feedback
Coming soon: Throughout 2024 we will be phasing out GitHub Issues as the feedback mechanism for content and replacing it with a new feedback system. For more information see: https://aka.ms/ContentUserFeedback.
Submit and view feedback for