Note
Access to this page requires authorization. You can try signing in or changing directories.
Access to this page requires authorization. You can try changing directories.
Original KB number: 2659085
Summary
This issue is caused by the corrupted Outlook profile. You can try to create a new profile to resolve the issue.
Symptoms
When you try to send or to receive email in Outlook 2010, you may receive one of these error messages:
0x8004010F: Outlook data file cannot be accessed.
or
0x8004010F: The operation failed. An object could not be found.
Resolution
To resolve error 0x8004010F, identify the current location of your default Outlook data file, and then create a new Outlook profile. To do this follow these steps:
Step 1 - Locate the default Outlook data file
Select Start, and then select Control Panel.
In Control Panel, select Mail.
In the Mail Setup - Outlook dialog box, select Show Profiles.
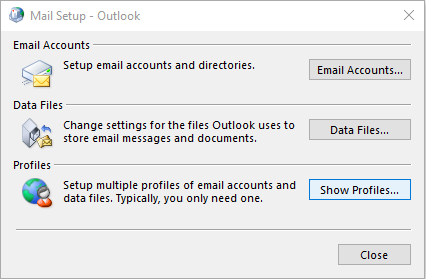
Select your current Outlook profile, and then select Properties.

In the Mail Setup - Outlook dialog box, select Data Files.
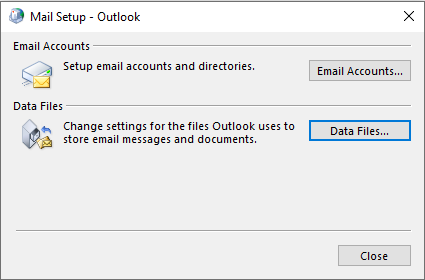
Select the Data Files tab in the Account Settings dialog box, and then note the name and location of the default data file for your profile (a check mark will denote the default data file).
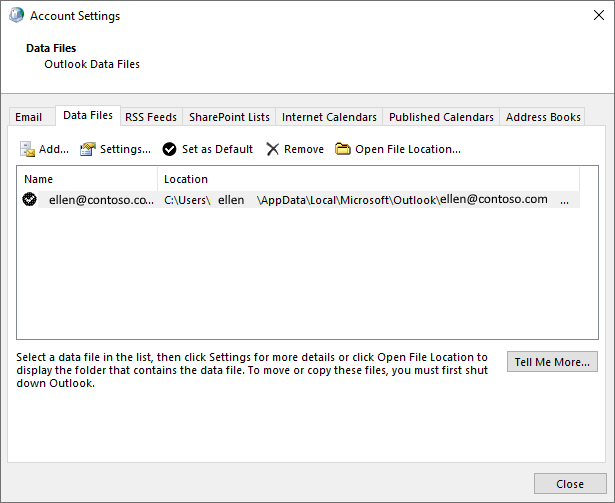
Select Close.
Step 2 - Create a new Outlook profile
Method 1 - Use auto account setup to create an IMAP or POP3 email account
Important
If your email server supports both IMAP and POP3, auto account setup will create an IMAP account by default. You will need to follow the manual steps in order to create a POP3 account. However, if your email server supports ONLY a POP3, auto account setup will create a POP3 account.
Select Start, and then select Control Panel.
In the Mail Setup - Outlook dialog box, select Show Profiles.

On the General tab in the Mail dialog box, select Add.

In the New Profile dialog box, type a new profile name, and then select OK.
In the Add Account dialog box, type your email account information, and then select Next.
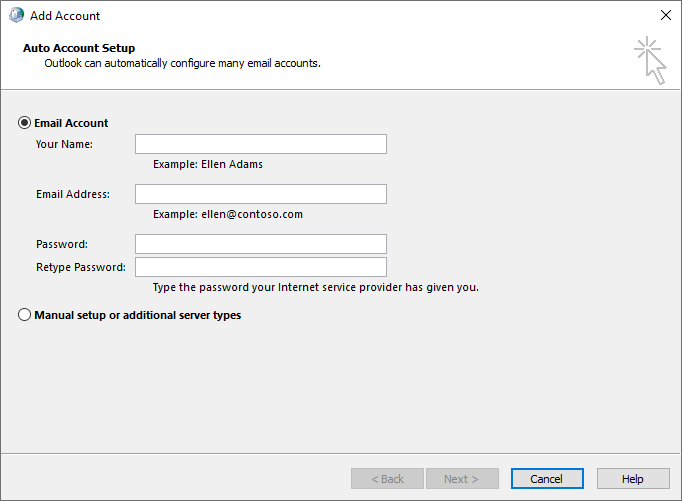
After your account is successfully configured, select Finish.
Method 2 - Manually create an IMAP or POP3 email account
Select Start, and then select Control Panel.
In the Mail Setup - Outlook dialog box, select Show Profiles.

On the General tab in the Mail dialog box, select Add.

In the New Profile dialog box, type a new profile name, and then select OK.
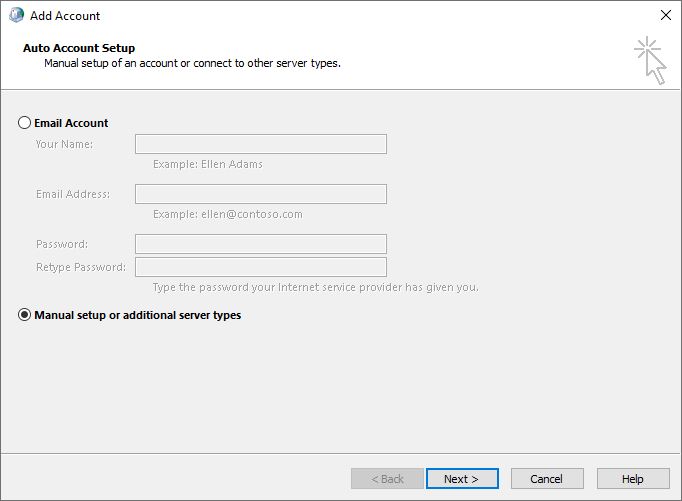
In the Add Account dialog box, select Manually configure server settings or additional server types, and then select Next.
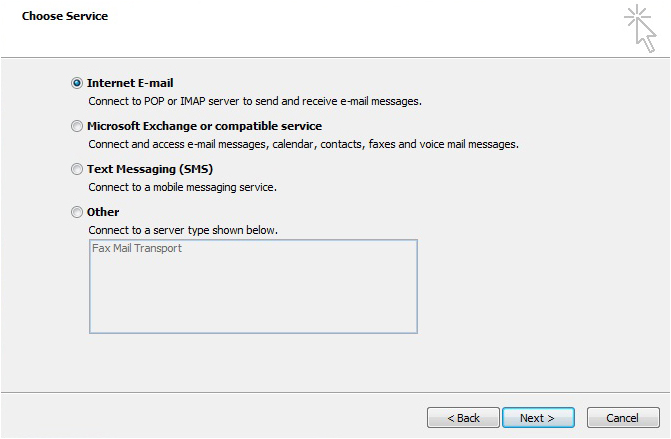
In the Choose Service dialog box, select Internet E-mail, and then select Next.
In the Internet E-mail Settings dialog box, type your account details.
Select Test Account Settings to test your account.
Note
Contact your Internet service provider if you are unsure of the correct account details.
Select Existing Outlook Data File, and then select Browse.
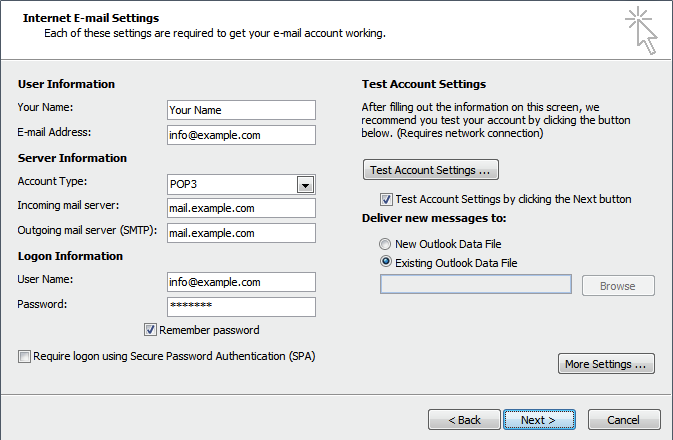
In the Open Outlook Data File dialog box, browse to and then select the Outlook data file you previously located. Select OK.
Select Next.
In the Test Account Settings dialog box, select Close.
Select Finish.
Step 3 - Configure your new Outlook profile as the default profile
If you want to set the new Outlook profile as the default profile, follow these steps:
- On the General tab of the Mail dialog box, select Always use this profile.
- Select the drop-down under Always use this profile, and then select the new profile.
- Select OK to close the Mail dialog box.
More information
If you have several non default .pst files and need to include them in your Outlook profile, follow these steps:
- Start Outlook.
- On the File tab, select Open.
- Select Open Outlook Data File.
- Browse to the folder location that contains your other .pst file, select it, and then select OK.
The newly added .pst file will appear in the Navigation pane.