Use an HTTPS endpoint to manage commercial marketplace leads
If your customer relationship management (CRM) system isn't explicitly supported in Partner Center to receive Microsoft AppSource and Azure Marketplace leads, you can use an HTTPS endpoint in Power Automate to handle these leads. With an HTTPS endpoint, commercial marketplace leads can be sent out as an email notification or they can be written to a CRM system supported by Power Automate.
This article explains how to create a new flow in Power Automate to generate the HTTP POST URL that you'll use to configure leads in Partner Center. It also includes steps to test your flow with Postman.
Note
The Power Automate connector used in these instructions requires a paid subscription to Power Automate. Make sure you account for this before you configure this flow.
Create a flow by using Power Automate
Open the Power Automate webpage. Select Sign in. If you don't already have an account, select Sign up free to create one.
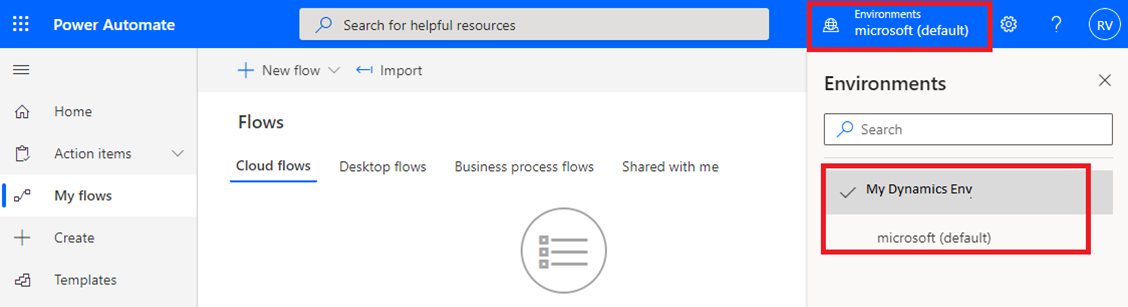
Sign in, select My flows, and switch the Environment from Microsoft (default) to your Dataverse (CRM) Environment.
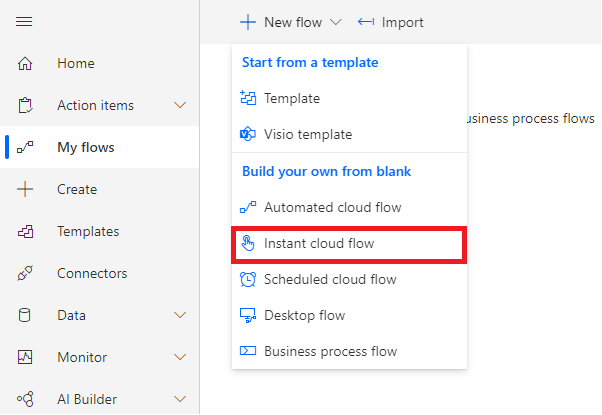
Under + New, select + Instant cloud flow.
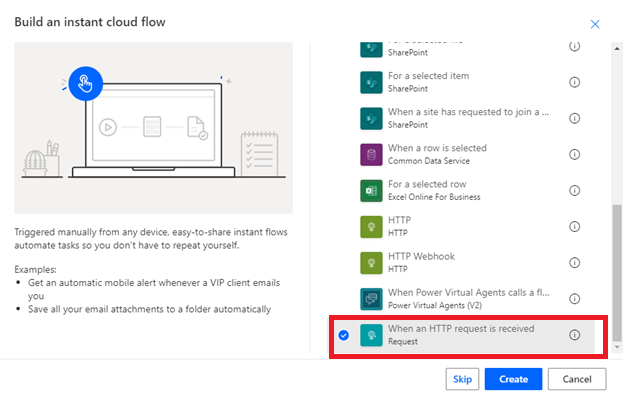
Name your flow, and then under Choose how to trigger this flow, select When a HTTP request is received.
Select the flow step to expand it.
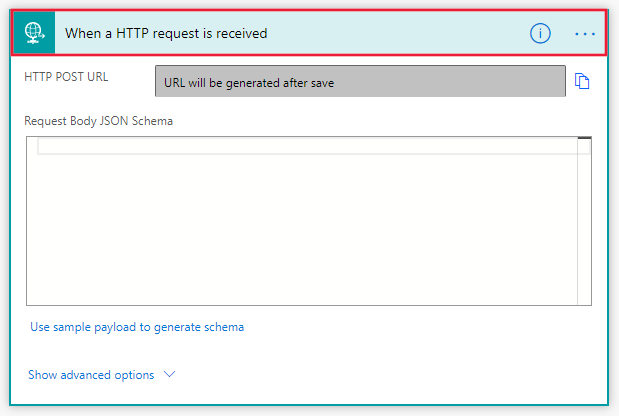
Use one of the following methods to configure the Request Body JSON Schema:
- Copy the JSON schema into the Request Body JSON Schema text box.
- Select Use sample payload to generate schema. In the Enter or paste a sample JSON payload text box, paste in the JSON example. Select Done to create the schema.
JSON schema
{
  "$schema": "https://json-schema.org/draft-04/schema#",
  "definitions": {},
  "id": "http://example.com/example.json",
  "properties": {
    "ActionCode": {
      "id": "/properties/ActionCode",
      "type": "string"
    },
    "OfferTitle": {
      "id": "/properties/OfferTitle",
      "type": "string"
    },
    "LeadSource": {
      "id": "/properties/LeadSource",
      "type": "string"
    },
    "Description": {
      "id": "/properties/Description",
      "type": "string"
    },
    "UserDetails": {
      "id": "/properties/UserDetails",
      "properties": {
        "Company": {
          "id": "/properties/UserDetails/properties/Company",
          "type": "string"
        },
        "Country": {
          "id": "/properties/UserDetails/properties/Country",
          "type": "string"
        },
        "Email": {
          "id": "/properties/UserDetails/properties/Email",
          "type": "string"
        },
        "FirstName": {
          "id": "/properties/UserDetails/properties/FirstName",
          "type": "string"
        },
        "LastName": {
          "id": "/properties/UserDetails/properties/LastName",
          "type": "string"
        },
        "Phone": {
          "id": "/properties/UserDetails/properties/Phone",
          "type": "string"
        },
        "Title": {
          "id": "/properties/UserDetails/properties/Title",
          "type": "string"
        }
      },
      "type": "object"
    }
  },
  "type": "object"
}
JSON example
{
  "UserDetails": {
    "FirstName": "Some",
    "LastName": "One",
    "Email": "someone@contoso.com",
    "Phone": "16175555555",
    "Country": "USA",
    "Company": "Contoso",
    "Title": "Esquire"
 },
  "LeadSource": "AzureMarketplace",
  "ActionCode": "INS",
  "OfferTitle": "Test Microsoft",
  "Description": "Test run through Power Automate"
}
Note
At this point in the configuration, you can select to either connect to a CRM system, or configure an email notification. Follow the remaining instructions based on your choice.
Connect to a CRM system
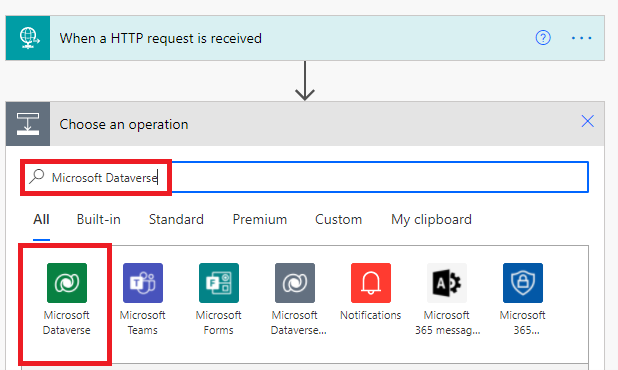
Select + New step.
Search for and select a CRM system in the Search connectors and actions box. The following screen shows Create a new record (Microsoft Dataverse) as an example.
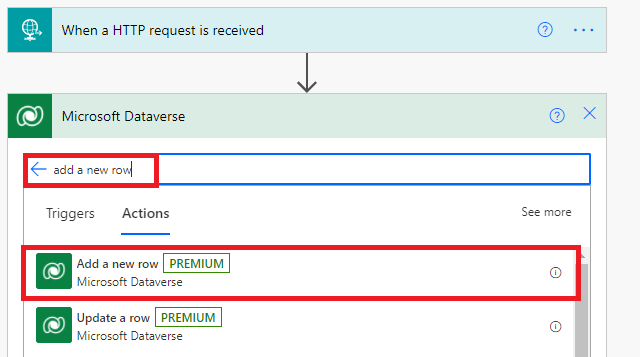
Select the Actions tab with the action to Add a new row.
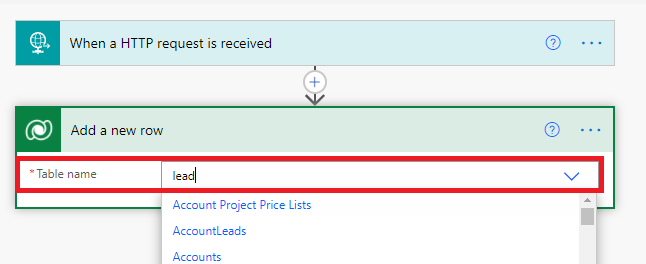
Select lead from the Table Name drop-down list.
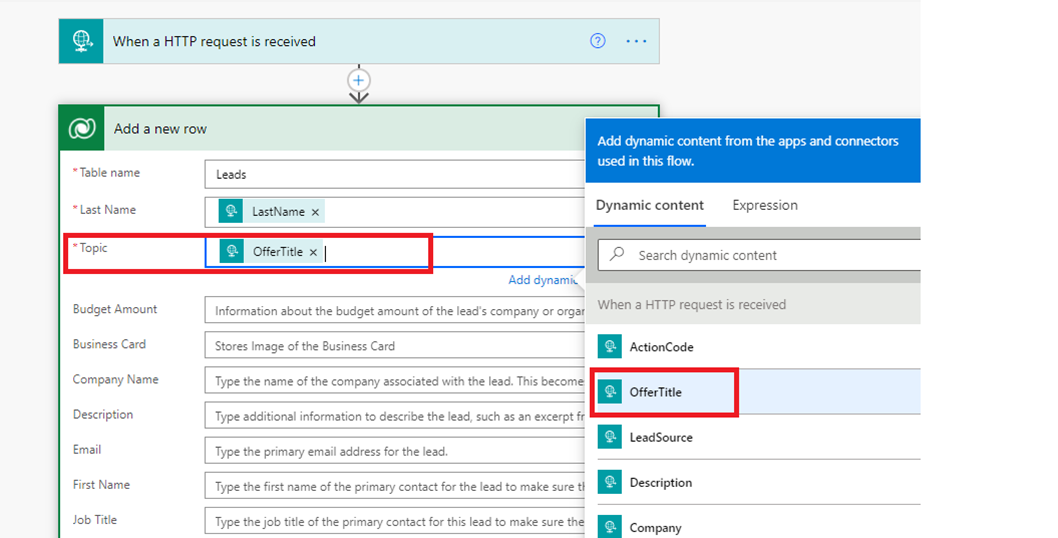
Power Automate shows a form for providing lead information. You can map items from the input request by choosing to add dynamic content. The following screen shows OfferTitle as an example.
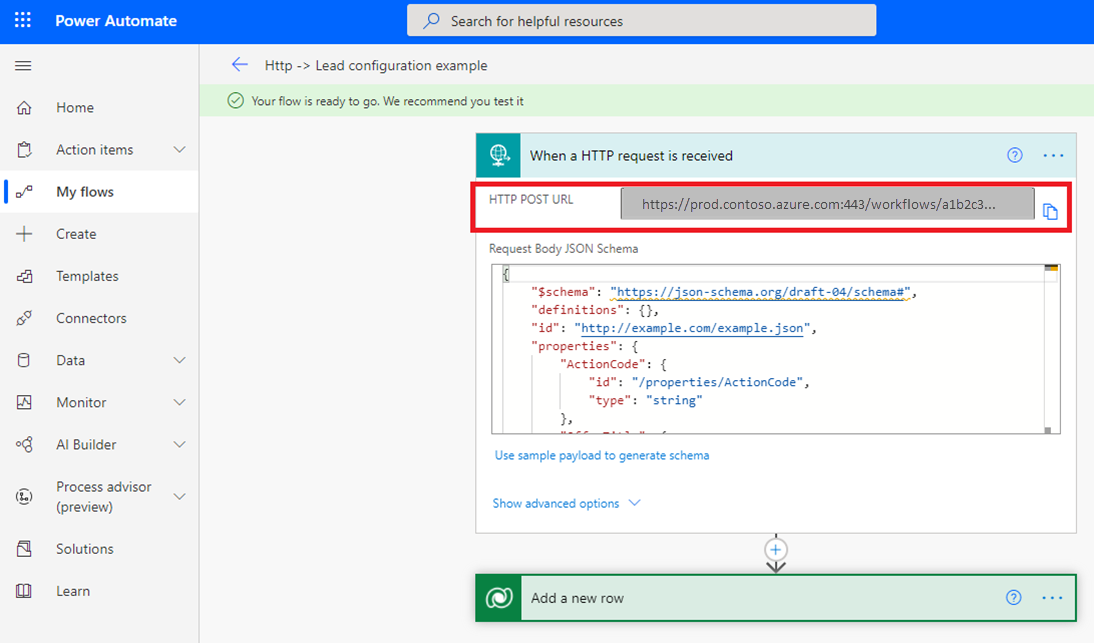
Map the fields you want, and then select Save to save your flow. An HTTP POST URL is created and is accessible in the When an HTTP request is received window. Copy this URL by using the copy control, which is located to the right of the HTTP POST URL. Using the copy control is important so that you don't miss any part of the entire URL. Save this URL because you'll need it when you configure lead management in the publishing portal.
Set up email notification
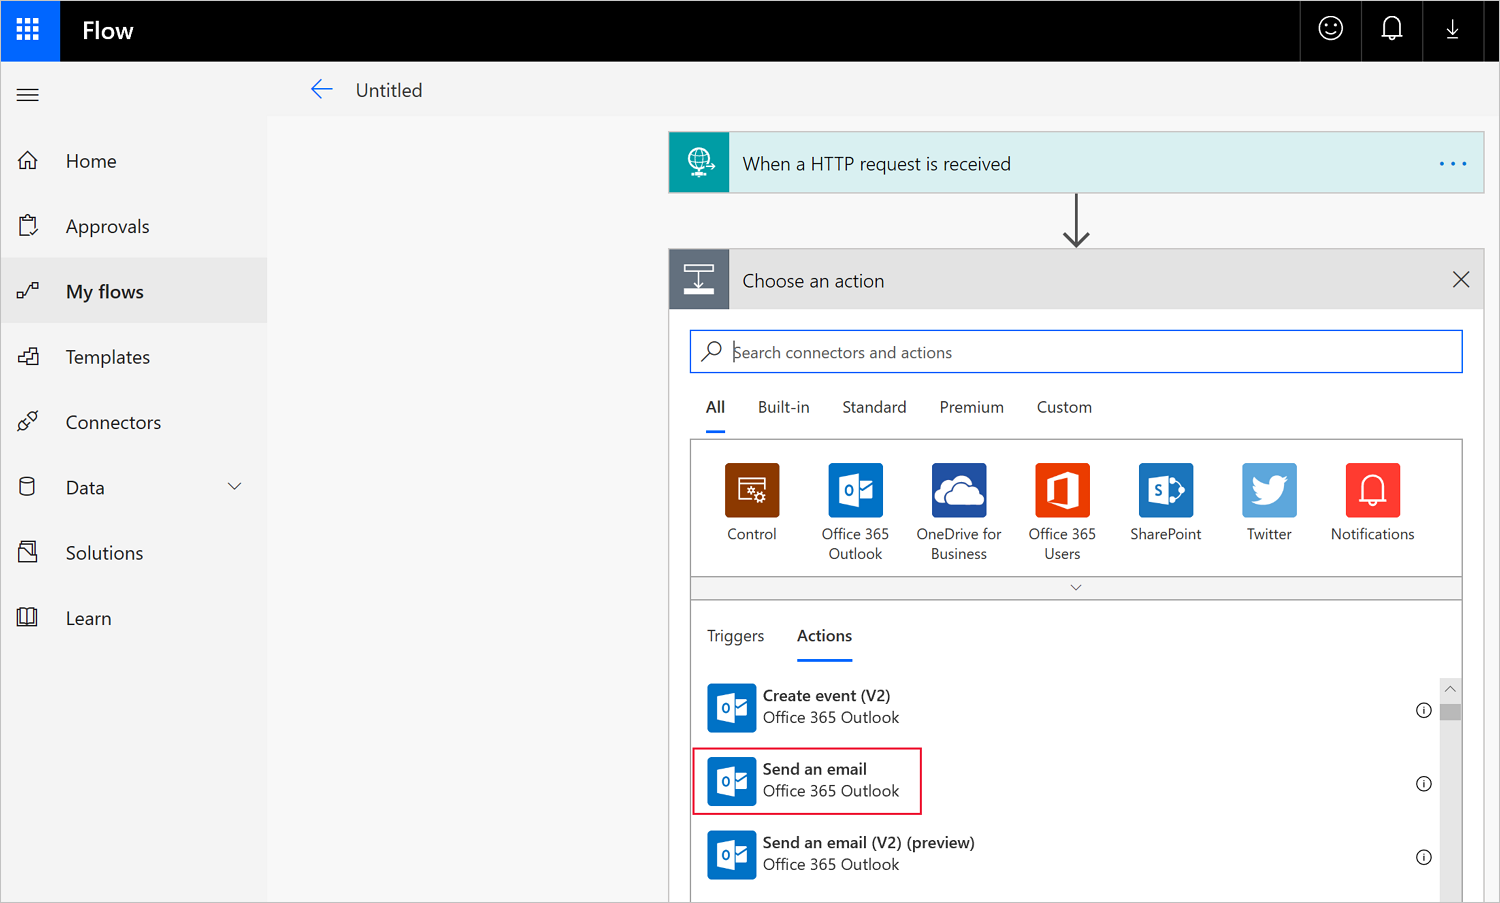
Now that you've finished the JSON schema, select + New step.
Under Choose an action, select Actions.
On the Actions tab, select Send an email (Office 365 Outlook).
Note
If you want to use a different email provider, search for and select Send an email notification (Mail) as the action instead.
In the Send an email window, configure the following required fields:
- To: Enter at least one valid email address where the leads will be sent.
- Subject: Power Automate gives you the option of adding dynamic content, like LeadSource shown in the following screen. Start by entering a field name. Then select the dynamic content pick list from the pop-up window.
Note
When you add field names, you can follow each name with a colon (:) and then select Enter to create a new row. After you have your field names added, you can then add each associated parameter from the dynamic pick list.
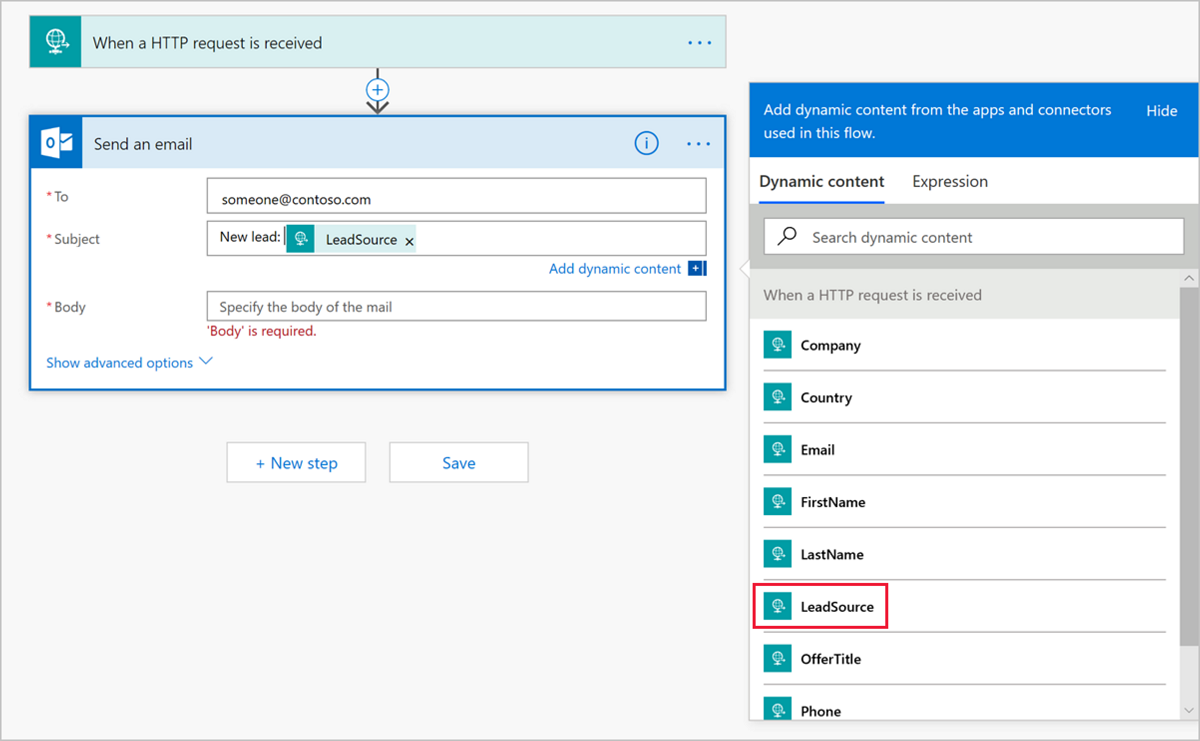
- Body: From the dynamic content pick list, add the information you want in the body of the email. For example, use LastName, FirstName, Email, and Company. When you're finished setting up the email notification, it looks like the example in the following screen.

Select Save to finish your flow. An HTTP POST URL is created and is accessible in the When an HTTP request is received window. Copy this URL by using the copy control, which is located to the right of the HTTP POST URL. Using this control is important so that you don't miss any part of the entire URL. Save this URL because you'll need it when you configure lead management in the publishing portal.

Testing
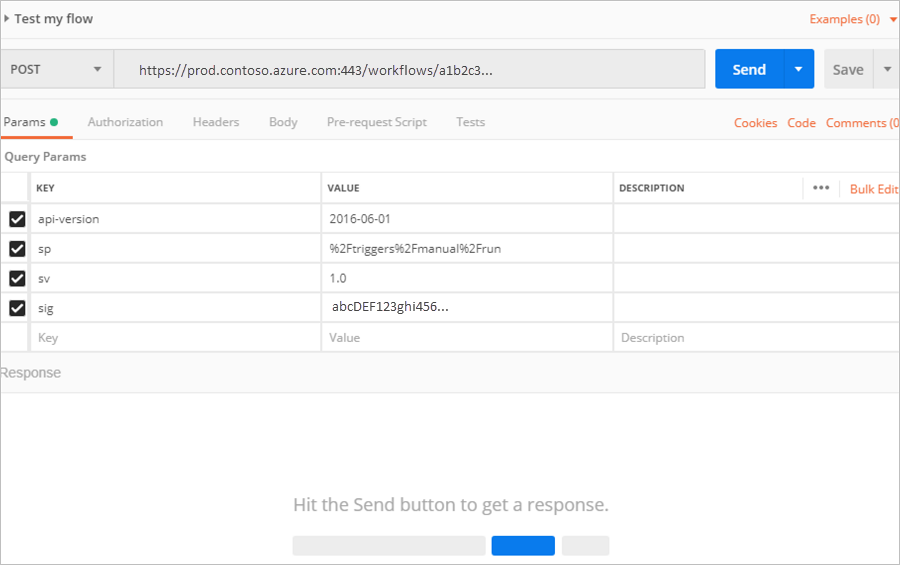
You can test your configuration with Postman. An online download of Postman is available for Windows.
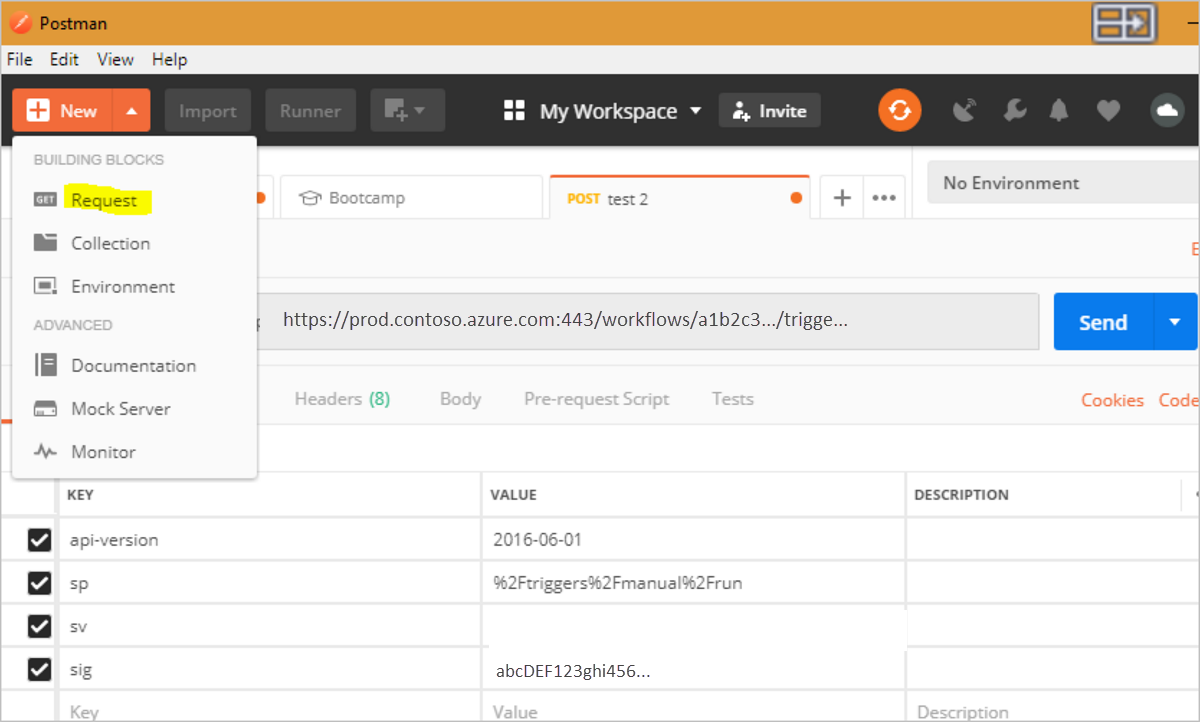
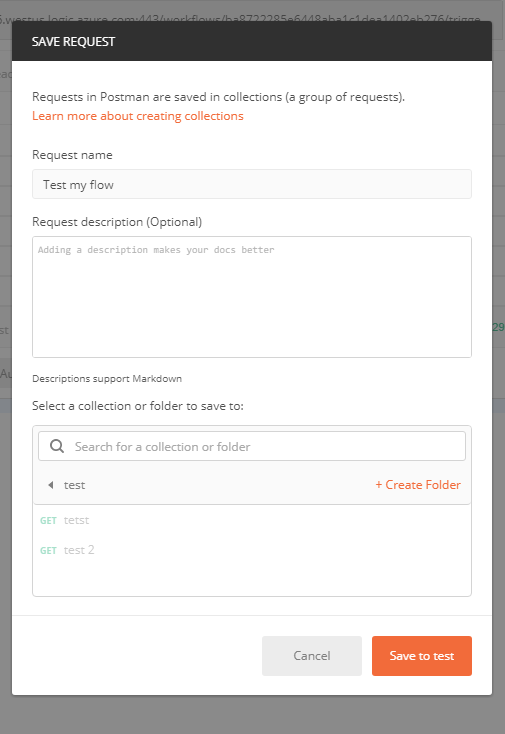
Start Postman, and select New > Request to set up your test tool.
Fill in the Save Request form, and then save to the folder you created.
Select POST from the drop-down list.
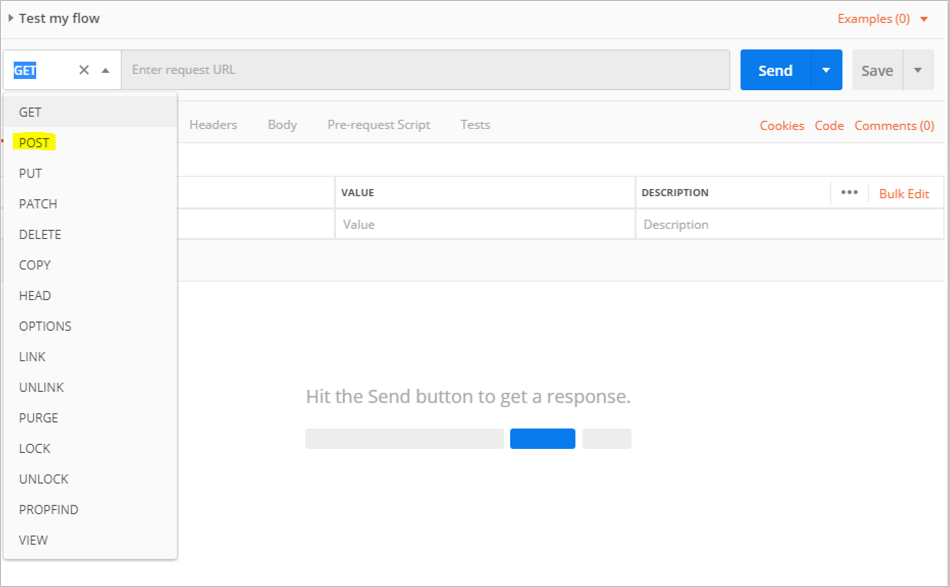
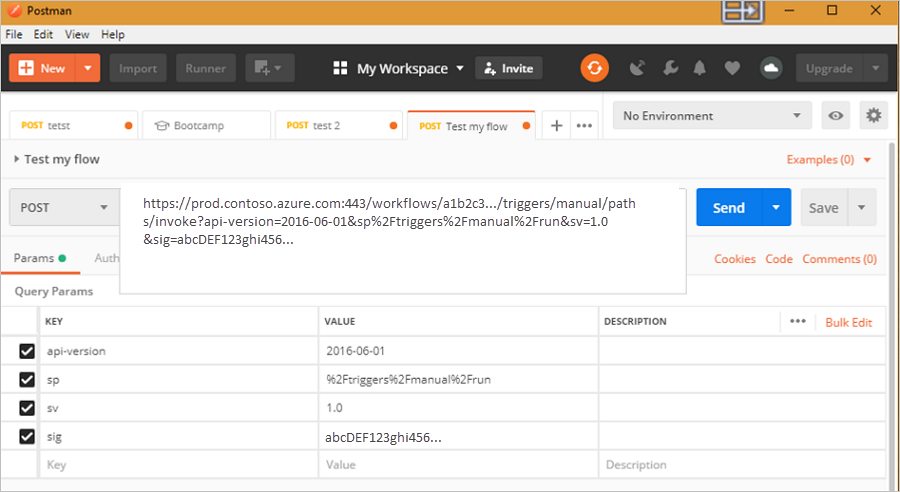
Paste the HTTP POST URL from the flow you created in Power Automate where it says Enter request URL.
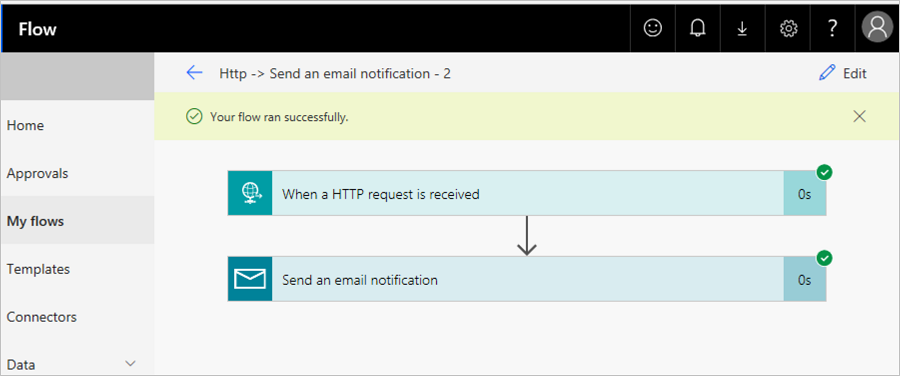
Go back to Power Automate. Find the flow you created to send leads by going to My Flows from the Power Automate menu bar. Select the ellipsis next to the flow name to see more options, and select Edit.
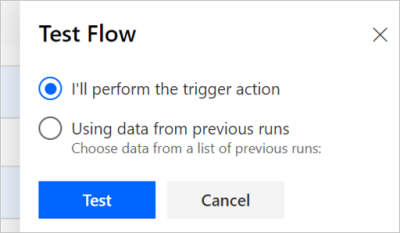
Select Test in the upper-right corner, select I'll perform the trigger action, and then select Test. You'll see an indication at the top of the screen that the test has started.
Go back to your Postman app, and select Send.
Go back to your flow and check the result. If everything works as expected, you'll see a message that indicates the flow was successful.
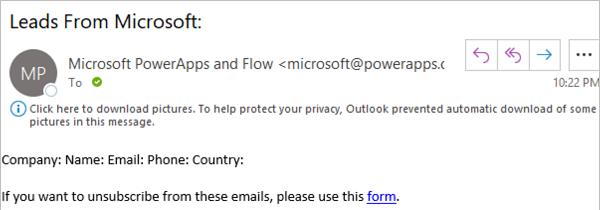
You should also receive an email. Check your email inbox.
Note
If you don't see an email from the test, check your spam and junk folders. In the following screen, you'll notice just the field labels you added when you configured the email notification. If this were an actual lead generated from your offer, you would also see the actual information from the lead contact in the body and in the subject line.
Configure your offer to send leads to the HTTPS endpoint
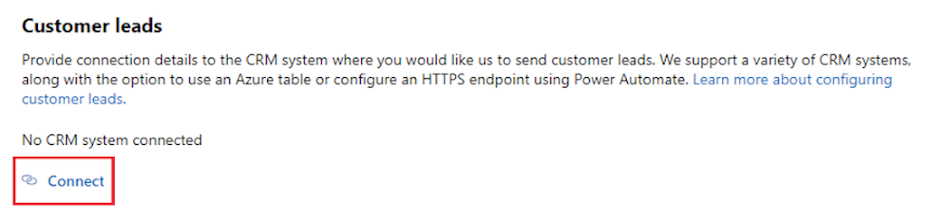
When you're ready to configure the lead management information for your offer in the publishing portal, follow these steps.
Sign in to Partner Center.
Select your offer, and go to the Offer setup tab.
Under the Customer leads section, select Connect.
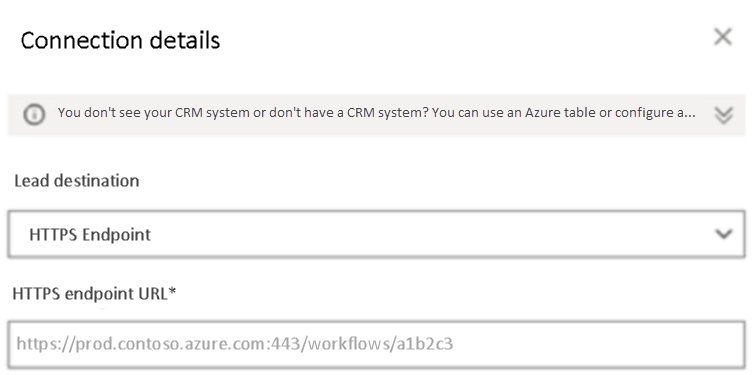
In the Connection details pop-up window, select HTTPS Endpoint for the Lead Destination. Paste the HTTP POST URL from the flow you created by following earlier steps into the HTTPS endpoint URL field.
Select OK.
To make sure you've successfully connected to a lead destination, select the Validate button. If successful, you'll have a test lead in the lead destination.
Note
You must finish configuring the rest of the offer and publish it before you can receive leads for the offer.
When leads are generated, Microsoft sends leads to the flow. The leads get routed to the CRM system or email address you configured.
Feedback
Coming soon: Throughout 2024 we will be phasing out GitHub Issues as the feedback mechanism for content and replacing it with a new feedback system. For more information see: https://aka.ms/ContentUserFeedback.
Submit and view feedback for