Note
Access to this page requires authorization. You can try signing in or changing directories.
Access to this page requires authorization. You can try changing directories.
Omnichannel lets enterprises instantly connect and engage with their customers via live chat. If the agent can't resolve their queries or they need a response beyond the site's programmed capabilities, the site agent enables a seamless transition to a live agent for help.
Prerequisites
- Add an agent to your site in the Power Pages design studio.
- Install the Dynamics 365 Customer Service app in the environment where the site is created.
Configure agent hand-off in Copilot Studio
The agent added with Power Pages design studio doesn't include instructions for transferring calls to Omnichannel.
To enable this functionality, configure the agent manually in Copilot Studio. You can access Copilot Studio directly from the Power Pages design studio.
- Go to Set up workspace.
- Under AI Assistance select Add agent.
- From the Agents in this site section, click on agent name to configure Omnichannel.
Configure an agent manually in Copilot Studio
In Copilot Studio, select the Topics tab.
Select the System tab, and then choose Escalate.
Select the + icon below the Message tile.
Hover over Topic management, and then select Transfer conversation.
Enter the message you'd like displayed to the end user while transferring the call in the Message to agent text entry field. For example,
Call transferred from chatbot to human agent.
Select Save to apply your changes.
Select the Channels tab, and then select Dynamics 365 Contact Center under Customer engagement hub.
Select Connect.
When the Status shows as Connected, select the Close button.
Select Publish to publish agent.
Complete chatbot setup in Customer Service Admin Center
Open the Customer Service admin center to finish configuring agent.
During setup, select chat and link the existing bot created in the Power Pages design studio.
Copy the script shown in the chat setup complete step.
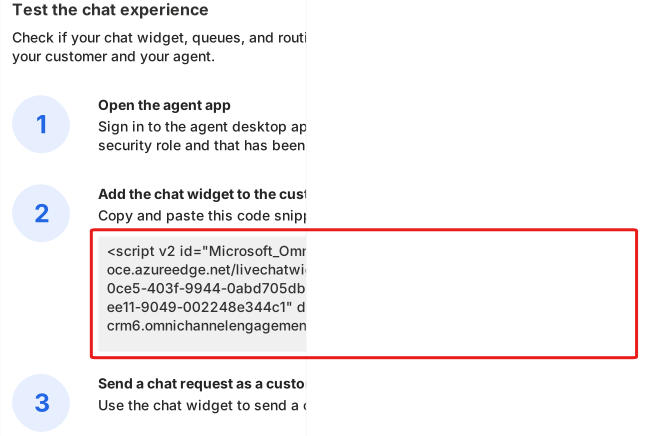
You need this script to host the live widget on a Power Pages site.
Enable Omnichannel live widget in Power Pages
Open the Portal Management app for the selected site.
Open the Header web template for the associated site.
Use the substitution liquid tag to add the live widget script you copied when you completed the chatbot setup.
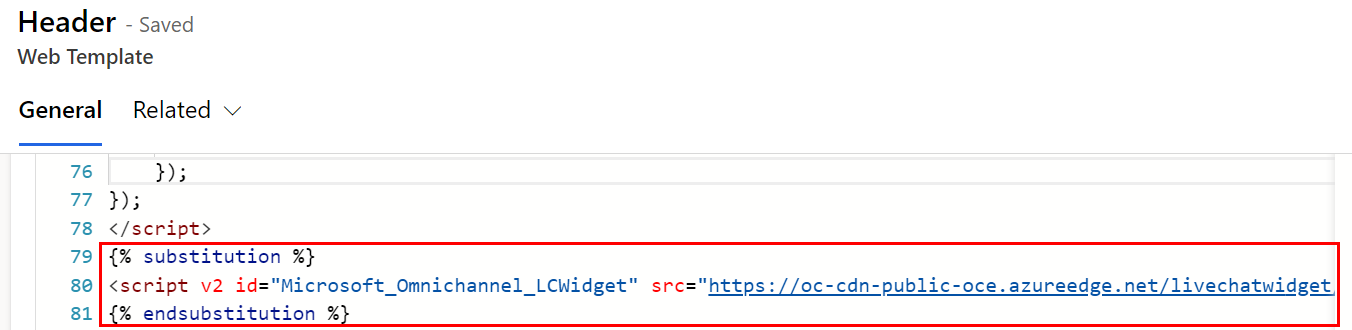
Save the template.
In the left-hand menu, select Site Settings.
Choose + New.
Create "SiteCopilot/EnableOmniChannelWidget" site setting and set value to
true.Save and preview the site.