Note
Access to this page requires authorization. You can try signing in or changing directories.
Access to this page requires authorization. You can try changing directories.
Use Auto Responder in Telerik Fiddler while developing and debugging JavaScript web resources to replace the content of a web resource with content from a local file rather than uploading it in your Model-driven Apps instance and publishing each time. Use the following steps to set up Auto Responder in Fiddler.
Install and configure Fiddler
Download and install Fiddler.
Open Fiddler and from the menu bar, go to Tools, and then select Options.
Select the HTTPS tab in the dialog box and check the Capture HTTPS CONNECTS and Decrypt HTTPS traffic checkboxes so that the HTTPS traffic is captured and then decrypted.
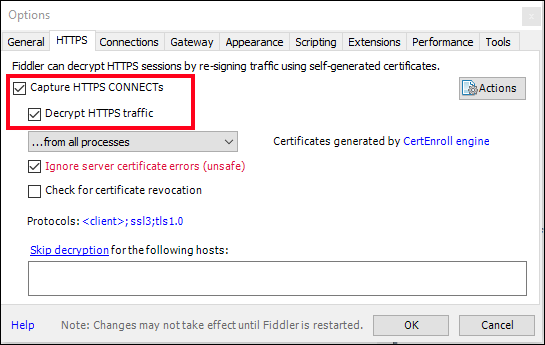
Select OK to close the dialog box.
Note
If it is the first time you are enabling this setting, Fiddler will prompt you to install a certificate. Install the certificate and restart Fiddler so that the new settings take effect.
If you have run Fiddler in the past and get a NET::ERR_CERT_AUTHORITY_INVALID error, in the HTTPS tab, click the Actions button and choose Reset All Certificates. This will also present a number of prompts for the new certificates to be installed.
Configure Auto Responder
Open the page in the model-driven app that you want to debug.
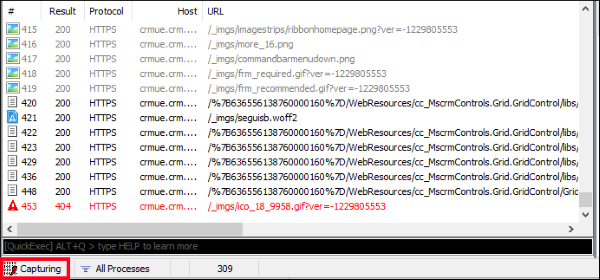
Start the Fiddler trace capture by clicking the Capturing button in the bottom left corner.
Note
If you want to capture HTTPS traffic only from a particular host, on the Filters tab, in the Hosts area, in the -No Host Filter- drop-down select Show only the following Hosts from the menu and enter the list of domains from which you wish to see traffic, separated by semi-colon. More information: Filters reference.

Perform any operation necessary to load the script you're testing. You can stop the capture by clicking the same Capturing button again.
Select the trace log sessions from the left pane and search for the file you want to set up the Auto Responder for.
For example, if the code you want to debug is in a JavaScript web resource named
new_testscript.js, use the Find button to open the Find Sessions dialog box and search for the name of the web resource.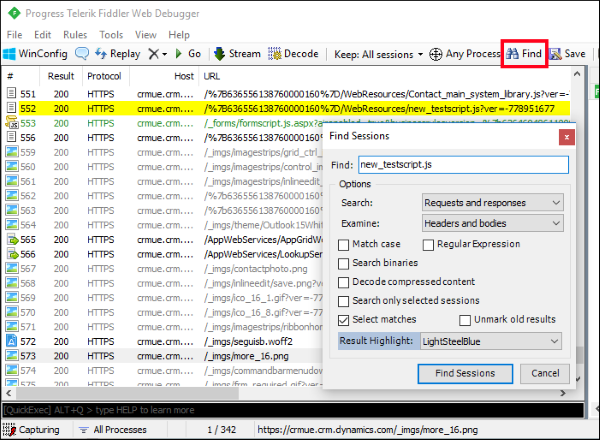
You see the rows that match with your search criteria highlighted in the left pane.
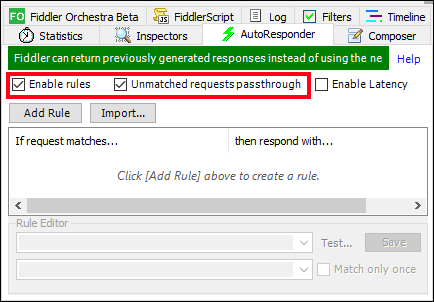
Select that row. In the right pane, select the Auto Responder tab.
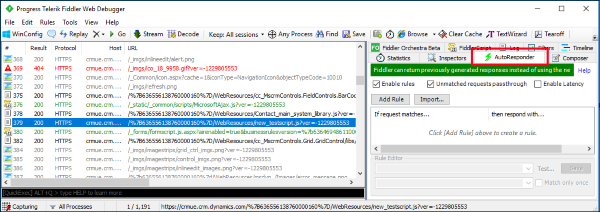
In the Auto Responder tab, select the Enable rules and Unmatched requests passthrough check boxes.
Ensure that you still have the session related to your target file selected and then select on the Add Rule button in the Auto Responder section. This adds a new entry into the rules table.
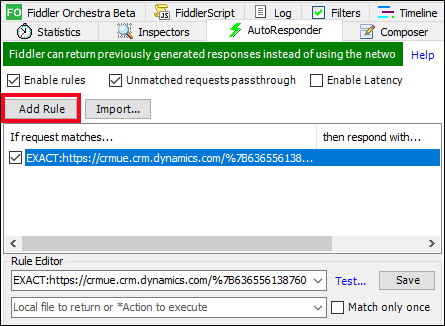
When the rule is selected, the Rule Editor at the bottom has the top row populated with the Session URL related to your file and prefixed with a string like
EXACT:.You can then edit the string to match to simplify it. With web resources, the URL contains generated values in the URL or in a query string to make sure that the latest published version is included in the response. You'll probably see the
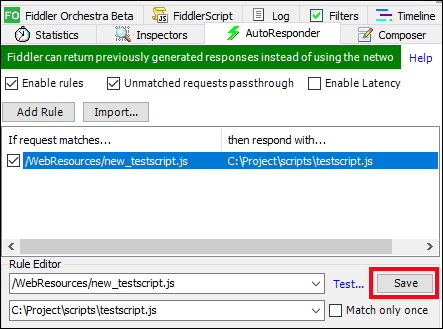
EXACTvalue looks something like this:EXACT:https://<org URL>/%7B636556138760000160%7D/WebResources/new_testscript.js? ver=-1229805553You can simplify this to remove the generated values and use this instead:
/WebResources/new_testscript.jsThe bottom row is left blank. Type the path to your local file on your disk on this bottom row and Save.
These steps configured Fiddler to listen to the requests and responds with the local file instead of passing the request over the network.
Update and test your code
- Apply changes to your local file.
- Start Fiddler trace capture again and go back to your browser and hard reload the page with empty cache.
- In the browser developer tools, you can see that the file that is now received is the local one.
- Continue repeating this process while updating your code until you get the results you require.