Note
Access to this page requires authorization. You can try signing in or changing directories.
Access to this page requires authorization. You can try changing directories.
When you create dependent (or cascading) drop-down lists, users select an option in a list to filter options in another list. Many organizations create dependent lists to help users fill out forms more efficiently. For example, users might select a country or region to filter a list of cities, or users might select a category to show only the codes in that category.
As a best practice, create a data source for the values in the "parent" and "child" lists (for example, countries/regions and cities) that's separate from the data source that users update by using the app. If you take this approach, you can use the same parent and child data in more than one app, and you can update that data without republishing the app or apps that use them. You can accomplish the same outcome by using a collection or static data, but it isn't recommended for enterprise scenarios.
For the scenario in this topic, store employees submit issues to an Incidents list through a form. Employees specify not only the location of the store at which the incident occurred but also the department within that location. Not all locations have the same departments, so a Locations list ensures that employees can't specify a department for a location that doesn't have that department.
Note
This article uses a list created using Microsoft Lists as the data source. However, all tabular data sources work the same way. Within Dataverse for Teams, you'll need to enable classic controls to get the classic drop-down to work for this scenario.
Create data sources
A Locations list shows the departments at each location.
| Location | Department |
|---|---|
| Eganville | Bakery |
| Eganville | Deli |
| Eganville | Produce |
| Renfrew | Bakery |
| Renfrew | Deli |
| Renfrew | Produce |
| Renfrew | Pharmacy |
| Renfrew | Floral |
| Pembroke | Bakery |
| Pembroke | Deli |
| Pembroke | Produce |
| Pembroke | Floral |
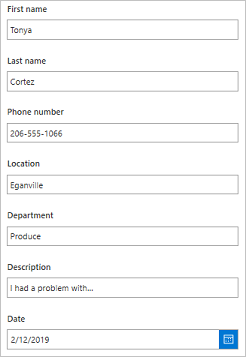
An Incidents list shows contact information and information about each incident. Create the Date column as a Date column, but create the other columns as Single line of text columns to simplify configuration and avoid delegation warnings in Microsoft Power Apps.
| First Name | Last Name | Phone Number | Location | Department | Description | Date |
|---|---|---|---|---|---|---|
| Tonya | Cortez | (206) 555 - 1022 | Eganville | Produce | I had a problem with… | 2/12/2019 |
| Moses | Laflamme | (425) 555 - 1044 | Renfrew | Floral | I experienced an issue… | 2/13/2019 |
By default, lists include a Title column that you can't rename or remove, and it must contain data before you can save an item in the list. To configure the column so that it doesn't require data:
- Near the upper-right corner, select the gear icon, and then select List settings.
- On the Settings page, select Title in the list of columns.
- Under Require that this column contains information, select No.
After that change, you can ignore the Title column, or you can remove it from the default view if at least one other column appears.
Open the form
Open the Incidents list, and then select Integrate -> Power Apps -> Customize forms.

A browser tab opens with the default form in Power Apps Studio.
(optional) In the Fields pane, hover over the Title field, select the ellipsis (...) that appears, and then select Remove.
If you've closed the Fields pane, you can open it again by selecting SharePointForm1 in the left navigation bar and then selecting Edit fields on the Properties tab of the right-hand pane.
(optional) Repeat the previous step to remove the Attachments field from the form.
The form appears with just the fields that you added.
Replace the controls
In the Fields pane, select the arrow next to Location.
If you've closed the Fields pane, you can open it again by selecting SharePointForm1 in the left navigation bar and then selecting Edit fields on the Properties tab of the right-hand pane.
Open the Control type list, and then select Allowed Values.

The input mechanism changes to a Drop down control.
Repeat these steps for the Department card.
Add the Locations list
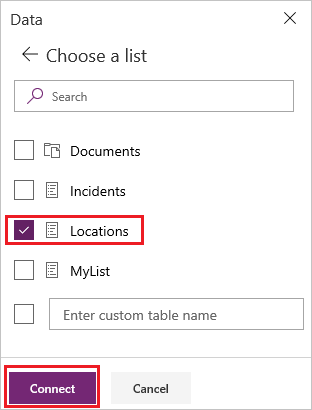
Select View > Data Sources > Add data source.
Select or create a SharePoint connection, and then specify the site that contains the Locations list.
Select the check box for that list, and then select Connect.
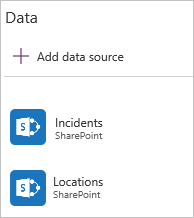
The list of connections shows the Incidents list, on which the form is based, and the Locations list, which will identify locations and departments in the form.
Unlock the cards
Select the Location card, select the Advanced tab in the right-hand pane, and then select Unlock to change properties.
Repeat the previous step for the Department card.
Rename the controls
If you rename your controls, you can identify them more easily, and the examples are easier to follow. To discover other best practices, review the Coding Standards and Guidelines whitepaper.
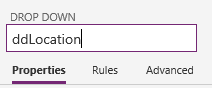
In the Location card, select the Drop down control.
Near the top of the right-hand pane, rename the selected control by typing or pasting ddLocation.
Repeat the previous two steps in the Department card to rename the Drop down control to ddDepartment.
Configure the locations
Set the Items property of ddlocation to this formula:
Distinct(Locations, Location)(optional) While holding down the Alt key, open ddLocation, and confirm that the list shows the three locations.
Configure the departments
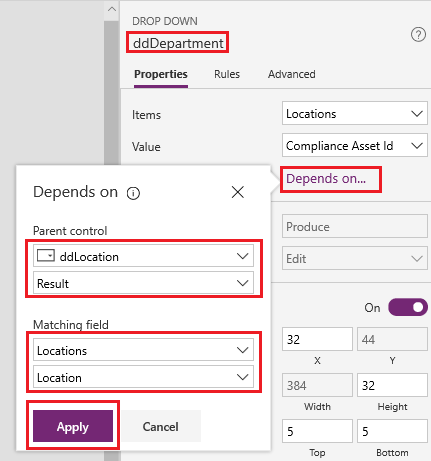
Select ddDepartment, and then, on the Properties tab of the right-hand pane, select Depends on.
Under Parent control, ensure that ddLocation appears in the upper list and Result appears in the lower list.
Note
If you don’t want to match on a string but on the actual ID of the row of data, select ID Instead of Result.
Under Matching field, select Locations in the upper list, select Location in the lower list, and then select Apply.
The Items property of ddDepartment is set to this formula:
Filter(Locations, Location = ddLocation.Selected.Result)This formula filters the items in ddDepartment based on what the user selects in ddLocation. Such a configuration ensures that the "child" list of departments reflects the data for its "parent" location, as the Locations list in SharePoint specifies.
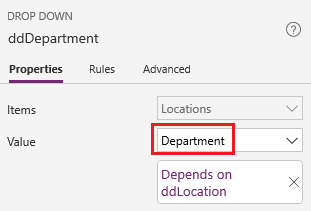
On the Properties tab of the right-hand pane, open the list next to Value, and then select Department.
This step sets the display text to the options from the Department column of the Locations list in SharePoint.
Test the form
While holding down the Alt key, open the list of locations, select one, open the list of departments, and then select one.
The lists of locations and departments reflects the information in the Locations list in SharePoint.
Save and open the form (optional)
Open the File menu, and then select Save > Publish to SharePoint > Publish to SharePoint.
In the upper-left corner, select the back arrow, and then select Back to SharePoint.
In the command bar, select New to open your customized form.
FAQ
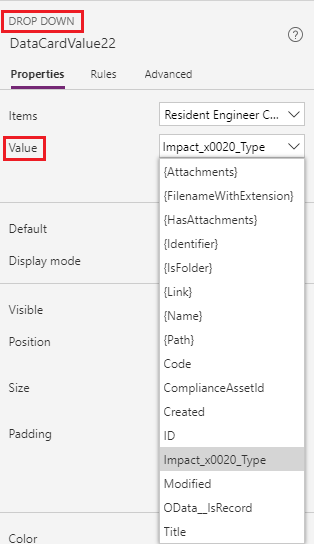
I can’t see any data: the sources are all blank or have the wrong data. Confirm whether you're displaying the correct field for your control in either of these ways:
Select a drop-down list, and then select the Value property in the Properties tab of the right-hand pane.
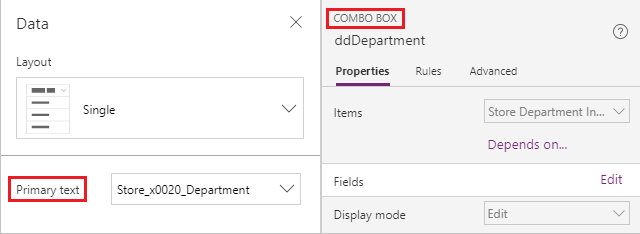
Select a combo box, and then ensure that the primary text is the field that you want to display.
My child drop-down list contains duplicate items. This symptom is likely due to using a LookUp column in SharePoint or a Choices function in Power Apps. To remove the duplication, wrap a Distinct function around the properly returning data. More information: Distinct function.
Known limitations
This configuration is available on Drop down controls, as well as Combo box and List box controls that allow one selection at a time. You can't use the Depends On configuration for any of those controls if they allow multiple selections. This approach isn't recommended for working with choices in Microsoft Dataverse.
The Depends On configuration doesn't support static data or collections. To configure dependent drop-down lists with these sources, edit the expression directly in the formula bar. In addition, Power Apps doesn't support using two choice fields in SharePoint without any matching table of data, and you can't define Matching field within this UI.