Note
Access to this page requires authorization. You can try signing in or changing directories.
Access to this page requires authorization. You can try changing directories.
Let customers or employees submit feedback for any table record, or rate table records within a defined rating range by enabling tables for feedback. Use this capability for the following scenarios:
- For customers to capture data via a portal or survey.
- To collect data about service or product satisfaction from table records.
- For employees to provide comments on collaborative efforts or as a way to improve on products and services.
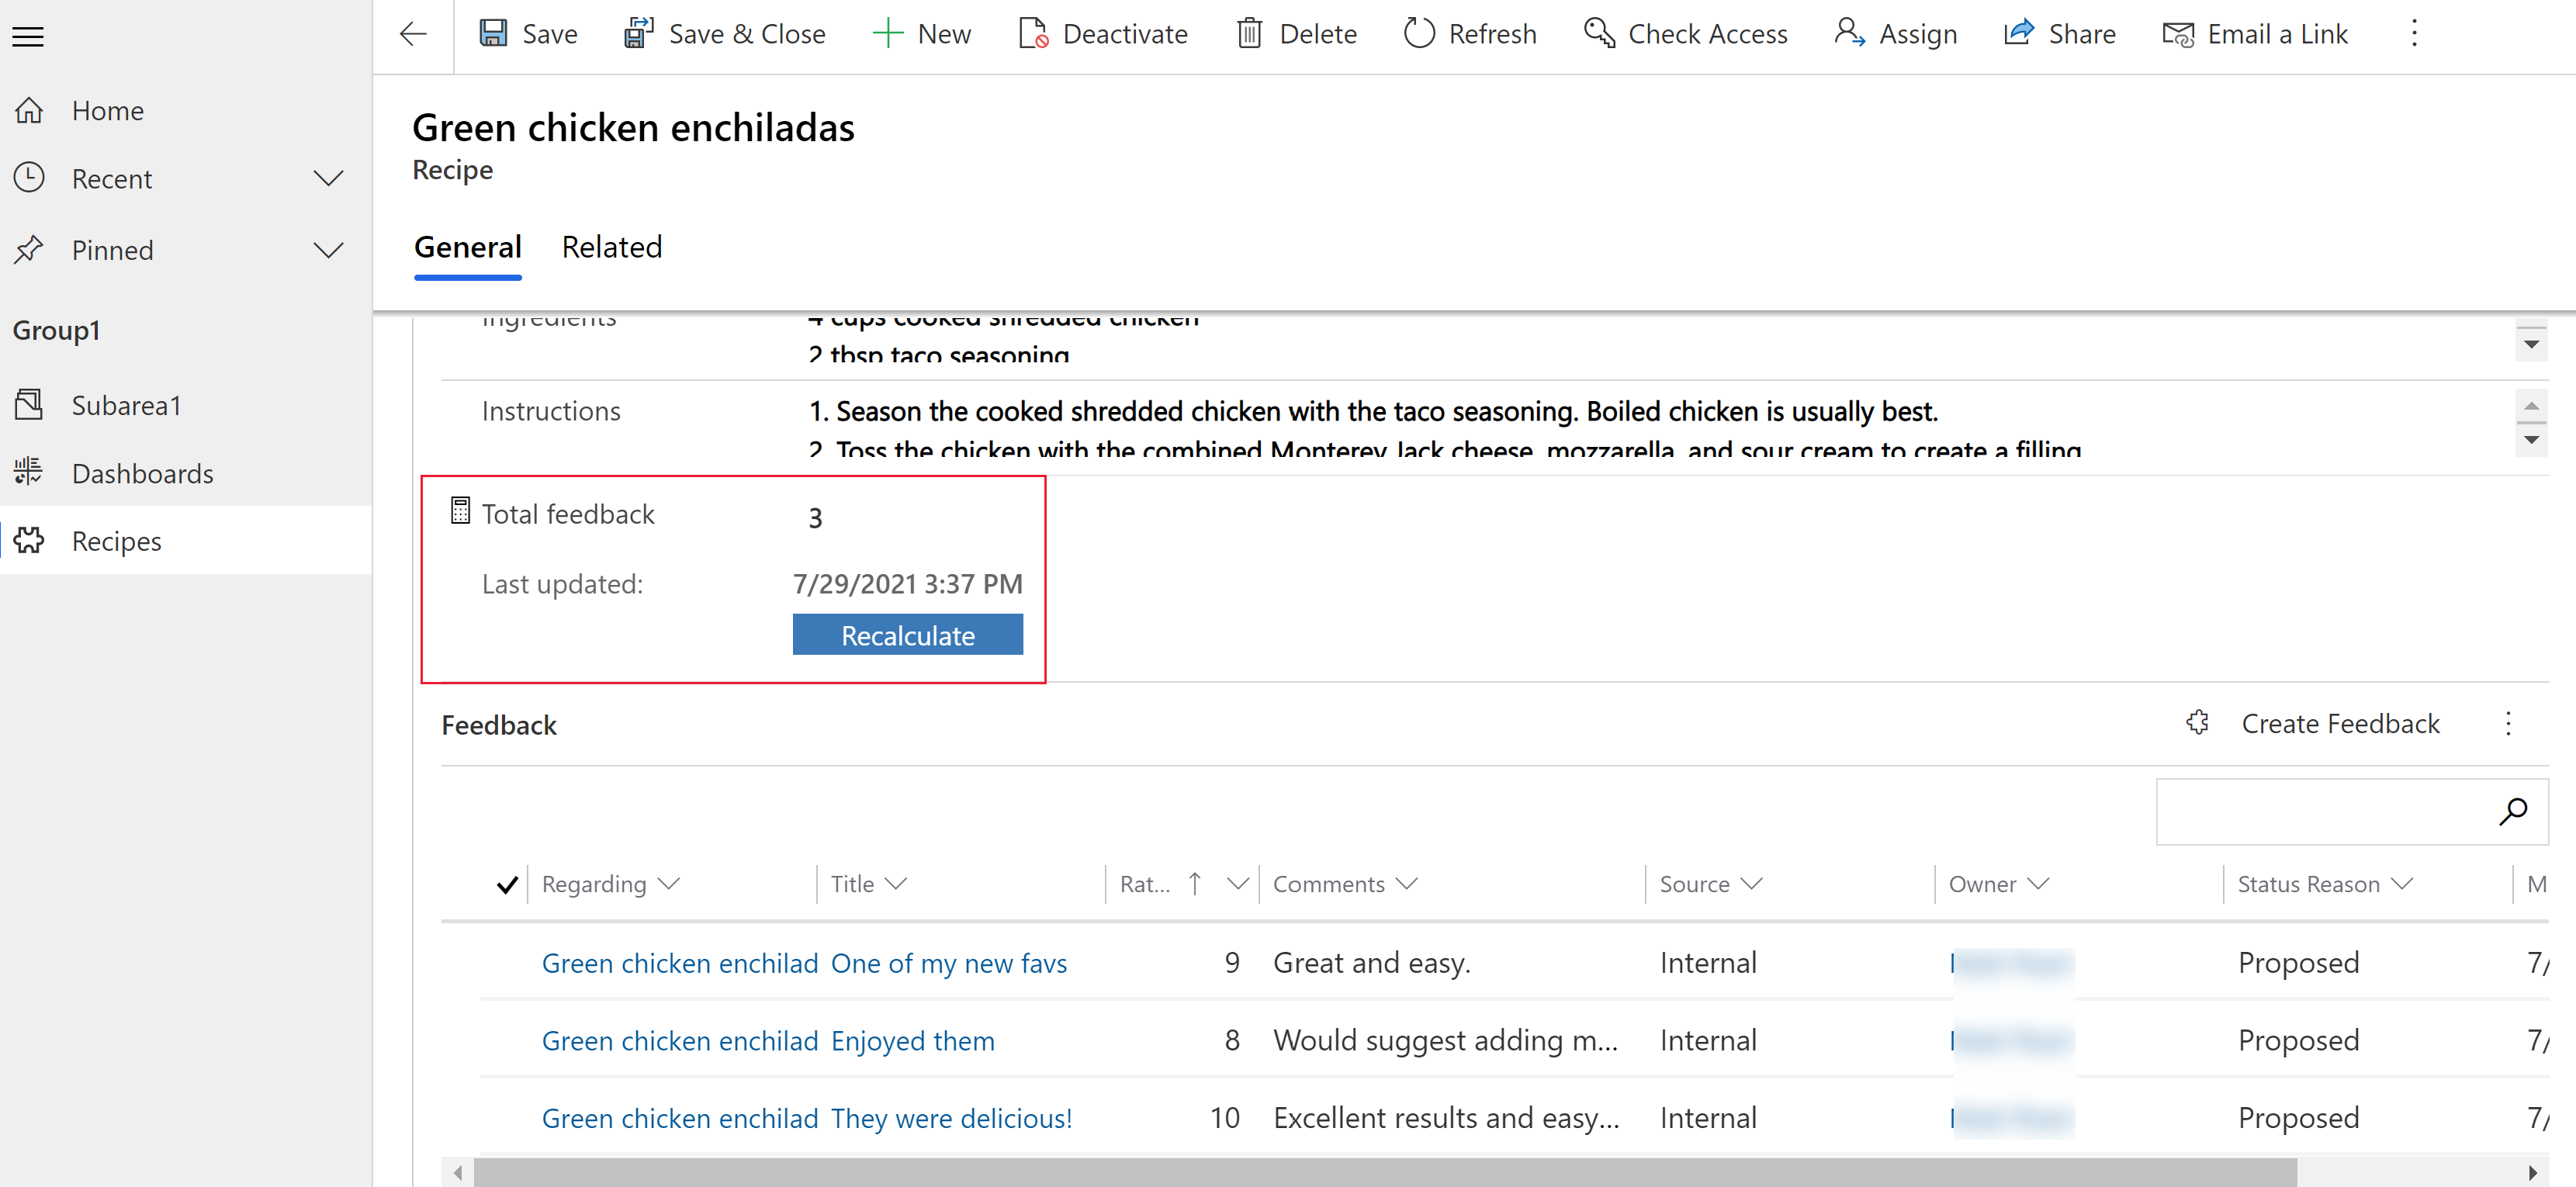
For example, imagine you have an app that is used to maintain recipes and you want to get feedback from your users about their experience using the recipes in the app.

Configure feedback for a table
First, you must enable the Allow feedback property in the table definition.
Sign into Power Apps.
Open the table you want or create a new one. More information: Edit a table
On the right table properties pane, select Allow feedback.
Note
Once you enable the Allow feedback property for a table, you can’t disable it.
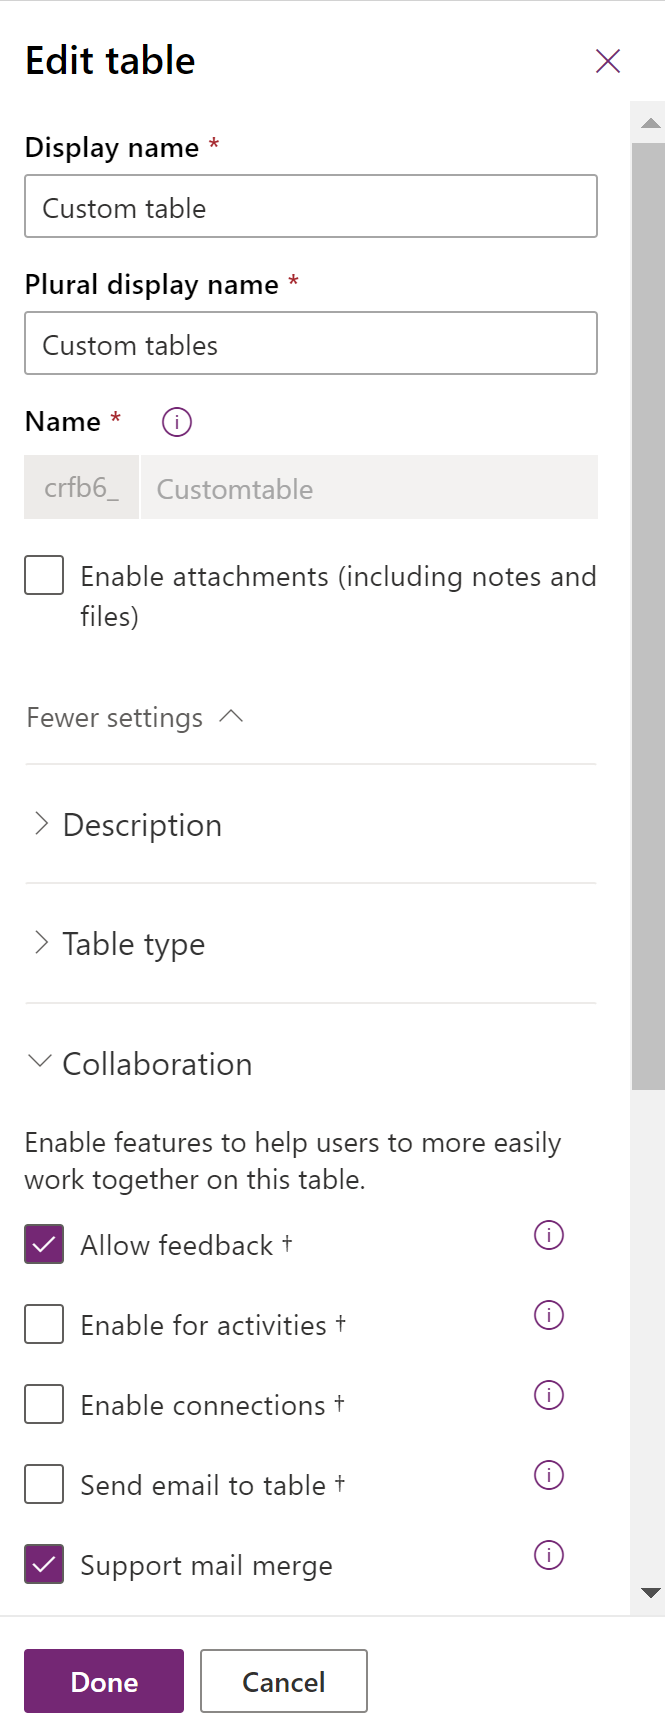
Select Done, and then select Save Table.
Add a subgrid for feedback on the table form
By default, users must go to the list of associated records of the record you want to add feedback to. To make it easier for users to add feedback, you should add a feedback subgrid to the form of the table you are enabling feedback for, such as in the recipe example depicted earlier in this article.
- In the form designer, select the area of the form where you want the feedback subgrid, and then select Subgrid on the left Components pane.
- Select the following subgrid properties, and then select Done:
Show related records
Table Feedback (Regarding)
Default view. Active Feedback.

- Save and Publish the form.
About the feedback table form
The feedback subgrid displays commands for creating new or adding existing feedback. When a user selects Create Feedback from the subgrid, the records to create feedback use the feedback standard table.
The feedback table form has the following columns:
- General
- Title: User provided title for the record feedback.
- Regarding: System provided table record that the feedback is associated with.
- Source: The feedback source to display where the feedback was submitted. If the feedback was created from within a model-driven app, the default value is set to Internal while Portal is the other option. This can be changed by the user.
- Created By: System provided value that's the user who created or last modified the feedback record.
- Comments
Minimum Rating: The user can define a range for ratings by specifying a minimum and maximum (numerical) value for ratings. For example, a minimum rating of 1.
Maximum Rating: The user can define a range for ratings by specifying a minimum and maximum (numerical) value for ratings. For example, a scale of maximum rating of 5.
Normalized Rating. System generated numeric value that's automatically calculated to show the specified user rating scaled to a value between 0 and 1 based on the minimum and maximum rating values.
The normalized rating helps to normalize or even out the specified rating value for different rating ranges (minimum and maximum rating values). The normalized rating is calculated as follows: (Rating - Minimum Rating) / (Maximum Rating - Minimum Rating). Also, rating for a record is calculated as an average of all the normalized ratings for the record.
Rating: User provided rating for the feedback that must be between the minimum and maximum range. For example, a rating of 4 on a scale of 1-5.
Comments: User provided comments for the record feedback.
Add a rollup column for the feedback
Optionally, you can create a rollup column that's based on the feedback or ratings for the table, and then add it to the form of the table you're enabling for feedback.
For example, you can provide a running total of all feedback records created for a given record.
- Open the table that contains the form with the feedback grid and select Columns.
- Select Add column, and then select the following properties:
- Display name: Total feedback
- Data type: Whole Number
- Calculated or Rollup: Select Add > Rollup. Select Save when prompted.
- Select Done. Select the Total feedback column, and then in the right column properties pane select Open rollup.
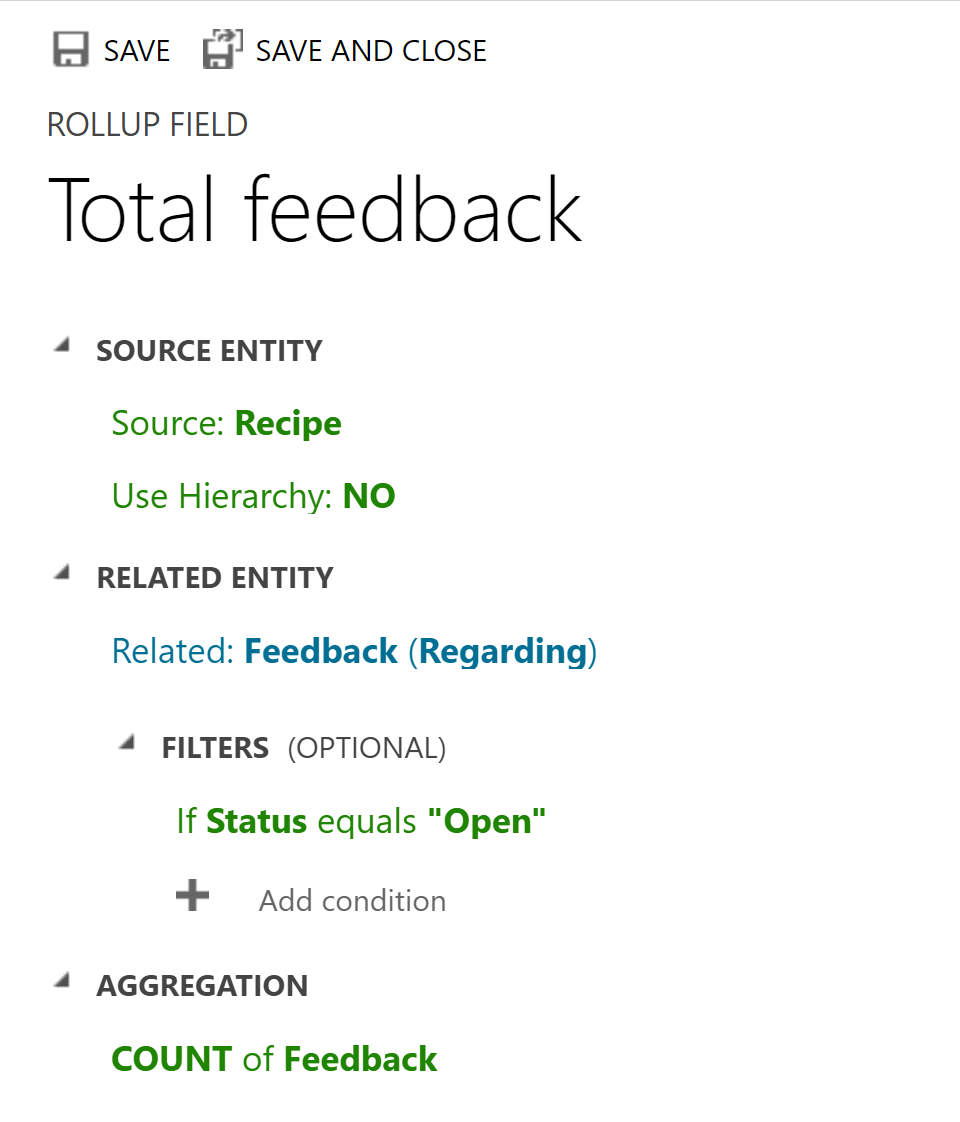
- The rollup editor opens in a new browser window. Configure the following rollup conditions, and then select Save and Close:
- Source entity:
- Source. Recipe (or the table that has the feedback subgrid)
- Use Hierarchy: No
- Related entity:
- Feedback (Regarding)
- Filters: If Status equals Open
- Aggregation:
- Count of Feedback
- Count of Feedback
- Source entity:
- Add the column to the form that has the feedback subrid, save and publish it.
The form in an app now displays a running total of all feedback records submitted for the record.