Note
Access to this page requires authorization. You can try signing in or changing directories.
Access to this page requires authorization. You can try changing directories.
This article explains how to set up a data retention policy for a Microsoft Dataverse table.
Prerequisites
Theses prerequisites must be completed before you can set a table for long term data retention:
Enable a table for long term retention
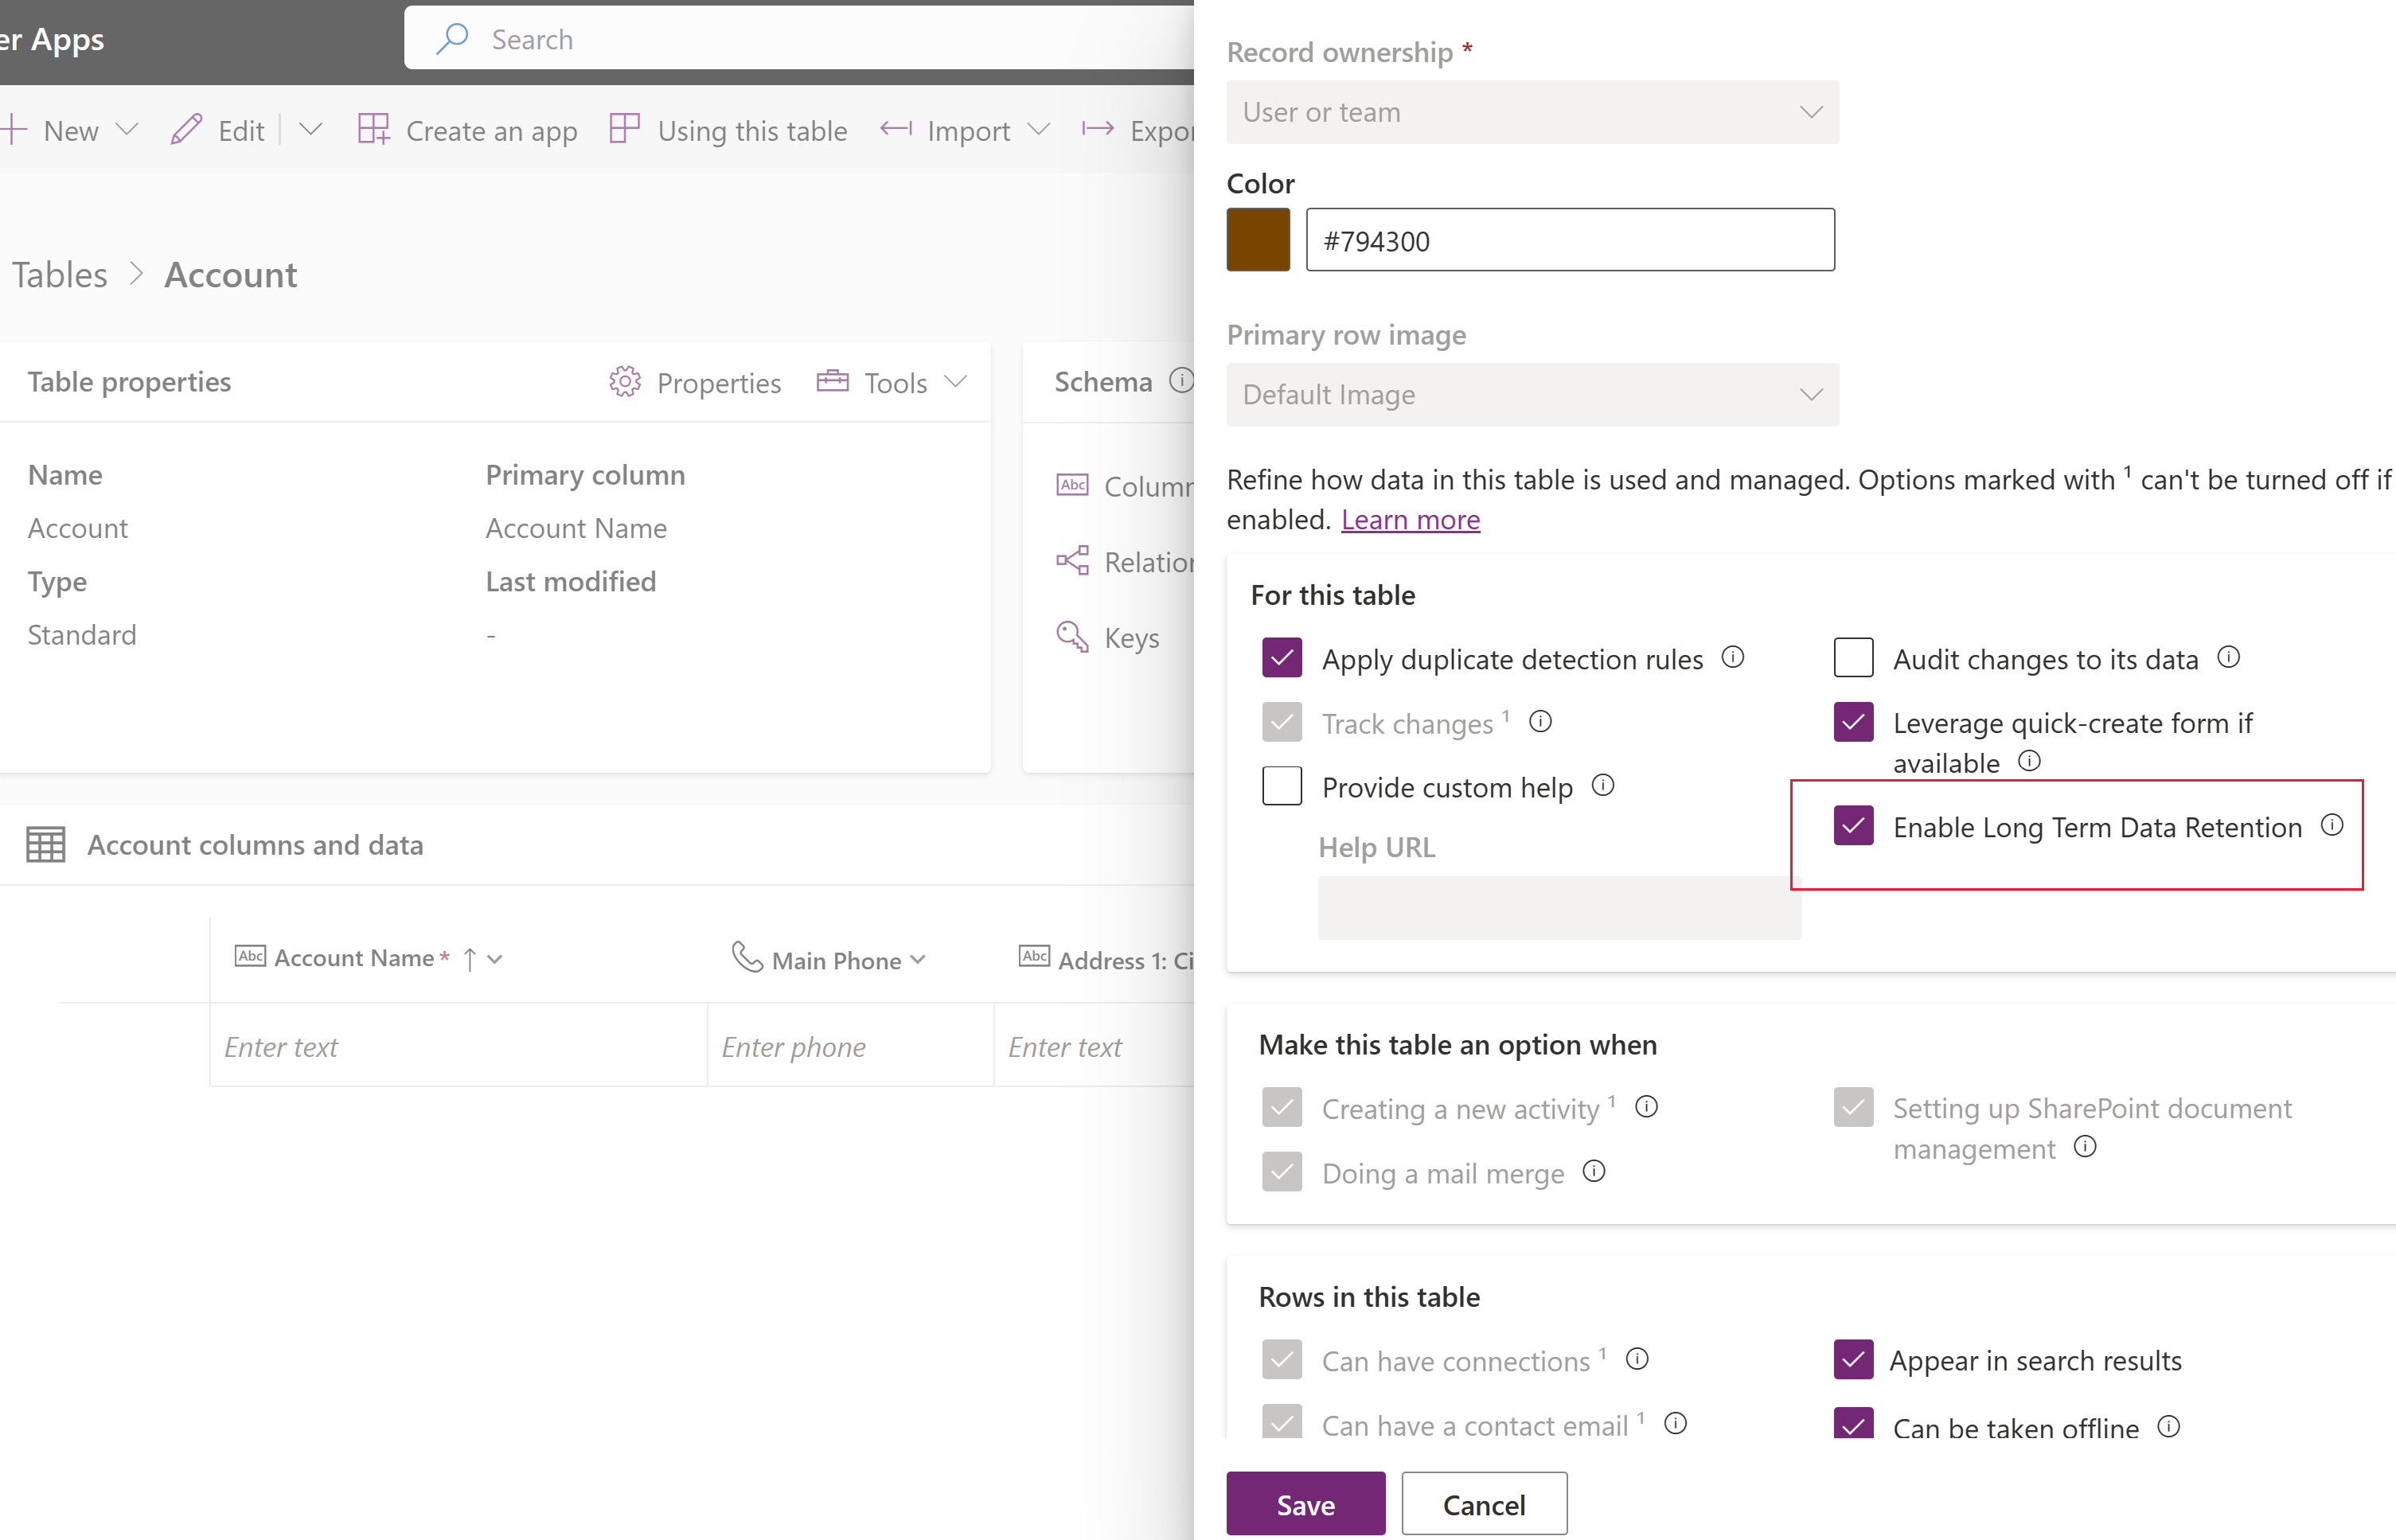
Before you set up a retention policy, enable the parent (root) table for long term retention.
Note
When a parent (root) table is enabled for long term retention, all the related child tables are automatically enabled. You can't disable retention for a child table when the parent table is already enabled for retention. For example, assume a custom table and notes table are child tables of the case table. These child tables can't be disabled for retention when the parent case table is enabled. A maker can always disable the parent table for long term retention and separately enable the child tables for retention. However, there's an exception to this related child tables behavior when long term retention is enabled through a solution import process. In this case, the related child tables aren't automatically enabled.
- Sign into Power Apps, go to Tables, and then open the table you want. If the item isn’t in the side panel pane, select …More and then select the item you want.
- Select Properties on the command bar, expand Advanced options, and then select Enable long term retention.

- Select Save.
The parent root and any child tables will be available for policy setup in about 15-30 minutes after you save the table. The larger the number of child tables, the longer it takes to complete the process.
Determine Dataverse views for policy criteria
Dataverse views are used to determine which table rows (records) are marked for retention using a long-term retention policy. Before setting up a data retention policy, you must set up a Dataverse view as the criteria for retention.
Once you have a Dataverse view for use in a particular long term retention policy, you should test the view result. A good practice is to modify the view query with a TOP N statement and test it to ensure that the result set returned is as expected. This is always recommended especially when the number of rows is large.
For example, consider a Dataverse view created to select all closed cases from the year 2015. The number of cases could be potentially very large. Therefore, you should add a TOP N, such as TOP 10, to the view and test it to confirm the sample set of the retrieved cases.
When the data retention policy is run, rows from the parent table and all child tables are included for long term data retention. The parent cases might have associated rows from child tables, for example notes, task, and custom tables. The retention policy ensures that the case record and all its related child rows are marked and retained as long term in Dataverse. In addition, lookup values in the case table, as an example, are denormalized with the ID and name values made available as part of the retained data. This allows in many scenarios for a single query to retrieve the relevant retained data.
Important
We recommend that you create a Dataverse view specific for identifying only the rows you want retained. Then, create and run an app that has the view to verify before using it as the criteria in your policy. For information about how to create a table view, go to Create and edit public or system views.
Setup a retention policy
Power Platform administrators set up retention policies.
Important
Once data is retained as long term (inactive) data, it can't be moved back to the active data store.
When a retention policy is run, the process makes API requests in Microsoft Power Platform. These requests are counted towards the existing API requests available with your plan. More information: Requests limits and allocations
To complete this task you must have the Power Platform administrator role.
- Enable a table for long term retention.
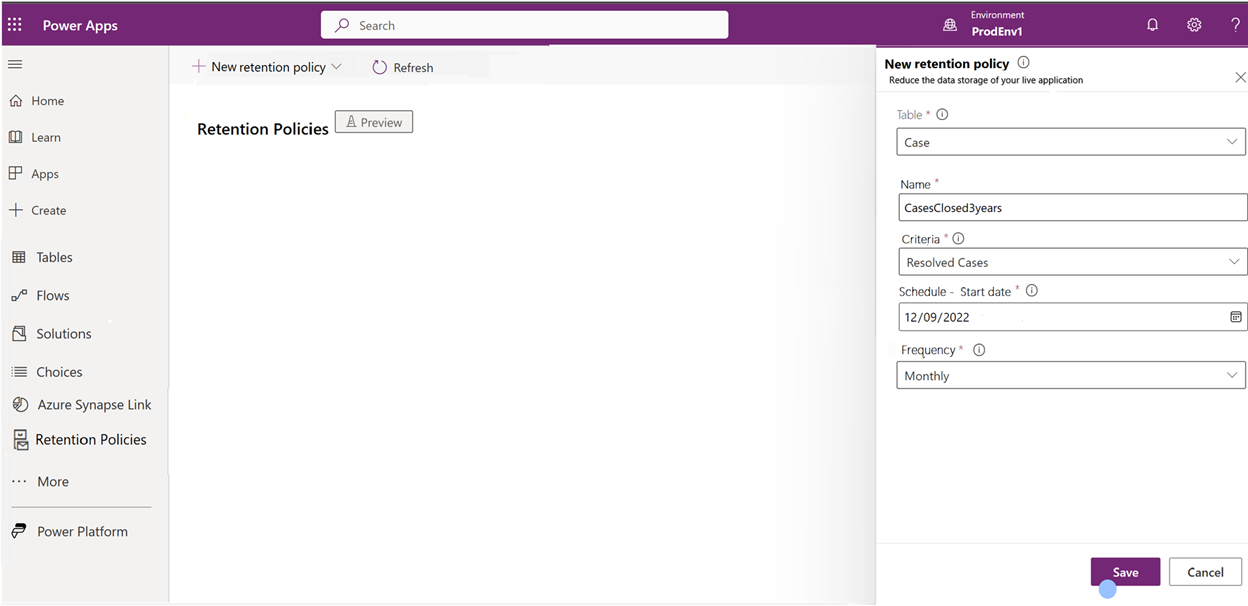
- Sign into Power Apps, and then on the left navigation pane, select Retention policies. If the item isn’t in the side panel pane, select …More and then select the item you want.
- On the command bar, select New retention policy.
- Complete the following properties for the retention policy:
- Table. Select the parent root table that will be used to set up a policy to retain historical cold data in long term storage.
- Name. Enter a name for the retention policy.
- Criteria. Select a view from the list. The view should have been previously created and tested to ensure the right historical data was selected. Determine Dataverse views for policy criteria
- Schedule - Start date. Enter the date you want the policy to run for the first time. The policy runs during the off hours of your environment’s region.
- Frequency. The choices available are Once, Daily, Weekly, Monthly, and Yearly.

- Select Save.
Now you can view and manage the policy. More information: Manage data retention policies
Important
- The retention policy will not start for environments that have administration mode enabled.
- All parent and associated child activities, emails, attachments are retained as a set when you set up a policy on a parent table. This is similar to bulk delete policies. For example, an explicit retention policy can't be set for Activity Pointer, Activity Party, and Attachment tables. Long term retention policies can't be set for those tables where bulk delete isn't supported.
- The parent table and all related rows from child tables, of the parent, will be marked and stored in Dataverse long term storage.
- Logic associated with an existing delete action of any table (parent and children) will always be executed during the policy run.
- A policy run will take from 72-96 hours irrespective of the data volume. Data retention policies are given a low priority by the platform. Dataverse will always run the retention process in the background to avoid any impact on other platform services, such as apps and flows.
- Consider a situation where two policies (Policy1 and Policy2) run on separate parent tables that have common child tables. Policy1 begins running prior to Policy2. If the status for Policy1 hasn't progressed beyond Pending reconciliation, then Policy2 status will remain at Pending delete status until Policy1 progresses from Pending reconciliation to Pending delete. This behavior occurs to prevent deletes on any common records from common tables in the two policies.
Known issue
If a parent table has many child tables, and the size of the parent or child tables is large, you might encounter timeouts. For example, when the number of tables is large in a cascade relationship chain, such as twenty-five or more. To mitigate this, enable a few child tables separately first. Then go back and enable the parent table.
Next steps
Manage data retention policies
Share your ideas
For developers: Long-term data retention