Setting up a virtual table relationship
Virtual tables are enabled for relationships. You can set up 1:N, N:1, and custom multi-table (polymorphic) relationships. Relationships can be established between:
- Local tables in Dataverse and virtual tables.
- Virtual tables and other virtual tables from the same provider, for example SQL->SQL.
For instance, you can't set up a relationship between a virtual table created using the OData virtual table provider and a virtual table created using the virtual connector provider.
Defining relationships in virtual tables
Virtual tables created using the virtual connector provider automatically creates all the columns that are represented in the external source table. This will also include columns on which relationships are defined. However, the relationship definition won't be automatically created. You'll have to define this relationship in Dataverse manually.
The following example creates an N:1 relationship between a virtual table (Service Request) and a native table (Account). The column used to set up the relationship is AccountId. This column is the primary key in the account table and is a foreign key in the service request table.
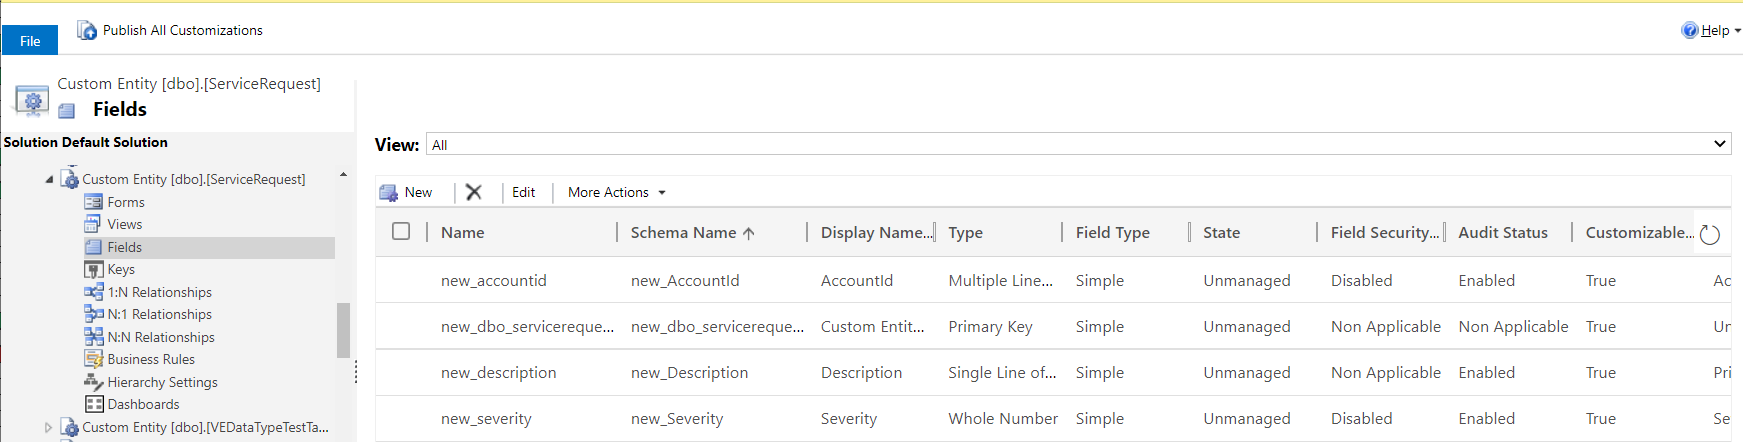
A representation of the Service Request virtual table is shown below. You'll notice that the AccountId column, which is the column used for relationship in the external source, is of type Multiple Line of Text. You need to have this column represented as a Lookup type to create a relationship.
Go to Advanced settings > Settings > Customization and choose Customize the System.
In the left navigation pane, expand the Entities view and browse to the Service Request virtual table definition.
Select the Fields view, select the AccountId column, and then select Delete.
Choose Delete to confirm the deletion of this column.
To create the relationship, select the N:1 Relationship within the Service Request table.
Select New Many-to-1 Relationship.
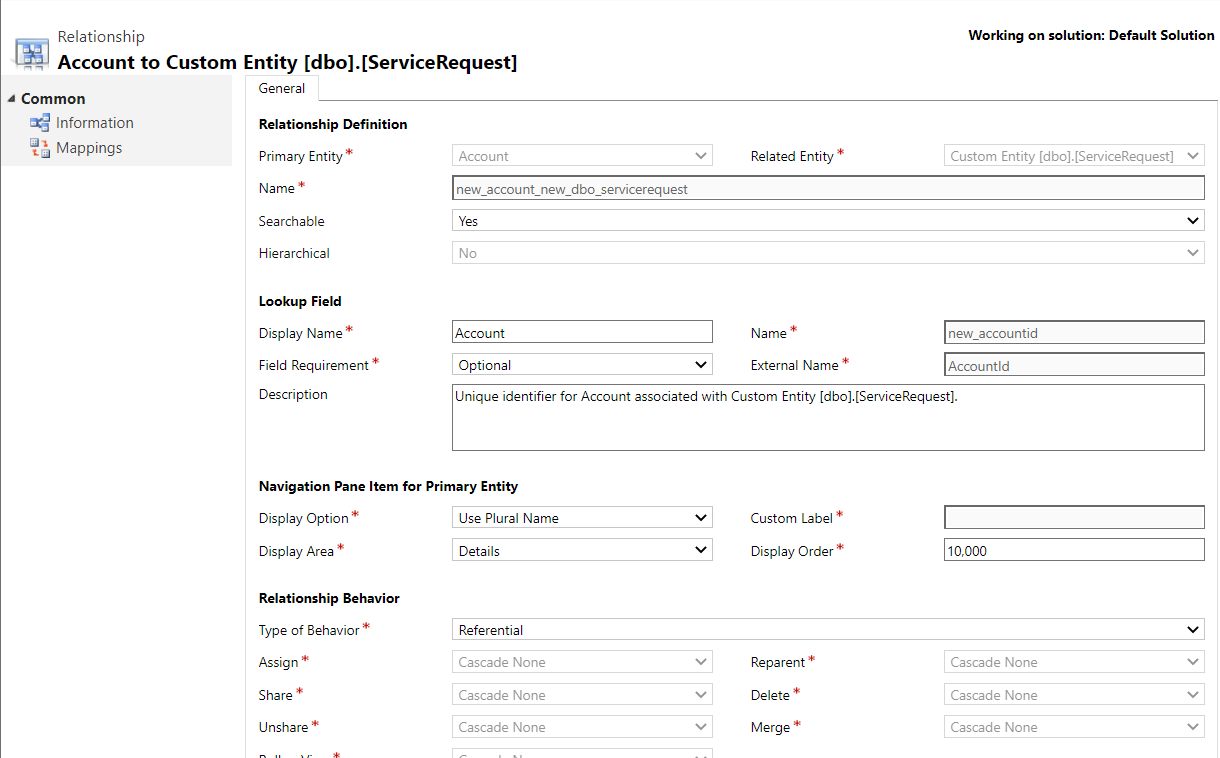
Enter the following details to create the relationship between the Service Request virtual table and the Account table.
- In the Relationship Definition section – set the Primary Entity column value to Account.
- Optionally, if you want to edit the name of the relationship, you can do so in the Name column.
- In the Lookup Field section, set the Display Name to Account.
- The Name column automatically populates with the lookup column name.
- Set the External Name value to AccountId (matching the column name in your source table).
Save, and then close the relationship.
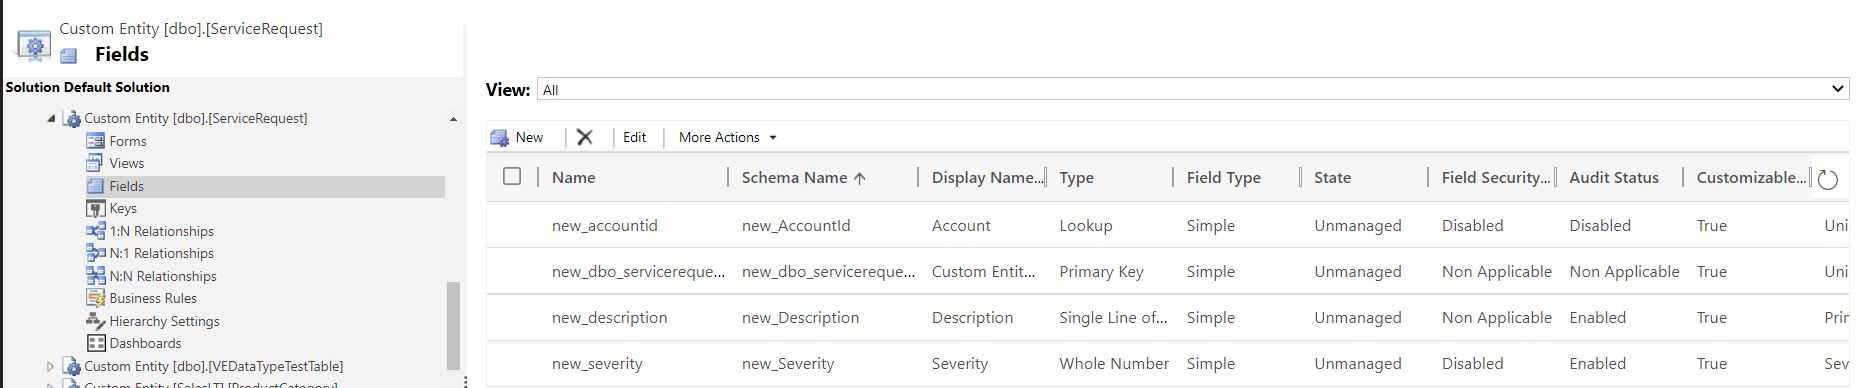
Refer to the columns for the Service Request virtual table, and you'll notice that the AccountId column is a Lookup type. This column can now be added to forms and views to see all associated accounts for each of the service request record.
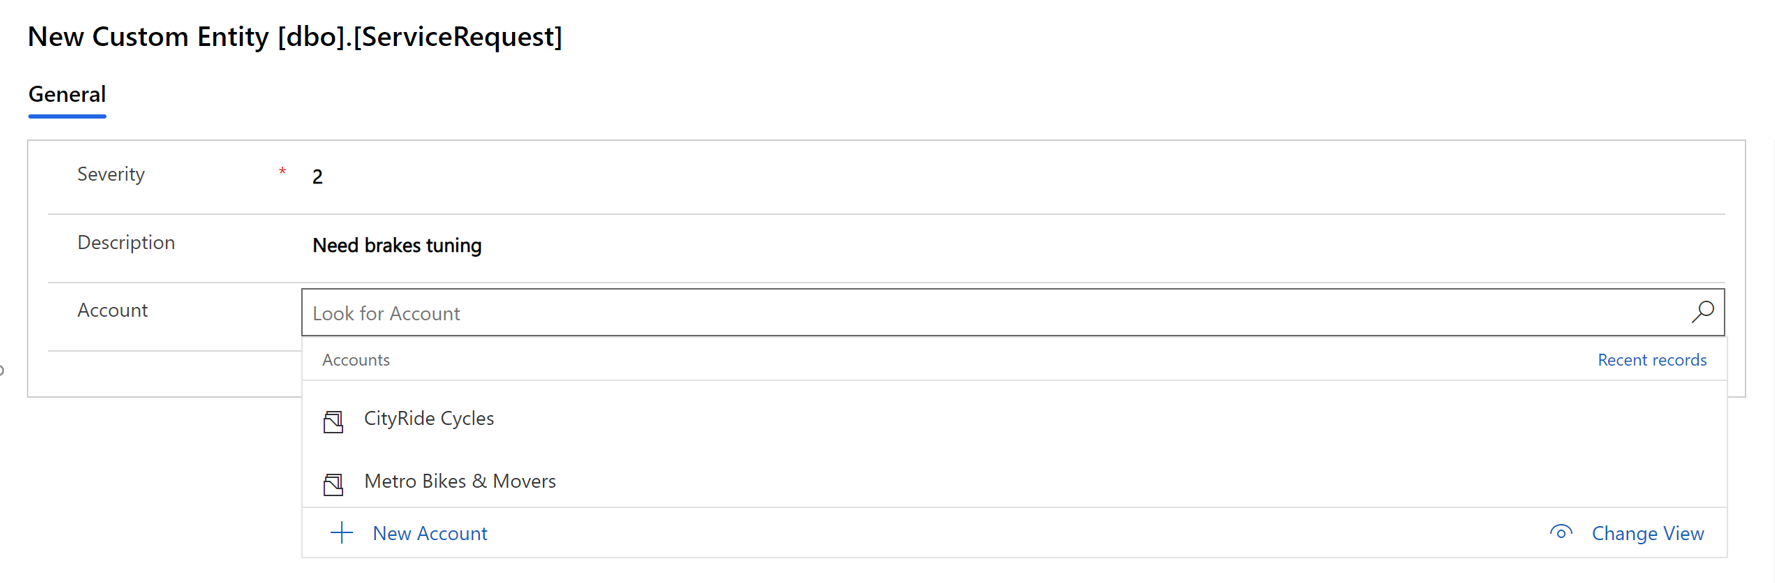
With the relationship established you can now create a new service request and pick accounts to associate them to.
Note
You will have to edit the forms and views for this table to include the lookup column and other required columns prior to operation on the virtual table.
Tip
- The Primary Key column should be included in the create form if you didn't set up the column to increment during the design of the underlying source table automatically. You'll have to enter a valid value in the primary key column for an insert operation to succeed.
Next steps
Create virtual tables using the virtual connector provider (preview)
Feedback
Coming soon: Throughout 2024 we will be phasing out GitHub Issues as the feedback mechanism for content and replacing it with a new feedback system. For more information see: https://aka.ms/ContentUserFeedback.
Submit and view feedback for