Note
Access to this page requires authorization. You can try signing in or changing directories.
Access to this page requires authorization. You can try changing directories.
When a custom table is created, a default icon is automatically assigned. All custom tables use the same icon by default. Use custom icons to differentiate how your custom tables look. It's not possible to modify the icons assigned to system tables.
In the example here, the accounts table has an icon already assigned to it as it's a system table, however the other tables have the default icon.
![]()
Icons can be used for the following purposes with model-driven apps.
| Icon Type | Description |
|---|---|
| Table icon | An .svg, .gif, .png, or .jpg format image, 16x16 pixels in size. This article describes how to edit the table icon. |
| Icon for table forms | An .svg, .gif, .png, or .jpg format image, 32x32 pixels in size. More information: Enable or disable table options |
| App icon | Must be a scalable vector graphic (.svg) icon. More information: Manage model-driven app settings in the app designer |
Note
All image files must be no more than 10 kilobytes in size.
Setting the icon in the app designer overrides the table definition icon setting. When the table icon in app designer is set to the default icon, the icon specified in the table definition is displayed in the app.
When a scalable vector graphic (.svg) image is used as the app icon or icon for table forms, it must have the default size set. Since SVG is an XML document, the svg element width, height and viewBox values can be edited with a text editor to define the default size for the image.
Where possible, remove any hard coded fill color attributes and use the currentColor keyword to avoid contrast issues. More information: Image web resources
Each type of icon is stored as a web resource. Create a web resource first and then set the icons to use them. Alternatively, you can add the icon by creating a new web resource when you define the table properties.
Set the icons for a custom table from the table definition
Sign in to Power Apps.
Select Solutions on the left navigation pane, and open the solution you want or create a new one. Then open the custom table from the solution. To use the default solution, select Tables on the left navigation pane, and then open the table you want. If the item isn’t in the side panel pane, select …More and then select the item you want.
Select Properties. In the right Edit table pane, expand Advanced options.
Under Choose table image, select from the following options:
- Select the dropdown to choose an existing web resource.
- Select New image web resource to create a web resource to add the icon. More information: Create or edit web resources to extend an app
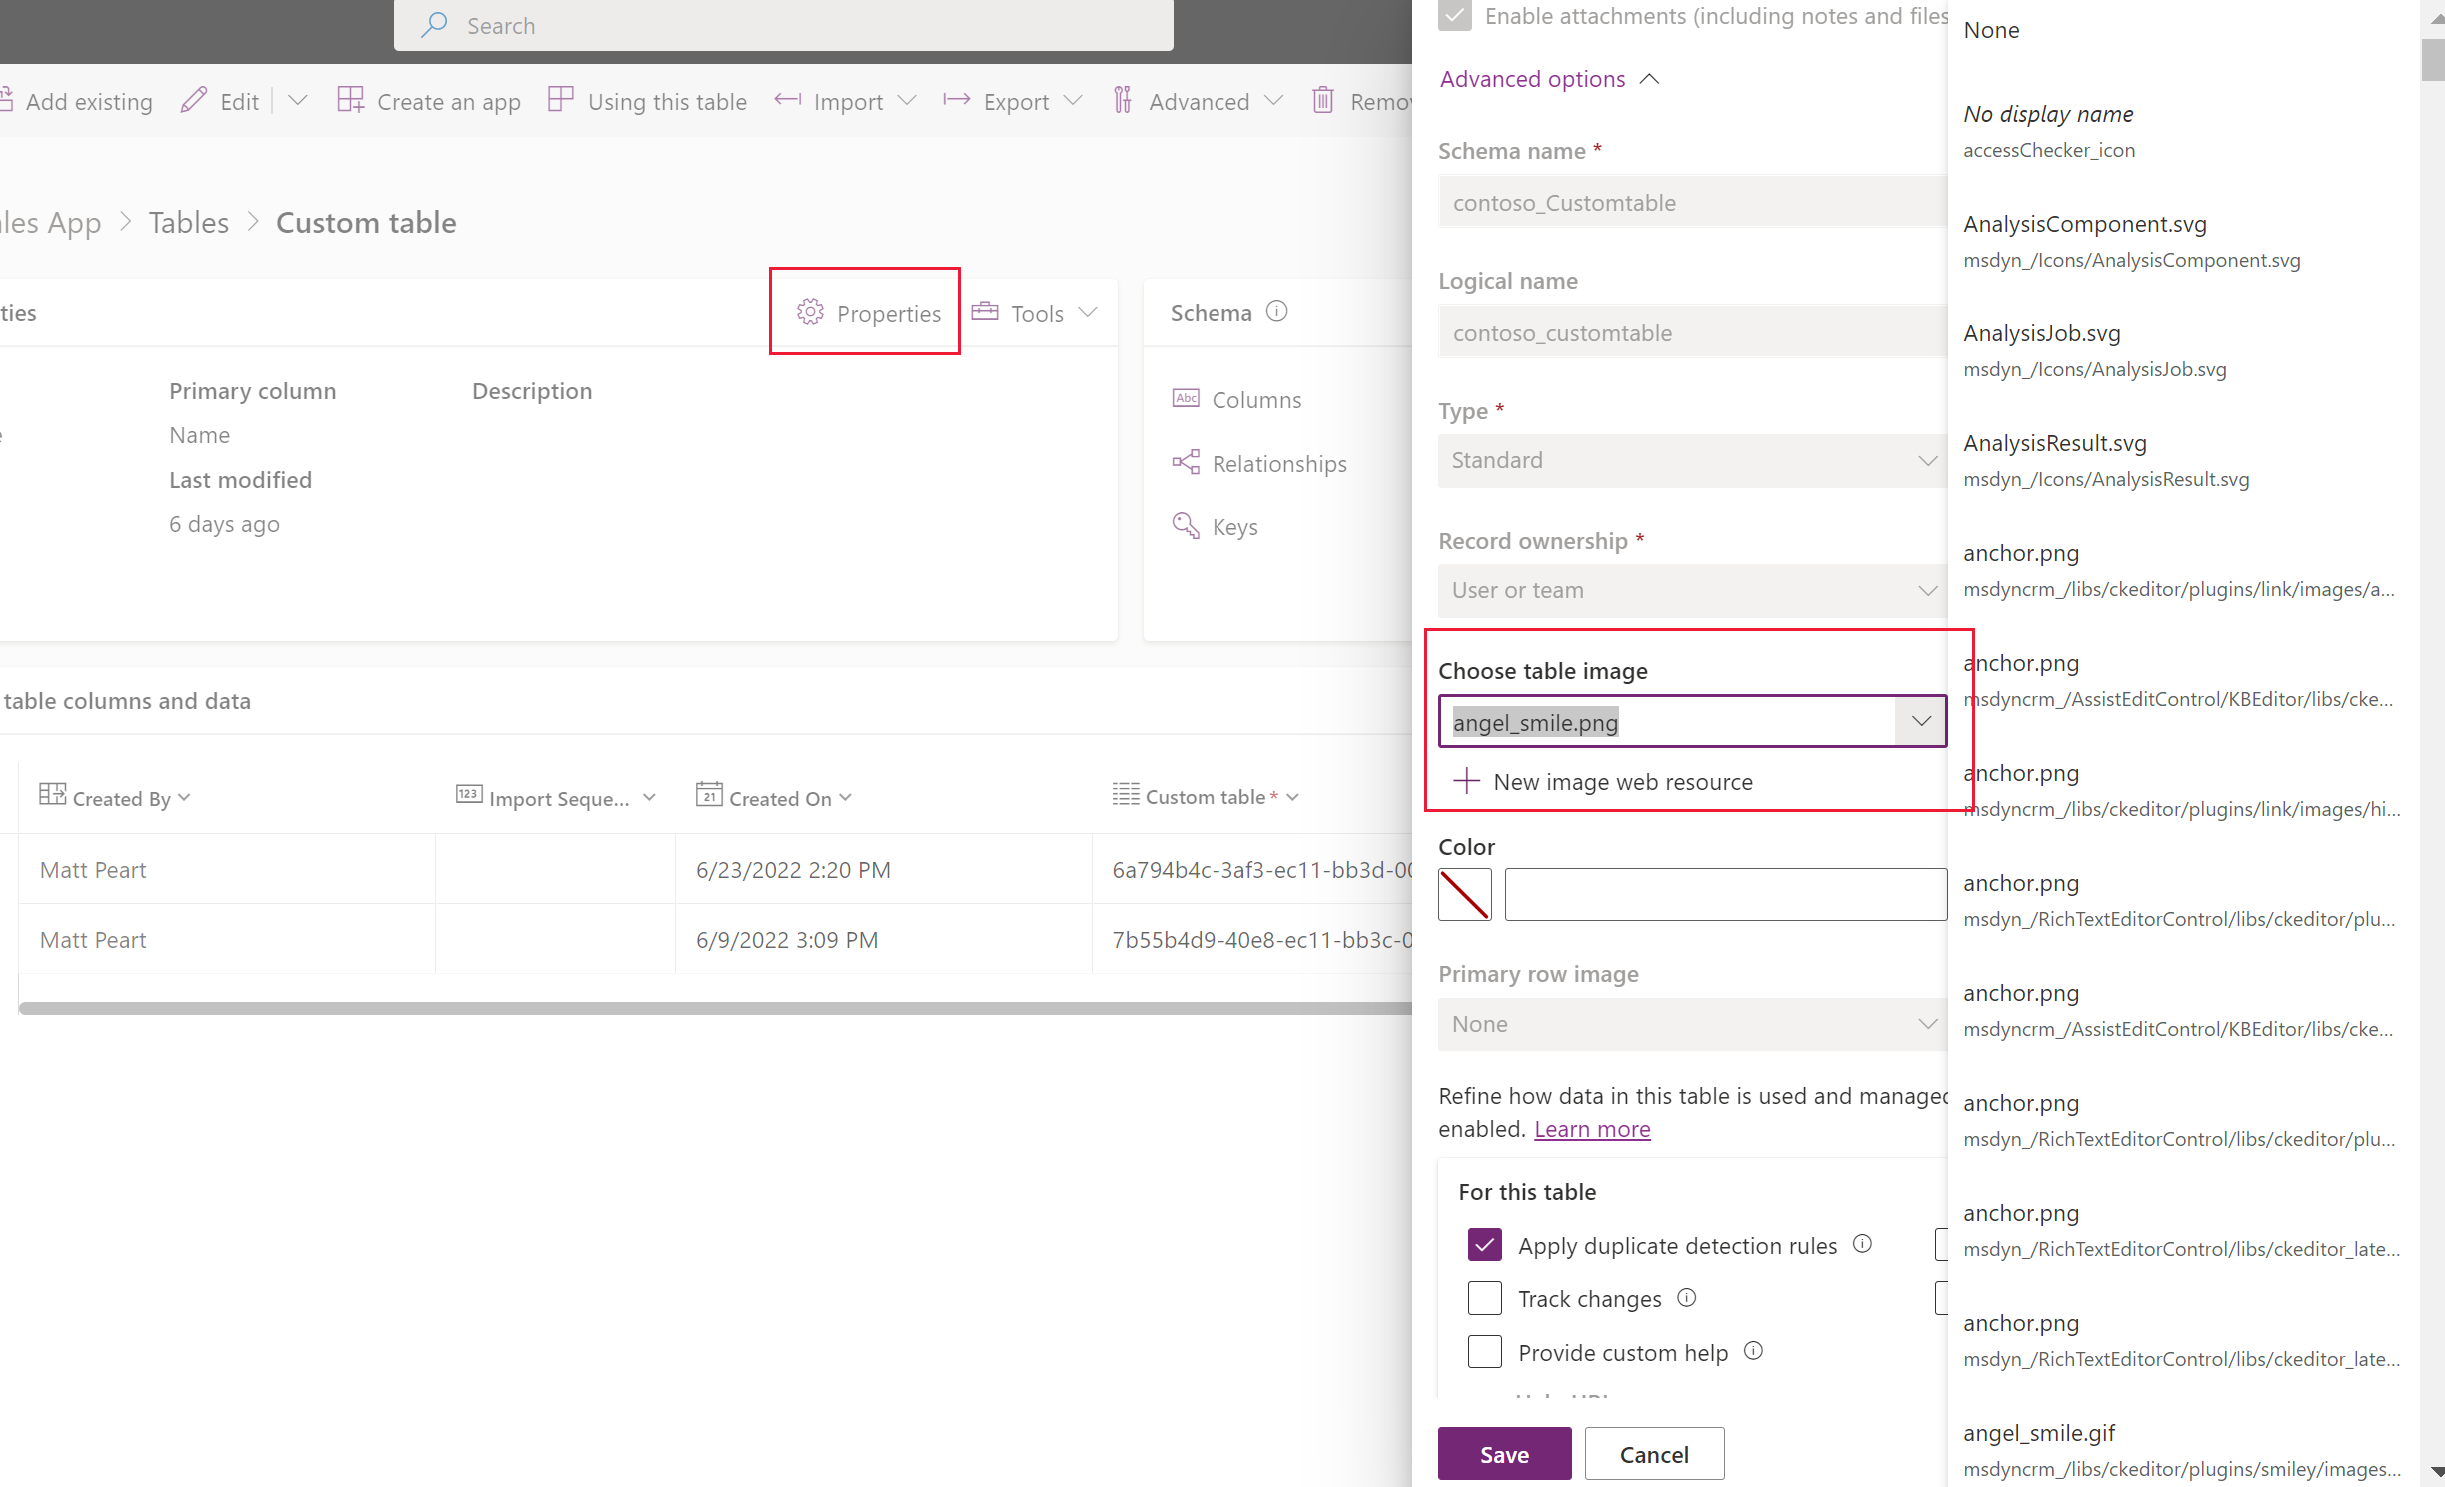
Select Save.
Set the icon for a table in app designer
- On the app designer left pane, select the table.
- In the right table properties pane, under Icon, select Use web resource > Select icon.
- Select from the list of existing image web resources or select New to create a new one.
- Select Select, and then select Publish to make the changes available in your app.
Review changes to your model-driven app icons
When the updates take effect, they can be reviewed by playing the app. In this case, the Courses table and its icon are updated.
![]()
Set the icons for a custom table (classic)
- From Power Apps, select Solutions on the left navigation pane. If the item isn’t in the side panel pane, select …More and then select the item you want.
- Select the unmanaged solution that contains the tables where icons need to be set.
- Select Switch to classic from within the solution command bar (you might need to select ... first). The classic solution explorer will open the solution.
- In the classic solution explorer, expand Entities (tables).
- Select the custom table that requires an updated icon.
Set table icons
- On the command bar, select Update Icons.
- In the Select New Icons dialog, on the Web Client tab, under Icon in Web application or Icon for Entity Forms, to the right of New Icon, select the Browse button
 .
. - Select or create the appropriate web resource, and then select OK.
- In the Unified Interface tab, do the same for the New Icon column.
- Select OK to close the Select New Icons dialog.
- On the command bar, on the File menu, select Save.
- When your changes are complete, publish them. Select Publish in the command bar while the table is selected in solution explorer.
Community tools
Iconator is a tool that XrmToolbox community developed for Power Apps. A designer can use the tool to update icons associated with a table in addition to introducing new icons.
See the Developer tools for Microsoft Dataverse article for community developed tools.
Note
The community tools are not a product of Microsoft and Microsoft doesn't provide support for the community tools. If there are questions relating to the tool, please contact the publisher. More Information: XrmToolBox.