Note
Access to this page requires authorization. You can try signing in or changing directories.
Access to this page requires authorization. You can try changing directories.
Card forms are used in views for model-driven apps. Card forms are designed to present information in a compact format that is suitable for mobile devices. For example, the default card form for the My Active Accounts view defines the information displayed for each account row.

Although card forms can be created and edited in the same way as other form types, card forms are added to apps differently. Instead of adding a form as an app component, custom card forms are added to views by using the Read-only Grid control.
Create a card form
To create a card form, sign in to Power Apps.
Select Tables, select the table you want, and then select the Forms area. If the item isn’t in the side panel pane, select …More and then select the item you want.
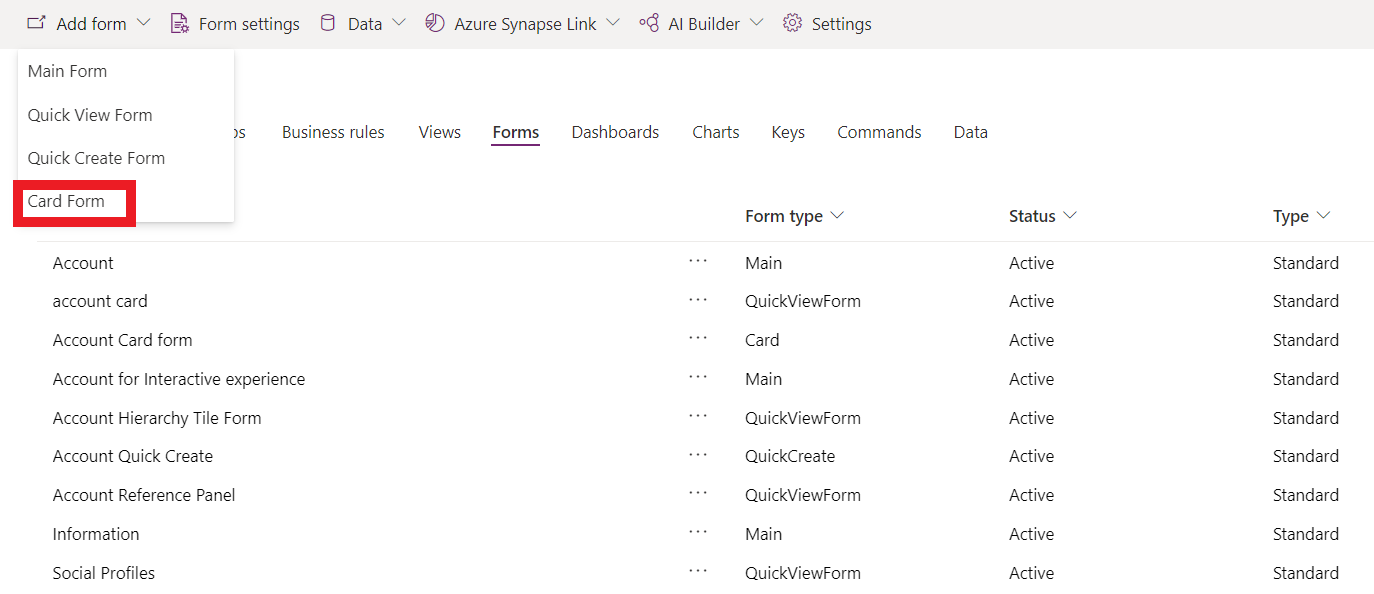
On the toolbar select Add form, and then select Card form. Alternatively, you can open an existing Form type that's a Card form to edit it.
Add the columns that you want. We recommend that you limit the number of columns so that the form displays well on small screens.
Select Save, and then select Publish.
Add a card form to a view
Important
To add a custom card form to a view requires the deprecated Read-only Grid control. The Read-only Grid has been deprecated so it is no longer the default grid control for tables in Dataverse. However, while the control remains available you can select it for a table to use to create a card form view. More information: Configure a grid control for a table
Sign in to Power Apps.
Select Tables, select the table you want, and then select the Views area. If the item isn’t in the side panel pane, select …More and then select the item you want.
Select the view that you want, and then on the view designer toolbar, select Switch to classic.
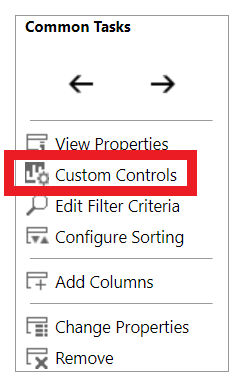
Select Custom Controls from the Common Tasks pane.
Select Add Control, from the list of controls select Read Only Grid, and then select Add.
Note
There are two read only grid controls. The default read only grid control that is named Read-only Grid (default) doesn’t support custom card forms.
From the Read Only Grid properties page configure the following properties, and then select OK.
Card Form. Select the pencil icon
 and then select the card form you want to display in the view. By default, the primary table associated with the view is already selected, but you can change it.
Reflow behavior. If you want to change whether the card form displays when resized, select the pencil icon
. More information: Allow grid to reflow into listSelect the client types, Web, Phone, or Tablet, where you want the Read Only Grid control to display.
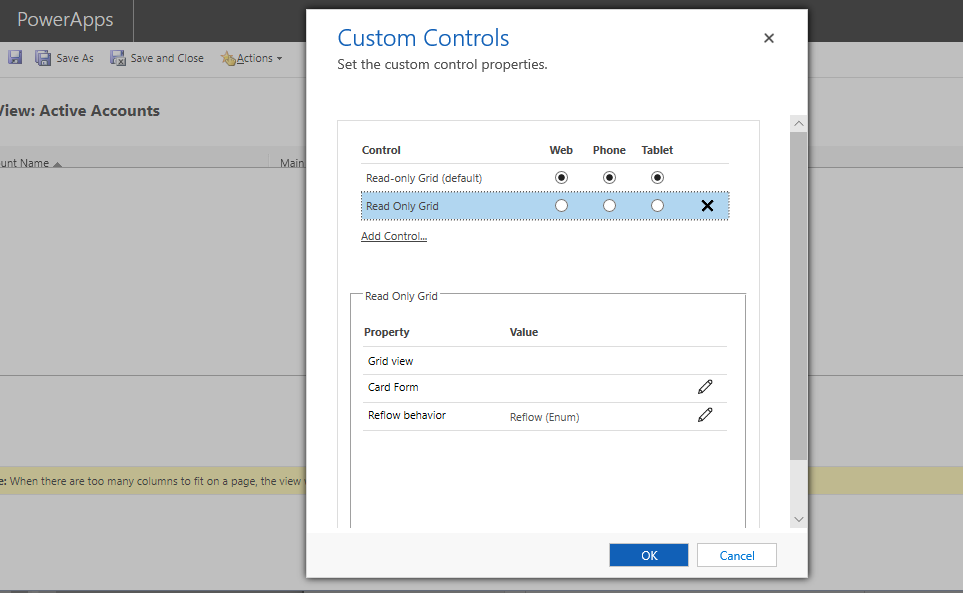
Select OK to close the Custom Controls properties page.
On the classic view designer toolbar, select Save and Close.