Note
Access to this page requires authorization. You can try signing in or changing directories.
Access to this page requires authorization. You can try changing directories.
Creating a table relationship adds the navigation within a form that allows app users to view a list of related records from the Related tab in a model-driven app.
Each table relationship has properties to control the relationship behavior. More information: Table relationship behavior
Table relationships that are configured to be displayed can be hidden using the form designer.
Add, edit, or create a related table in form designer (preview)
[This topic is pre-release documentation and is subject to change.]
Important
This is a preview feature.
- Sign into Power Apps
- Select Solutions on the left navigation pane, open the solution that has the table you want, and then open the table. If the item isn’t in the side panel pane, select …More and then select the item you want.
- Select Forms, and then open the main form where you want to add a related table.
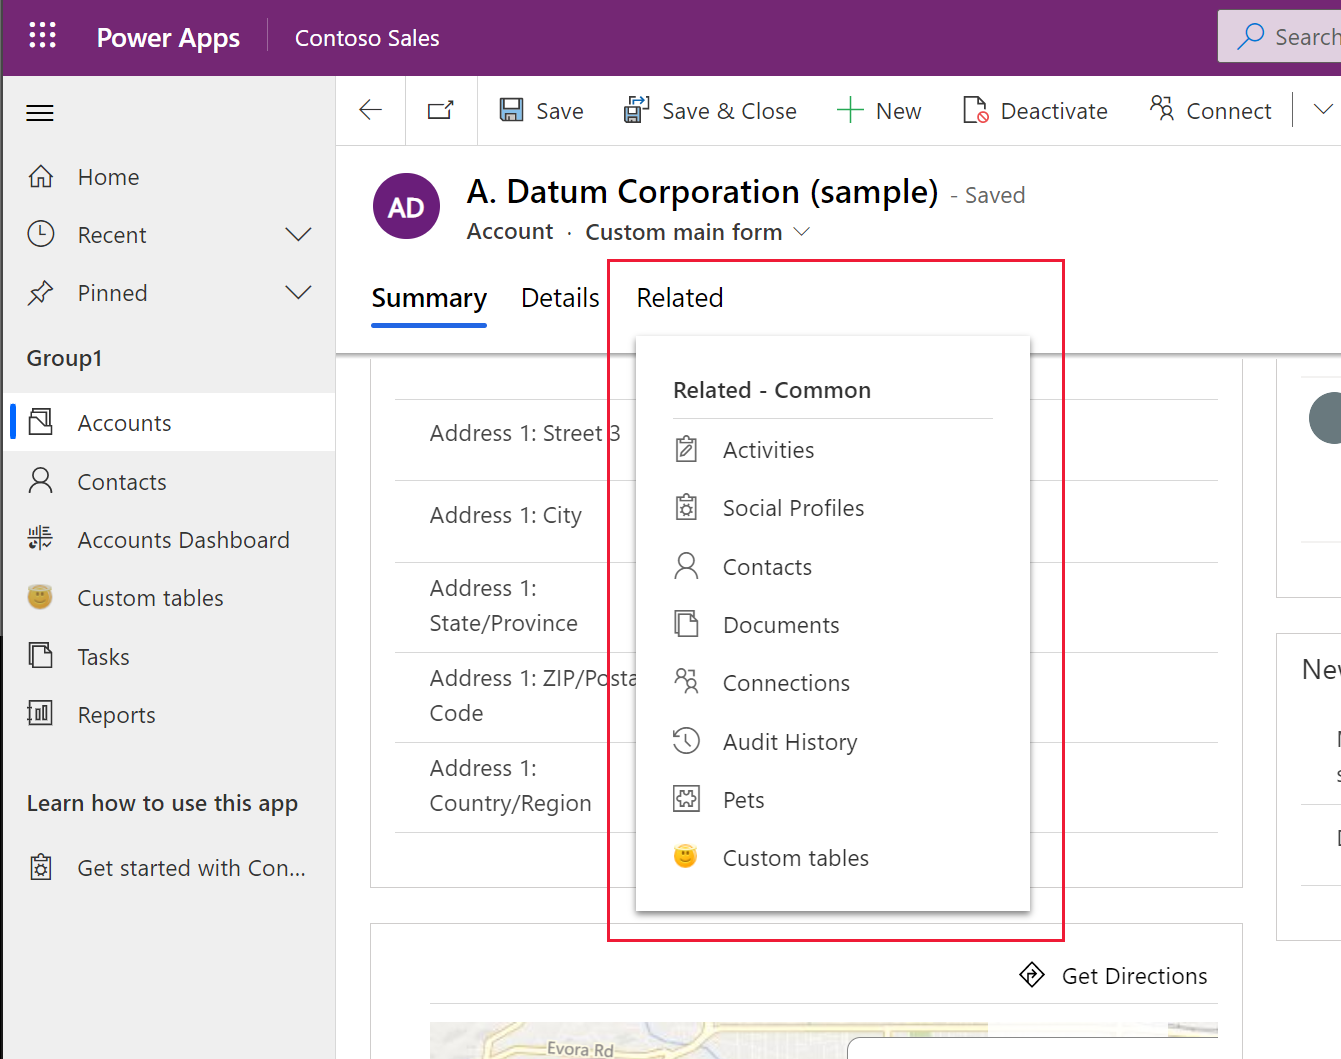
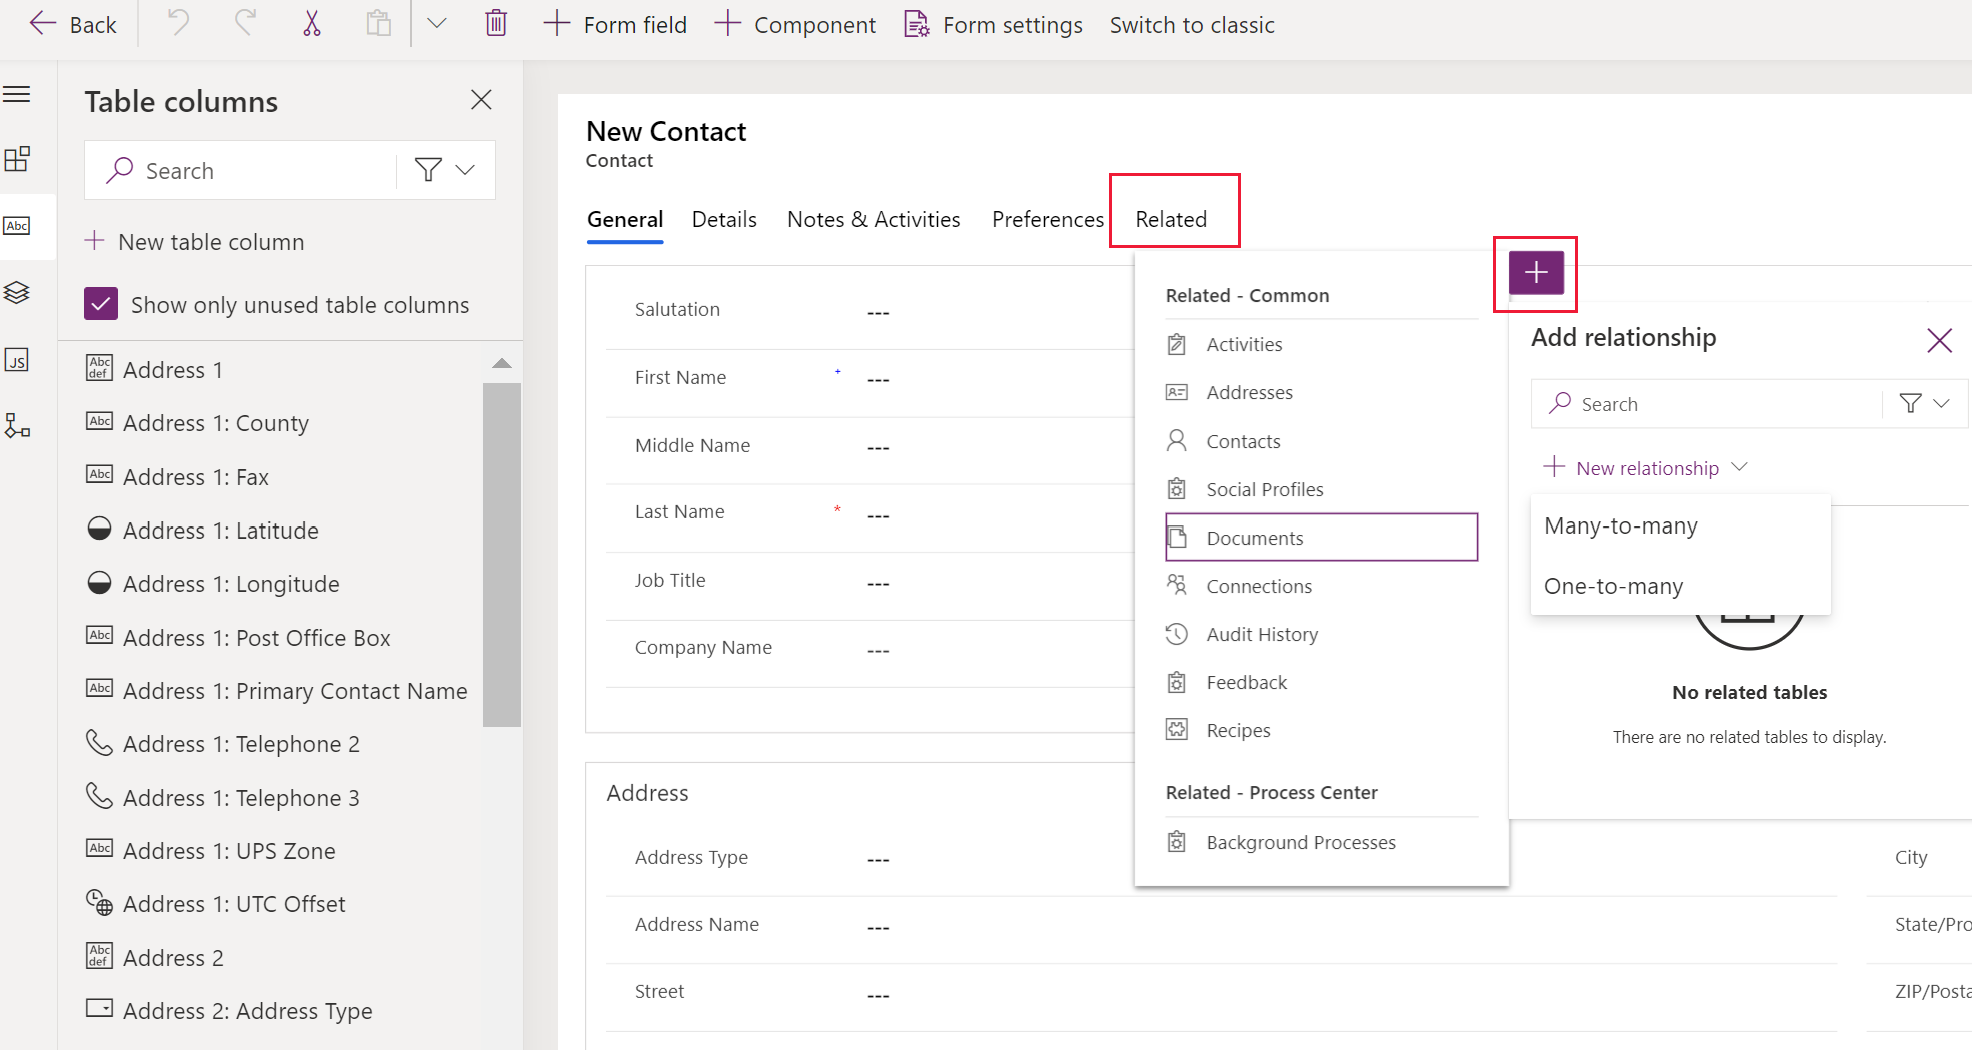
- Select the Related tab. The Related menu appears:
Add and edit an existing relationship. Select a table in the list to display the table properties in the right pane. Select Edit relationship to make changes to the relationship. More information: Add advanced relationship behavior
Add a new relationship. Select + to Search for another relationship or select New relationship to create either a One-to-many relationship or Many-to-many relationship. More information: Add a One-to-many relationship and Add a Many-to-many relationship
- Save and Publish the change.
Hide a relationship
- In form designer, select the Related tab, and then select the table where you want to hide a relationship.
- On the right properties pane, under Display options select Hide.
- Save and Publish the change.
Relationship management limitations in form designer
- You can edit display options for system relationships but you can’t remove the relationship from the related menu. However, you can hide the relationship. More information: Hide a relationship
- You can’t edit or remove self many-to-many relationships.
- You can't add or edit related web resources or external URLs.
Create navigation using the legacy experience
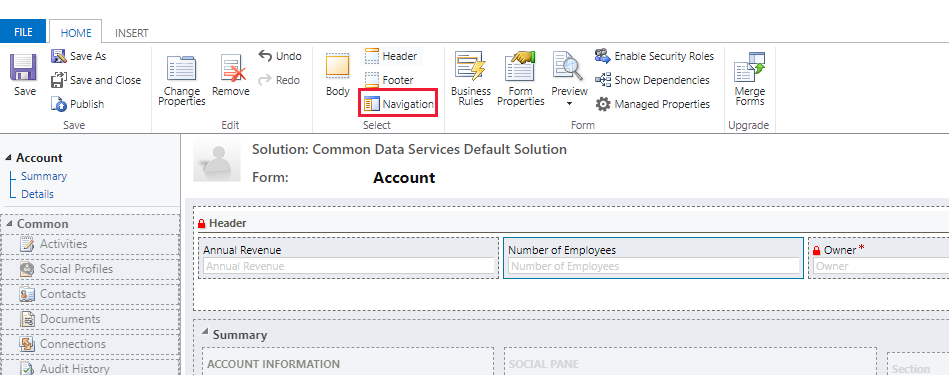
To enable editing navigation first select Navigation from the Select group on the Home tab of the form designer.
In the right pane, from Relationship Explorer you can filter by 1:N (one-to-many) or N:N (many-to-many) relationships, or view all available relationships. The Only show unused relationships checkbox is disabled and selected. Relationships are added one at a time.

To add a relationship from the Relationship Explorer just double-click the relationship and it will be added below the currently selected relationship in the navigation area. Double-click a relationship in the navigation area and you can change the label on the Display tab. On the Name tab you can see information about the relationship. Use the Edit button to open the definition of the table.
There are five groups in the navigation area. You can drag them to reposition them and double-click them to change the label, but you can’t remove them. These groups will only display when there is something in them. So if you don’t want a group to appear, just don’t add anything to it.
Use the Navigation Link button in the Control group of the Insert tab to add a link to a web resource or external URL.
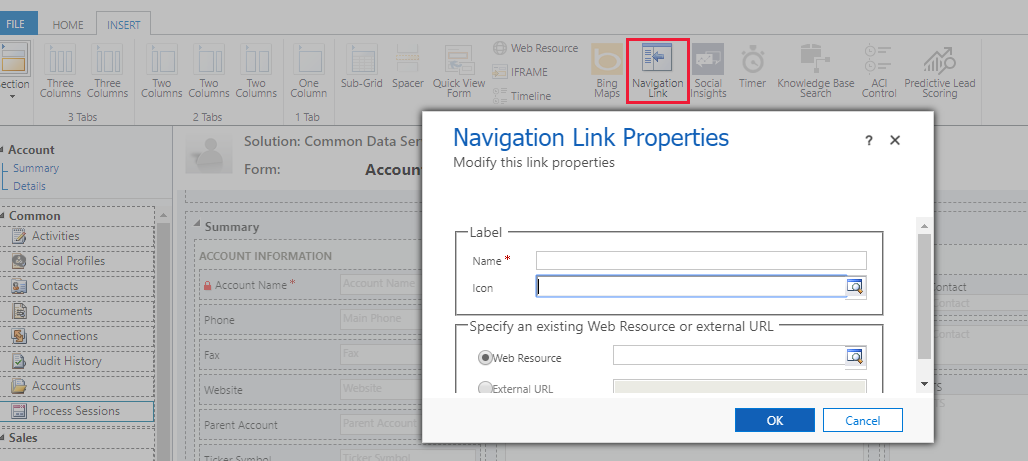
Navigation link properties
Navigation links have the following properties:
| Property | Description |
|---|---|
| Name | Required: Text to display as a label. |
| Icon | Use a 32x32 pixel web resource. Use a PNG image with a transparent background is recommended. |
| Web Resource | Specify a web resource to display in the main pane of the form. |
| External URL | Specify the URL of a page to display in the main pane of the form. |
Privacy notices
When you add the Website Preview Control to a form, on load, certain identifiable device information (the device name – such as iPhone, the OS and the OS version, the browser and the browser version) will be sent to Bing (a consumer service). Therefore, Consumer Data sent to Bing will be subject to Microsoft Privacy and Cookies. By adding this control, you agree for this limited set of data to be sent to the Bing service. Note that you may remove the control at any time to discontinue use of this functionality.
When you add the Multimedia Control to a form, certain identifiable device information (the device name – such as iPhone, the OS and the OS version, the browser and the browser version) will be sent to the service that you are calling (such as YouTube or Azure Media Services) and will be subject to the terms of that service’s privacy statement. By adding this control, you agree for this limited set of data to be sent to the external service you are calling. Note that you may remove the control at any time to discontinue use of this functionality.