Attach a file to email
The option to attach files to an email is a useful feature when you need to share additional information. Use the Attach file button on the command menu or the New Attachments button in the email body to attach files to the email.
Important
- The default file size limit for an email file attachment is 5 MB. The size limitations on email file attachments can be increased by your system administrators.
- You can't attach files to sent email messages after they have been attempted for delivery through server-side synchronization.
Work with attachments
You can attach an unlimited number of files to an email; however, there are file size limitations that are managed by your system administrator.
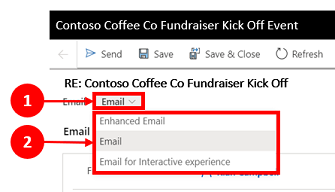
Enhanced email is the default email form, however you can switch forms by doing the following:

- Under the email subject name, select on the caret (v) next to Email
- A dropdown appears with a list of email form options you can choose from.
File attachments display differently, depending on the email form you're working in. You can switch email forms without losing information.
If you specify "attach" or "attachments" in the subject or the body of the email and you select Send without attaching a file, the application displays a warning message reminding you to attach a file.
Important
- The warning message reminding you to attach a file is an early access feature.
- Early access features aren't meant for production use and may have restricted functionality. These features are available before an official release so that customers can get early access and provide feedback.
Email form file attachment

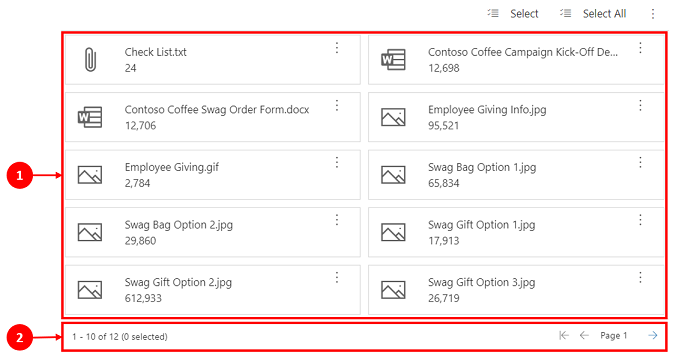
- Email. This display confirms which email form you're working in.
- Attachment. This section displays a list of file attachments in a vertical view and only displays the first three attachments.
- File count. This displays when you have more files than what can be viewed and allows you to see the total number of attached files on the left side under the last attachment with the option to page over to see more files.
Enhanced email form file attachment

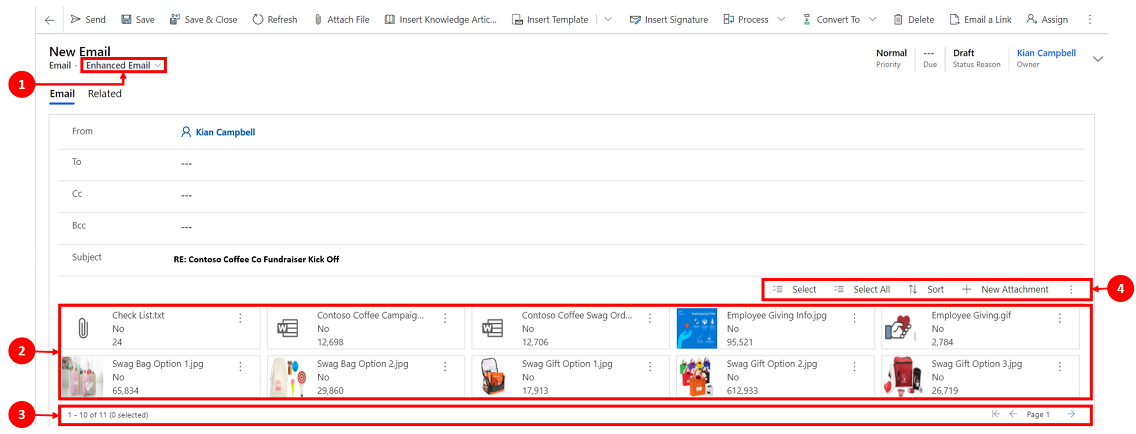
- Enhanced Email. This display confirms you're working in the Enhanced email form.
- Attached files. This section displays all your email attachments in a tile view above your message horizontally. The defaulted setting for the maximum number of files that can display is five attachments before displaying the page forward functionality.
- File count. This displays when you have files that occupy more than two rows and allows you to see the total number of attached files on the left side under the last attachment with the option to page over to see more files.
- Attachment Commands. This allows you to use the select, select all, sort, delete, and download functionality when working with your file attachments.
Work with the attachment command bar
When you’ve attached one or more files to a message, you can manage them using the file attachment commands.
Select commands
Select commands allow you to select individual files or multiple files at once.

Legend
Select All. This command is located on the right, above your attached files and allows you to select all file attachments at once.
Note
Select All only selects files that are visible. If you have multiple pages of file attachments, you will need to go to that page and select those files independently.
Tile Color Transparency. The background color of selected file attachments changes to light grey to identify which files have been selected.
Check box You can also verify which files have been selected by viewing whether the checkbox in the top-right corner of the file attachment is selected.
Formatting of file attachments in email can be realigned based on the device being used and format it's being worked in.

- Format Display Regardless of format display, file attachments will only display the number of files that are enabled by your system administrator.
- Page view. The page view displays the total number of email attachments and always is displayed under the file attachments.
Delete and download commands
These are two of the most important commands when working with images.

- Delete. This command works with the Select commands. You must first select a file before you can delete it. A confirmation request appears, requiring you to confirm you want to delete the file(s) you’ve selected.
- Download. This command also works with the Select commands and your browser download settings, allowing you to download an individual file or multiple files at once.
Preview image attachments

- More options. This command provides a list of actions for that file type.
- Non-preview image. Only non-preview image types allow you to either export selected records, download, or delete the attached file.
- Preview image types. Allow you to export selected record, preview, download, or delete the attached file. When you select the preview option, a pop-up window appears, displaying the image with the image name listed below.
Supported email file attachments
The following is a list of file image types that are supported:
| image type | supports preview | supported inline (in editor) |
|---|---|---|
| BMP.bmp | Yes | Yes |
| GIF.gif | Yes | Yes |
| ICO.ico | Yes | Yes |
| JPG.jpg | Yes | Yes |
| PNG.png | Yes | Yes |
| SVG.svg | Yes | Yes |
| PDF.pdf | Yes (preview not supported on IE) | No |
View and insert images in email
The use of visual aids helps users convey a tremendous amount of information with just a glance. Having the ability to view and insert inline images in email using the drag-and-drop or copy-and-paste functionality is a powerful tool for users. Additionally, you can browse to a file or reference an online URL using the image toolbar button.
You can drag-and-drop or copy-and-paste images into the email.

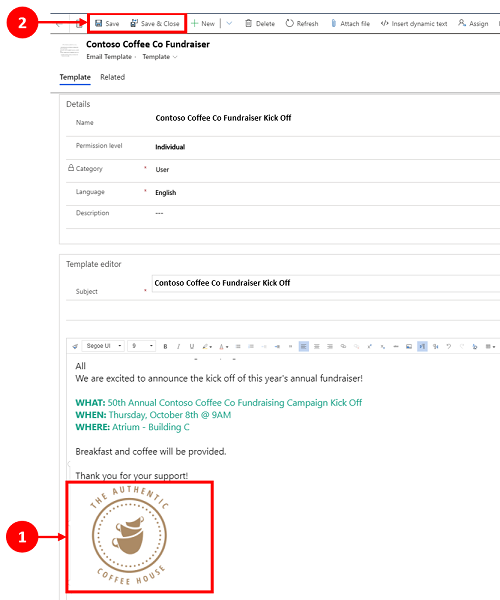
Email images You can adjust the image size.
Save. When you complete your edits, select Save or Save & Close.
Note
There's a 1 MB file size limitation when adding an inline image to an email for email templates. (For new or replied emails, there isn't a limit to the email size (it becomes part of the total email size).