Note
Access to this page requires authorization. You can try signing in or changing directories.
Access to this page requires authorization. You can try changing directories.
When you build automation with Power Automate, it might take valuable time to learn which actions and triggers you need, especially if you’re new to the Power Automate. If you want to jump right in and get started, you can now just write a description of what you want to automate in everyday language. Supporting most of the connectors, Power Automate then uses OpenAI Codex to translate your description into code, and then provides a corresponding flow that you can create instantly.
Prerequisites
A work or school account with access to a Power Automate environment that's based in Europe or the United States.
Note
- You can't create cloud flows from a description if you're logged in with a Microsoft account.
- If you don’t have access to an environment that's based Europe or the United States, you can create a new environment and select Europe or United States as the region.
Check current limitations for more information.
Create a flow from a description
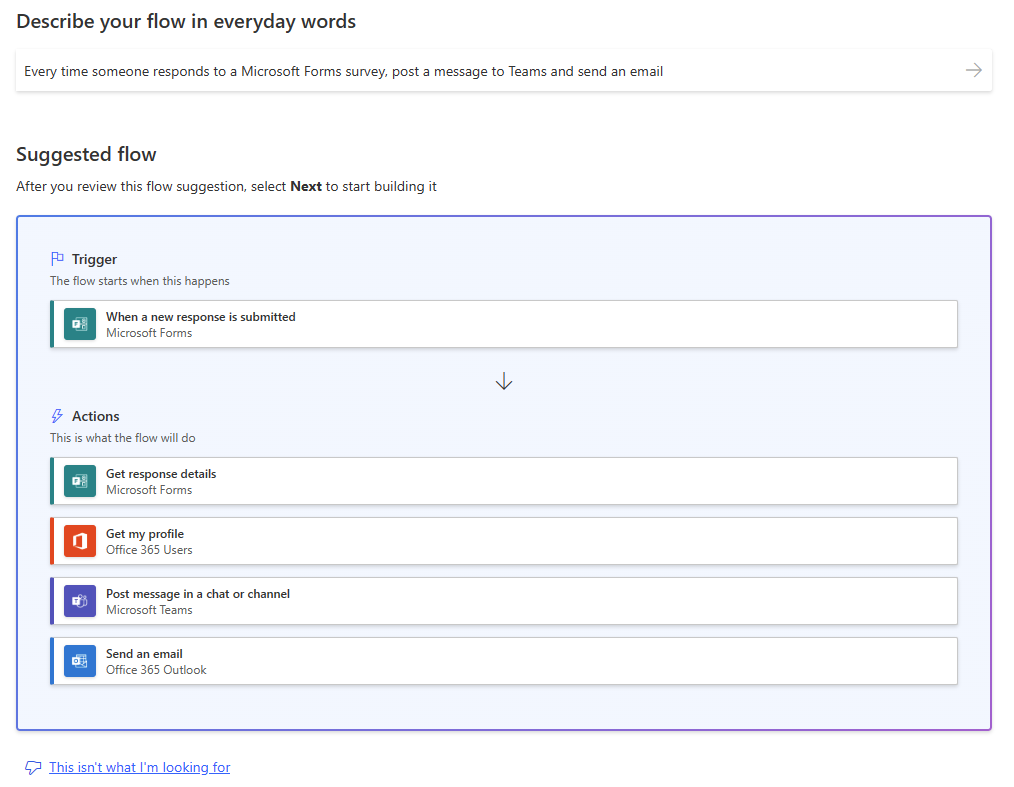
In the following example, you build an automated cloud flow that sends a notification through Teams and an email each time someone responds to a Microsoft Forms survey.
Sign in to Power Automate.
On the navigation menu to the left, select Create > Describe it to design it (preview).

A screen opens where you can enter a description of what you want to automate. You also get an example you can use for inspiration and try it out right away. As an alternative, you can go to Home and start describing your requirement. Learn more in Create your first cloud flow using Copilot.
For this example, enter Every time someone responds to a Microsoft Forms survey, post a message to Teams and send an email.
Select Confirm (the right arrow).
Power Automate returns a suggested flow that corresponds to what you entered.
Note
If the suggestion doesn't correspond to what you’re looking to automate, select This isn't what I'm looking for. You get guidance on what you can do next. This helps Microsoft to improve the AI behind this feature.
Select Next.
Set up the connections you need to run the flow.
Select Next.
Enter the information needed to run the flow. For example, which form to use and to whom to send the Teams message and email. You can decide to fill in the information on this step or do it later in the designer.
Select Create flow.
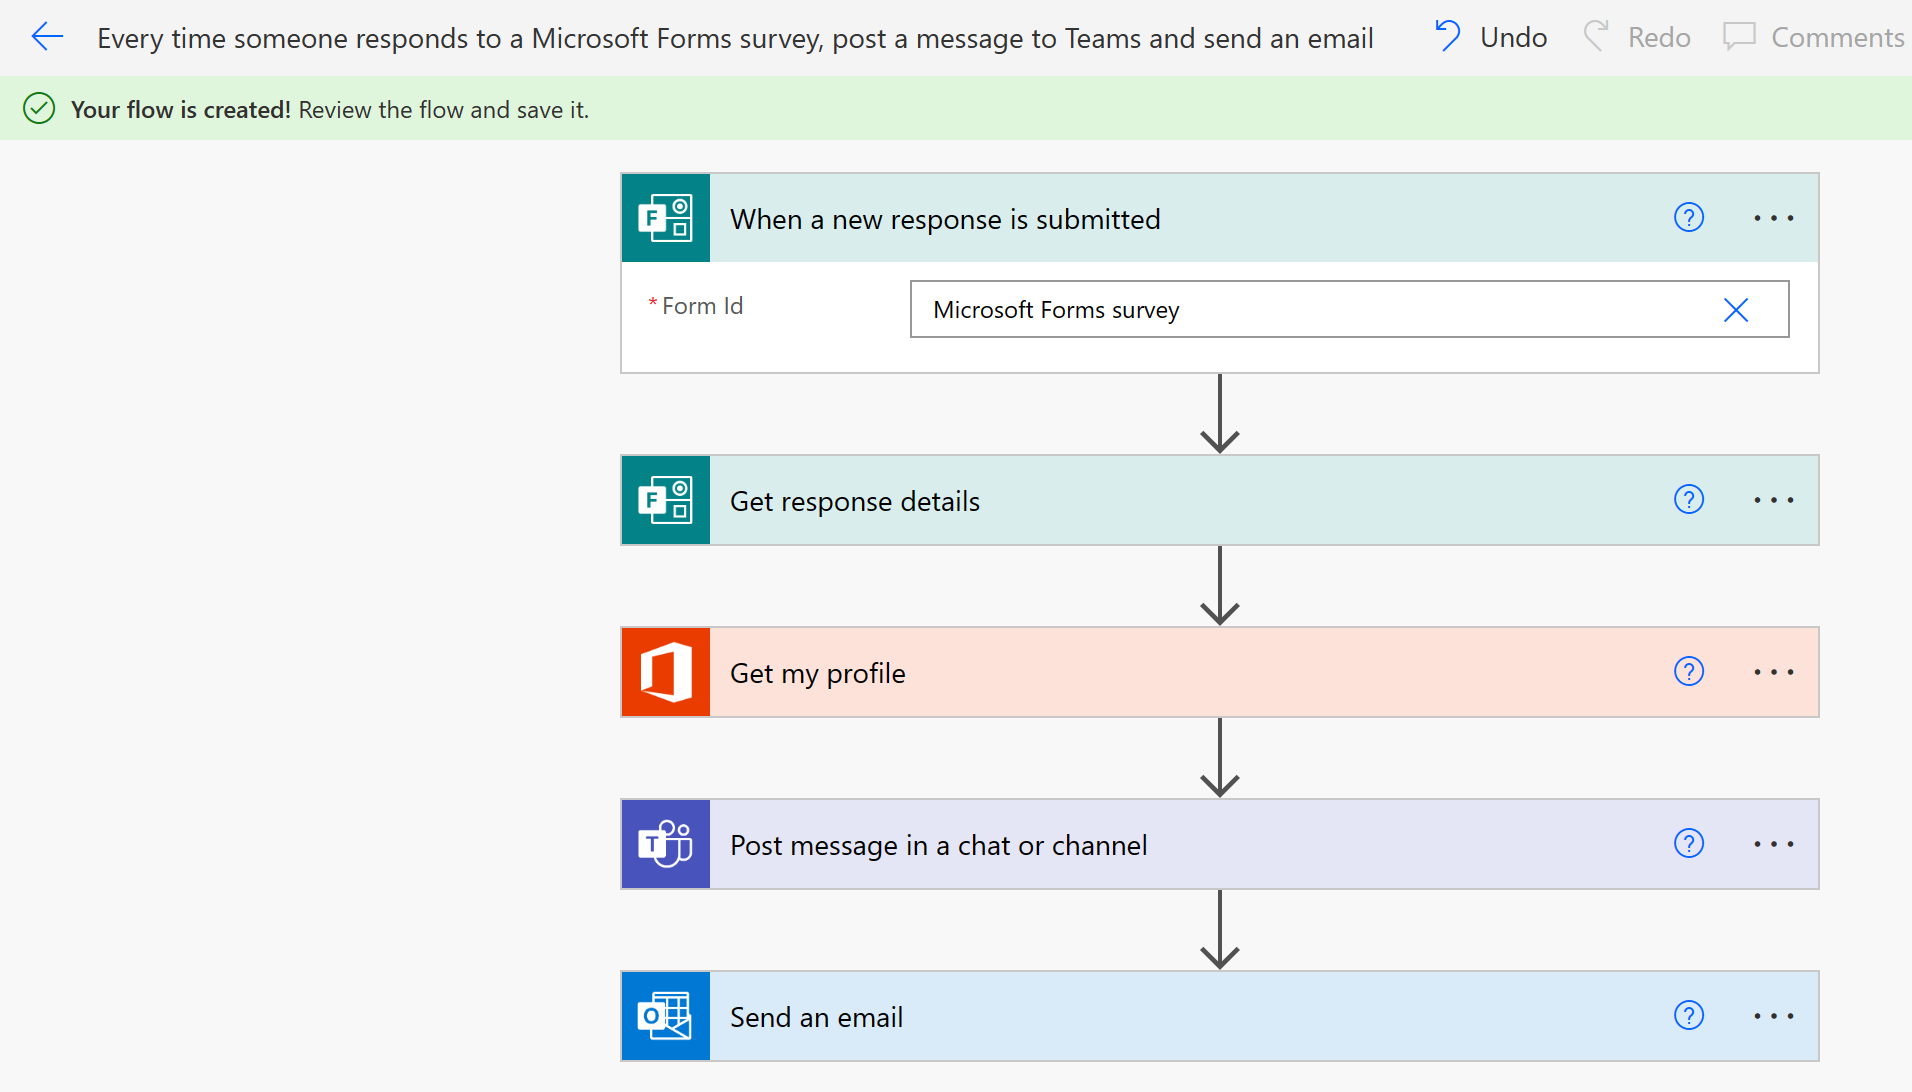
Your flow is now built. Congratulations! You can make modifications and edit the flow, or save and test it.
Use natural language to flow in Teams
You can use natural language to flow in Teams. If the Workflows app doesn’t have a template that fits your scenario, this feature helps you create a flow in Teams. To do this, type a prompt describing what you want the flow to do, and then the feature generates the flow for you. These steps eliminate the need to start from scratch.
Note
Natural language to flow in Teams is available only for select channels.
To use natural language to flow, follow these steps:
At the top of the Teams Chat menu, select Channels.
Find your channel, select the ellipsis (...), and then select Workflows.
At the bottom of the Workflows screen, select Workflow builder.
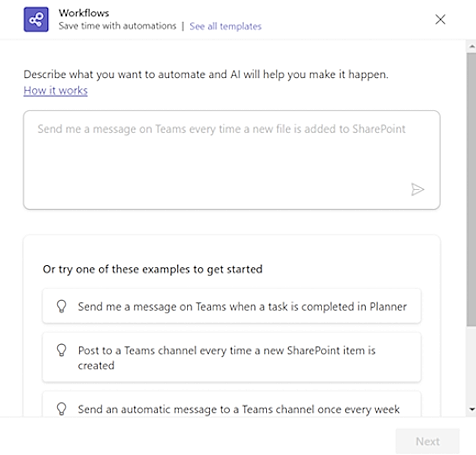
In the empty filed, type your prompt.
The AI suggests a list of flows based on your prompt.
If the examples don't quite match your scenario, scroll down and select View more examples. If you're not satisfied with the examples, you can edit the prompt for new examples.
Select an example that fits your scenario and then select Next.
Review the flow. If you're satisfied, select Next. If you're not satisfied, select This isn't what I'm looking for and follow the instructions.
When the parameters for your flow are set, select Next.
If necessary, edit the flow and select Create flow.
When your get the message, Workflow added successfully, select Done.
Limitations
- Power Automate supports descriptions written in the English language only. Descriptions you write in other languages might work, but they aren't supported.
- Cloud flows are the only type of flow that you can create from a description.
- In the current version, the AI might not fill in some parameters automatically, even if you provide them in the description.