Note
Access to this page requires authorization. You can try signing in or changing directories.
Access to this page requires authorization. You can try changing directories.
With Power Automate, you can automate exporting and distributing Power BI paginated reports to various supported formats and scenarios. In this article, you use a Power Automate template to automate setting up recurring exports of single or multiple paginated reports. You export them in a desired format for each row in an Excel Online table or SharePoint Online list. You can distribute the exported paginated report to OneDrive for work or school or a SharePoint Online site, or email it via Office 365 Outlook.
Each row in your Excel Online table or SharePoint Online list can represent a single user to receive a paginated report on a subscription basis. Or instead, each row can represent a unique paginated report you wish to distribute. Your table or list requires a column that specifies how to distribute a report, whether OneDrive, SharePoint Online, or Outlook. The Power Automate flow uses this column in its Switch statement.
Looking for other Power Automate templates for Power BI paginated reports? See Export Power BI paginated reports with Power Automate.
Prerequisites
To follow along, make sure you meet these criteria:
- You can publish to My Workspace, or you have at least a Contributor role for any other workspace.
- Access to the standard connectors in Power Automate, which come with any Office 365 subscription.
- If you're using an Excel Online table, it needs to be formatted as a table in Excel. See Create a table to learn how.
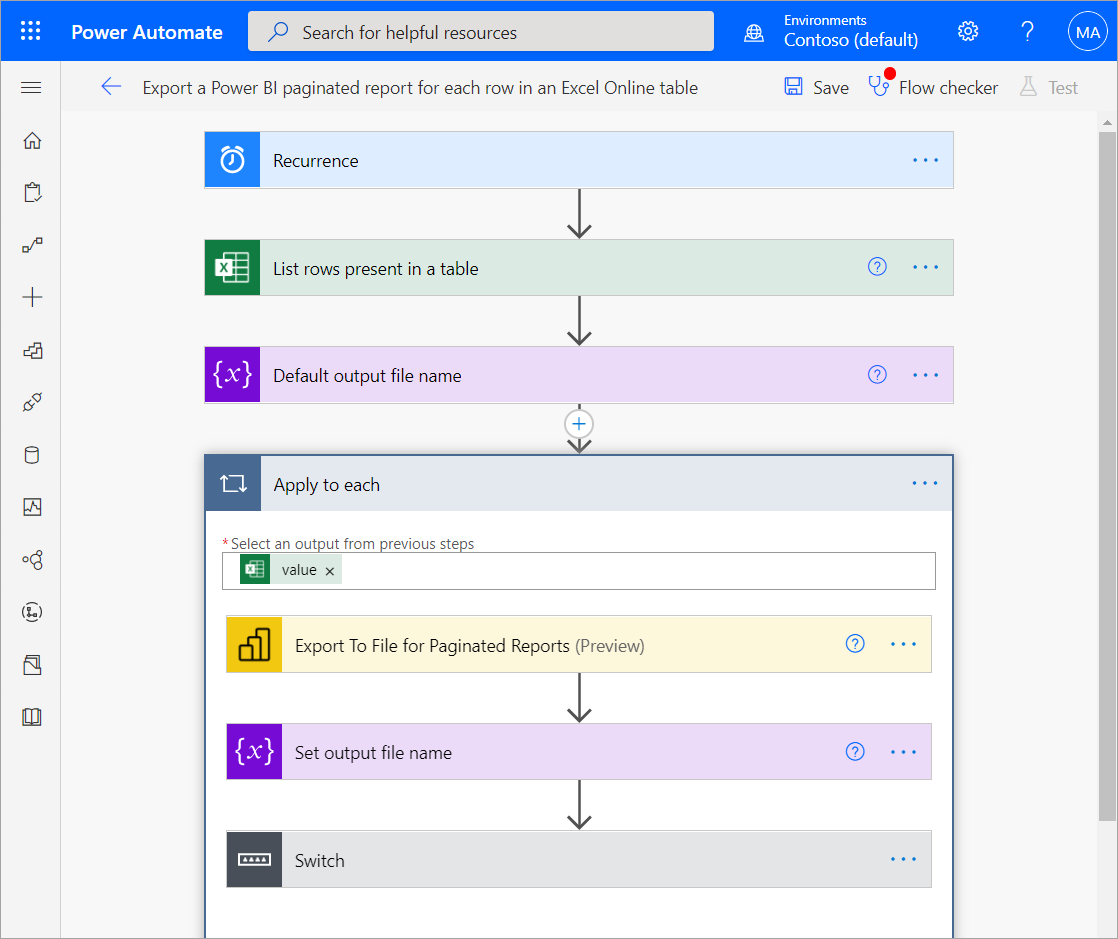
Export a paginated report for each row in a table or list
Note
The following steps and images show setting up a flow using the Export a Power BI paginated report for each row in an Excel Online table template. You can follow the same steps to create a flow using the Export a Power BI paginated report for items in a SharePoint Online list template. Instead of an Excel Online table, a SharePoint Online list will contain the information about how to export the paginated report.
Sign in to Power Automate flow.microsoft.com.
Select Templates, and search for paginated reports.
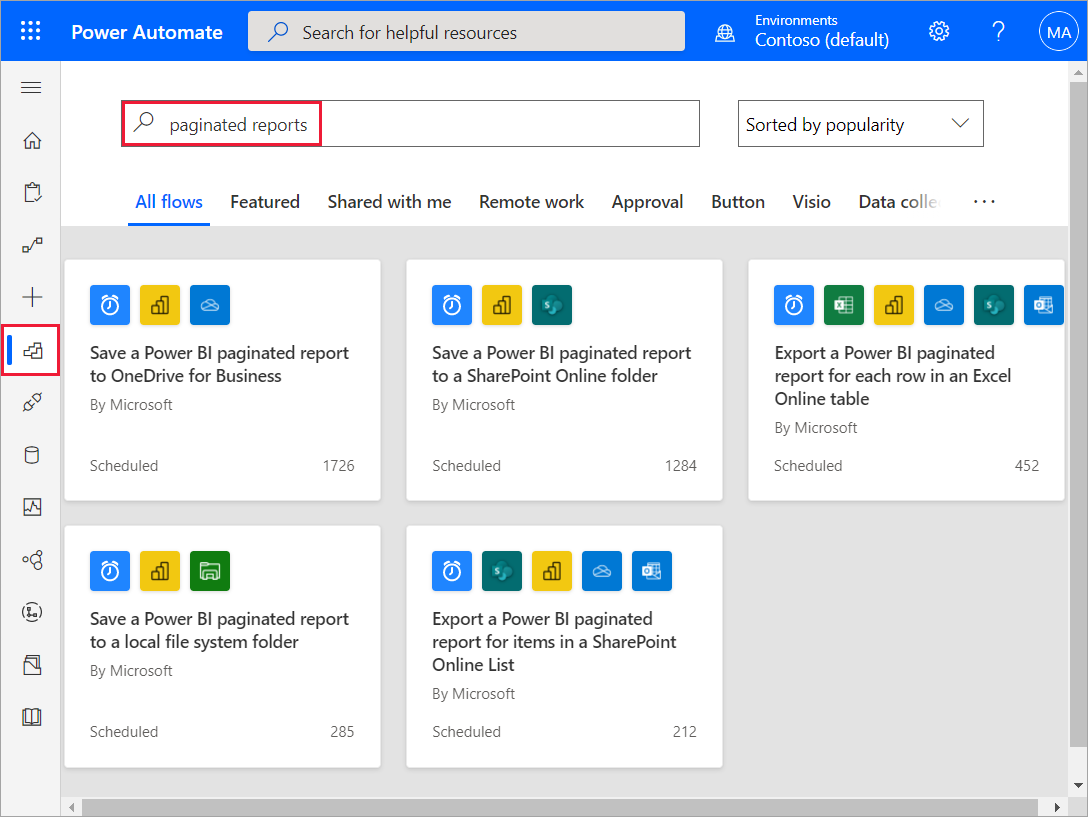
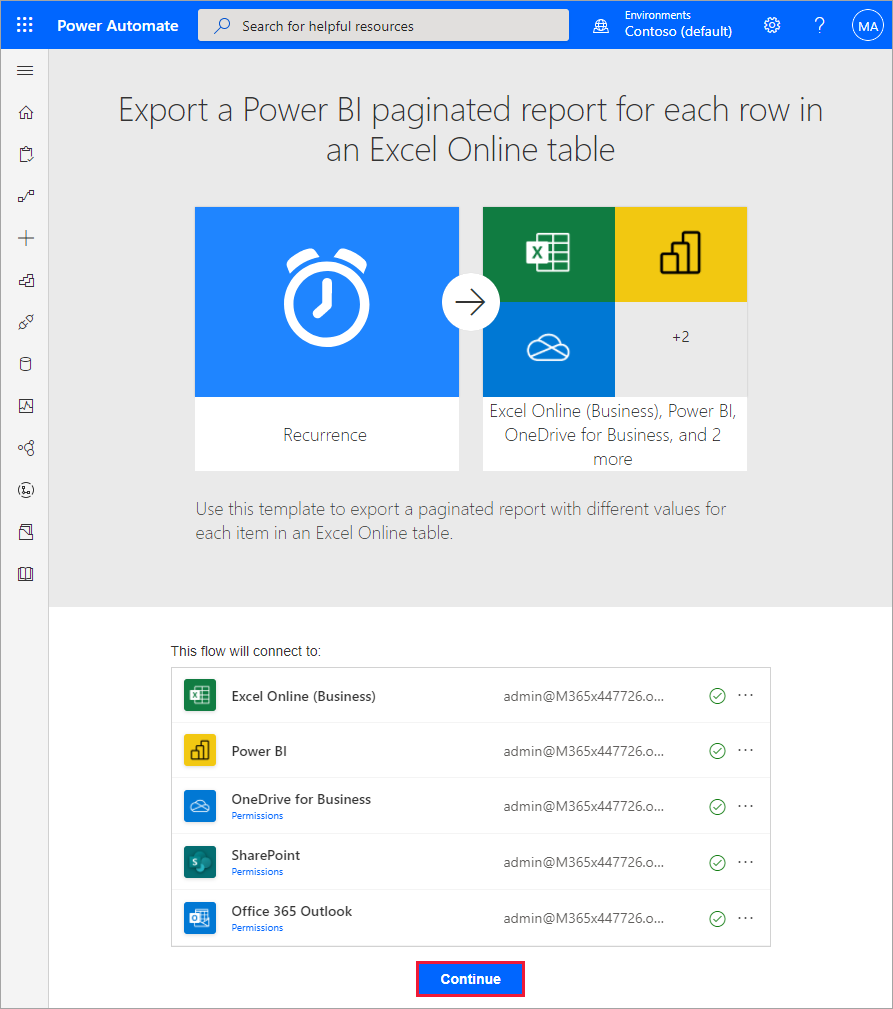
Select the Export a Power BI paginated report for each row in an Excel Online table or Export a Power BI paginated report for items in a SharePoint Online list template. Make sure you're signed into Excel Online, Power BI, OneDrive for work or school, SharePoint Online, and Office 365 Outlook. Select Continue.
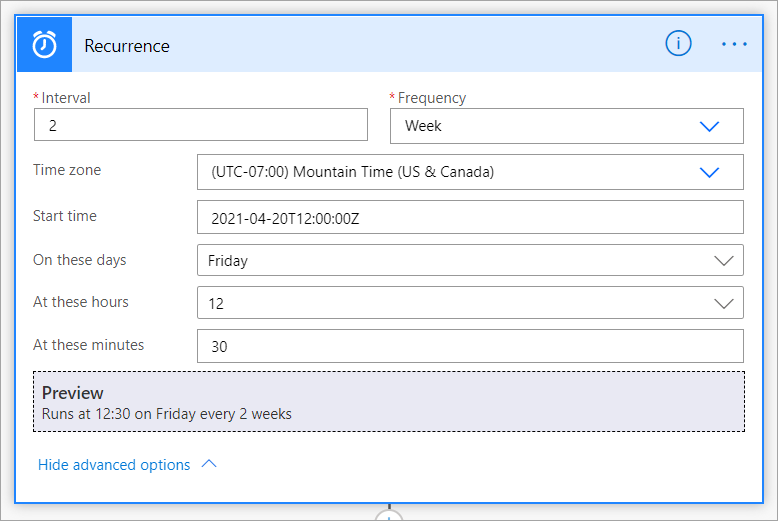
To set the Recurrence for your flow, select an option in Frequency and enter a desired Interval value.

(Optional) Select Show advanced options to set specific Recurrence parameters, including Time zone, Start time, On these days, At these hours, and At these minutes.
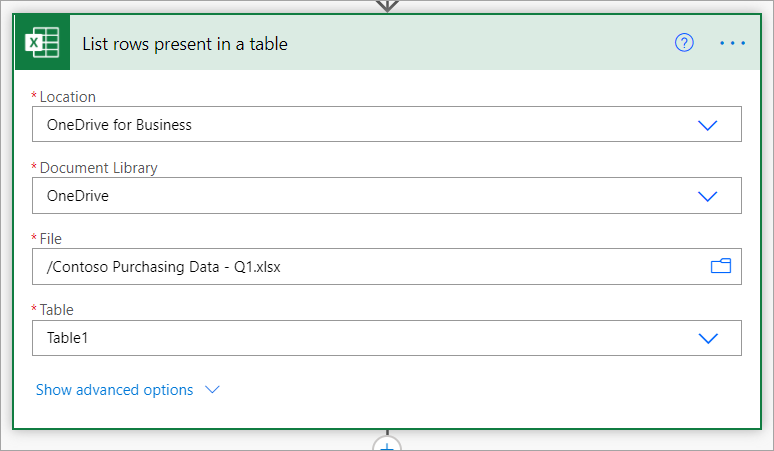
In the Location box, select OneDrive for work or school or the SharePoint Online site where your Excel Online table or SharePoint Online list is saved. Then, select the Document Library from the dropdown list.
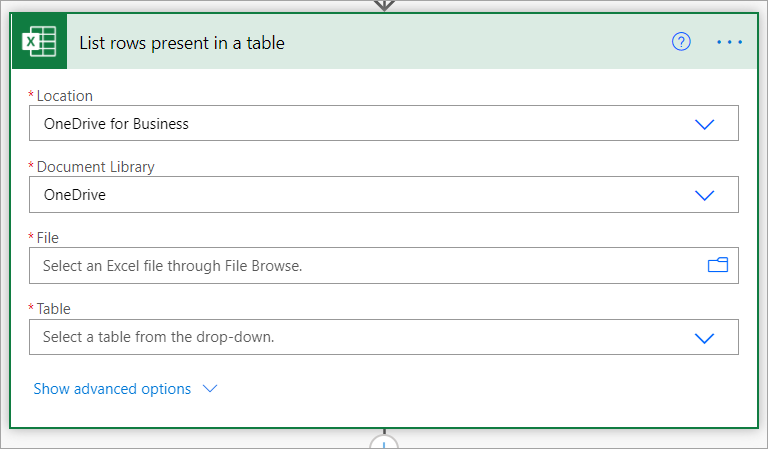
Select the Excel Online file or SharePoint Online list in the File box. Select the name of the table or list from the dropdown list in the Table box.
Tip
See Create a table to learn how to format data as a table in Excel.
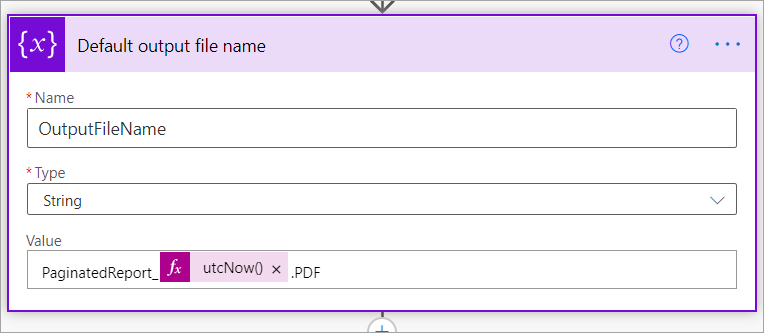
Initialize a variable to use for the file name. You can keep or modify the default values for Name and Value, but leave the Type value as String.
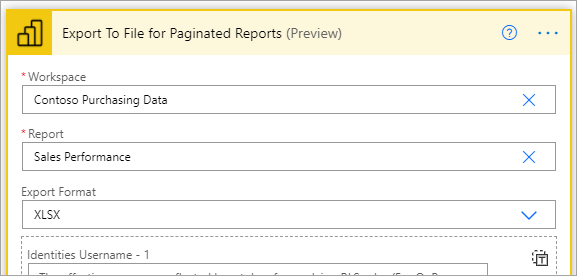
In the Workspace box, select a workspace in a reserved capacity. In the Report box, select the paginated report in the selected workspace you want to export. If you set Enter a custom value from the dropdown list, you can set Workspace and Report to equal a column in your Excel Online table or SharePoint Online list. These columns should contain Workspace IDs and Report IDs, respectively.
Select an Export Format from the dropdown list, or set it equal to a column in your Excel Online table containing desired export formats. for example PDF, DOCX, or PPTX. Optionally, you can specify parameters for the paginated report. Find detailed descriptions of the parameters in the connector reference for the Power BI REST API.
In the Value box, enter a name for the paginated report once it's exported. Be sure to enter a file extension. You can set it statically, for example
.pdf,.docx, or.pptx. Or, set it dynamically by selecting the column in your Excel table corresponding to your desired export format.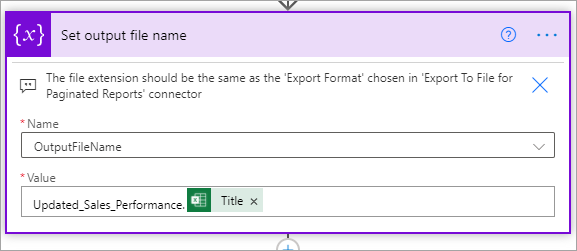
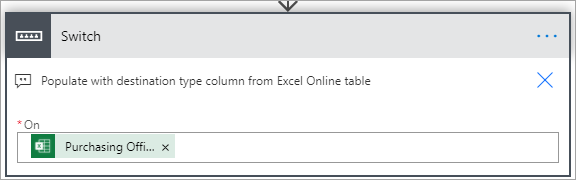
In the Switch section, populate the On box with the column in your Excel Online table corresponding to the desired method of delivery: OneDrive, SharePoint, or Email.
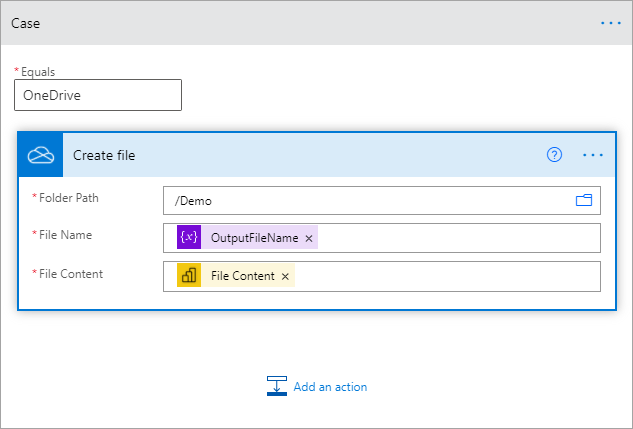
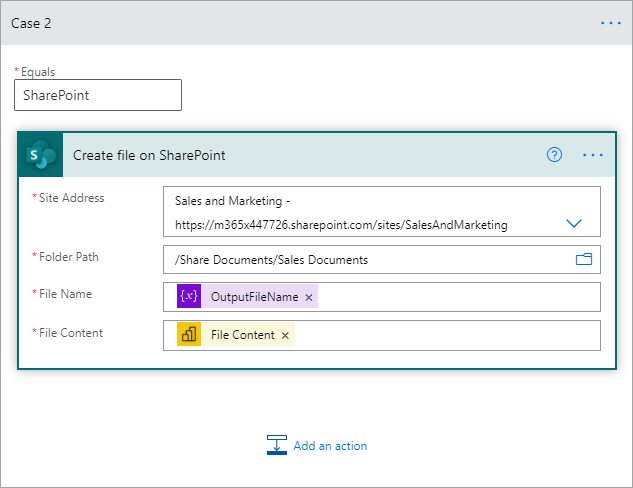
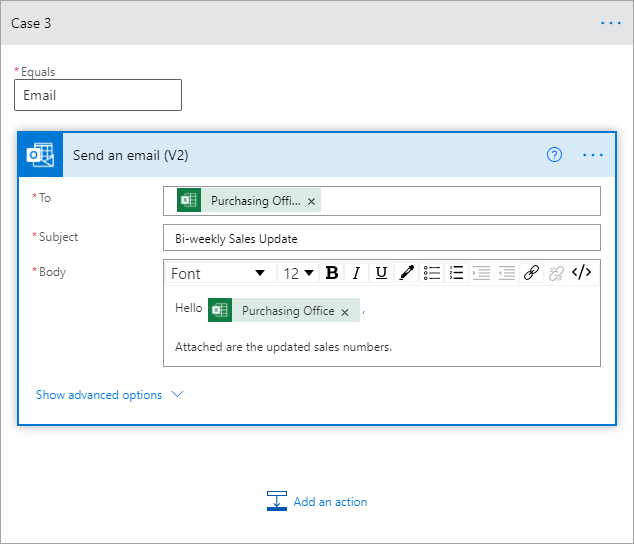
In the Case, Case 2, and Case 3 sections, enter the values present in the Excel Online table column selected in the previous step.

In the case where you're saving your paginated report to OneDrive, select the Folder Path where it should be saved.
In the case where you're saving your paginated report to SharePoint Online, enter the Site Address and Folder Path where it should be saved.
In the case where you're sending your paginated report as an email via Outlook, populate the To, Subject, and Body boxes. These boxes can contain static content, or dynamic content from your Excel Online table or SharePoint Online list. Power Automate attaches your paginated report to this email automatically.
When you're done, select New step or Save. Power Automate creates and evaluates the flow, and lets you know if it finds errors.
If there are errors, select Edit flow to fix them. Otherwise, select the Back arrow to view the flow details and run the new flow.