Note
Access to this page requires authorization. You can try signing in or changing directories.
Access to this page requires authorization. You can try changing directories.
APPLIES TO: ![]() Power BI service for business users
Power BI service for business users ![]() Power BI service for designers & developers
Power BI service for designers & developers ![]() Power BI Desktop
Power BI Desktop  Requires Pro or Premium license
A bookmark captures the state of a report page. It includes the changes you made to filters, slicers, and visuals on that page. After the report page is set the way you want, give it a friendly name. Now you can easily return to that state of the report page. Select a bookmark, and Power BI takes you back to that view.
Types of bookmarks
There are two types of Power BI bookmarks: personal and report. Report designers add the report bookmarks. When the designers share their reports with colleagues, the bookmarks travel with the reports. Everyone who can open and view that report can also see and use the report bookmarks. Anyone who can open a report can create personal bookmarks; you don't even need edit permissions. However, if you create personal bookmarks and share your report, the personal bookmarks don't travel with the report. Personal bookmarks are for your use only.
Tip
There are some ways for you to share your personal bookmarks with others. See Share changes later in this article for tips and tricks.
This article explains how to create and use personal bookmarks. It also explains how to interact with report bookmarks that someone else creates and shares with you. Viewing shared reports and report bookmarks requires one or both of the following prerequisites:
- A Power BI Pro or a Premium Per User (PPU) license. See Which license do I have?
- A report that is saved in Premium capacity and shared with you
If you're designing reports and creating report bookmarks for others to use, see Create report bookmarks.
Other articles about bookmarks
- In the Power BI service and Power BI Desktop, report owners can create report bookmarks. For more information, read about report bookmarks.
- If you have edit permissions for the report, you can quickly build a bookmark navigation experience. Bookmark navigation is available for both personal and report bookmarks. Each bookmark converts to a customizable button or dropdown menu.
Use personal bookmarks to save insights and build stories in Power BI
There are many uses for personal bookmarks. If you discover an interesting insight and want to preserve it, create a personal bookmark so you can return later. If you need to leave and want to preserve your current work, create a personal bookmark. You can even make a personal bookmark your default view of a report, so each time you return that view of the report page opens first.
You can also create a collection of personal bookmarks and arrange them in the order you want. Then you can step through each bookmark in a presentation to highlight a series of insights that tell a story. This feature works like a slideshow, where you select an arrow to go forward or backward. There's a limit of 20 personal bookmarks per report. For more information about creating a bookmark slide show, see Bookmarks as a slide show.
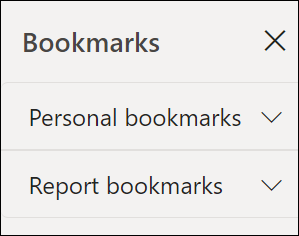
Open the Bookmarks pane
To open the Bookmarks pane, start on a report page and select the bookmarks icon  and choose Show more bookmarks.
![]()
Create personal bookmarks in the Power BI service
If you can view a report, then you can also add personal bookmarks. The maximum number of personal bookmarks per report is 20. When you create a bookmark, the following elements are saved with the bookmark:
- The current page
- Filters
- Slicers, including slicer type (for example, dropdown or list) and slicer state
- Visual selection state (such as cross-highlight filters)
- Sort order
- Drill location
If you have edit permissions for a report, you can set and save other elements that are saved with a bookmark. For example, you can decide which visuals on the page are visible when the bookmark is selected. To learn more about report bookmarks and the Selection pane, see Using the Selection pane.
Create two different personal bookmarks
Configure a report page the way you want it to appear in the bookmark. The following example has filters applied to the default report page:
- Date is changed to include All dates.
- Region filter is changed to include only West .
- A specific data point on the donut chart visual is selected. This selection cross-filters and cross-highlights the other visuals on the report canvas.

Create the first bookmark
- After your report page and visuals are arranged how you want them, select the bookmarks icon
and choose Show more bookmarks to open the Bookmarks pane.
- From the Bookmarks pane, select Personal bookmarks > Add.
- The personal bookmark gets a generic name, or you can enter a name. If you want this bookmarked view to be your default view, select the Make default check box.
- Select Save. To edit your bookmark, select the ellipses next to the bookmark's name and choose Update, Make default, Rename, or Delete.
Note
You can also add and edit bookmarks directly from the bookmark menu, without opening the Bookmarks pane.
Create the second bookmark
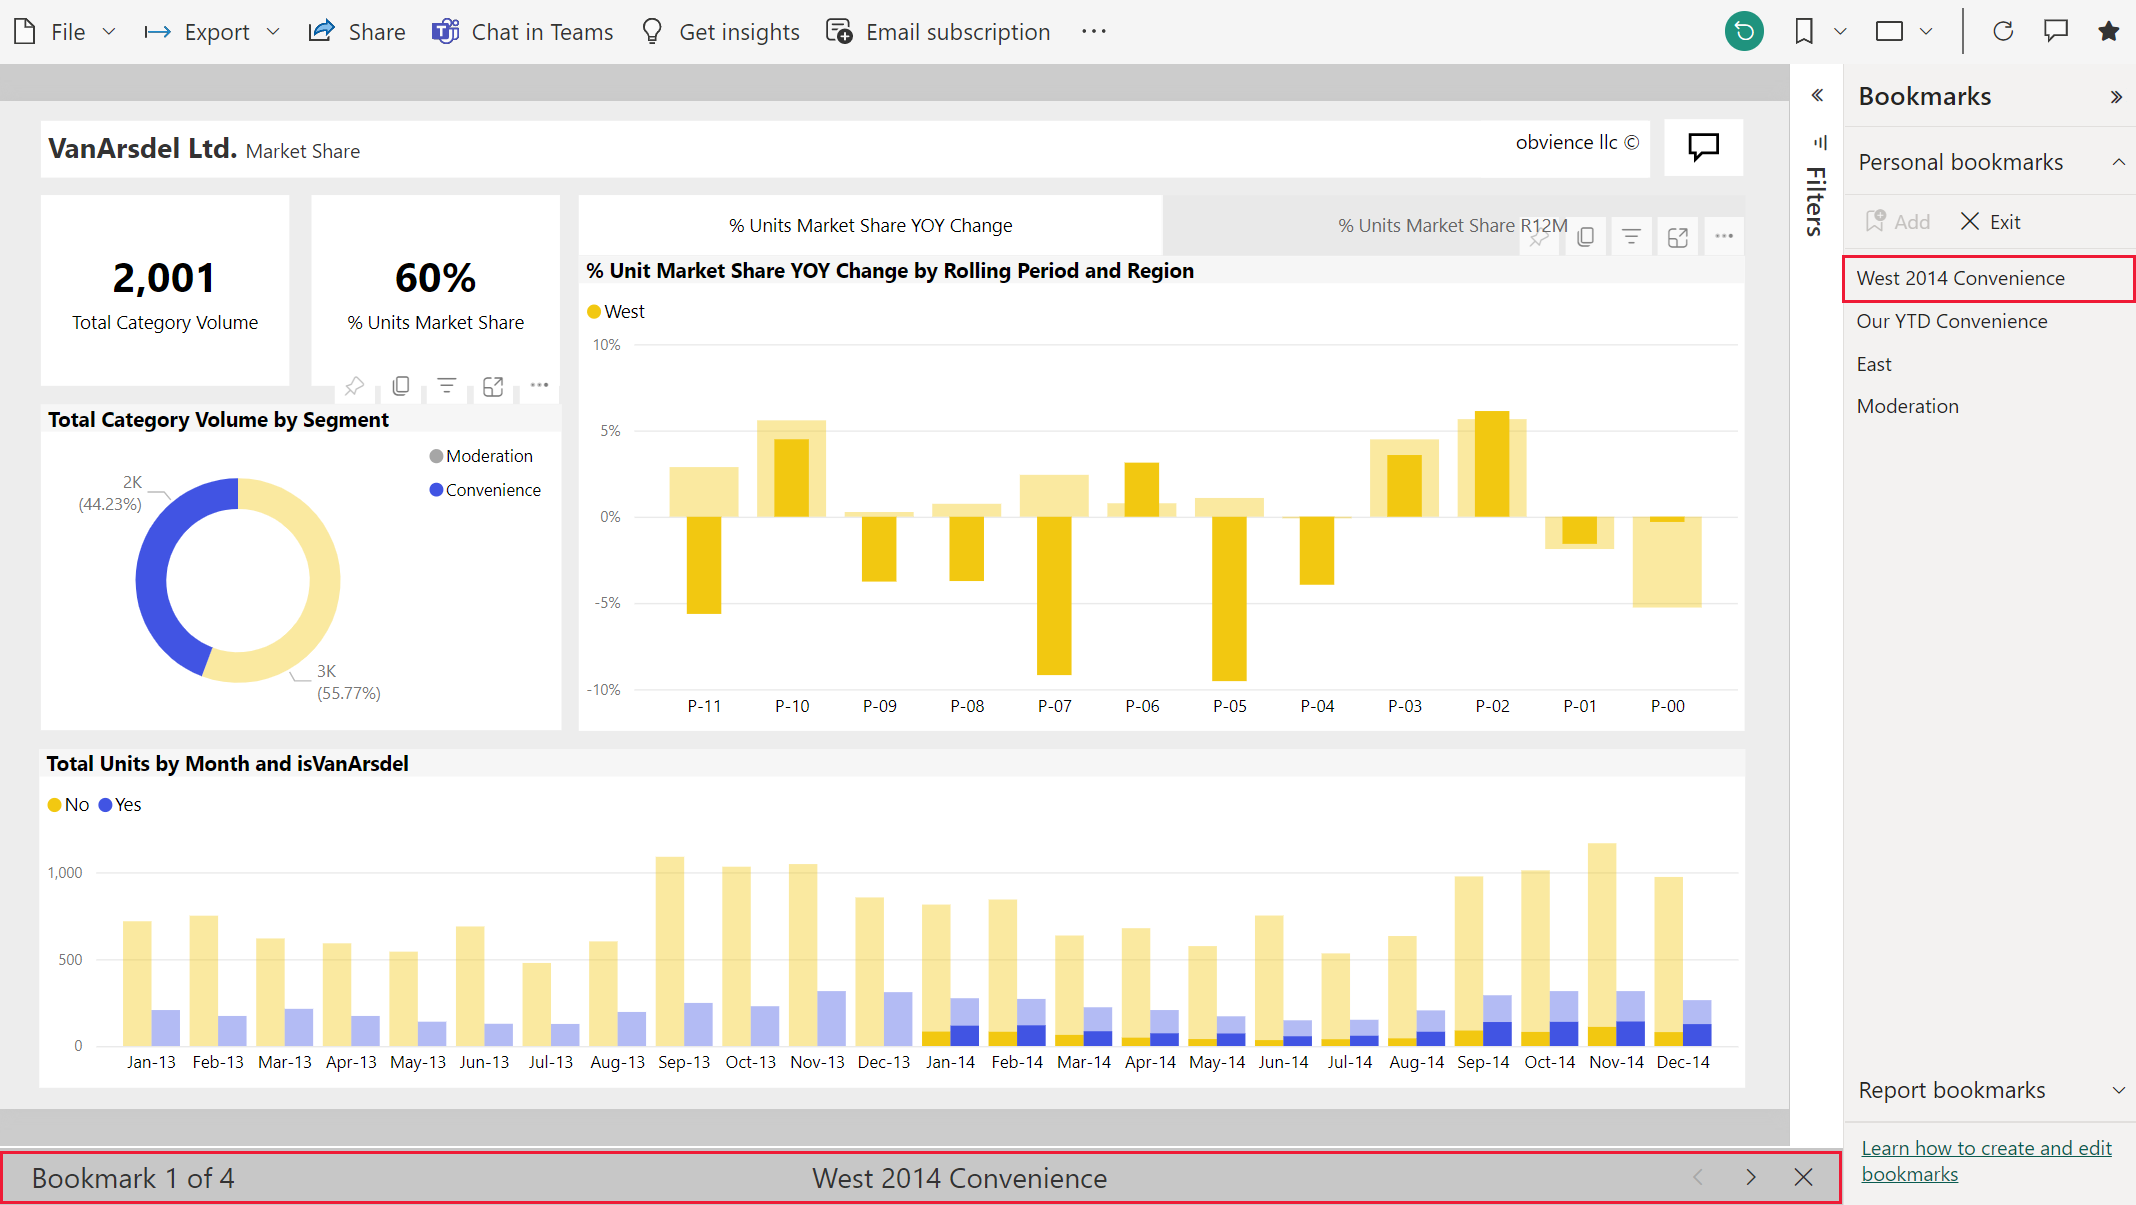
Open a different report page and create another personal bookmark. The bookmark in the following example captures the YTD information for the VanArsdel company.
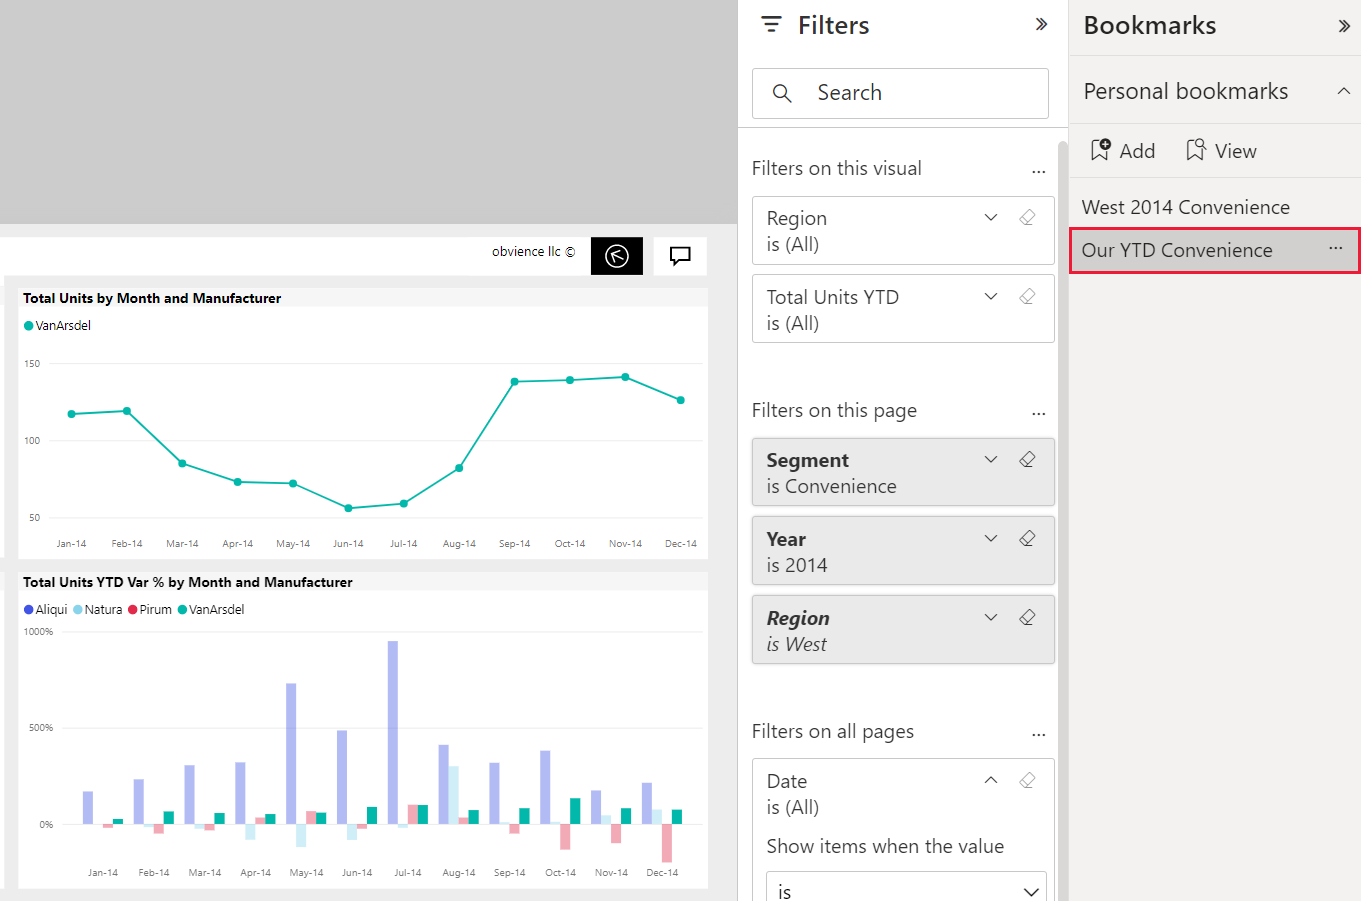
Now that you have two bookmarks, switch between them by selecting the bookmark in the Bookmarks pane or in the bookmarks menu.
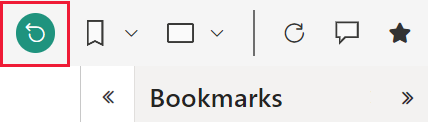
To return to the original published view of the report, select the Reset icon, and then select Reset on the dialog.
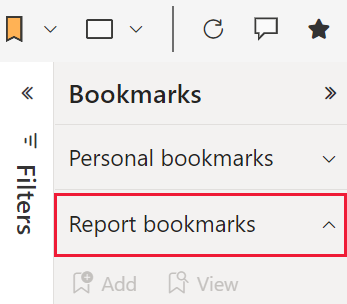
Open report bookmarks
To view the report bookmarks created by the report designer, from the Bookmarks pane, select Report bookmarks.
Note
To view shared reports, or to save reports in Premium capacity, you need a Power BI Pro or Premium Per User license. To learn more, see Licenses and subscriptions for business users.
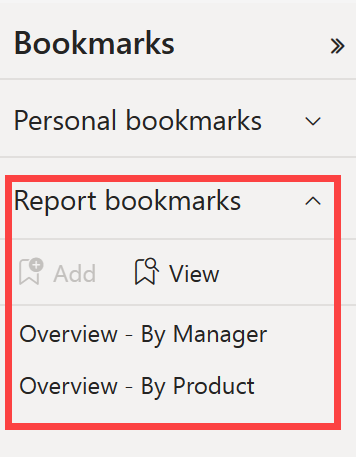
Report bookmarks
If the report designer included report bookmarks, they appear under the Report bookmarks heading. This report page has two report bookmarks: Overview- By Manager and Overview-By Product.
Bookmarks as a slideshow
To present or view bookmarks in order, select View from the Bookmarks pane to begin a slideshow.
When in View mode, notice the following features:
- The name of the bookmark appears in the bookmark title bar, which appears at the bottom of the canvas.
- The bookmark title bar has arrows where you can move to the next or previous bookmark.
- To exit View mode, select Exit from the Bookmarks pane, or select the X in the bookmark title bar.
In View mode, you can collapse the Bookmarks pane to provide more space for your presentation. While in View mode, all visuals are interactive and available for cross-highlighting, like they are when you interact with them in other modes.
Share changes
While you can't directly share your personal bookmarks with others, there are some workarounds. These workarounds require that you have one or both of the following prerequisites:
- Pro or PPU license
- Permissions to content saved in a workspace in Premium capacity
Here are a few ways you can share your view with others:
Share your active view. If you have a personal bookmark active when you share a report, recipients who have read access to the report see the bookmarked version of that report page. Recipients don't see your bookmark in their "Personal bookmarks" list. They see the result of your personal bookmark.
This personalized view of the report doesn't override the designer's original report or the designer's report bookmarks. Sharing with colleagues who don't already have read access requires reshare permissions. If you're unable to share your view of the report, contact the report owner to request reshare permission.
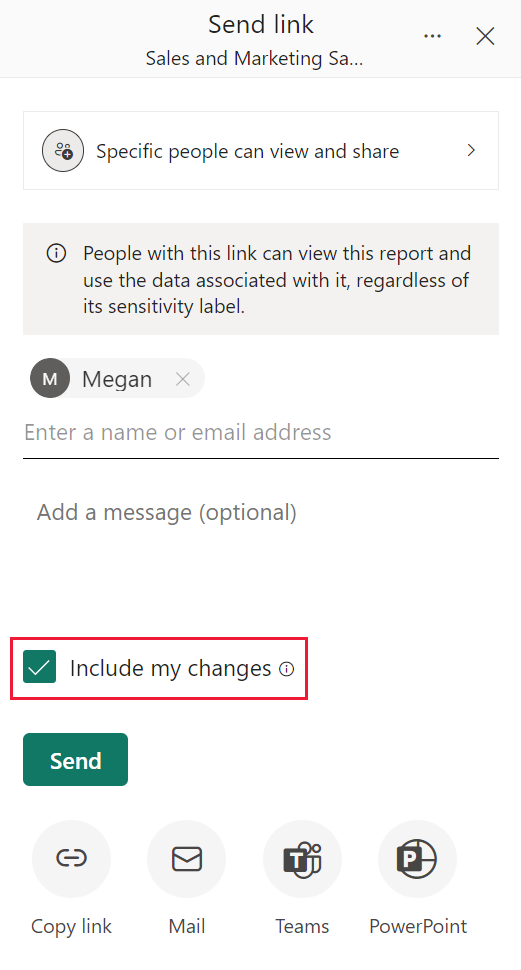
When you select Share from the top menu of the report, you can choose to include your changes.
Chat in teams. Like the previous method, with a personal bookmark active, you can share a report in Microsoft Teams. Select Chat in Teams from the top menu. In the Share to Microsoft Teams dialog, enter the name of the person, group, or channel that you want to share to. The URL automatically appears in the Say something about this box; you can enter additional information and edit the way the report link appears, and then select Share. For more information, see Share a filtered Power BI report.
Use the comment feature. With a personal bookmark active, add a comment. When other users select the comment, they see your personal bookmark view. For more information, see Add comments to a dashboard or reports.
If you make changes to your personal bookmark after you share a report, it has no effect on your recipients' view. For example, if you share a report with a 2021 date filter applied and then change the year to 2022 in your bookmark, your recipient still sees the 2021 filter.
Note
To share reports, you will need a Power BI Pro or Premium Per User license, or for the report to be saved in reserved capacity. To learn more, see Licenses and subscriptions for business users.
Reset all your changes to a report
From the upper-right corner of your report canvas, select Reset to default. This action removes all your changes in the report and sets it back to the designer's last saved view of the report. Resetting the report doesn't delete the bookmarks.

Considerations and limitations
In this release of personal bookmarks, there are a few considerations and limitations to keep in mind.
The bookmark captures the state of the page at the time the bookmark is created. When someone selects the bookmark, Power BI attempts to show them that bookmark in its original report state. However, there are situations where showing the bookmark isn't possible. For example, if the report owner changes the name of a field that the bookmark uses, Power BI no longer displays visuals, filters, or slicers that use that field. Certain visuals display no data for the renamed field. Filtered or sliced visuals revert to the default view.
Most Power BI custom visuals should work well with personal bookmarking. If you run into trouble with bookmarking and a Power BI custom visual, contact the creator of that visual, and ask them to add support for bookmarks.
Generally, your personal bookmarks aren't affected if the report designer updates or republishes the report. However, if the designer makes major changes to the report, such as removing fields used by a personal bookmark, you'll receive an error message the next time you attempt to open that bookmark.
Report bookmarks and personal bookmarks created in Power BI Desktop or in the Power BI service are recognized in the Power BI mobile apps for iOS and Android tablets and phones. However, you can't create bookmarks in these apps. For information about using bookmarks in the Power BI mobile apps, see Explore reports in the Power BI mobile apps - bookmarks.
Because personal bookmarks capture the exploration state of the current page, personal bookmarks don't capture changes to other pages. For example, if you have sync-slicers in your report and you personalize the sync-slicer to use a different field and capture a personal bookmark, then the personal bookmark only captures the slicer change on the current page.
You can create up to 20 bookmarks for a single report.