Note
Access to this page requires authorization. You can try signing in or changing directories.
Access to this page requires authorization. You can try changing directories.
This article shows you how to implement data translation by using a field parameter. The process has the following steps:
- Create a field parameter
- Use a slicer and data table
- Edit translated names
- Add a language ID column
Create a field parameter
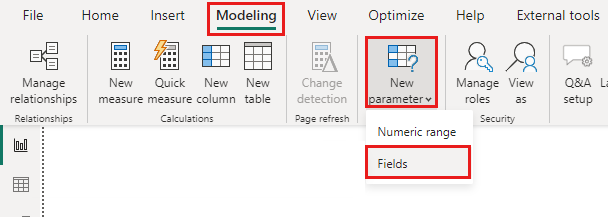
To create a field parameter in Power BI Desktop, in Modeling, select New parameter > Fields.
In the Parameters dialog box, enter a name Translated Product Names.
Populate the fields connection of this field parameter with the columns from the Products table with the translated product names.
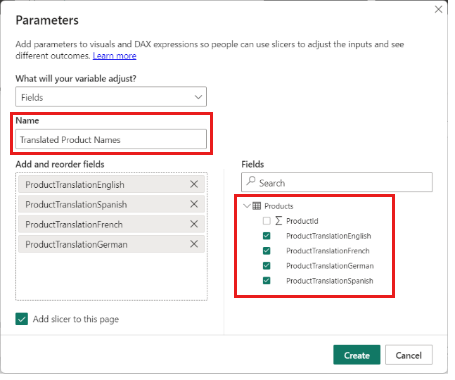
Be sure that Add slicer to this page is enabled.
Select Create.
After you create a field parameter, it appears in the Fields list on the right as a new table. Under Data, select Translated Product Names to see the Data Analysis Expressions (DAX) code that defines the field parameter, as shown in the following screenshot.

Use a slicer and data table
Under Data, expand the Translated Product Names node. Then select the Translated Product Names item. A table appears in the canvas.
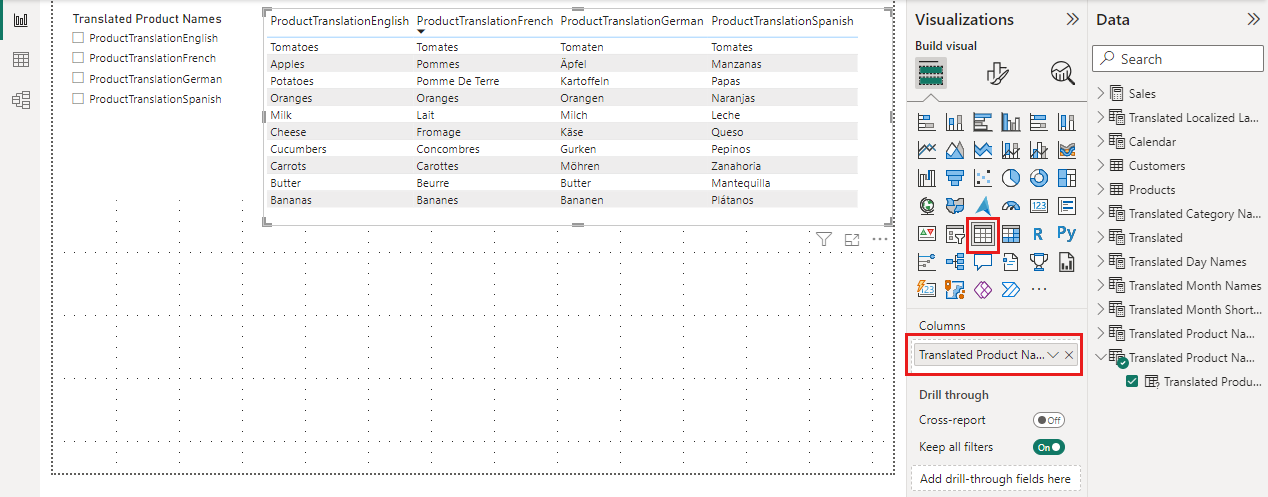
You can see the table type under Visualizations and Translated Product Names as the Columns value. Position both the slicer and the data table anywhere on the canvas.
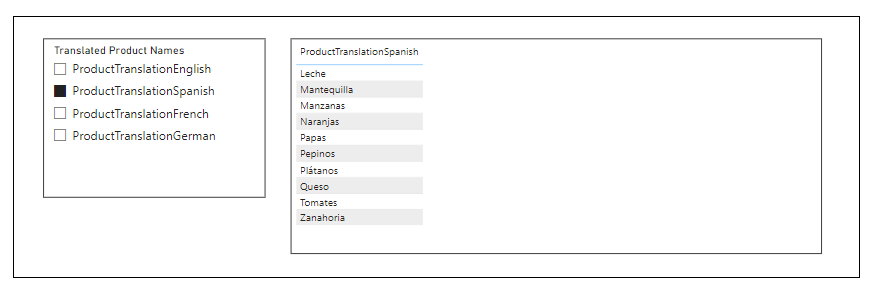
Select one item in the slicer, such as ProductTranslationSpanish. The table now shows a single corresponding column.


Edit translated names
The column values for product names have been translated into Spanish. The column header still displays the column name from the underlying data source, which is ProductTranslationSpanish. This fact is because those column header values are hard-coded into the DAX expression when Power BI Desktop creates the field parameter.

If you examine the DAX expression, the hard-coded column names from the underlying data source appear, such as ProductTranslationEnglish and ProductTranslationSpanish.
Translated Product Names = {
  ("ProductTranslationEnglish", NAMEOF('Products'[ProductTranslationEnglish]), 0),
  ("ProductTranslationSpanish", NAMEOF('Products'[ProductTranslationSpanish]), 1),
  ("ProductTranslationFrench", NAMEOF('Products'[ProductTranslationFrench]), 2),
  ("ProductTranslationGerman", NAMEOF('Products'[ProductTranslationGerman]), 3)
}
Update the DAX expression to replace the column names with localized translations for the word Product as shown in the following code.
Translated Product Names = {
  ("Product", NAMEOF('Products'[ProductTranslationEnglish]), 0),
  ("Producto", NAMEOF('Products'[ProductTranslationSpanish]), 1),
  ("Produit", NAMEOF('Products'[ProductTranslationFrench]), 2),
  ("Produkt", NAMEOF('Products'[ProductTranslationGerman]), 3)
}
When you make this change, the column header is translated along with product names.

Edit column names in the Table view
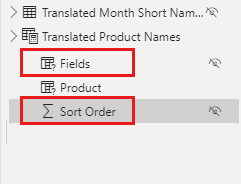
Up to this point, you've looked at the field parameter in Report view. Now open the Table view. There you can see two more fields in the field parameter that are hidden in Report view.

The names of the columns in a field parameter are generated based on the name you give to the top-level field parameter. You should rename the columns to simplify the data model and to improve readability.
To rename a column label, double-click the field. Rename Translated Product Names to Product.
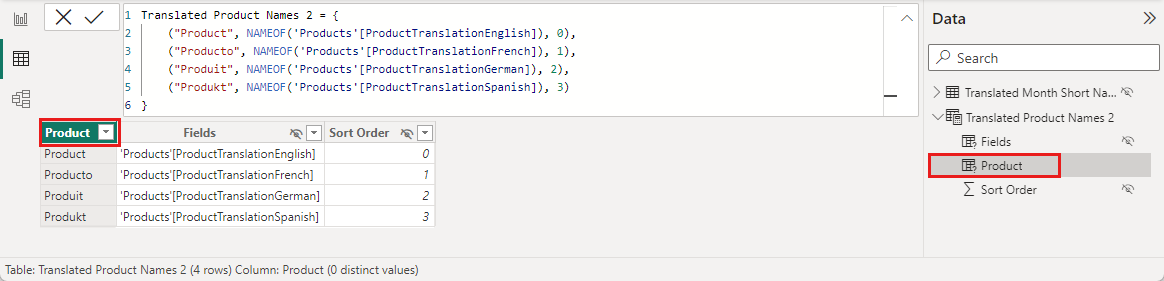
Rename the two hidden fields with shorter names, such as Fields and Sort Order.

Add a language ID column
The field parameter is a table with three columns named Product, Fields, and Sort Order. The next step is to add a fourth column with a language identifier to enable filtering by language. You can add the column by modifying the DAX expression for the field parameter.
Add a fourth string parameter to the row for each language with the lower-case two character language identifier.
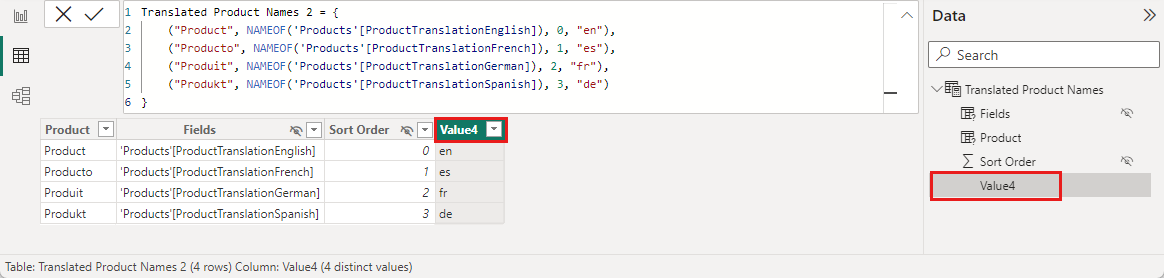
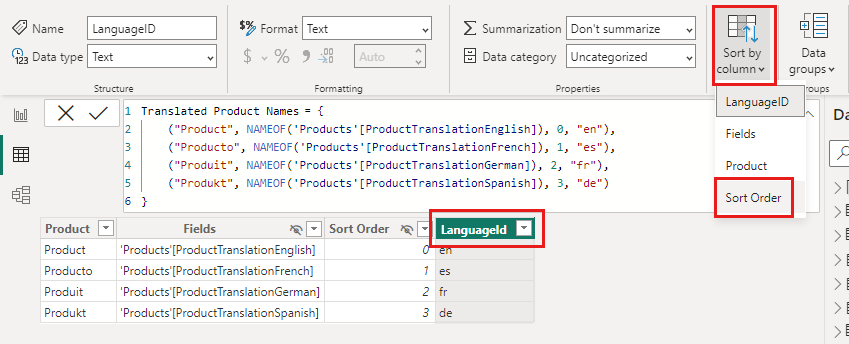
Translated Product Names = {
  ("Product", NAMEOF('Products'[ProductTranslationEnglish]), 0, "en" ),
  ("Producto", NAMEOF('Products'[ProductTranslationSpanish]), 1, "es" ),
  ("Produit", NAMEOF('Products'[ProductTranslationFrench]), 2, "fr" ),
  ("Produkt", NAMEOF('Products'[ProductTranslationGerman]), 3, "de" )
}
After you update the DAX expression with a language identifier for each language, a new column appears in the Table view of the Products table named Value4.
Double-click the name Value4 and rename it to LanguageId.
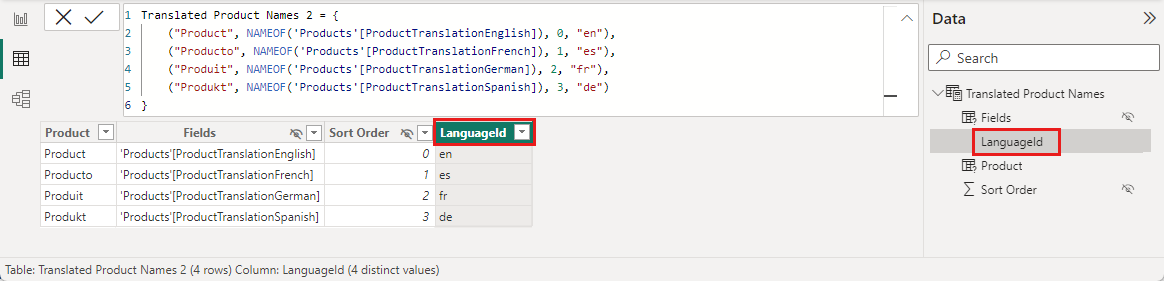
Select LanguageId to highlight it. From the control ribbon, select Sort by column > Sort Order.
You don't need to configure the sort column for the two pre-existing fields. Power BI Desktop configured them when you set up the field parameter.
Open the Model view and, next to LanguageId select More options (three dots). Select Hide in report view.


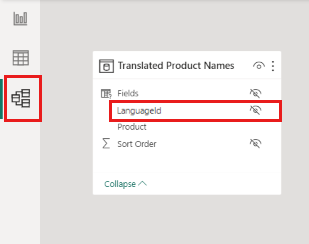
Report authors never need to see this column because it's used to select a language by filtering behind the scenes.
In this article, you created a field parameter named Translated Product Names and extended it with a column named LanguageId. The LanguageId column is used to filter which source column is used. That action determines which language is displayed to report consumers.