Note
Access to this page requires authorization. You can try signing in or changing directories.
Access to this page requires authorization. You can try changing directories.
Power BI Report Server is an on-premises server that provides a web portal for displaying and managing reports and key performance indicators (KPIs). This article shows you how to install Power BI Report Server.
Note
Starting with SQL Server 2025 (17.x) Preview, on-premises reporting services are being consolidated under Power BI Report Server. For more information, see Reporting Services consolidation FAQ.
Tip
An alternative to installing Power BI Report Server on-premises is to create a Windows Server 2019 virtual machine (VM) with a Power BI Report Server Enterprise image from Azure Marketplace.
Prerequisites
The requirements listed in Hardware and software requirements for installing Power BI Report Server
Important
You can install Power BI Report Server in an environment that has a read-only domain controller (RODC). But Power BI Report Server needs access to a read-write domain controller to function properly. If Power BI Report Server only has access to a RODC, you might encounter errors when you try to administer the service.
Power BI Report Server product key
If you want to use a product key instead of installing a free edition, you first need to locate your product key. For instructions, see How to find your report server product key.
Important
When you install Power BI Report Server on multiple servers for a scale-out scenario, all servers must use the same Power BI Report Server product key.
Download the Power BI Report Server installer
To download the Power BI Report Server installer, take the following steps:
Go to On-premises reporting with Power BI Report Server, and then select Download free trial. Even though you select the free trial in this step, you have the option later of entering a product key.
On the page that opens, select your preferred language, and then select Download.
Select PowerBIReportServer.exe, and then select Download.
Install your report server
Installing Power BI Report Server is straightforward. You can install the files in a few steps.
You don't need a SQL Server database engine server for installation. But you do need one to configure your report server after the installation.
Find the downloaded PowerBIReportServer.exe file and open the installer.
Select Install Power BI Report Server.

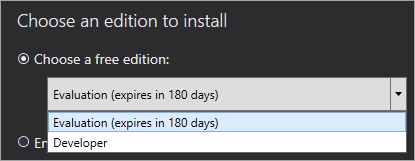
Select an edition to install.

If you select Choose a free edition, select either Evaluation or Developer, and then select Next.
If you select Enter the product key, enter the product key that you got from either the Power BI service or the Microsoft 365 admin center, and then select Next. For more information about how to get your product key, see Power BI Report Server product key, earlier in this article.
Review and accept the license terms, and then select Next.

On the Install Database Engine page, select Next to install the report server only. You need a database engine available to store the report server database.

Enter the installation location for the report server, and then select Install.

The default path is C:\Program Files\Microsoft Power BI Report Server.
After a successful setup, select Configure report server to open Report Server Configuration Manager.

Configure your report server
After you select Configure report server in the setup, Report Server Configuration Manager opens. For more information, see What is Report Server Configuration Manager (Native mode)?.
To complete the initial configuration of your report server, you create a report server database. A SQL Server database server is required to complete this step.
Create a database on a different server
You can use one machine for your report server and a different machine for your database server. If you do, change the service account for the report server to a credential that the database server recognizes.
By default, the report server uses the virtual service account. If you try to create a database on a different server, you might receive the following error on the step for applying connection rights:
System.Data.SqlClient.SqlException (0x80131904): Windows NT user or group '(null)' not found. Check the name again.
To work around the error, you can change the service account to either Network Service or a domain account. Changing the service account to Network Service applies rights in the context of the machine account for the report server.

For more information, see Configure the report server service account (Report Server Configuration Manager).
Windows service
A Windows service is created as part of the installation. Windows Services Manager lists it as Power BI Report Server. The service name is PowerBIReportServer.


Default URL reservations
By default, Power BI Report Server uses certain URLs to provide access to its report server and web portal. These URL reservations are composed of a prefix, host name, port, and virtual directory.
| Part | Description |
|---|---|
| Prefix | The default prefix is HTTP. If you previously installed a Transport Layer Security (TLS) certificate, the setup process tries to create URL reservations that use the HTTPS prefix. |
| Host name | The default host name is a strong wildcard (+). It specifies that the report server accepts any HTTP request on the designated port for any host name that resolves to the computer, including https://<computer-name>/reportserver, https://localhost/reportserver, or https://<IP-address>/reportserver. |
| Port | The default port is 80. If you use any port other than port 80, you have to explicitly add it to the URL when you open the web portal in a browser. |
| Virtual directory | By default, Power BI Report Server creates two virtual directories: -For the report server: reportserver. -For the web portal: reports. |
The complete strings might look like the following URLs:
- For the report server:
https://+:80/reportserver - For the web portal:
https://+:80/reports
For more information, see Configure report server URLs (Report Server Configuration Manager) and Configure TLS connections on a native mode report server.
Firewall
If you're accessing the report server from a remote machine, make sure you configure any firewall rules if there's a firewall present.
Open up the Transmission Control Protocol (TCP) port that you configure for your report server URL and web portal URL. By default, they're configured on TCP port 80.
Other configurations
- To configure integration with the Power BI service so you can pin report items to a Power BI dashboard, see Power BI Report Server integration (Configuration Manager).
- To configure email for subscriptions processing, see Email settings in Reporting Services native mode (Report Server Configuration Manager) and Email delivery in Reporting Services.
- To configure the web portal so you can access it on a report computer to view and manage reports, see Configure a firewall for report server access and Configure a report server for remote administration.
- For detailed information about setting report server system properties in SQL Server Management Studio, see Server properties Advanced page - Power BI Report Server & Reporting Services. Unless it specifies otherwise, the options apply to both Power BI Report Server and SQL Server Reporting Services.