Note
Access to this page requires authorization. You can try signing in or changing directories.
Access to this page requires authorization. You can try changing directories.
An image column stores an image file in a column in a Microsoft Dataverse table. Add an image column to a form to upload, view, modify, and delete images. The form shows a thumbnail of the image if one is available.
Note
You can't upload a image file by using insert mode on a basic form or an multistep form step.
Image URL
The image URL indicates the full URL of where the image is stored. This can be used for development and troubleshooting.
An image URL takes the following form:
{0}/Image/download.aspx?entity={1}&attribute={2}&id={3}
where:
{0} is the website URL
{1} is the logical name of the entity
{2} is the logical name of the column
{3} is the image ID
For example, if your website is located at https://contososite.powerappsportals.com, your code will look like this:
https://contososite.powerappsportals.com/Image/download.aspx?entity=contact&attribute=entityimage&id=cb059a4a-b1a6-ec11-9840-00224829604e
Liquid
You can design a website using Liquid code to retrieve records from Dataverse tables. Use fetchXML and the Entity view to fetch image column values, like this:
    {% for item in tables.results.entities %}
        {{ item.columnname.Type }}
        {{ item.columnname.Size }}
        {{ item.columnname.Url }}
        {{ item.columnname.Value }}
    {% endfor %}
where:
Type is the mime type of the image
Size is the image size in bytes
Value is the image value as a base64 string
Url is the image URL
Example: Retrieve a default contact image
    {% fetchxml contacts %}
        <fetch version="1.0" output-format="xml-platform" mapping="logical" distinct="false">
            <entity name="contact">
                <attribute name="fullname"/>
                <attribute name="entityimage"/>
            </entity>
        </fetch>
    {% endfetchxml %}

    {% for item in contacts.results.entities %}
        {
            "Full Name":"{{ item.fullname }}"
            "Entity Image Type":"{{ item.entityimage.Type}}",
            "Entity Image Size":"{{ item.entityimage.Size}}",
            "Entity Image Url":"{{ item.entityimage.Url}}",
            "Entity Image Value":"{{ item.entityimage.Value}}"
        }
    {% endfor %}
Web API
The portals Web API can be used to create, read, update, and delete images in image columns across Dataverse tables.
Retrieve image data
To download thumbnail image data, use the following API call:
GET /_api/<entity-type>(id)/<image-attribute-name>/$value
Image data transferred from the web service endpoints is limited to a maximum of 16 MB in a single service call.
Example: Download a thumbnail
In the following example, we'll use a GET call to download a thumbnail if it exists.
HTTP request:
    GET [website url]/_api/accounts(62d53214-9dfa-eb11-94ee-0022482230a8)/entityimage/$value

    Headers:
    Content-Type: application/octet-stream
HTTP response:
    204 No Content

    Body:
    Byte[ ]
In this example, the thumbnail doesn't exist and so no image is returned. If a thumbnail did exist, the response would return a byte array with values.
Upload image data
To upload an image, set the value of the image column to a byte array that contains the content of the image file:
PUT or PATCH /_api<entity-type>(id)/<image-attribute-name>
Example: Upload an image
HTTP request:
    PUT [website url]/_api/accounts(62d53214-9dfa-eb11-94ee-0022482230a8)/entityimage

    Headers:
    Content-Type: application/octet-stream

    Body :
    Byte [ ]
Upload profile images
Authenticated website users can upload their picture in the profile section of the website. The image is saved in the Entity Image column of the corresponding contact record in Dataverse. Users can upload images up to 10 MB.
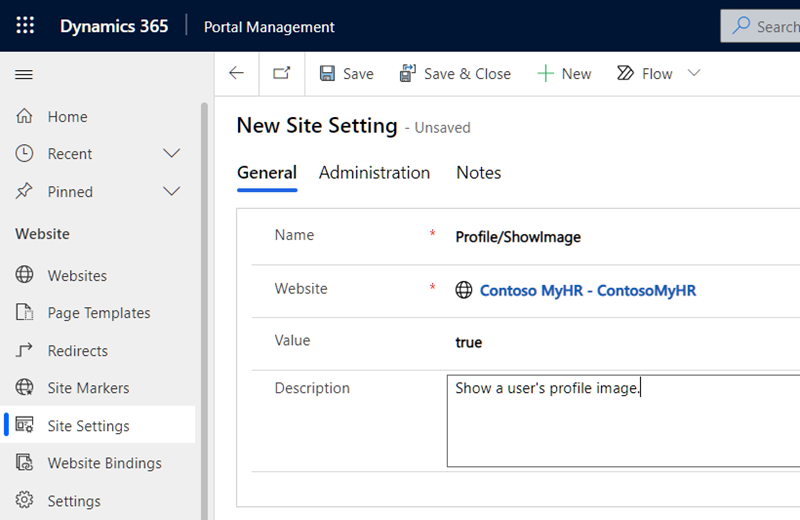
Create site settings
First, you must create a site setting to allow authenticated users to upload a profile picture:
Open the Portal Management app
Under Website, select Site Settings.
Create a setting called Profile/ShowImage, and set its value to true. (If the setting exists, set its value to true.)
