Liquid template tag for code components
Power Apps component framework empowers professional developers and app makers to create code components for model-driven and canvas apps. These code components can provide an enhanced experience for users working with data on forms, views, and dashboards. More information: Use code components in Power Pages
Important
The Liquid template tag for code components requires portals version 9.3.10.x or later.
With this release, we've introduced the ability to add code components using a Liquid template tag on webpages, and enabled components using Web API that are enabled for field-level components on forms in Power Pages.
Code components can be added using the codecomponent Liquid template tag. The key for denoting the code component that needs to be loaded is passed in using the name attribute. The key can be the GUID (which is the code component ID) or the name of the code component imported into Microsoft Dataverse.
The values of the properties that the code component expects need to be passed in as a key/value pair separated by ":" (colon sign), where the key is the property name and the value is the JSON string value.
{% codecomponent name: <ID or name> <property1:value> <property2:value> %}
For example, to add a code component expecting an input parameter named controlValue, use the following Liquid template tag:
{% codecomponent name:abc_SampleNamespace.MapControl controlValue:'Space Needle' controlApiKey:<API Key Value>%}
Tip
This example uses parameters called controlvalue and controlApiKey, however the component you use might require different parameter names.
You can use the sample map control and package the code component as a solution for use with Power Pages.
Note
Microsoft doesn't support community-created resources. If you have questions or issues with community resources, contact the publisher of the resource. Before using these resources, you must ensure that they meet the Power Apps component framework guidelines and should only be used for reference purpose.
Tutorial: Use code components on pages with Liquid template tag
In this tutorial, you configure Power Pages to add the component to a webpage. You then visit the site webpage and interact with the component.
Before you begin
If you're using the sample code component used in this tutorial, ensure that you first import the sample solutions to the environment before you begin. To learn about solution import, go to Import solutions.
Prerequisites
For prerequisites, and to learn about supported/unsupported code components in Power Pages, go to Use code components in Power Pages.
Note
This tutorial uses a sample code component created using Power Apps component framework to demonstrate a map control on a webpage. You can also use any existing or new component of your own, and any other webpage for this tutorial. In this case, be sure to use your component and webpage when following the steps in this tutorial. For more information about how to create code components, go to Create your first component.
Step 1. Add the code component to a webpage from Studio
Open your site in the Power Pages design studio.
Select the Pages workspace and select + Page.
Give the page a name. For example, Map viewer.
Select the Start from blank page layout.
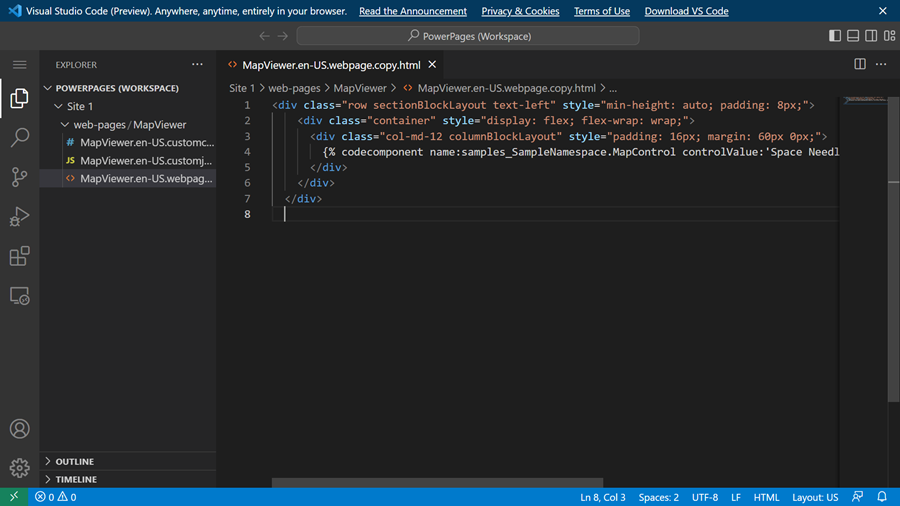
Select the Edit code button to open Visual Studio Code for the Web.
Add control between the
<div></div>with Liquid template tag using the following syntax:{% codecomponent name:abc\_SampleNamespace.MapControl controlValue:'Space Needle' controlApiKey:'<API Key Value>' %}
Tip
To retrieve the details of all imported components, and to search for a component name, refer to CustomControl Web API.
For example:
To search for a component:
https://contoso.api.crm10.dynamics.com/api/data/v9.2/customcontrols?$select=ContosoCustomControlNameTo retrieve input parameters for a component:
https://contoso.api.crm10.dynamics.com/api/data/v9.2/customcontrols?$filter=name eq 'ContosoCustomControlName' &$select=manifest
Select CTRL-S on the keyboard to save the update code.
Navigate back to the design studio and select Sync to update the webpage with the edits from Visual Studio Code.
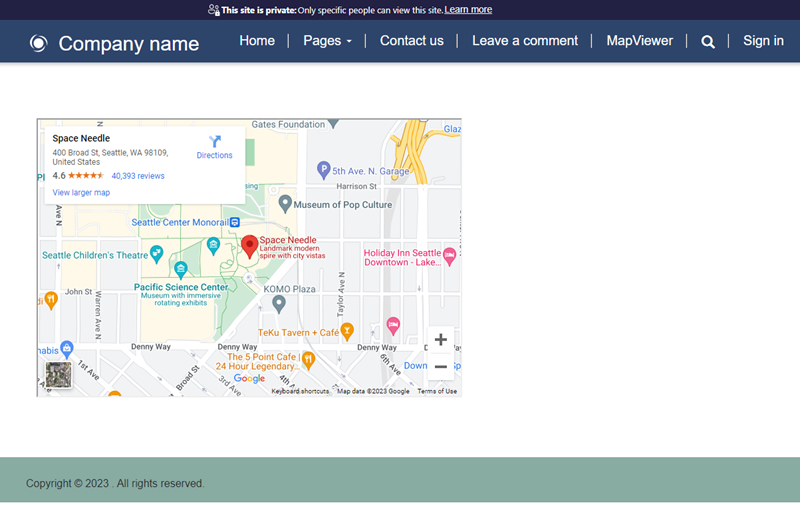
On the top-right corner, select Preview and Desktop to preview the site.
The webpage now shows the control added on it.

Next steps
Overview: Use code components in portals