Note
Access to this page requires authorization. You can try signing in or changing directories.
Access to this page requires authorization. You can try changing directories.
Follow the steps in this article to set up server-side synchronization to send and receive email in customer engagement apps (such as Dynamics 365 Sales, Dynamics 365 Customer Service, Dynamics 365 Marketing, Dynamics 365 Field Service, and Dynamics 365 Project Service Automation) from Gmail accounts by using OAuth 2.0 as the authorization mechanism.
Note
The Gmail OAuth email server profile works for up to 100 users. Create multiple OAuth profiles (steps 1 through 4) if you want to associate the same profile with multiple users.
Step 1. Enable IMAP or POP in Gmail
Note
These steps should be done by the system administrator.
For IMAP, follow the steps in Check Gmail through other email platforms.
For POP, follow the steps in Read Gmail messages on other email clients using POP.
Step 2. Create a project
Note
These steps should be done by the system administrator.
Using a Google account (this can be the same one you'll use to send and retrieve email, or a different one), go to the Google Developers Console and create a new project.
Follow the steps for Create a project in Create, shut down, and restore projects.
Step 3. Configure OAuth consent
Note
These steps should be done by the system administrator.
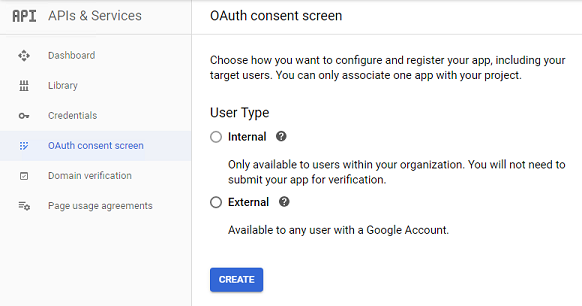
Select OAuth consent screen, and then select the user type:
- Select Internal if you're using a GSuite admin tenant and will be creating the app exclusively for your organization.
- Select External if you're testing by using a standalone Gmail account.

Select Create.
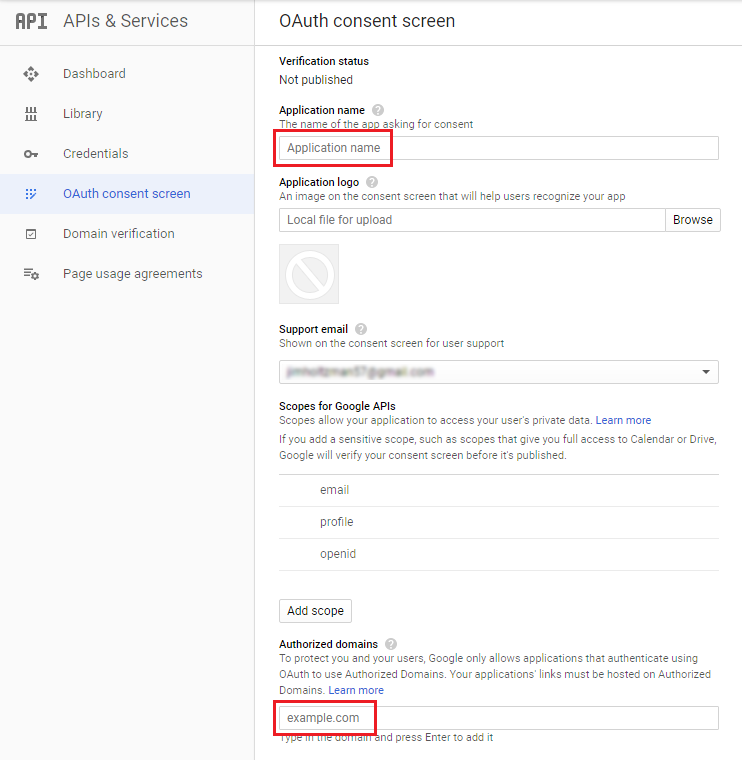
Under Application name, enter the application name. Under Authorized domains, enter your environment's top private domain name (for example,
dynamics.com). Select Save.
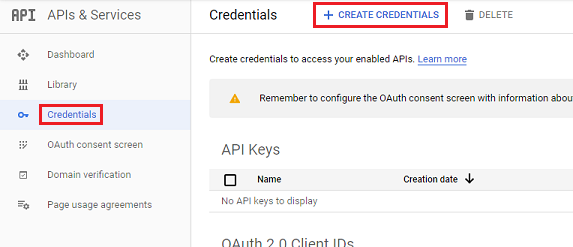
Select Credentials > Create credentials.

Select OAuth client ID.
Select Configure consent screen.
Enter the following settings:
Setting Use Application type Web application Name The name of your web client Authorized JavaScript origins Your environment's URL (for example, https://contoso.crm.dynamics.com)Authorized redirect URIs Your environment's URL with /_grid/cmds/dlg_gmailoauth.aspxappended to it (for example,https://contoso.crm.dynamics.com/_grid/cmds/dlg_gmailoauth.aspx)Select Create. In the screen that appears, make note of the client ID and client secret. You'll use this data in the next step.
Step 4. Create an email server profile
- Sign in to the Power Platform admin center.
- In the navigation pane, select Manage.
- In the Manage pane, select Environments.
- On the Environments page, select an environment.
- In the command bar, select Settings.
- Expand Email, then select Server profiles.
- In the command bar, select New server profile.
In the Set up server profile panel:
For Email Server Type, select Gmail, then enter a meaningful Name for the profile.
To set this server profile as the default for new mailboxes, enable Set as default profile for new mailboxes.
For Authentication Type, select Gmail OAuth.
Enter the Client ID and Client Secret from step 8 of the previous procedure.
Note
The Locations and ports fields are automatically populated.
Expand Advanced, and use the tooltips to configure your email processing options.
When finished, click Save.
Step 5. Configure the mailbox
Note
These steps should be done by the mailbox user.
In a Dynamics 365 app, click Settings in the top command bar, then select Advanced Settings.
Under the System group, select Email configuration, then click Mailboxes.
Select the mailbox for the user configured in previous steps.
In the Synchronization Method pane, enter the following settings:
Setting Use Server profile The profile created in step 4 Incoming email Server-Side Synchronization or Email Router Outgoing email Server-Side Synchronization or Email Router Select Save to apply the changes.
Select Signin to Gmail.
Follow the Gmail sign-in and authorization pages.
Step 6. Add test users
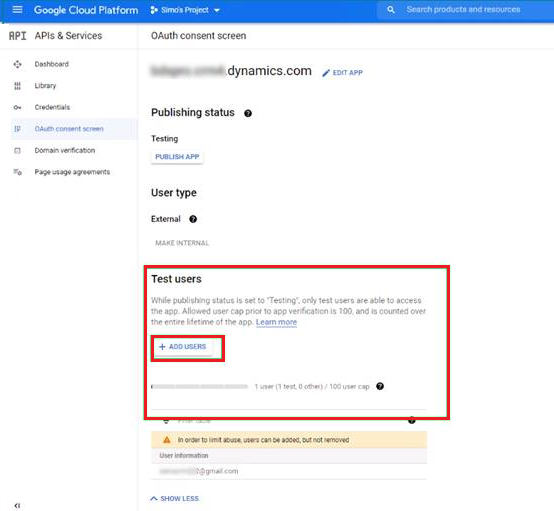
In the Google Cloud Platform (Developer Console), add users in the Test Users section when publishing the app. You can learn more about adding test users in Google Cloud Platform Console Help.

Step 7. Test and enable
Note
These steps should be done by the mailbox user.
Select Test & Enable Mailbox to test the mailbox configured in step 6.
