Note
Access to this page requires authorization. You can try signing in or changing directories.
Access to this page requires authorization. You can try changing directories.
The Index column command adds a new column to the table with explicit position values, and is usually created to support other transformation patterns.
![]()
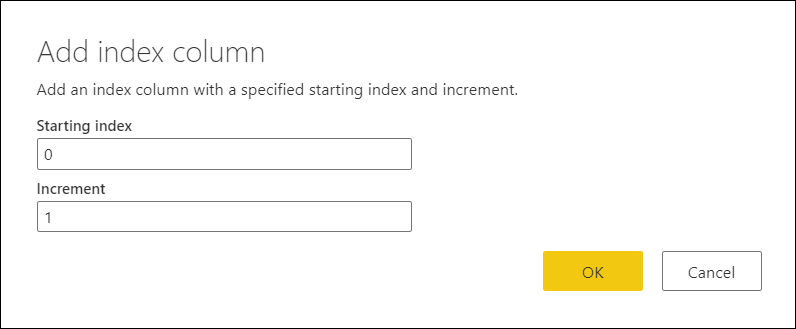
By default, the starting index starts from the value 0 and has an increment of 1 per row.
You can also configure the behavior of this step by selecting the Custom option and configuring two parameters:
- Starting index: Specifies the initial index value.
- Increment: Specifies how much to increment each index value.
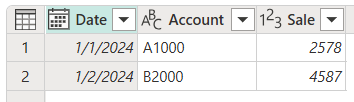
For the example in this article, you start with the following table that has only one column, but notice the data pattern in the column.

Let's say that your goal is to transform that table into the one shown in the following image, with the columns Date, Account, and Sale.
Step 1. Add an index column
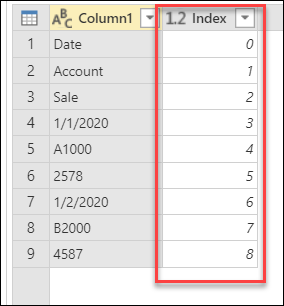
You first need to add a new Index column to your table that starts from 0.
Step 2. Add a modulo column from the index column
The next step is to select the newly added index column, and then on the Add column tab, select Standard > Modulo.
In the Modulo dialog box, enter the number from which to find the remainder for each value in the column. In this case, your pattern repeats itself every three rows, so enter 3.
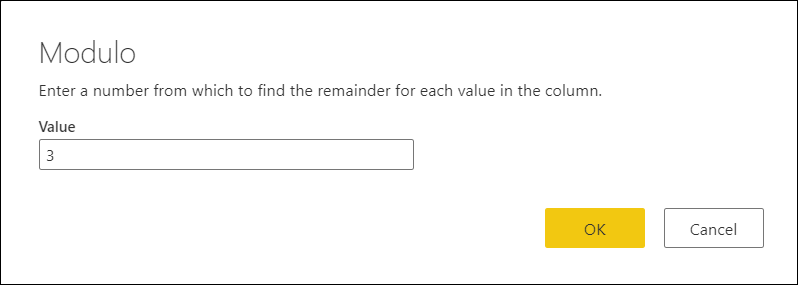
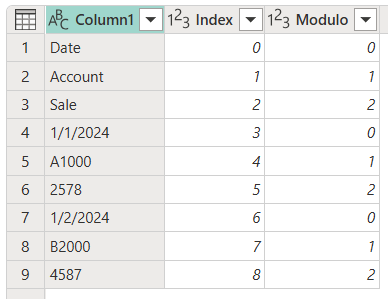
The result of that operation gives you a new column named Modulo.
Step 3. Add an integer-divide column from the index column
Select the Index column, go to the Add column tab, and then select Standard > Divide (Integer).
![]()
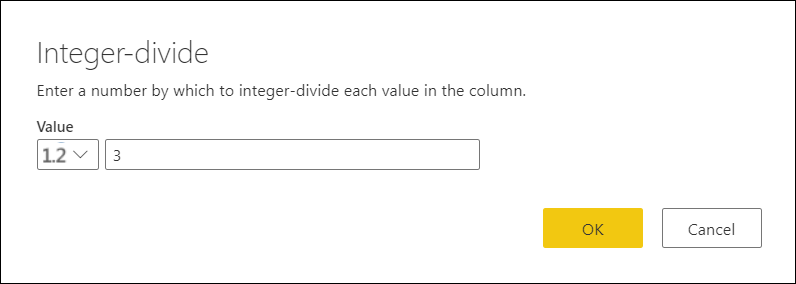
In the Integer-divide dialog box, enter a number by which to divide each value in the column. In this case, your pattern repeats itself every three rows, so enter the value 3.
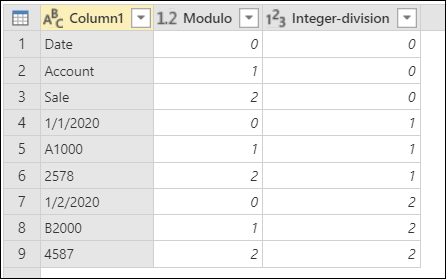
Remove the Index column, because you no longer need it. Your table now looks like the following image.
Step 4. Pivot a column
Your table now has three columns where:
- Column1 contains the values that should be in the final table.
- Modulo provides the column position of the value (similar to the y coordinates of an xy chart).
- Integer-division provides the row position of the value (similar to the x coordinates of an xy chart).
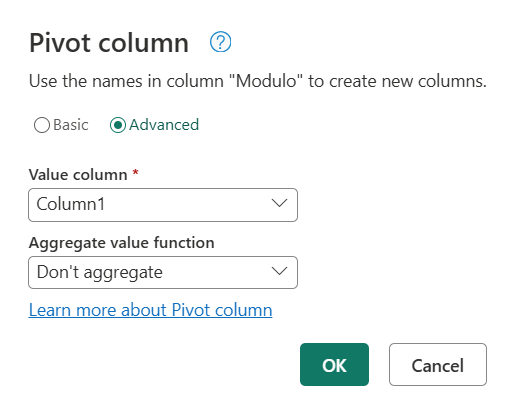
To achieve the table you want, you need to pivot the Modulo column by using the values from Column1 where these values don't get aggregated.
Select the Modulo column.
On the Transform tab, select Pivot column from the Any column group.
In the Pivot column dialog box, select the Advanced option button.
Make sure Value column is set to Column1 and Aggregate values function is set to Don't aggregate.
More information: Pivot columns
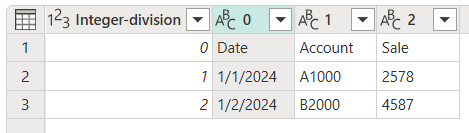
The result of that operation gives you a table with four columns, as shown in the following image.
Step 5. Clean the table
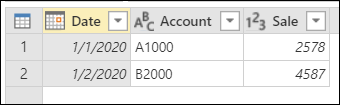
You can now delete the Integer-division column and promote the first row of the table to become the headers of your table. More information: Promote or demote column headers
After you define the correct data types for your columns, your table looks like the following table, with exactly the three columns that you needed and the shape that you were looking for.