Note
Access to this page requires authorization. You can try signing in or changing directories.
Access to this page requires authorization. You can try changing directories.
Summary
| Item | Description |
|---|---|
| Release State | General Availability |
| Products | Power BI (Semantic models) Power BI (Dataflows) Excel Dynamics 365 Customer Insights Analysis Services |
| Authentication Types Supported | Database Windows |
Note
Some capabilities might be present in one product but not others due to deployment schedules and host-specific capabilities.
Prerequisites
Before you can connect to a Sybase database, you need the SAP SQL Anywhere driver installed on your computer. Select the driver that matches your Excel installation (32-bit or 64-bit).
Capabilities Supported
- Import
- Advanced options
- Command timeout in minutes
- SQL statement
- Include relationship columns
- Navigate using full hierarchy
Connect to a Sybase database from Power Query Desktop
To make the connection, take the following steps:
Select the Sybase database option from Get Data. More information: Where to get data
Specify the Sybase server to connect to in Server and the database where your data is stored in Database.
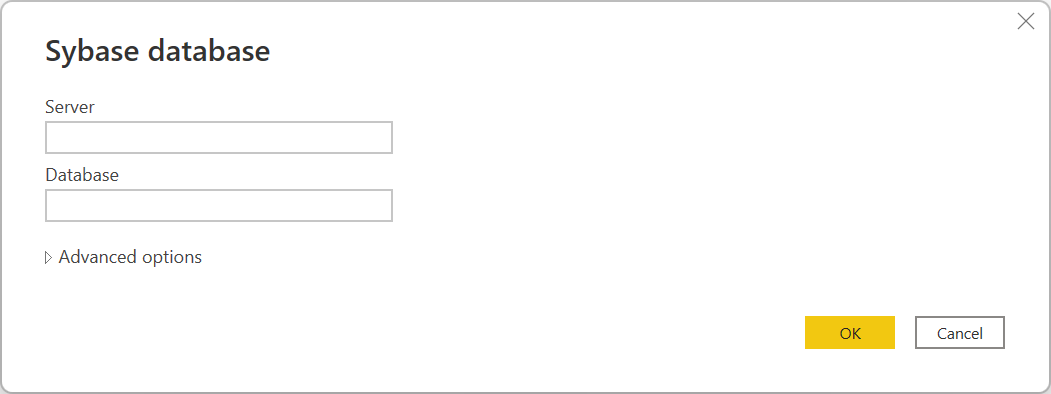
Select OK.
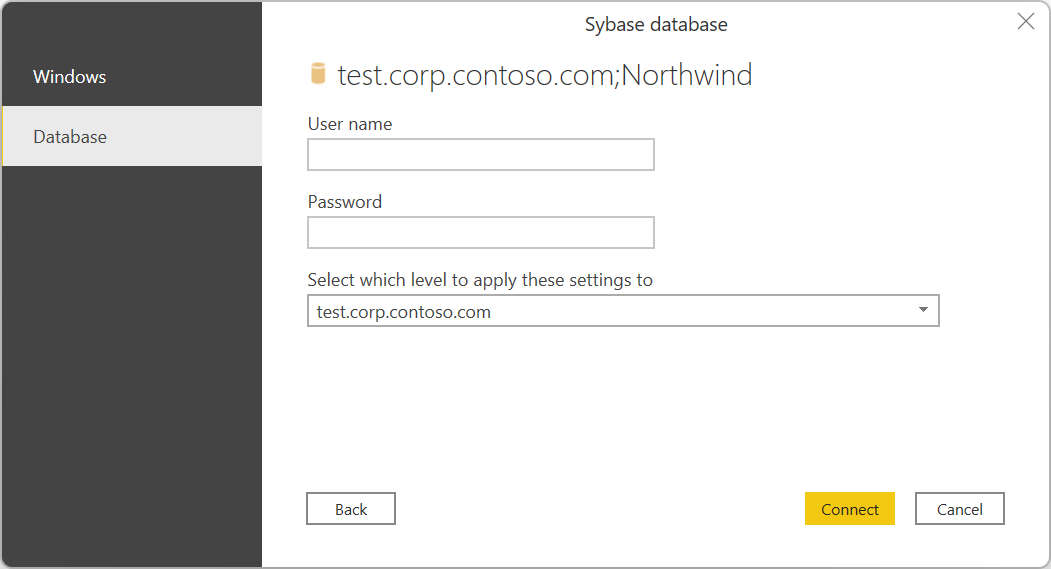
If this is the first time you're connecting to this Sybase server and database, select the authentication type you want to use, enter your credentials, and then select Connect. For more information about using and managing authentication, go to Authentication with a data source.
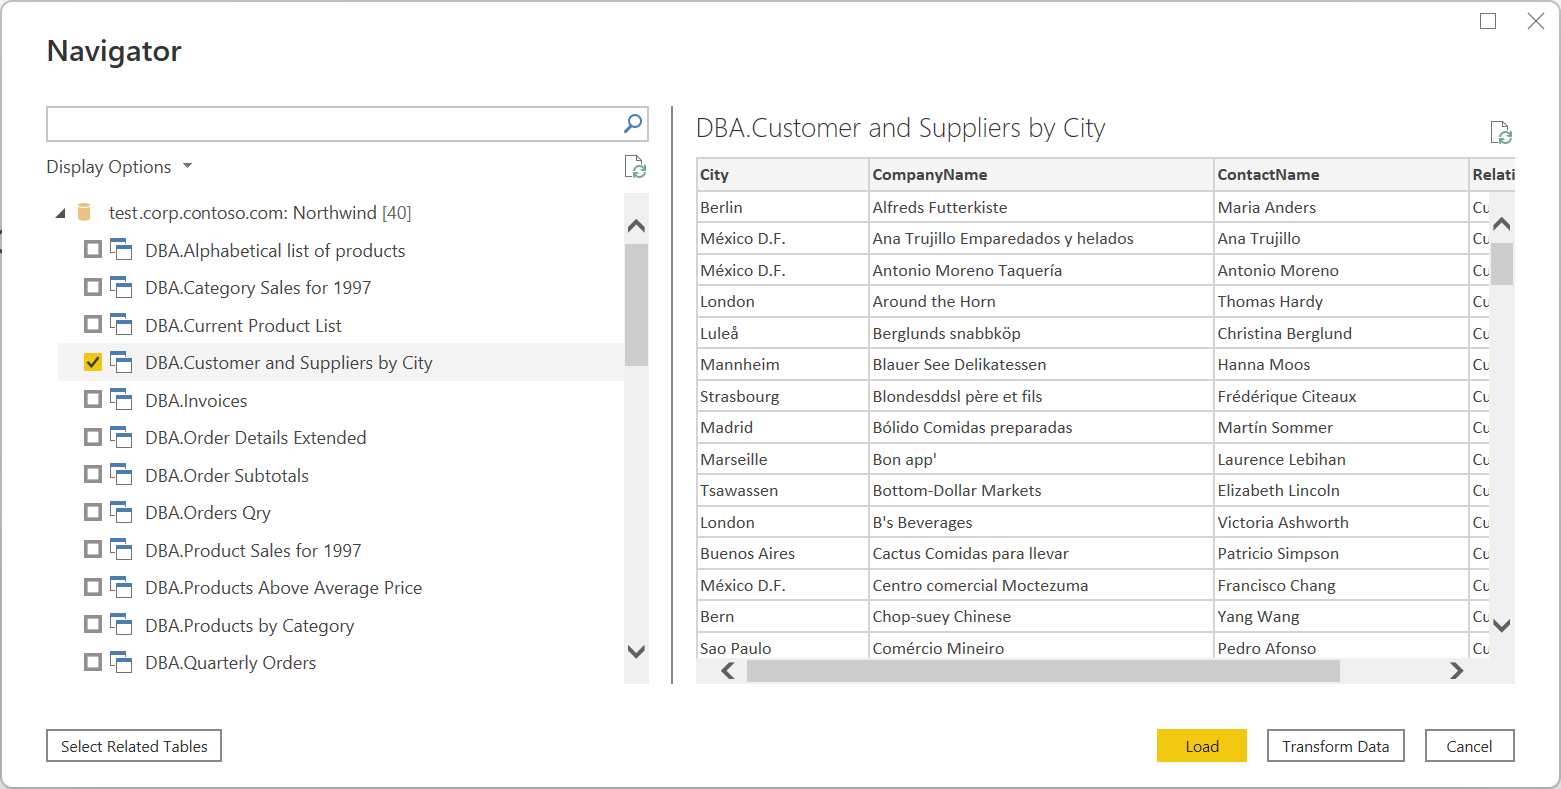
In Navigator, select the data you require, then either select Load to load the data or Transform Data to transform the data.

Connect to a Sybase database from Power Query Online
To make the connection, take the following steps:
Select the Sybase database option in the Choose data source page. More information: Where to get data
Specify the Sybase server to connect to in Server and the database where your data is stored in Database.
Select the name of your on-premises data gateway.
Note
You must select an on-premises data gateway for this connector, whether the Sybase database is on your local network or online.
If this is the first time you're connecting to this Sybase server and database, select the type of credentials for the connection in Authentication kind. Choose Basic if you plan to use an account that's created in the Sybase database instead of Windows authentication. For more information about using and managing authentication, go to Authentication with a data source.
Enter your credentials.
Select Use Encrypted Connection if you want to use an encrypted connection, or clear the option if you want to use an unencrypted connection.
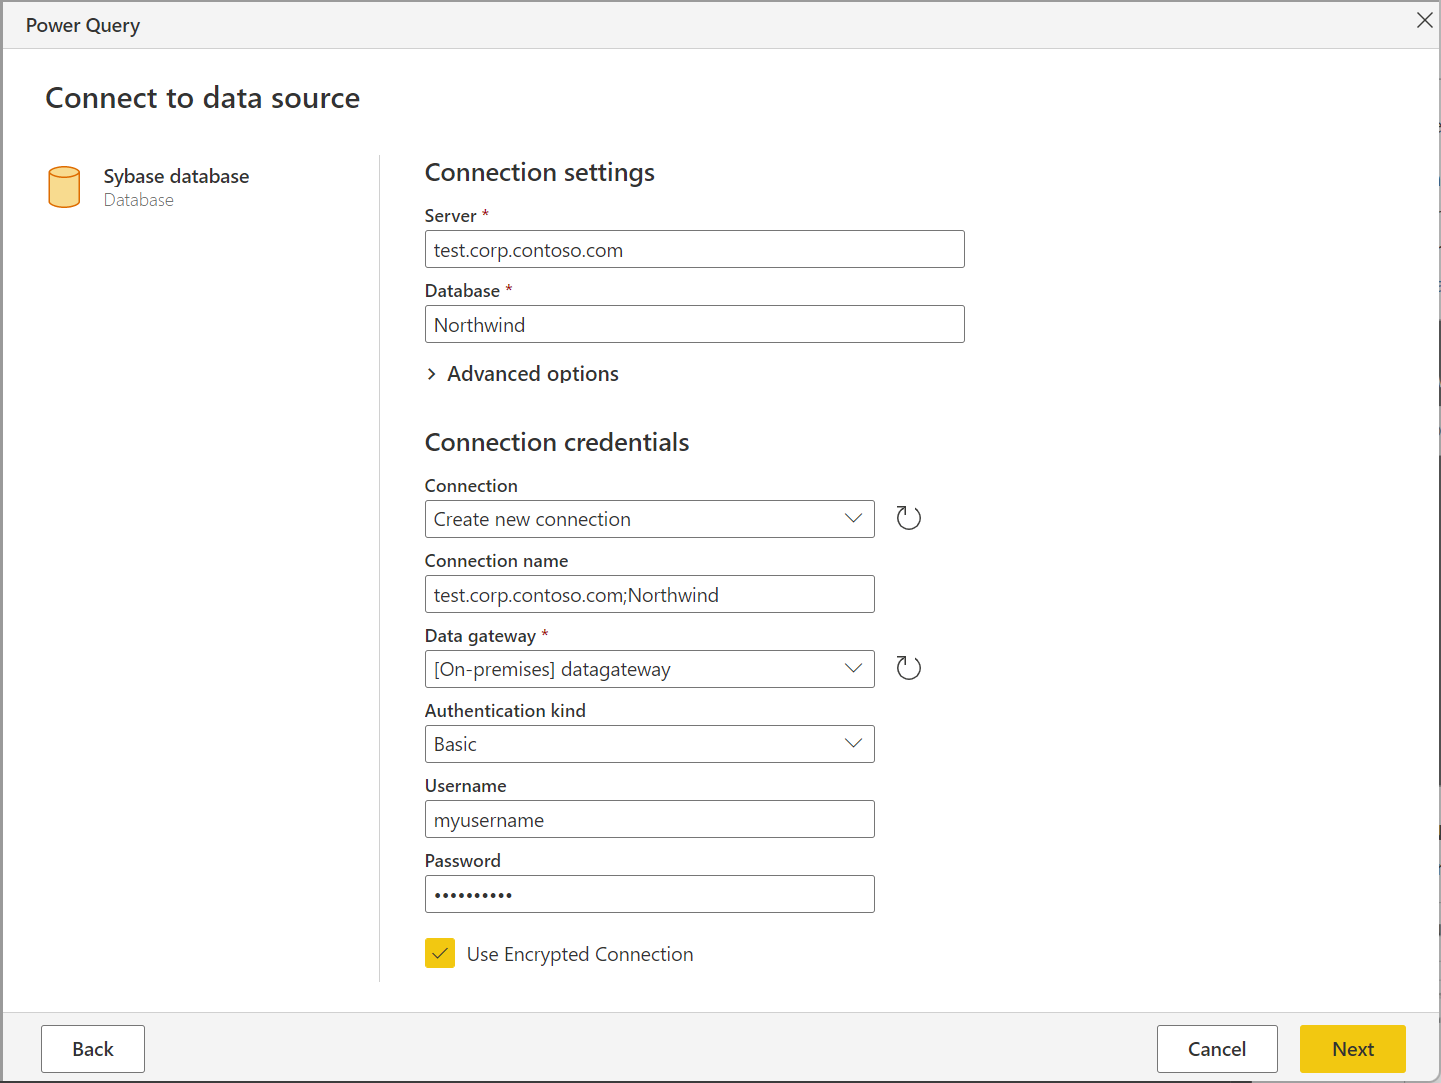
Select Next to continue.
In Navigator, select the data you require, then select Transform data to transform the data in the Power Query editor.

Connect using advanced options
Power Query provides a set of advanced options that you can add to your query if needed.
The following table lists all of the advanced options you can set in Power Query.
| Advanced option | Description |
|---|---|
| Command timeout in minutes | If your connection lasts longer than 10 minutes (the default timeout), you can enter another value in minutes to keep the connection open longer. |
| SQL statement | For information, go to Import data from a database using native database query. |
| Include relationship columns | If checked, includes columns that might have relationships to other tables. If this box is cleared, you won’t see those columns. |
| Navigate using full hierarchy | If checked, the navigator displays the complete hierarchy of tables in the database you're connecting to. If cleared, the navigator displays only the tables whose columns and rows contain data. |
Once you've selected the advanced options you require, select OK in Power Query Desktop or Next in Power Query Online to connect to your Sybase database.