Note
Access to this page requires authorization. You can try signing in or changing directories.
Access to this page requires authorization. You can try changing directories.
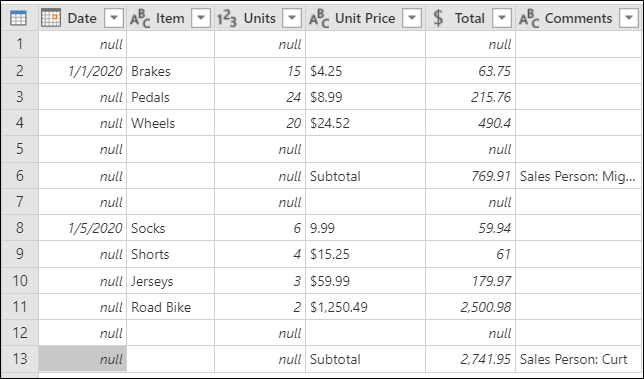
You can use fill up and fill down to replace null values with the last nonempty value in a column. For example, imagine the following table where you'd like to fill down in the Date column and fill up in the Comments column.
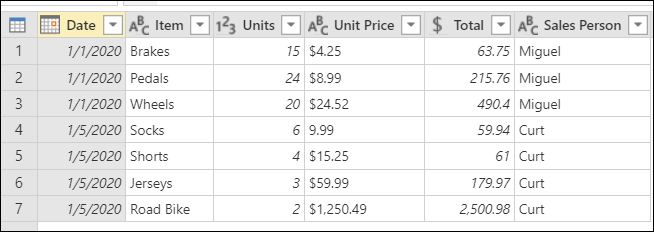
The outcome that you'd expect is shown in the following image.
Fill down
The fill down operation takes a column and traverses through the values in it to fill any null values in the next rows until it finds a new value. This process continues on a row-by-row basis until there are no more values in that column.
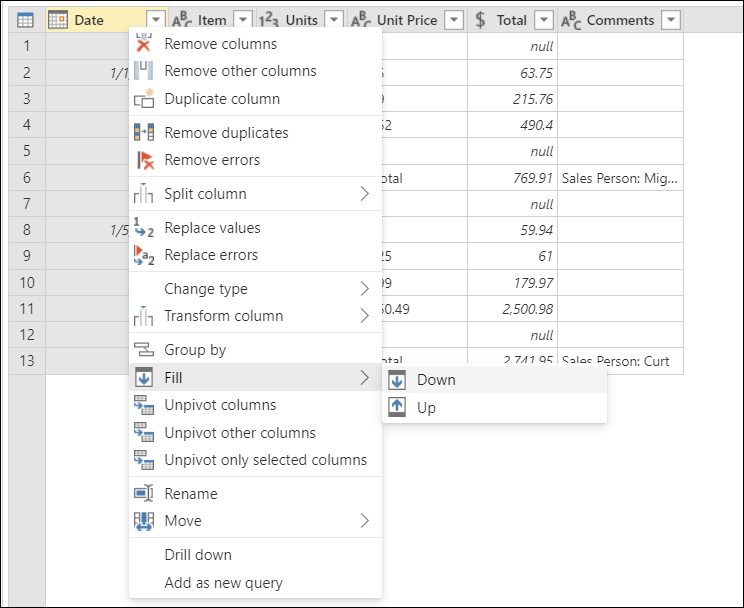
In the following example, you want to fill down on the Date column. To do that, you can right-click to select the Date column, and then select Fill > Down.
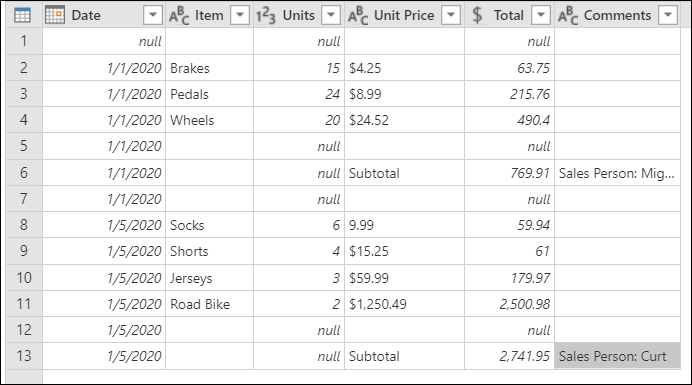
The result of that operation looks like the following image.
Fill up
In the same way as the fill down operation, fill up works on a column. But by contrast, fill up finds the last value of the column and fills any null values in the previous rows until it finds a new value. Then the same process occurs for that value. This process continues until there are no more values in that column.
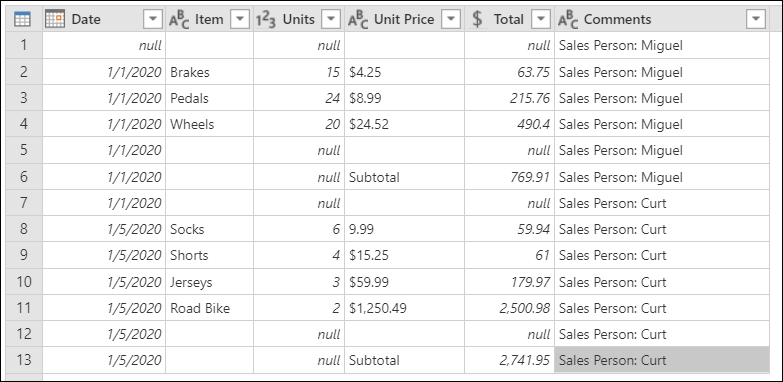
In the following example, you want to fill the Comments column from the bottom up. Notice that your Comments column doesn't have null values. Instead it has what appears to be empty cells. Before you can do the fill up operation, you need to transform those empty cells into null values: select the column, go to the Transform tab, and then select Replace values.

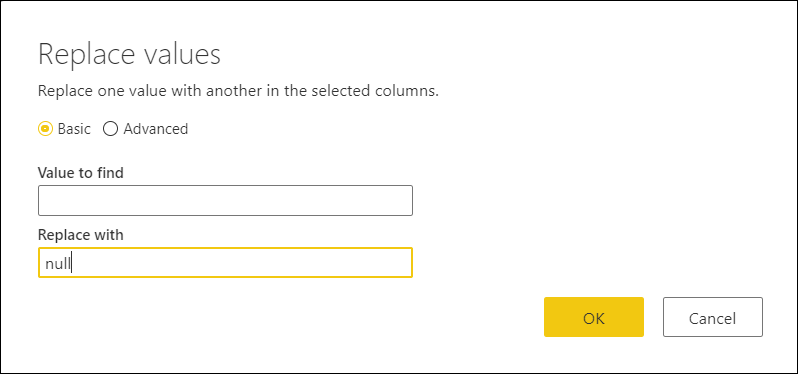
In the Replace values dialog box, leave Value to find blank. For Replace with, enter null.
More information: Replace values
After all empty cells are replaced with null, select the Comments column, go to the Transform tab, and then select Fill > Up.
![]()
The result of that operation looks like the following image.
Cleaning up your table
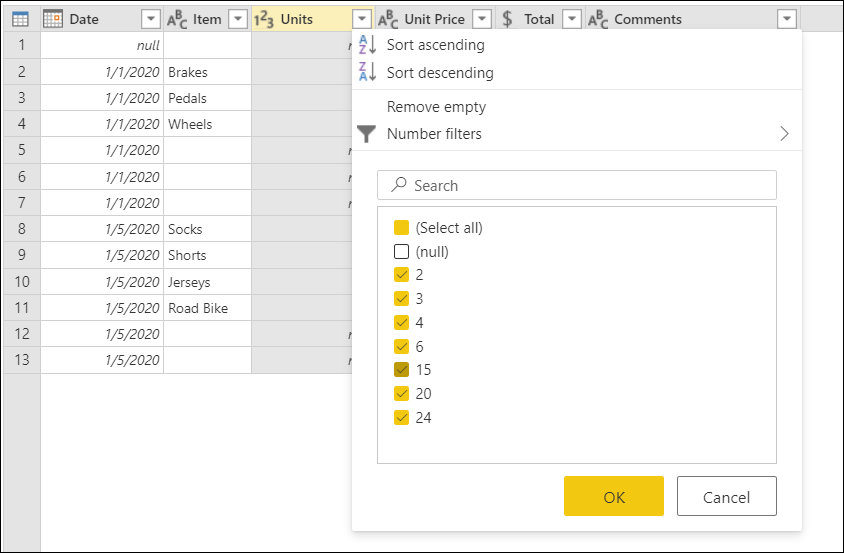
Filter the Units column to show only rows that aren't equal to null.
Rename the Comments column as Sales Person.

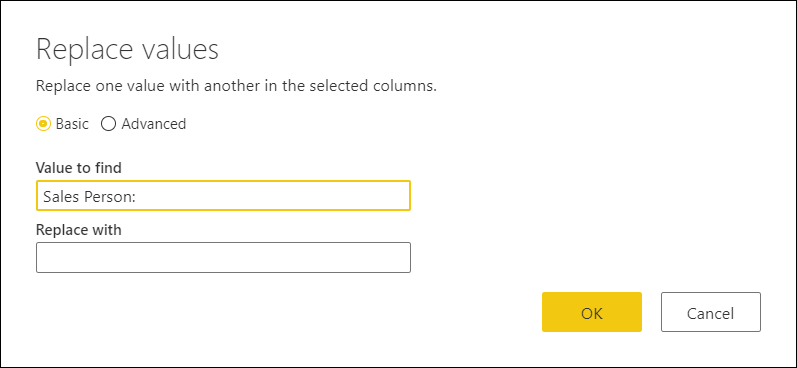
Remove the Sales Person: values from the Sales Person column so you only get the names of the salespeople.
Now you should have exactly the table you were looking for.
