Note
Access to this page requires authorization. You can try signing in or changing directories.
Access to this page requires authorization. You can try changing directories.
In Power Query, you can include or exclude rows according to a specific value in a column. You can choose from three methods to filter the values in your column:
After you apply a filter to a column, a small filter icon appears in the column heading, as shown in the following illustration.
![]()
Sort and filter menu
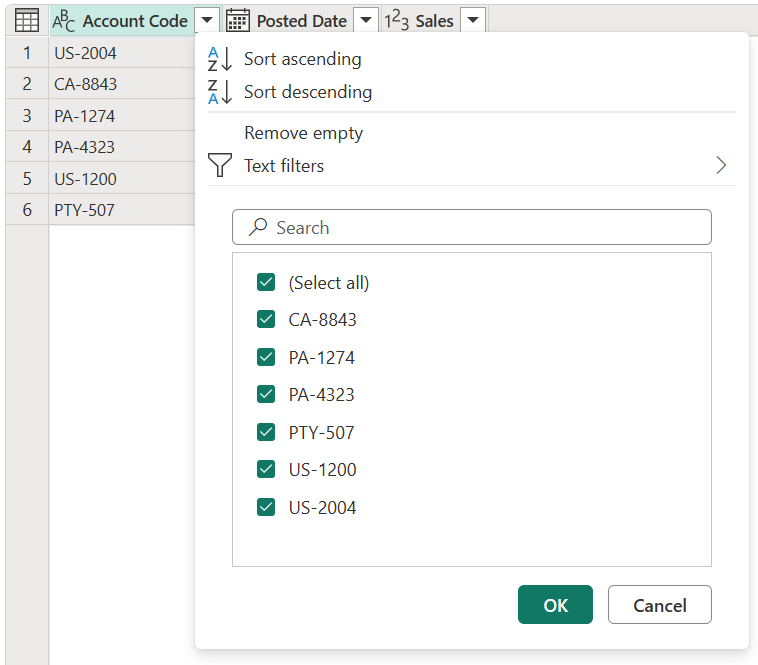
In the column header, you can see an icon with an inverse triangle. When you select this icon, the sort and filter menu is displayed. With this menu, you can apply or remove any filters to or from your column.
Note
In this article, we focus on aspects related to filtering data. To learn more about the sort options and how to sort columns in Power Query, go to Sort columns.
Remove empty
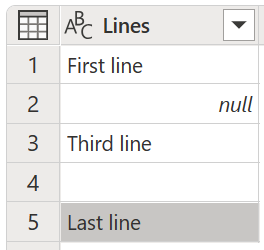
The Remove empty command applies two filter rules to your column. The first rule gets rid of any null values. The second rule gets rid of any blank values. For example, imagine a table with just one text column with five rows, where you have one null value and one blank cell.
Note
A null value is a specific value in the Power Query language that represents no value.
You then select Remove empty from the sort and filter menu, as shown in the following image.

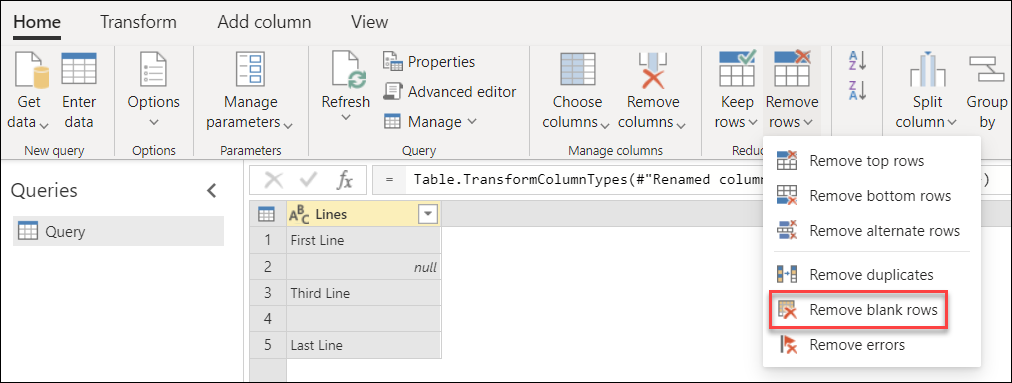
You can also select this option from the Home tab in the Reduce Rows group in the Remove Rows drop-down options, as shown in the next image.
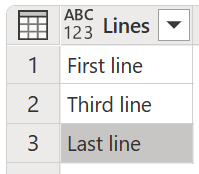
The result of the Remove empty operation gives you the same table without the empty values.
Clear filter
When a filter is applied to a column, the Clear filter command appears on the sort and filter menu.

Auto filter
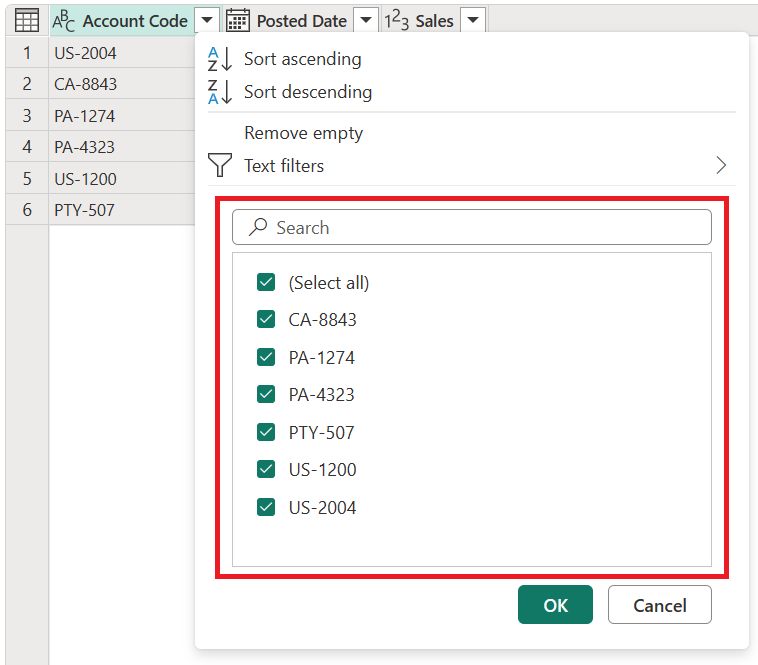
The list in the sort and filter menu is called the auto filter list, which shows the unique values in your column. You can manually select or deselect which values to include in the list. Any selected values are taken into consideration by the filter; any values that aren't selected are ignored.
This auto filter section also has a search bar to help you find any values from your list.
Note
When you load the auto filter list, only the top 1,000 distinct values in the column are loaded. If there are more than 1,000 distinct values in the column in the that you're filtering, a message appears indicating that the list of values in the filter list might be incomplete, and the Load more link appears. Select the Load more link to load another 1,000 distinct values.
- If exactly 1,000 distinct values are found again, the list is displayed with a message stating that the list might still be incomplete.
- If fewer than 1,000 distinct values are found, the full list of values is shown.
Cell shortcut menu
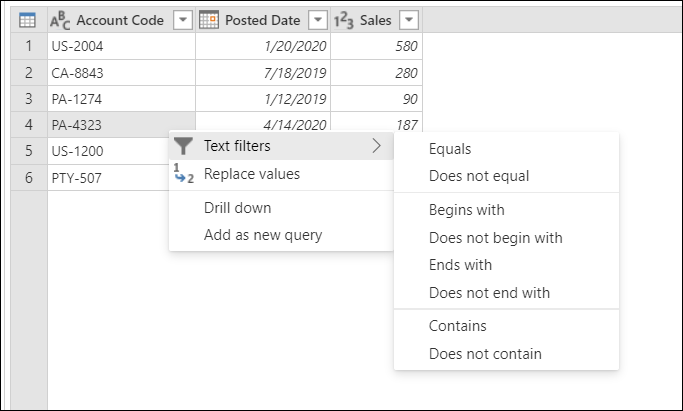
You can right-click a particular cell in a column to open the shortcut menu for that value. Point to the small filter icon, and then select the filter option you want to use.
Note
Power Query displays a type-specific filter based on the data type of the column.
Type-specific filters
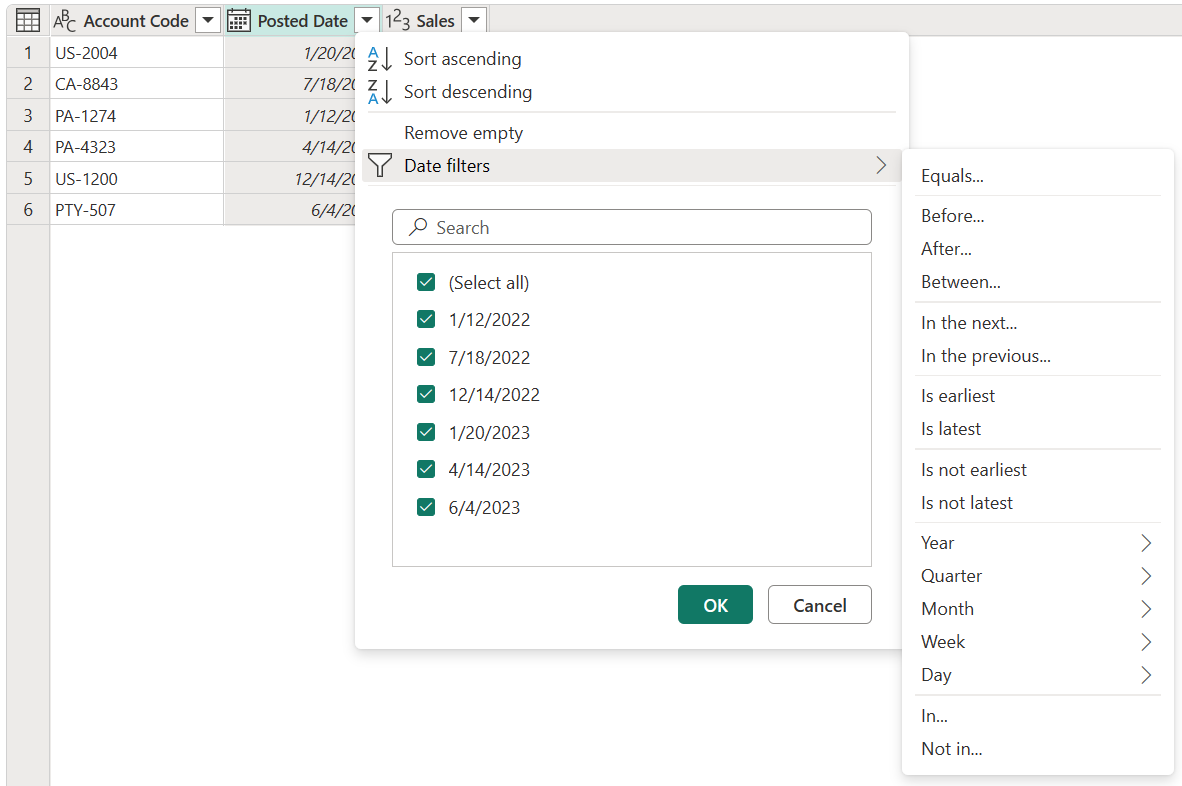
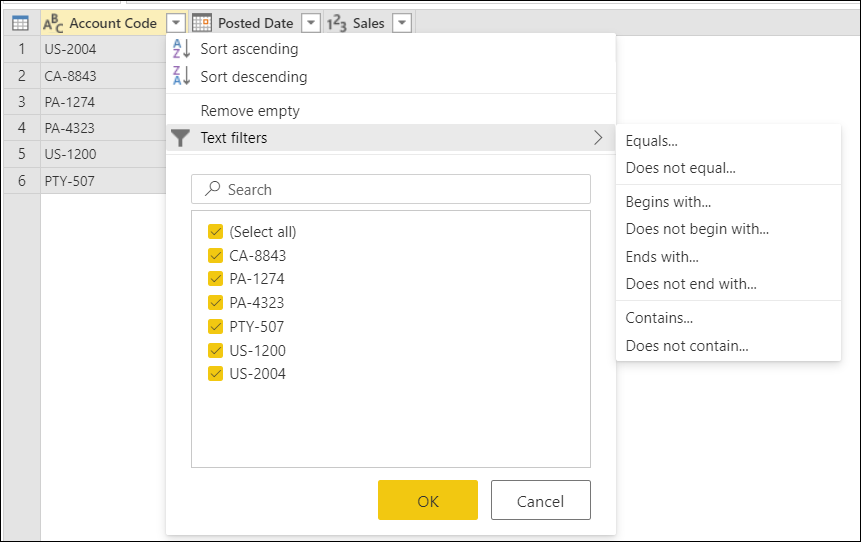
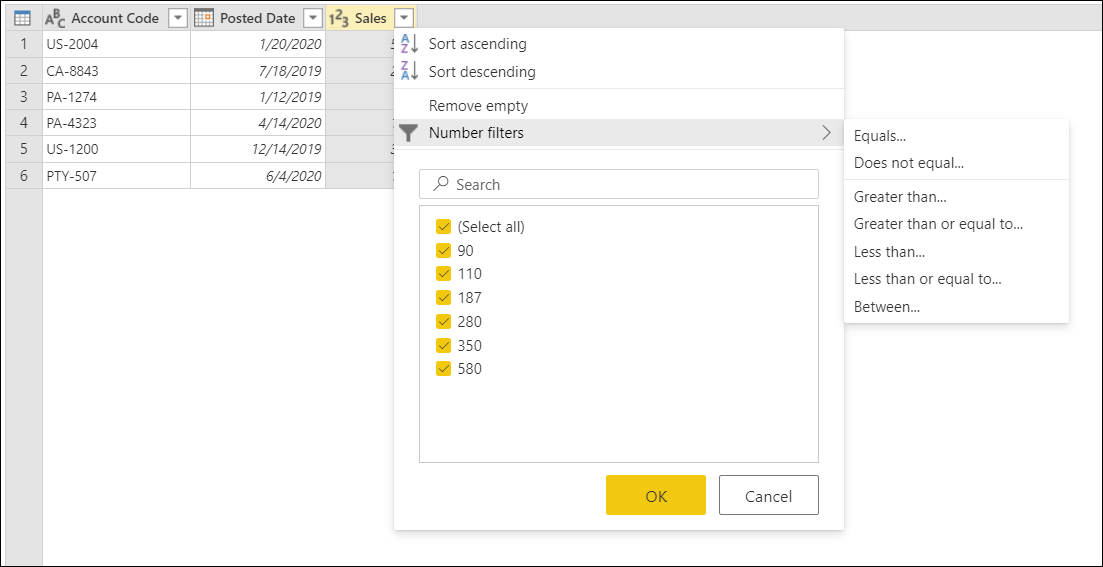
Depending on the data type of your column, different commands are displayed in the sort and filter menu. The following images show examples for date, text, and numeric columns.
Filter rows
When you select any of the type-specific filters, you use the Filter rows dialog to specify filter rules for the column. This dialog is shown in the following image.
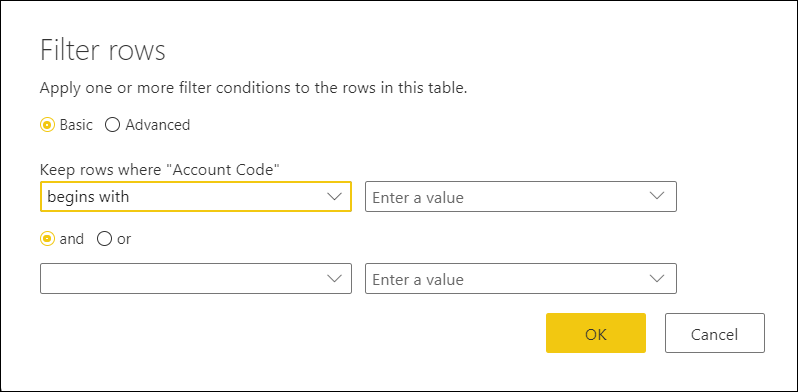
The Filter rows dialog box has two modes: Basic and Advanced.
Basic
With basic mode, you can implement up to two filter rules based on type-specific filters. In the preceding image, notice that the name of the selected column is displayed after the label Keep rows where, to let you know which column these filter rules are being implemented on.
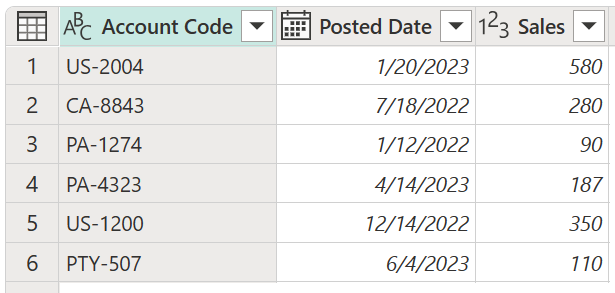
For example, imagine that in the following table, you want to filter the Account Code by all values that start with either PA or PTY.
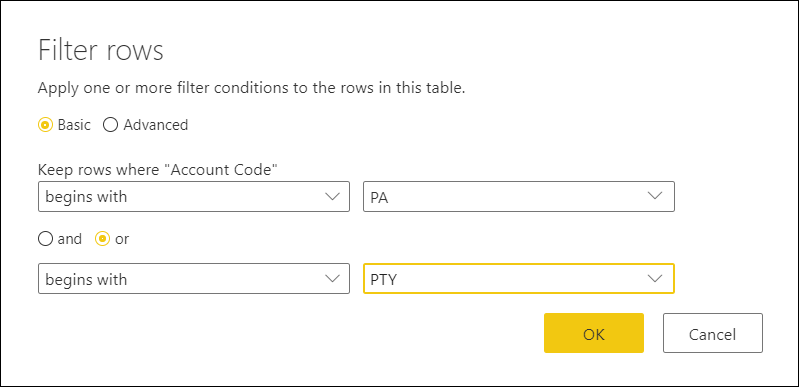
To do that, you can go to the Filter rows dialog box for the Account Code column and specify the set of filter rules you want.
In this example, first select the Basic button. Then under Keep rows where "Account Code", select begins with, and then enter PA. Then select the or button. Under the or button, select begins with, and then enter PTY. The select OK.
The result of that operation gives you the set of rows that you're looking for.

Advanced
With advanced mode, you can implement as many type-specific filters as necessary from all the columns in the table.
For example, imagine that instead of applying the previous filter in basic mode, you wanted to implement a filter to Account Code to show all values that end with 4. Also, you want to show values over $100 in the Sales column.
In this example, first select the Advanced button. In the first row, select Account Code under Column name, ends with under Operator, and select 4 for the Value. In the second row, select and, and then select Sales under Column Name, is greater than under Operator, and 100 under Value. Then select OK
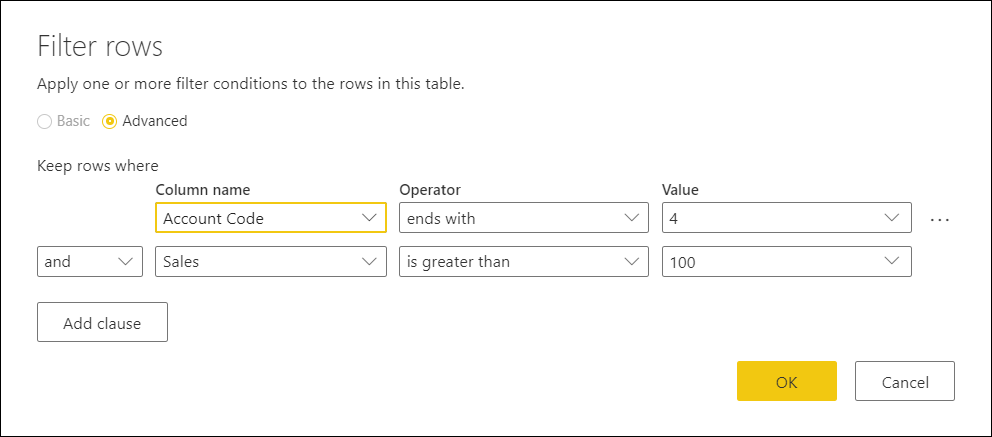
The result of that operation gives you just one row that meets both criteria.

Note
You can add as many clauses as you'd like by selecting Add clause. All clauses act at the same level, so you might want to consider creating multiple filter steps if you need to implement filters that rely on other filters.