Note
Access to this page requires authorization. You can try signing in or changing directories.
Access to this page requires authorization. You can try changing directories.
Power Apps forms settings are a set of capabilities that make it easy for model-driven app makers to configure and verify how users access forms in a solution or application. From Form settings, there are four different areas a maker can choose from:
- Set security roles for a form.
- Set the form order.
- Set the fallback form for a table.
- Form access checker.
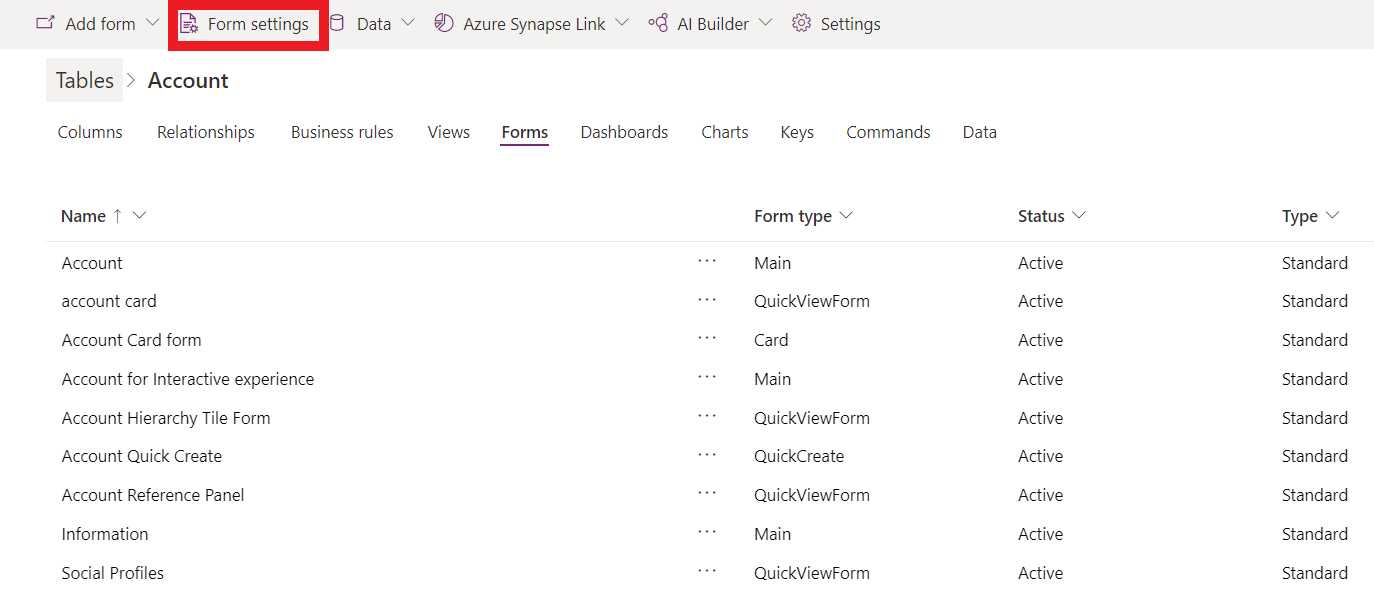
You can access form settings from the Forms area in Power Apps or command bar in the form designer.
Set security roles for a form
Different people in your organization might interact with the same data in different ways. Managers might depend on being able to quickly scan information in a row and service people might require a form that streamlines data entry. You can accommodate different requirements by assigning forms to the security roles that different groups of people belong to.
When you have more than one main or other form type defined for a table, you can select which forms users are able to use based on their security roles. Because each table must be able to display a form for any user, at least one form must be designated as a "fallback" form – a form visible to users whose security roles don't have any forms explicitly assigned to them.
Note
- Quick Create, Quick View, and Card forms can't be assigned to security roles.
- Another option makers have to control form access is to make a main form inactive. You can set an active or inactive state to main forms. This feature was included primarily to manage new forms included when Microsoft Dataverse environments upgrade but you can use it to prevent users from being able to use any main form.
Assign a security role to a form
Sign into Power Apps, select Solutions, open the solution you want, open a table, and then select the Forms area. If the item isn’t in the side panel pane, select …More and then select the item you want.
Select the main form you want to configure the security roles for a form, and then on the command bar select Form settings.
In the left navigation on the Form settings page, select Security role.
Choose from the following options:
- To set the security roles for every user select Everyone.
- To set the access to the form for one or more specific security roles, select Specific security roles. Then, select the security roles you want to grant access from the list of security roles that are set up for your environment.
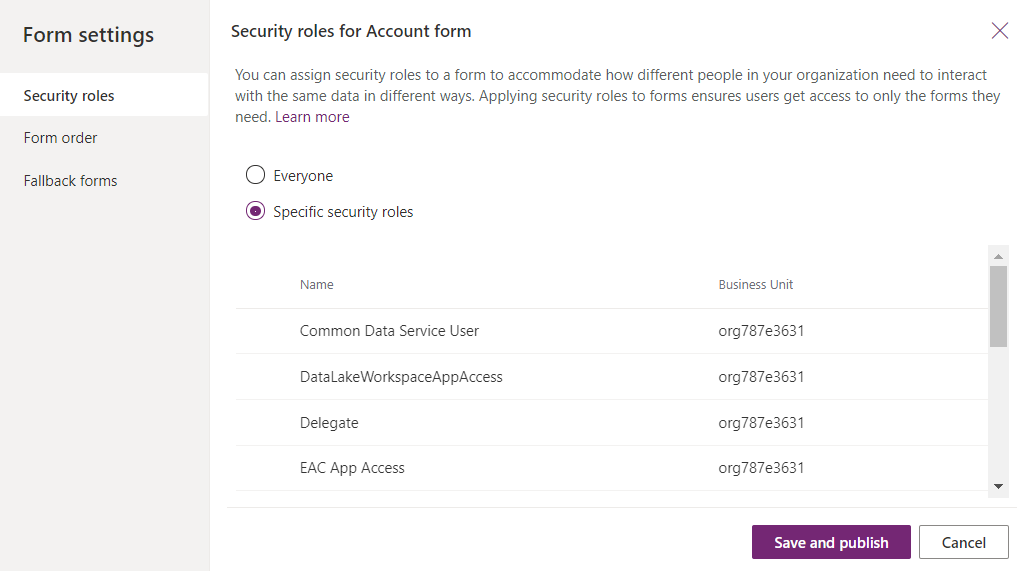
Select Save and Publish.
Set the form order
When you have multiple main, quick create, quick view, or card forms for a table, you can assign a form order. The form order determines which of the available forms is shown by default. The available main forms can be further controlled by assigning security roles to the form.
Notice that the form order doesn't set who can view the form that is managed by setting security roles. More information: Set security roles for a form
- Sign into Power Apps, select Solutions, open the solution you want, select a table, and then select the Forms area. If the item isn’t in the side panel pane, select …More and then select the item you want.
- Select the main form you want to configure the fallback form for, and then on the command bar select Form settings.
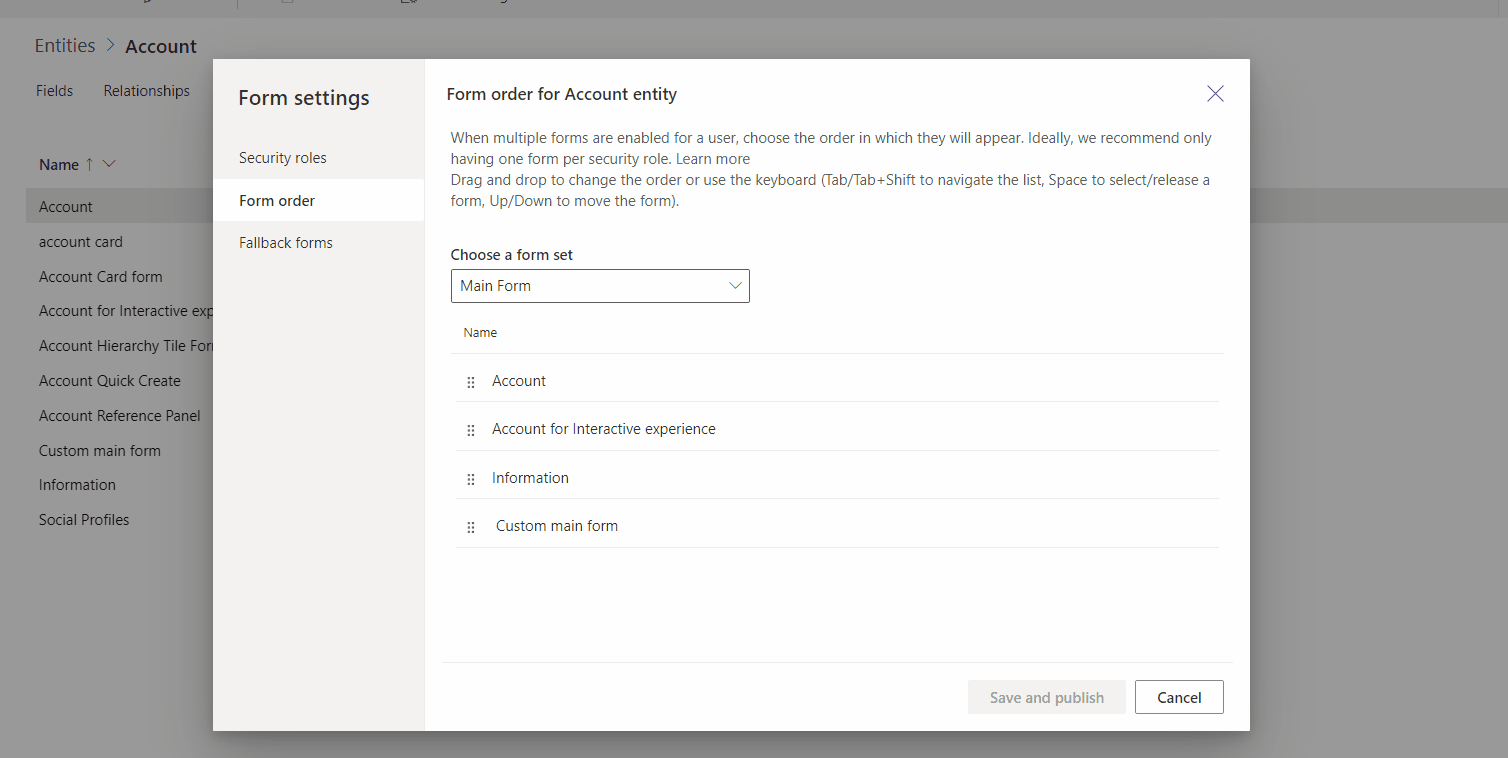
- In the left navigation on the Form settings page, select Form order.
- Select the form set that you want, such as Main Form, Quick Create Form, **Quick View Form, or Card Form.
- Change the order by dragging and dropping the form up and down the list in the order you want it to be shown to your users. You can also use these keyboard shortcuts: Tab/Tab + Shift to move the focus, Space to select or release a form, and Down/Up arrow keys to move a form.
- Select Save and publish.
 To set the form order using solution explorer, see Assign model-driven app form order.
Set the fallback form for a table
Setting the fallback form for a table is important to ensure that if a user doesn't have any assigned security roles or there are no assigned security roles for a main form type there's always a "default" form that shows for that table. Fallback forms are only available with main forms and don't apply to quick create, quick view, and card forms.
There are a few different strategies to consider when you manage the fallback form for a table.
All users view the same form
If you don't require multiple forms for a table you don't need a fallback form.
Create a contingency form
If you're using role-based forms because you want to restrict the information people might view or edit, consider creating a form that has a minimum of information displayed. Then, select specific security roles, but don't select any roles except system administrator. The result is that this form will never be seen by anyone except users with the system administrator security role and anyone whose security roles haven't been associated with a specific form. You could include an HTML web resource in the form with information about why little information is visible in the form and a link to information about how to request being added to a security role that is associated with a from or to include a new security role for a form.
Create a generic form
If you use role-based forms to provide a customized experience based on a user's role, you can set your least specialized form as the fallback form and configure it to display for everyone. Then, create customized forms for specific security roles and configure those forms to only display for security roles that require them. Don't enable these forms for fallback. Finally, in the Form settings configure the Form order to specify which forms to display ranking them from most exclusive to least exclusive. Your fallback form is at the bottom of the list. This strategy causes people seeing the form that has been customized for their role as the default form, yet they can use the form selector to select the most common form if they want. Whatever form they select remains their default form until they select a different form.
- Sign into Power Apps, select Solutions, open the solution you want, select a table, and then select the Forms area. If the item isn’t in the side panel pane, select …More and then select the item you want.
- Select the main form you want to configure the fallback form for, and then on the command bar select Form settings.
- In the left navigation on the Form settings page, select Fallback forms.
- To disable a form from the fallback order, clear the checkbox. In this example the Information form is removed from the fallback order.
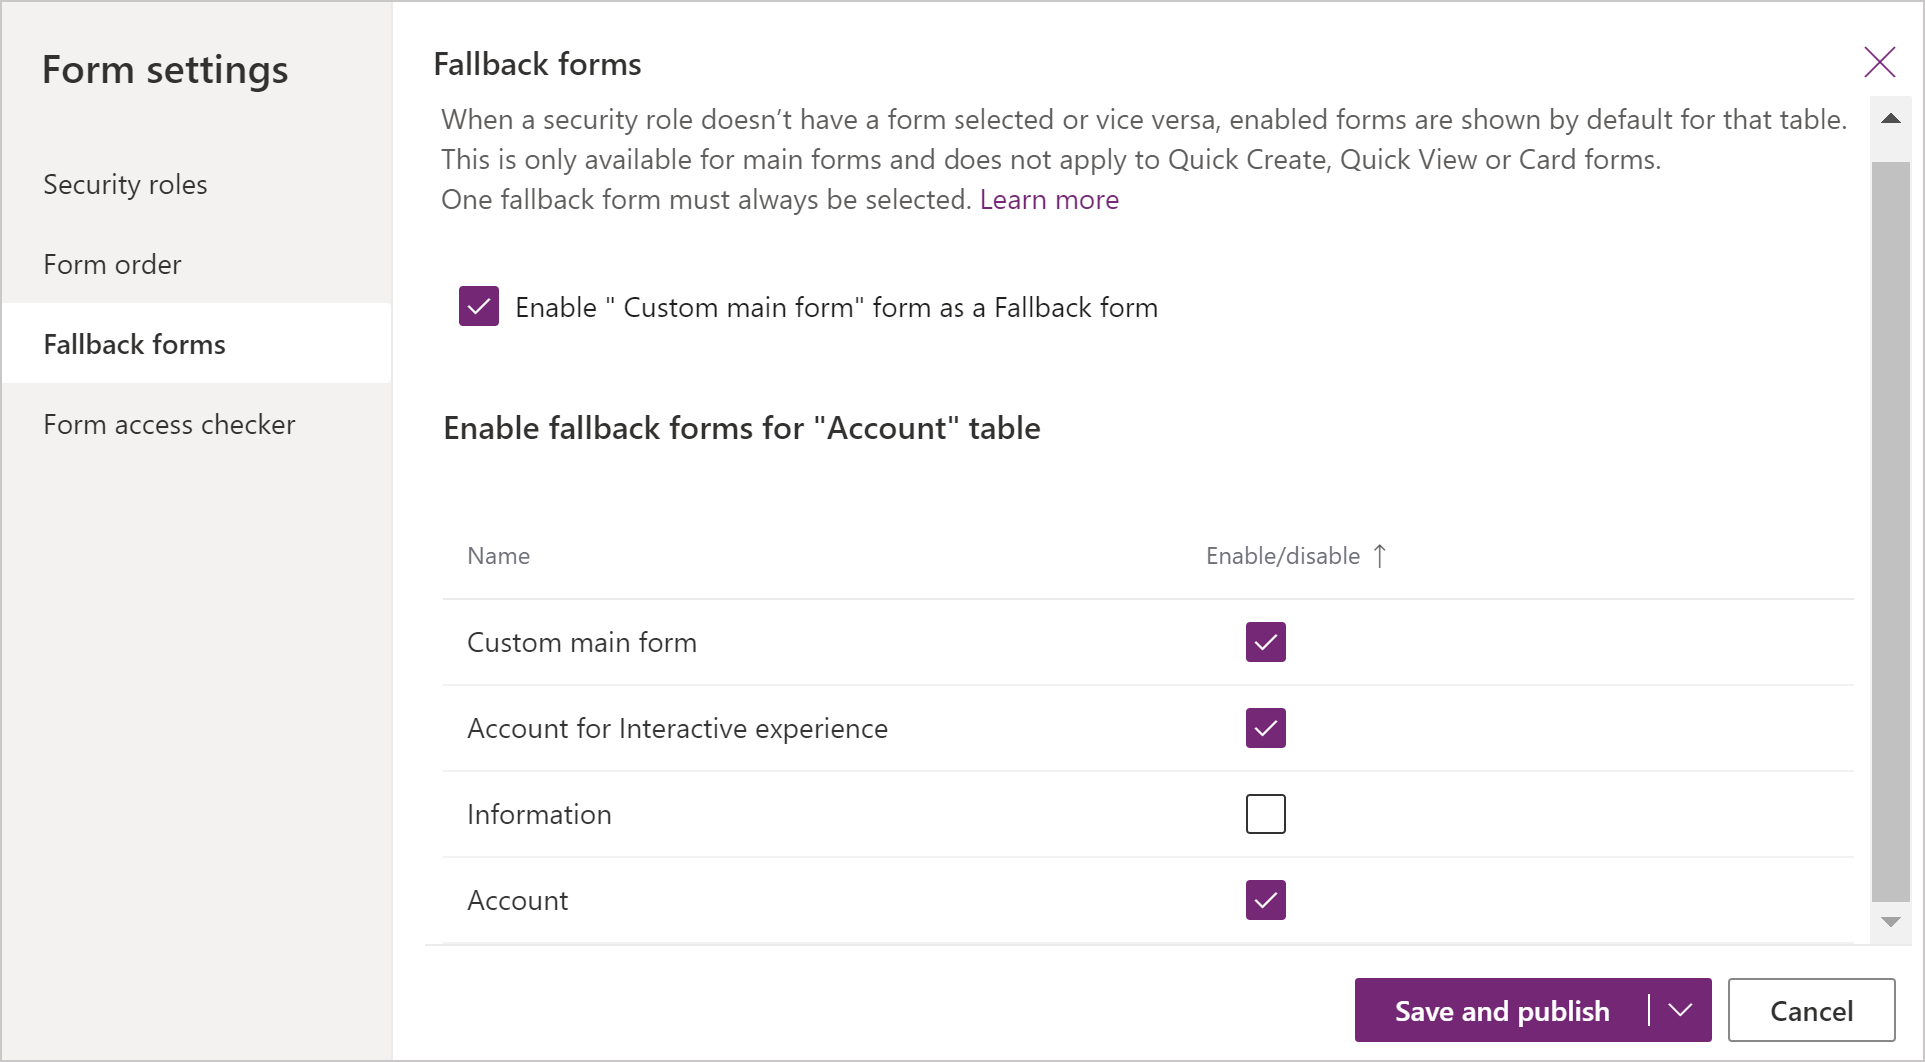 To enable a form for fallback select the checkbox next to the form to enable it.
 - Select Save and publish.
Use form scripting
The Client API form context (formContext) provides a reference to the form or to an item on the form, such as, a quick view control or a row in an editable grid, against which the current code is executed. More information: Client API form context
Important
The Xrm.Page object is deprecated, and you should use the getFormContext method of the passed in execution context object to return reference to the appropriate form or an item on the form.