Note
Access to this page requires authorization. You can try signing in or changing directories.
Access to this page requires authorization. You can try changing directories.
Note
This describes the process that currently uses the classic editor to introduce a control. In due course this will be migrated so that this can be performed within the modern form editor.
Gain valuable insights from the latest news about your customers, competitors, and contacts. Staying on top of the news helps you stay ahead of your competition by showing you real-time contextual information about your customers and competitors. Install the news Power Apps component framework control, which delivers relevant news from Bing News.
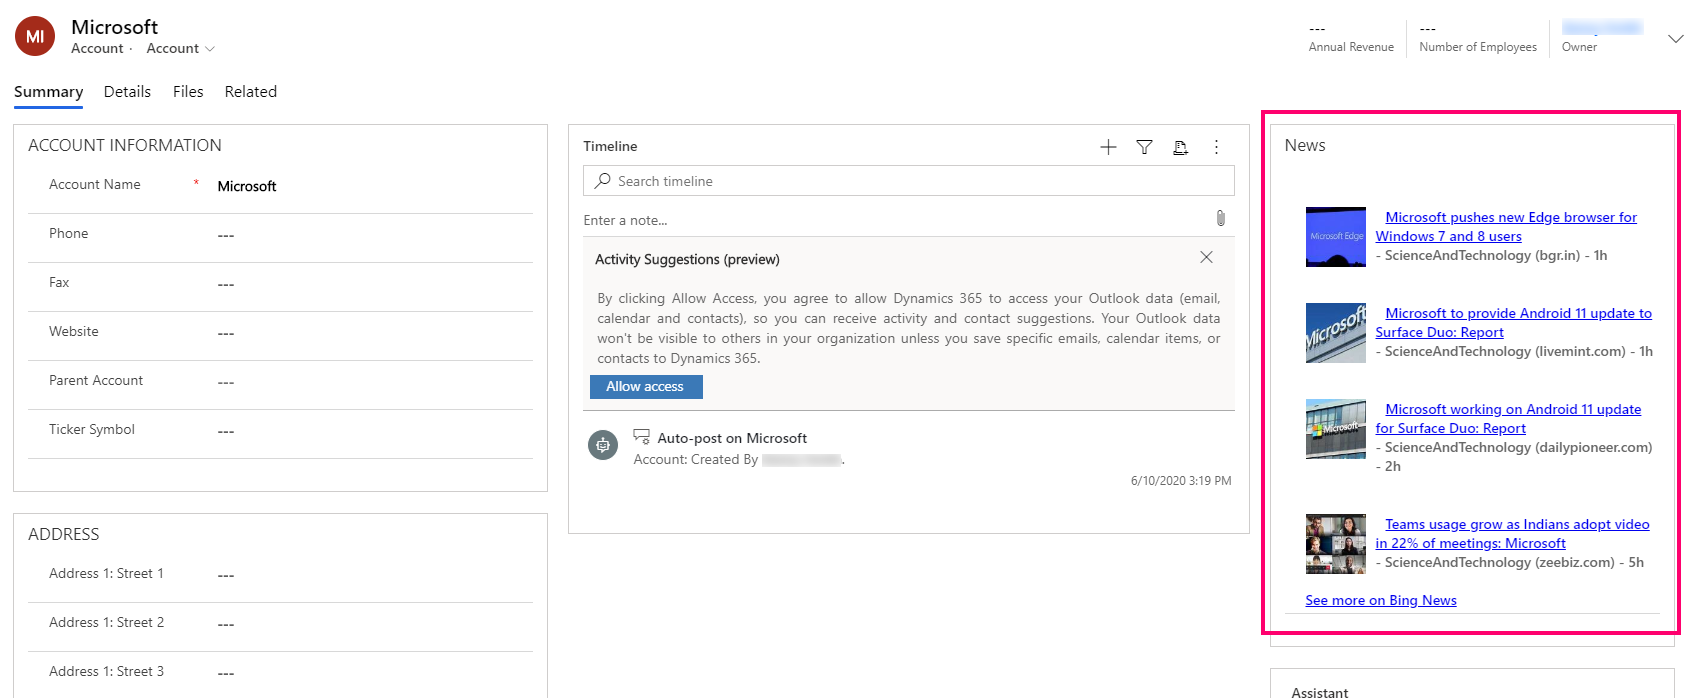
You can customize to support additional news sources, the look and feel and the behavior of the PCF control. For more information, see the readme in the news control GitHub repo.
Add the company news control to the account main form
The steps in this article add the company news control to the account main form already configured to query news topics collected from Bing News. You can use similar steps to add the control to the main form for other tables, such as contact and competitor.
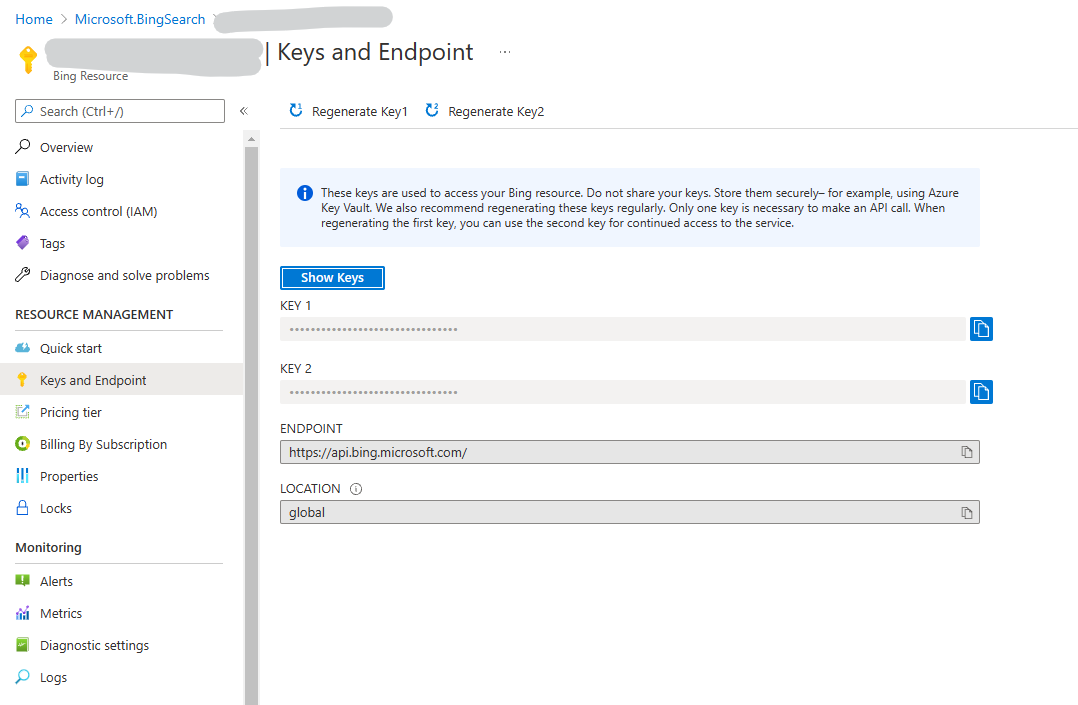
Get the Bing News API key and URL
The news control requires a news API URL, API key, and more news URL. For Bing News, the more news URL is preconfigured in the control to use https://www.bing.com/news/search. For the News API URL, and API Key, you’ll need to provide these by creating a Bing Search azure resource under your Azure account. Once created, you will get the API key and API URL under the Keys and Endpoint section.
Import the company news solution
Go to the news control GitHub repo.
Download Solutions.zip. To do this, open the Solutions folder, open Solutions.zip, and then select Download.
Sign-in to Power Apps, and then in the upper right select the environment where you want to install the company news control.
Select Solutions on the left pane, and then select Import on the command bar. If the item isn’t in the side panel pane, select …More and then select the item you want.
In the Import solution wizard, select Choose File, browse to and select Solutions.zip, and then select Open.
Select Next, and then select Next again to complete the import.
Add the control to the account main form
In Power Apps select Settings (gear) on the upper right, and then select Advanced settings.
Go to Settings > Customizations > Customize the System.
In the left navigation tree, expand Tables > Account, select Forms, and then open the Account Main form.
In the form editor, add two new text columns, which will be used to pass the key and base URL to the news component.
a. Select New Column from the right navigation Column Explorer.
b. For both Display name and Name enter newsapikey. Leave the rest of the settings as the default and then select Save and Close.
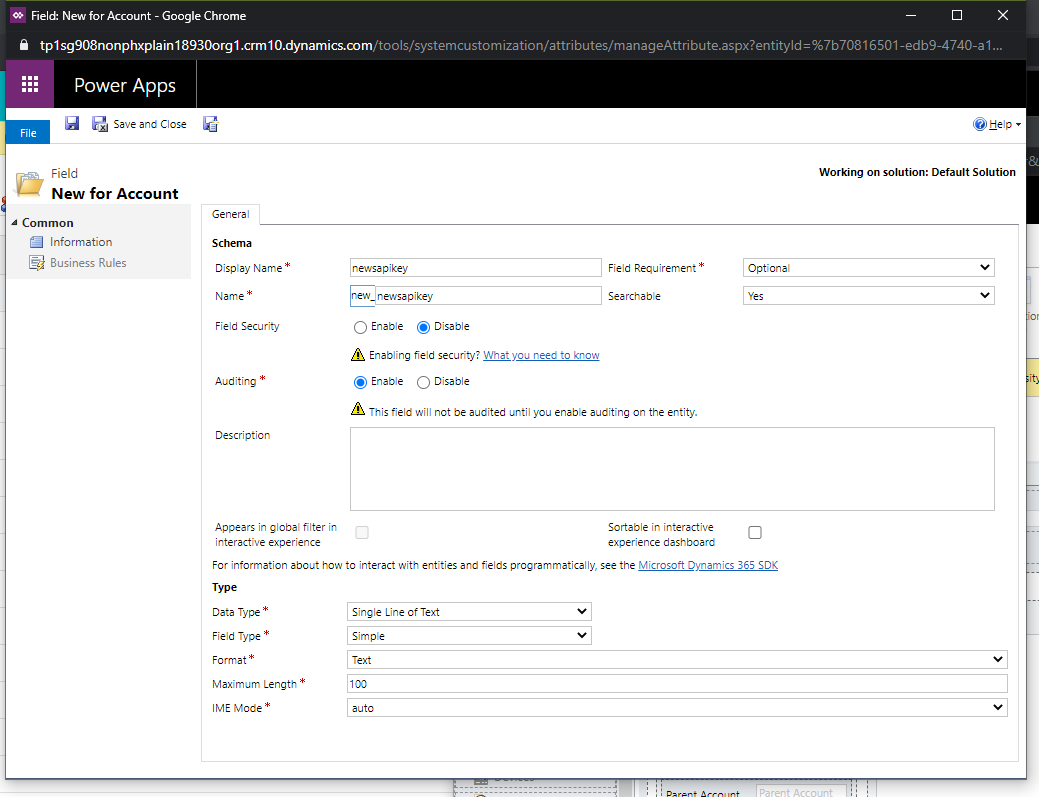
c. Repeat the previous two steps to create another text column. For both the Display name and Name enter newsurl. Leave the rest of the settings as the default and then select Save and Close.
In the form editor, select a place on the form where you want the company news control, and then select Insert tab > Section > One Column.
To show news by account name, drag and drop the Account Name column from the right Column Explorer pane to the newly created section.
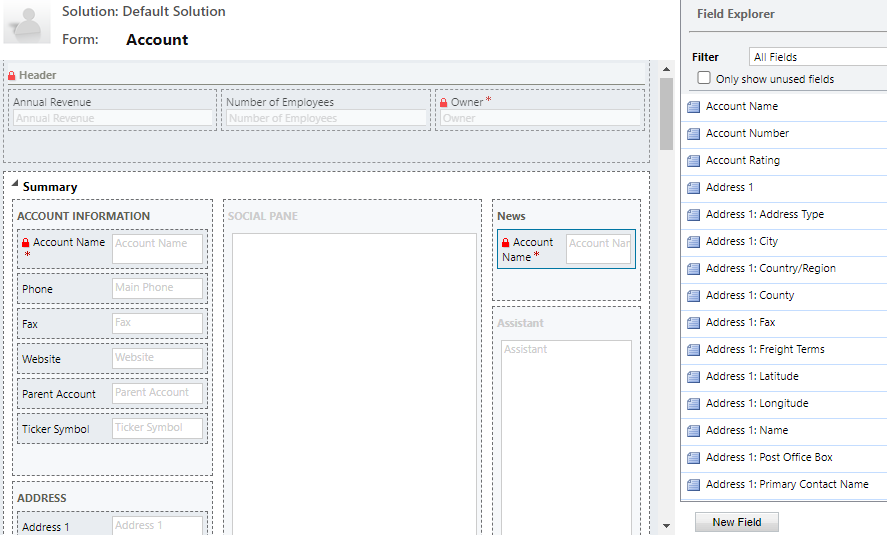
Select the section and then select Change properties. Enter a descriptive section a Name, such as Company news. You might want to check Show the label of this section on the form to provide heading to the section. Select OK.
Select the newly added Account Name column, and then select Change properties on the Home tab. On the Column Properties page, select the Controls tab, select Add Control, select the companynews control, and then select Add.
Configure the following bindings for the apikey and baseurl columns.
a. Select Configure property (pencil icon) next to APIKey.
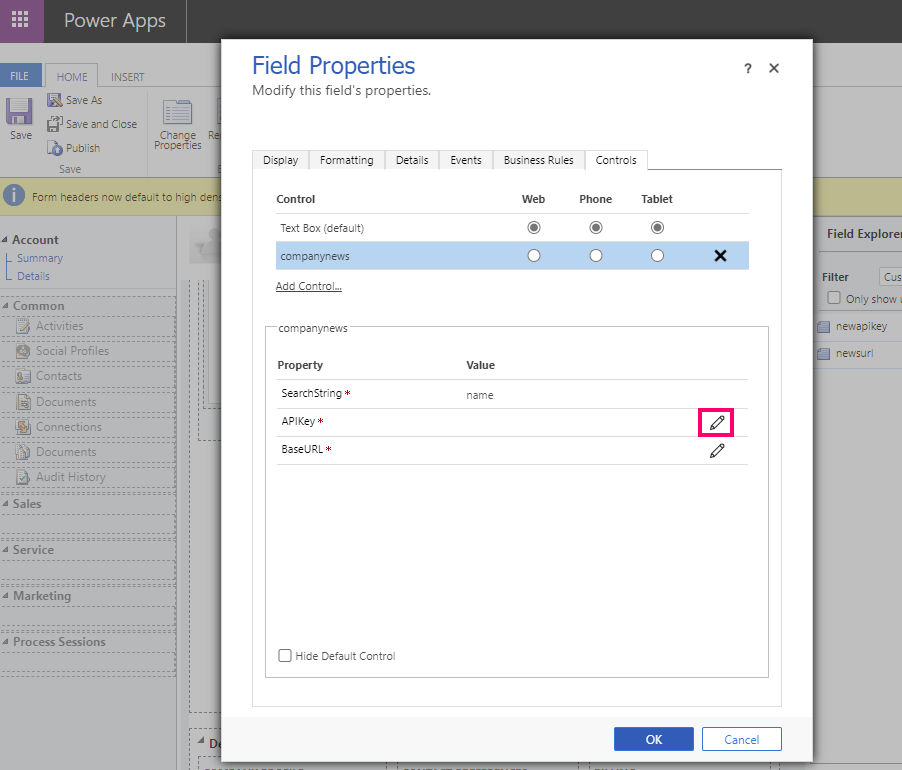
b. From Bind to value on a column the dropdown list, select new_newsapikey (SingleLine.Text), and then select OK.
c. Select Configure property (pencil icon) next to BaseURL.
d. From Bind to value on a column the dropdown list, select new_newsurl (SingleLine.Text), and then select OK.
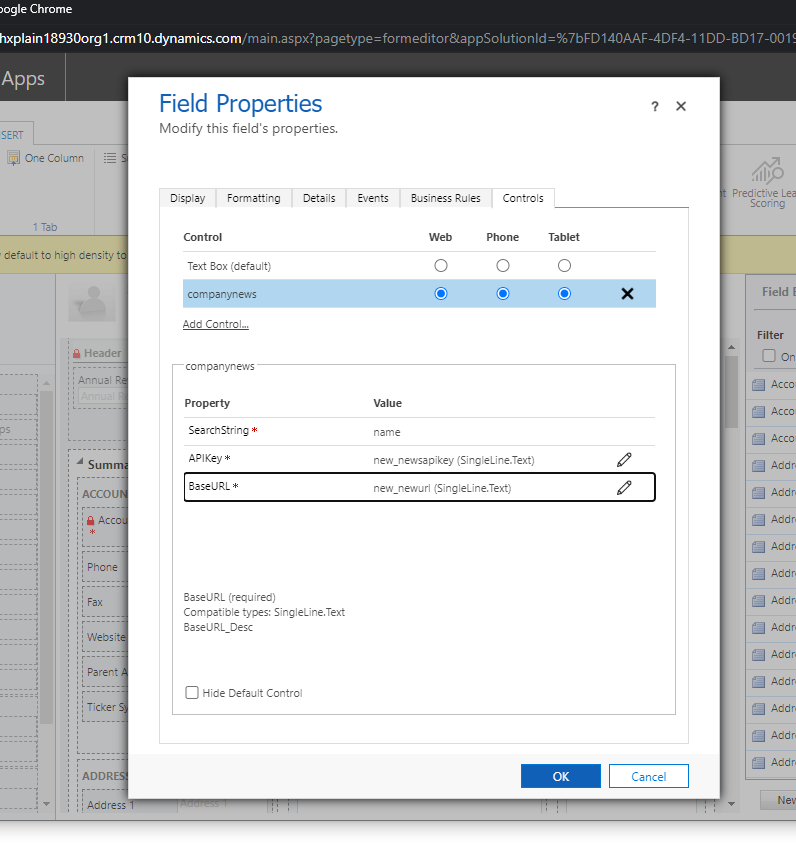
e. On the Column Properties page, select the Web, Phone, and Tablet, client options.
f. On the Column Properties page, select the Display tab, clear the Display label on form option, and then select OK.
To provide API Key and Base URL default values, use business rules. Select Business Rules from the form editor, and then select New Business Rule from the bottom of the right pane.
In the business rule designer, select Condition on the designer canvas, set Column to Account Name and Operator to Contains data, and then select Apply. Then, select the Components tab, drag a Set Column Value action, and provide a column value where Column is newsapikey and the value is the Key you copied from the Bing Search properties. Create another Set Column Value action where Column is newsurl and add the value as the Endpoint you copied from the Bing Search properties. Make sure to append /v7.0/news/search at the end of the news URL. The final URL should look like
https://api.bing.microsoft.com/v7.0/news/search.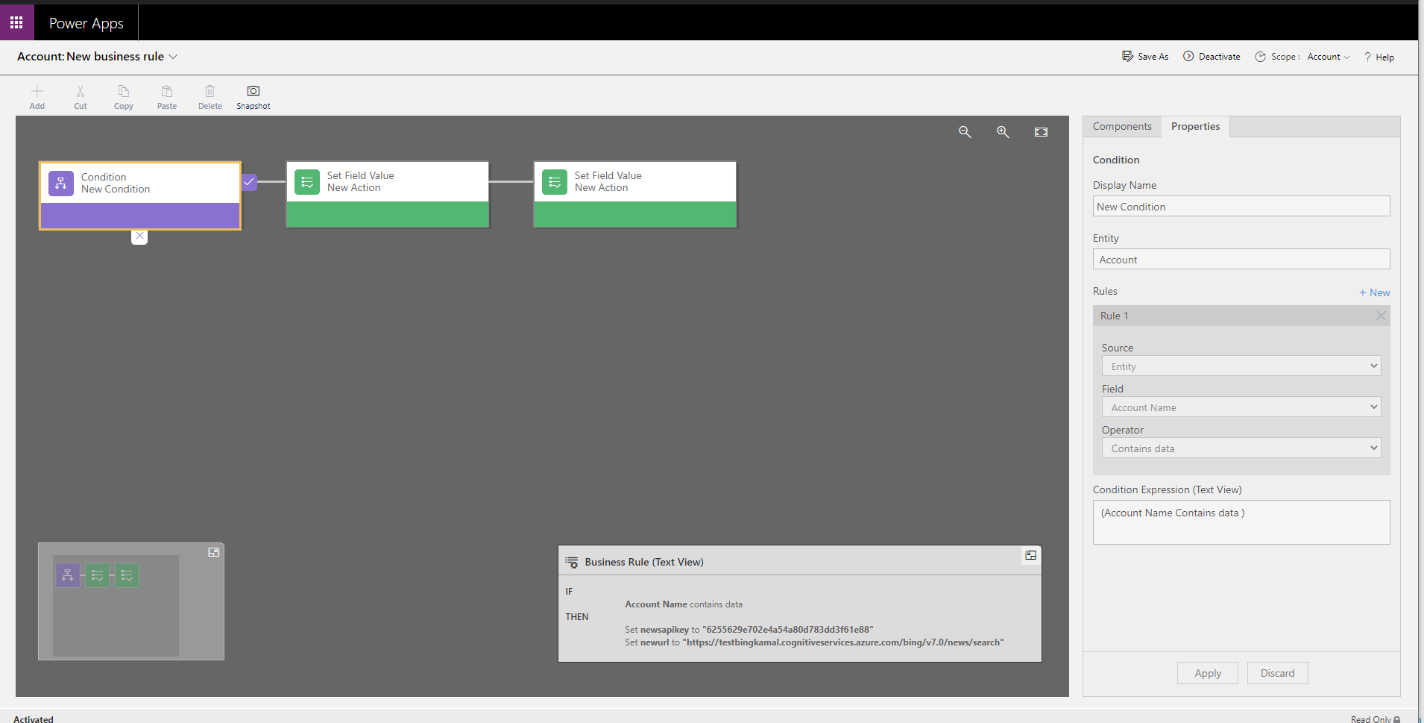
Save and activate the rule. Close the business rule designer.
Make sure you add the newly added columns, newsapikey and newsurl, to the account main form.
Clear Visible by default for the form tab properties where the newsapikey and newsurl columns are added.
In the form designer, select Save and then select Publish.
See also
Use custom controls for model-driven app data visualizations