Note
Access to this page requires authorization. You can try signing in or changing directories.
Access to this page requires authorization. You can try changing directories.
Background
In the present day, AI models are evolving to become more substantial, necessitating an increasing demand for advanced hardware and a cluster of computers for efficient model training. HPC Pack can simplify the model training work for you effectively.
PyTorch Distributed Data Parallel (aka DDP)
To implement distributed model training, it is necessary to utilize a distributed training framework. The choice of framework depends on the one used to build your model. In this article, I'll guide you on how to proceed with PyTorch in HPC Pack.
PyTorch offers several methods for distributed training. Among these, Distributed Data Parallel (DDP) is widely preferred due to its simplicity and minimal code alterations required from your current single-machine training model.
Setup a HPC Pack cluster for AI model training
You can setup a HPC Pack cluster using your local computers or Virtual Machines (VMs) on Azure. Just ensure that these computers are equipped with GPUs (in this article, we'll be using Nvidia GPUs).
Typically, one GPU can have one process for a distributed training work. So, if you have two computers (aka nodes in a computer cluster), each equipped with four GPUs, you can achieve 2 * 4, which equals 8, parallel processes for a single model training. This configuration can potentially reduce the training time to about 1/8th compared to single process training, omitting some overheads of synchronizing data between the processes.
Create a HPC Pack cluster in ARM template
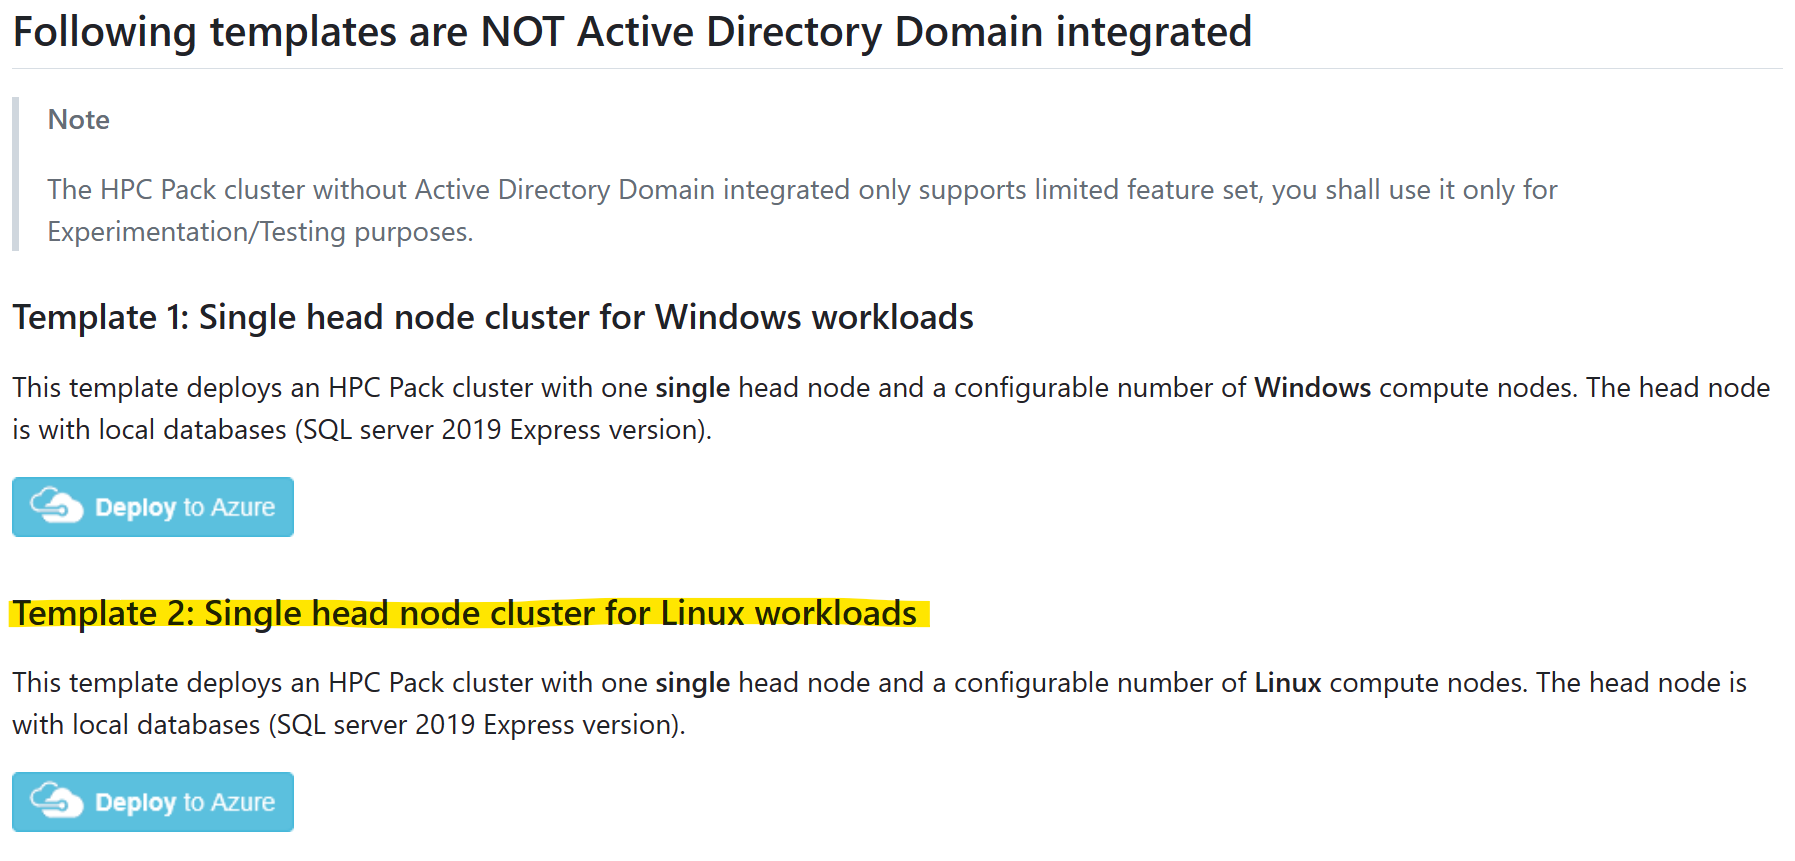
For simplicity, you can start a new HPC Pack cluster on Azure, in ARM templates at GitHub.
Select the template "Single head node cluster for Linux workloads" and click "Deploy to Azure"
And refer to the Pre-Requisites for how to make and upload a certificate for use of HPC Pack.
Please note:
You should select an Compute Node Image marked with "HPC". This indicates that GPU drivers are pre-installed in the image. Failing to do so would necessitate manual GPU driver installation on a compute node at a later stage, which could prove to be a challenging task due to the complexity of GPU driver installation. More about HPC images can be found here.
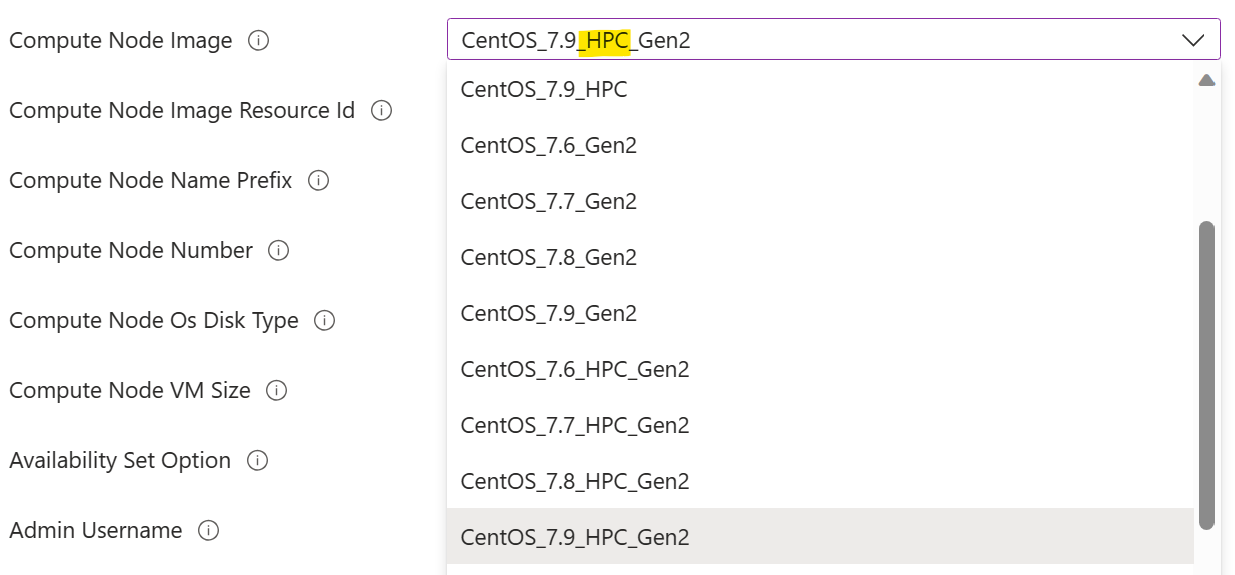
You should select a Compute Node VM Size with GPU. That is N-series VM size.

Install PyTorch on compute nodes
On each compute node, install PyTorch with command
pip3 install torch torchvision torchaudio
Tips: you can leverage HPC Pack "Run Command" to run a command across a set of cluster nodes in parallel.
Setup a shared directory
Before you can run a training job, you need a shared directory that can be accessed by all the compute nodes. The directory is used for training code and data (both input data set and output trained model).
You can setup a SMB share directory on a head node and then mount it on each compute node with cifs, like this:
On a head node, make a directory
appunder%CCP_DATA%\SpoolDir, which is already shared asCcpSpoolDirby HPC Pack by default.On a compute node, mount the
appdirectory likesudo mkdir /app sudo mount -t cifs //<your head node name>/CcpSpoolDir/app /app -o vers=2.1,domain=<hpc admin domain>,username=<hpc admin>,password=<your password>,dir_mode=0777,file_mode=0777NOTE:
- The
passwordoption can be omitted in an interactive shell. You will be prompted for it in that case. - The
dir_modeandfile_modeis set to 0777, so that any Linux user can read/write it. A restricted permission is possible, but more complicated to be configurated.
- The
Optionally, make the mounting permanently by adding a line in
/etc/fstablike//<your head node name>/CcpSpoolDir/app cifs vers=2.1,domain=<hpc admin domain>,username=<hpc admin>,password=<your password>,dir_mode=0777,file_mode=0777 0 2Here the
passwordis required.
Run a training job
Suppose now we have two Linux compute nodes, each with four NVidia v100 GPUs. And we have installed PyTorch on each node. We also have setup a shared directory "app". Now we can start our training work.
Here I'm using a simple toy model built on PyTorch DDP. You can get the code on GitHub.
Download the following files into the shared directory %CCP_DATA%\SpoolDir\app on head node
- neural_network.py
- operations.py
- run_ddp.py
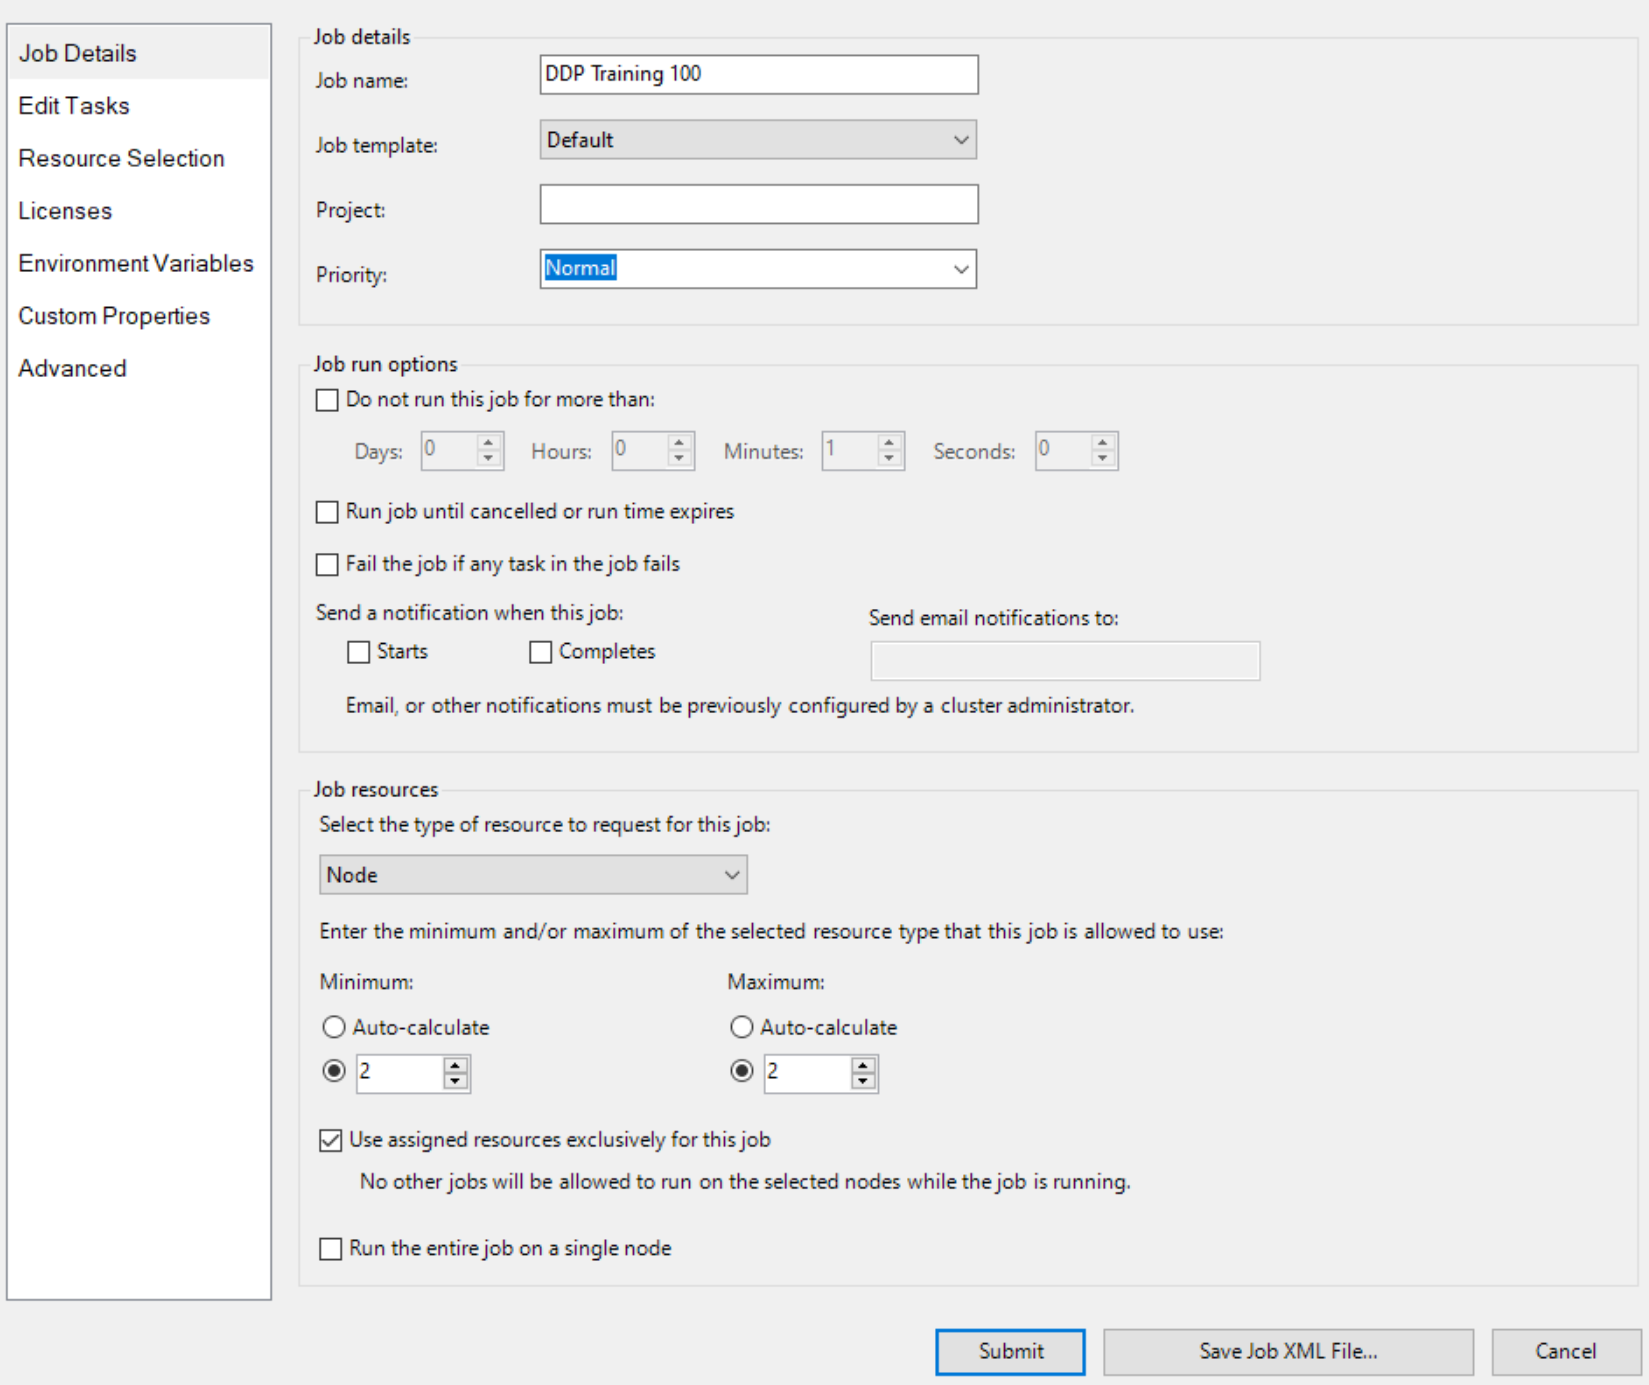
Then create a job with Node as resource unit and two nodes for the job, like
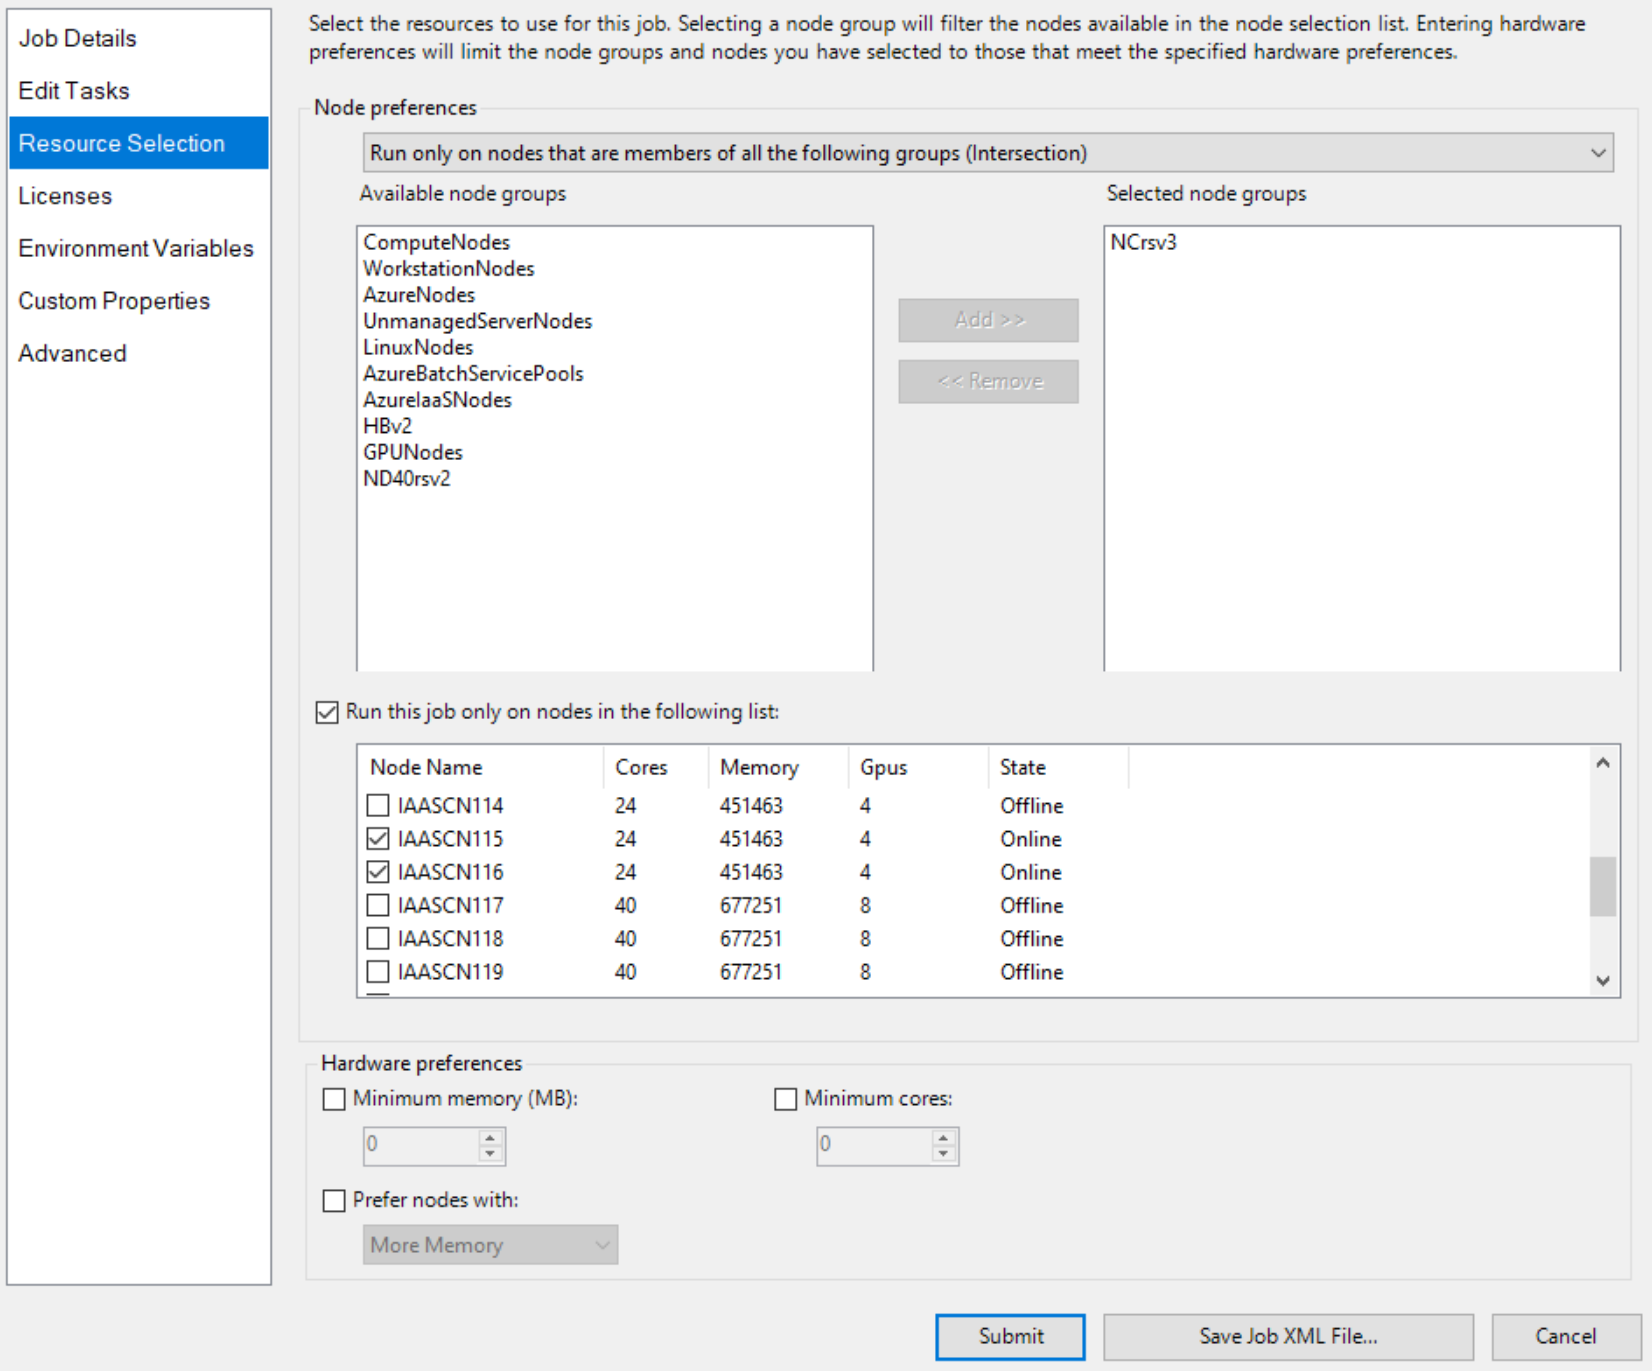
And specify two nodes with GPU explicitly, like
Then add job tasks, like
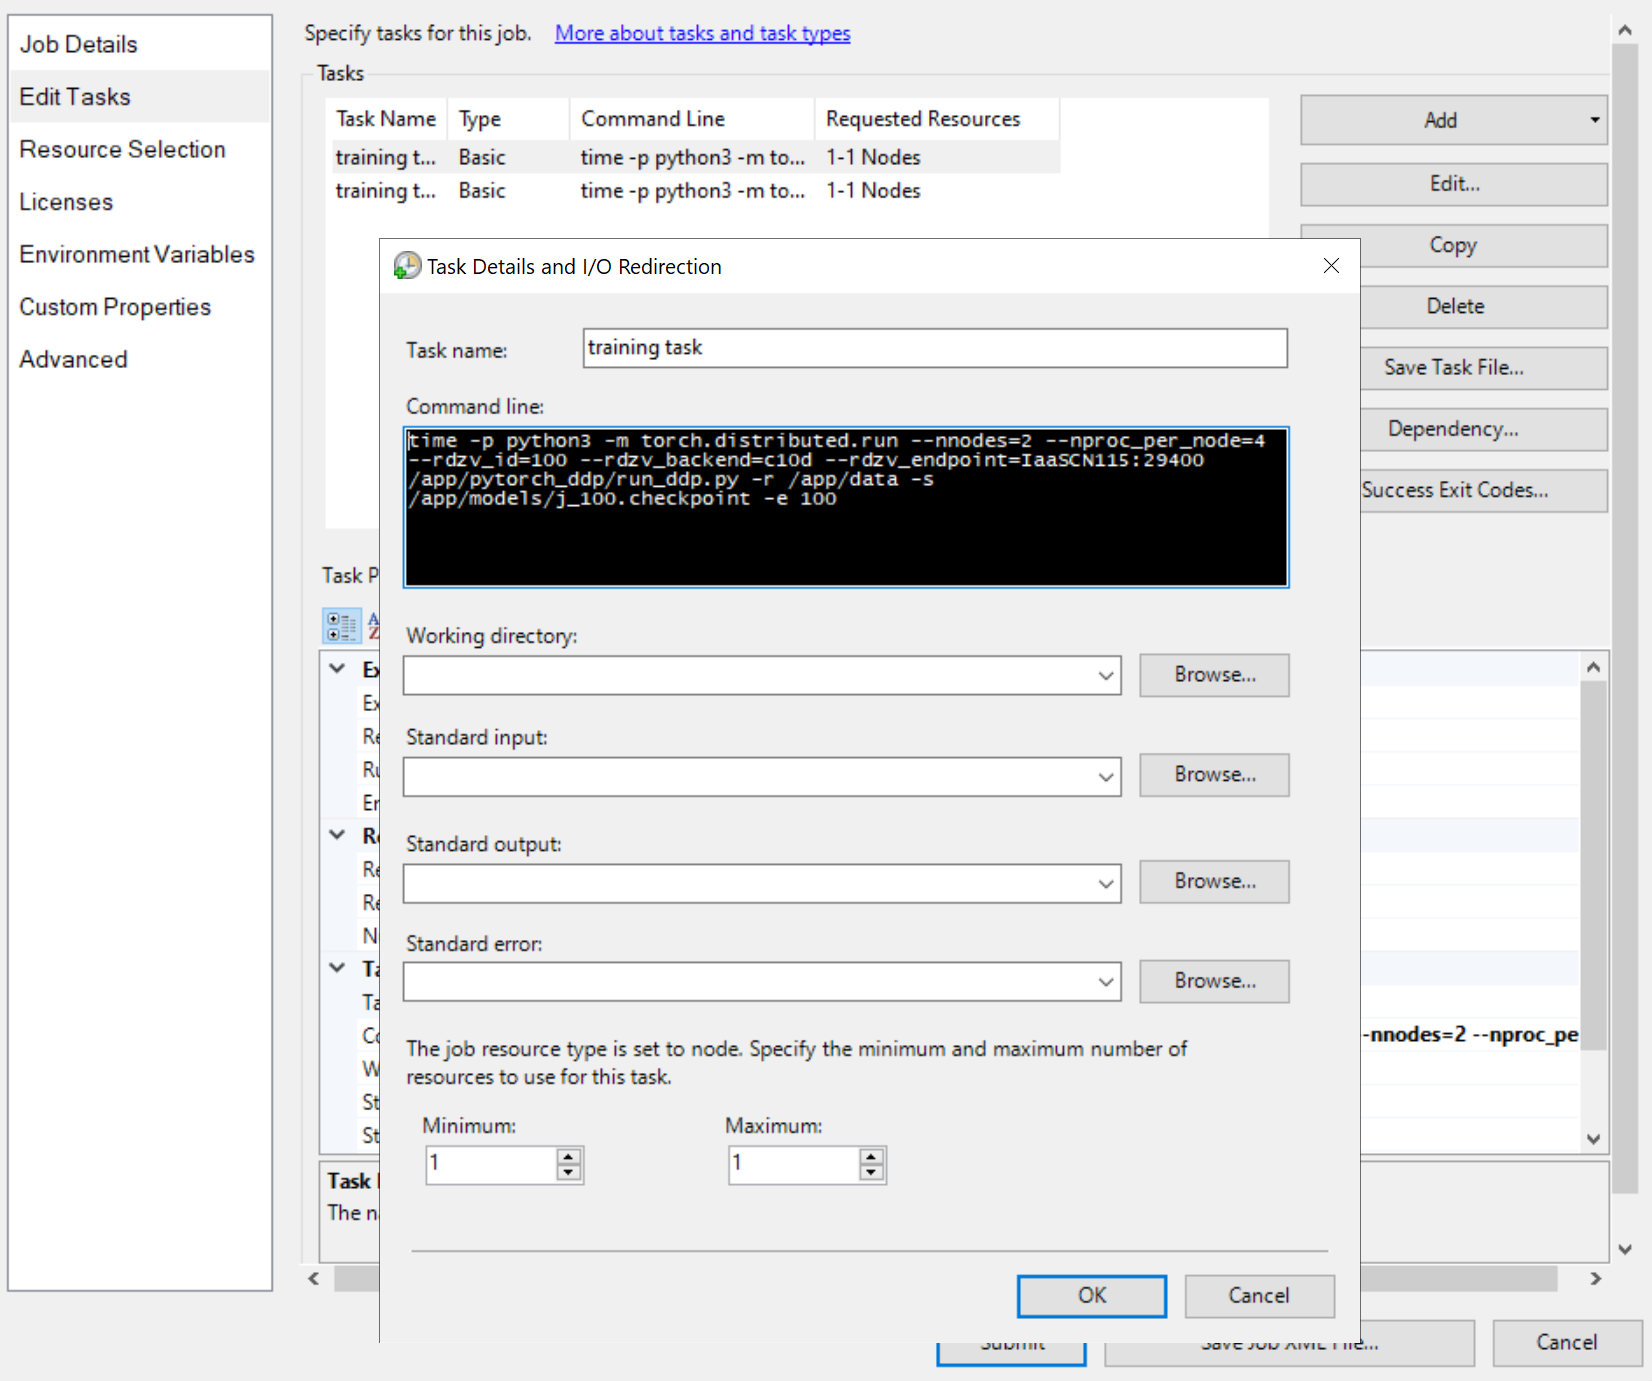
The command lines of the tasks are all the same, like
python3 -m torch.distributed.run --nnodes=<the number of compute nodes> --nproc_per_node=<the processes on each node> --rdzv_id=100 --rdzv_backend=c10d --rdzv_endpoint=<a node name>:29400 /app/run_ddp.py
nnodesspecifies the number of compute nodes for your training job.nproc_per_nodespecifies the number of processes on each compute node. It can not exceed the number of GPUs on a node. That is, one GPU can have one process at most.rdzv_endpointspecifies a name and a port of a node that acts as a Rendezvous. Any node in the training job can work.- "/app/run_ddp.py" is the path to your training code file. Remember that
/appis a shared directory on head node.
Submit the job and wait the result. You can view the running tasks, like
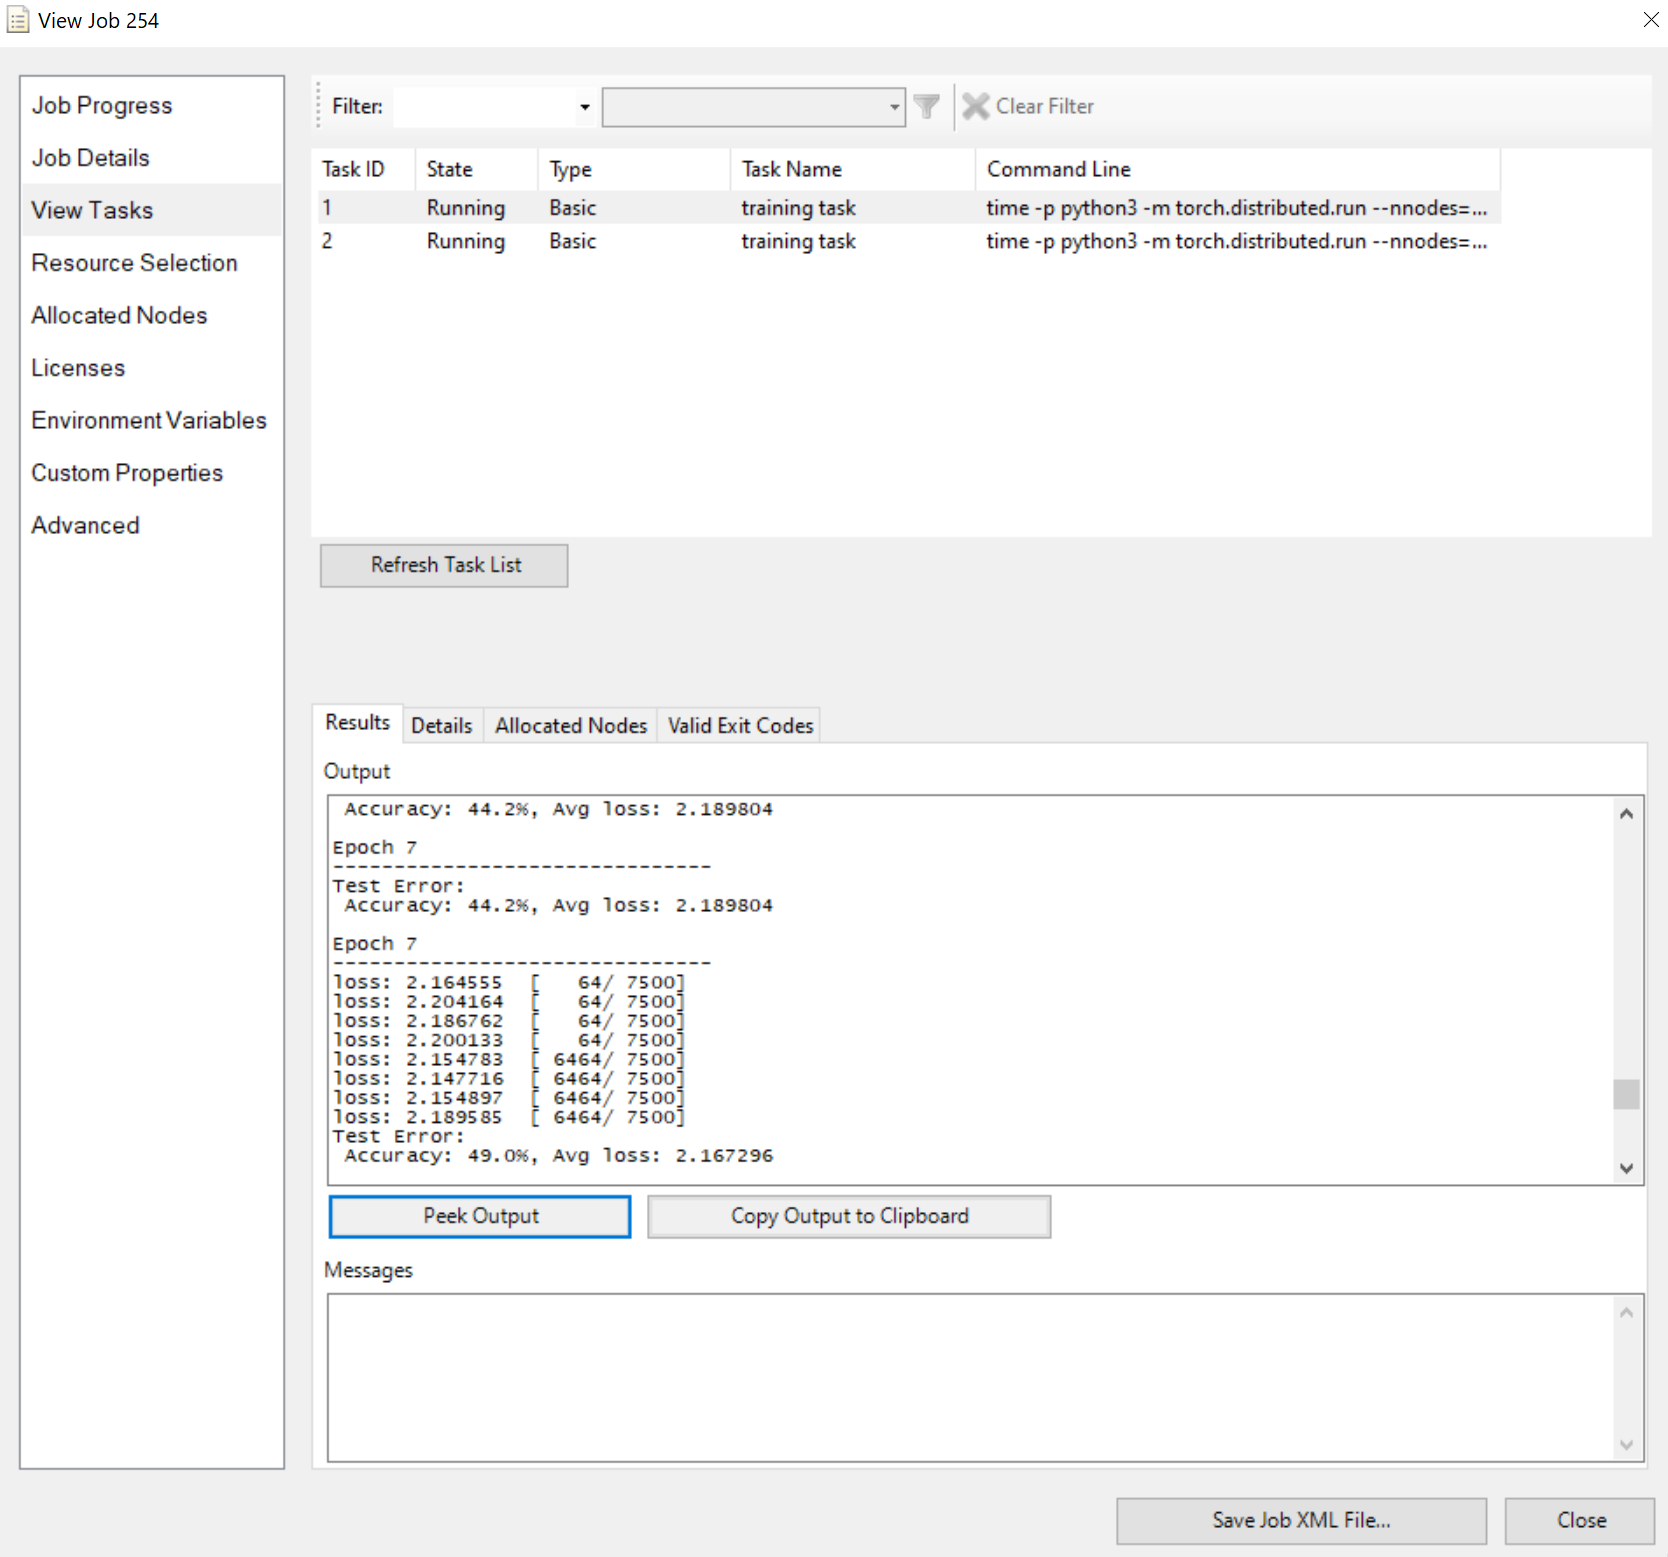
Note that the Results pane shows truncated output if it's too long.
That's all for it. I'm hoping you get the points and HPC Pack can speed up your training work.