Install Azure Percept development tools
Important
Retirement of Azure Percept DK:
Update 22 February 2023: A firmware update for the Percept DK Vision and Audio accessory components (also known as Vision and Audio SOM) is now available here, and will enable the accessory components to continue functioning beyond the retirement date.
The Azure Percept public preview will be evolving to support new edge device platforms and developer experiences. As part of this evolution the Azure Percept DK and Audio Accessory and associated supporting Azure services for the Percept DK will be retired March 30th, 2023.
Effective March 30th, 2023, the Azure Percept DK and Audio Accessory will no longer be supported by any Azure services including Azure Percept Studio, OS updates, containers updates, view web stream, and Custom Vision integration. Microsoft will no longer provide customer success support and any associated supporting services. For more information, please visit the Retirement Notice Blog Post.
The Dev Tools Pack Installer is a one-stop solution that installs and configures all the tools required to develop an advanced intelligent edge solution.
Mandatory tools
- Visual Studio Code
- Python 3.6 or later
- Docker 20.10
- PIP3 21.1
- TensorFlow 2.0
- Azure Machine Learning SDK 1.2
Optional tools
- NVIDIA DeepStream SDK 5 (toolkit for developing solutions for NVIDIA Accelerators)
- Intel OpenVINO Toolkit 2021.3 (toolkit for developing solutions for Intel Accelerators)
- Lobe.ai 0.9
- Streamlit 0.8
- Pytorch 1.4.0 (Windows) or 1.2.0 (Linux)
- Miniconda 4.5
- Chainer 7.7
- Caffe 1.0
- CUDA Toolkit 11.2
- Microsoft Cognitive Toolkit 2.5.1
Known issues
Optional Caffe, NVIDIA DeepStream SDK, and Intel OpenVINO Toolkit installations might fail if Docker isn't running properly. To install these optional tools, ensure that Docker is installed and running before you attempt the installations through the Dev Tools Pack Installer.
Optional CUDA Toolkit installed on the Mac version is 10.0.130. CUDA Toolkit 11 no longer supports development or running applications on macOSity.
Docker minimum requirements
Windows
Windows 10 64-bit: Pro, Enterprise, or Education (build 16299 or later).
Hyper-V and Containers Windows features must be enabled. The following hardware prerequisites are required to successfully run Hyper-V on Windows 10:
- 64-bit processor with Second Level Address Translation (SLAT)
- 4 GB system RAM
- BIOS-level hardware virtualization support must be enabled in the BIOS settings. For more information, see Virtualization.
Note
Docker supports Docker Desktop on Windows based on Microsoft’s support lifecycle for Windows 10 operating system. For more information, see the Windows lifecycle fact sheet.
Learn more about installing Docker Desktop on Windows.
Mac
Mac must be a 2010 or a newer model with the following attributes:
- Intel processor
- Intel’s hardware support for memory management unit (MMU) virtualization, including Extended Page Tables (EPT) and Unrestricted Mode. You can check to see if your machine has this support by running the following command in a terminal:
sysctl kern.hv_support. If your Mac supports the Hypervisor framework, the command printskern.hv_support: 1.
macOS version 10.14 or newer (Mojave, Catalina, or Big Sur). We recommend upgrading to the latest version of macOS. If you experience any issues after upgrading your macOS to version 10.15, you must install the latest version of Docker Desktop to be compatible with this version of macOS.
At least 4 GB of RAM.
Do NOT install VirtualBox prior to version 4.3.30--it is not compatible with Docker Desktop.
The installer is not supported on Apple M1.
Learn more about installing Docker Desktop on Mac.
Launch the installer
Download the Dev Tools Pack Installer for Windows, Linux, or Mac. Launch the installer according to your platform, as described below.
Windows
- Click on Dev-Tools-Pack-Installer to open the installation wizard.
Mac
After downloading, move the Dev-Tools-Pack-Installer.app file to the Applications folder.
Click on Dev-Tools-Pack-Installer.app to open the installation wizard.
If you receive an “unidentified developer” security dialog:
- Go to System Preferences -> Security & Privacy -> General and click Open Anyway next to Dev-Tools-Pack-Installer.app.
- Click the electron icon.
- Click Open in the security dialog.
Linux
When prompted by the browser, click Save to complete the installer download.
Add execution permissions to the .appimage file:
Open a Linux terminal.
Enter the following in the terminal to go to the Downloads folder:
cd ~/Downloads/Make the AppImage executable:
chmod +x Dev-Tools-Pack-Installer.AppImageRun the installer:
./Dev-Tools-Pack-Installer.AppImage
Add execution permissions to the .appimage file:
- Right click on the .appimage file and select Properties.
- Open the Permissions tab.
- Check the box next to Allow executing file as a program.
- Close Properties and open the .appimage file.
Run the installer
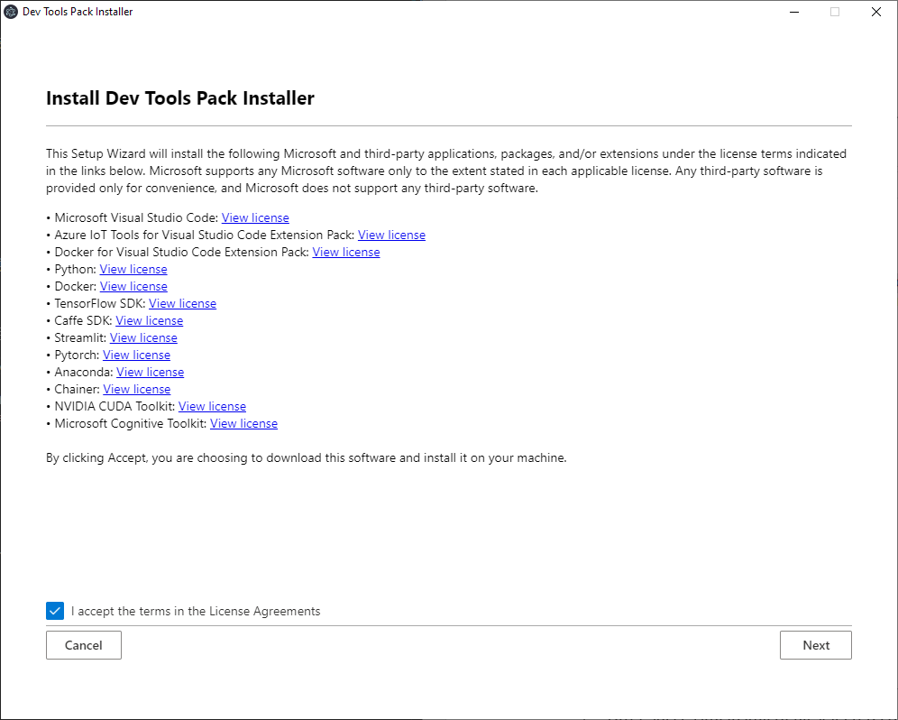
On the Install Dev Tools Pack Installer page, click View license to view the license agreements of each software package included in the installer. If you accept the terms in the license agreements, check the box and click Next.

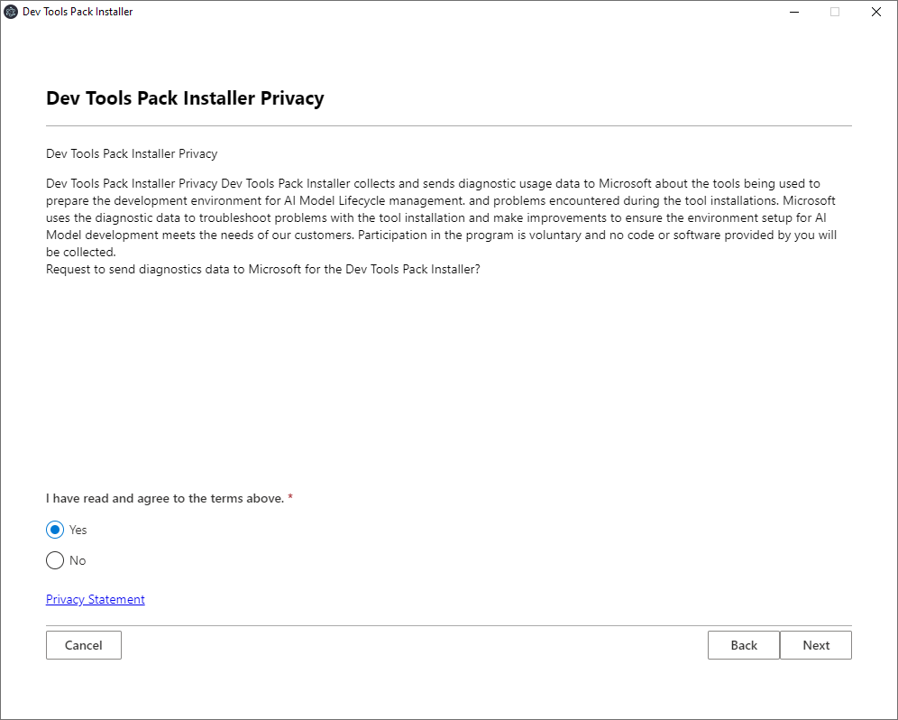
Click on Privacy Statement to review the Microsoft Privacy Statement. If you agree to the privacy statement terms and would like to send diagnostic data to Microsoft, select Yes and click Next. Otherwise, select No and click Next.

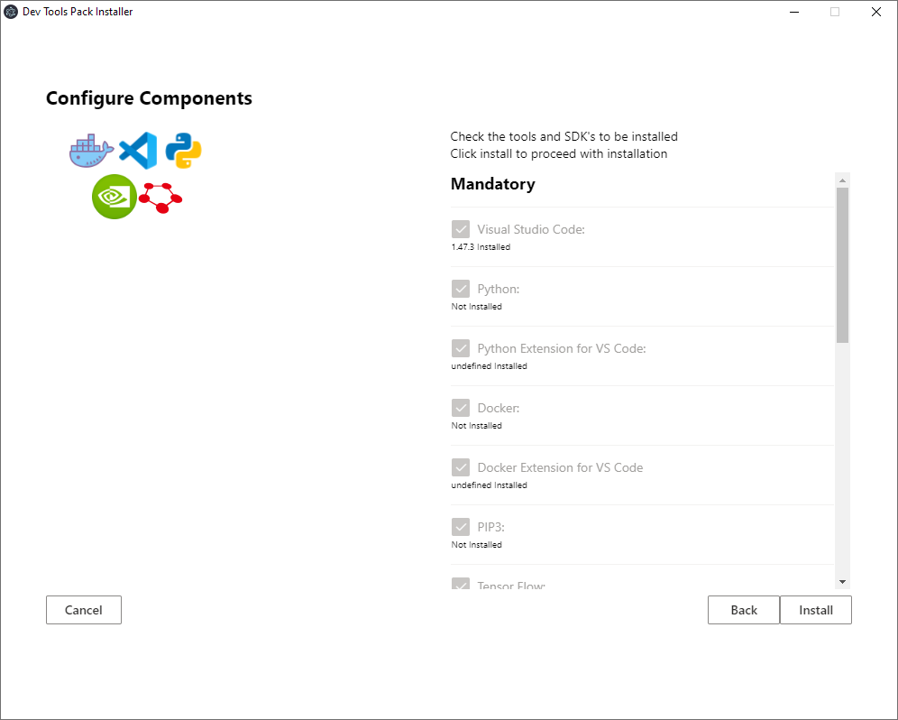
On the Configure Components page, select the optional tools you would like to install (the mandatory tools will install by default).
If you are working with the Azure Percept Audio SoM, which is part of the Azure Percept DK, make sure to install the Intel OpenVino Toolkit and Miniconda3.
Click Install to proceed with the installation.

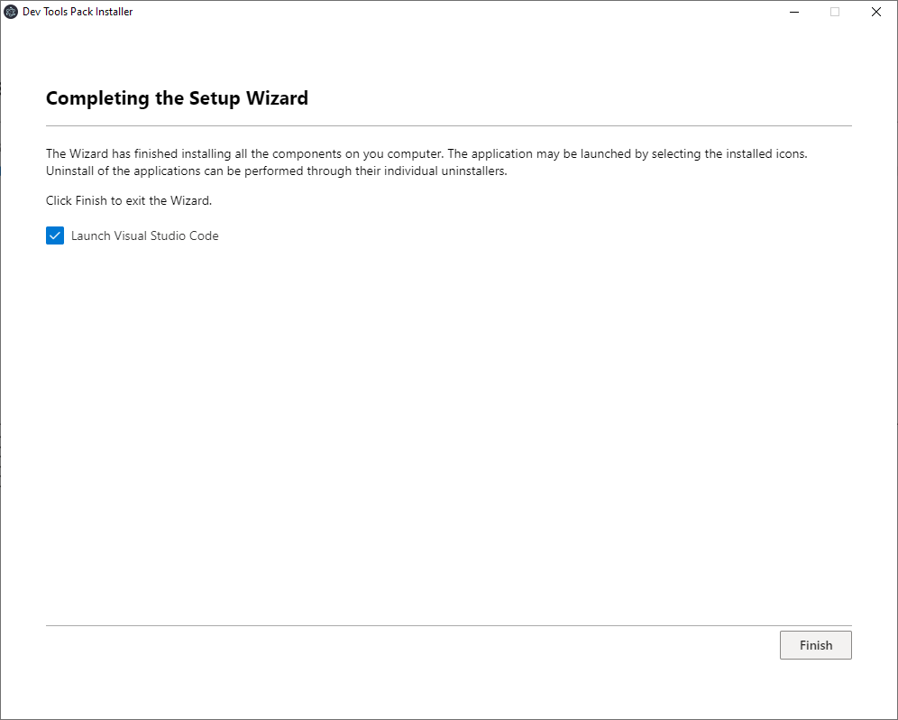
After successful installation of all selected components, the wizard proceeds to the Completing the Setup Wizard page. Click Finish to exit the installer.

Docker status check
If the installer notifies you to verify Docker Desktop is in a good running state, see the following steps:
Windows
Expand system tray hidden icons.

Verify the Docker Desktop icon shows Docker Desktop is Running.

If you do not see the above icon listed in the system tray, launch Docker Desktop from the start menu.
If Docker prompts you to reboot, it's fine to close the installer and relaunch after a reboot has completed and Docker is in a running state. Any successfully installed third-party applications should be detected and will not be automatically reinstalled.
Next steps
Check out the Azure Percept advanced development repository to get started with advanced development for Azure Percept DK.