Connect to Azure Percept DK over Ethernet
Important
Retirement of Azure Percept DK:
Update 22 February 2023: A firmware update for the Percept DK Vision and Audio accessory components (also known as Vision and Audio SOM) is now available here, and will enable the accessory components to continue functioning beyond the retirement date.
The Azure Percept public preview will be evolving to support new edge device platforms and developer experiences. As part of this evolution the Azure Percept DK and Audio Accessory and associated supporting Azure services for the Percept DK will be retired March 30th, 2023.
Effective March 30th, 2023, the Azure Percept DK and Audio Accessory will no longer be supported by any Azure services including Azure Percept Studio, OS updates, containers updates, view web stream, and Custom Vision integration. Microsoft will no longer provide customer success support and any associated supporting services. For more information, please visit the Retirement Notice Blog Post.
In this how-to guide you'll learn how to launch the Azure Percept DK setup experience over an Ethernet connection. It's a companion to the Quick Start: Set up your Azure Percept DK and deploy your first AI model guide. See each option outlined below and choose which one is most appropriate for your environment.
Prerequisites
- An Azure Percept DK
- A Windows, Linux, or OS X based host computer with Wi-Fi or ethernet capability and a web browser
- Network cable
Identify your dev kit's IP address
The key to running the Azure Percept DK setup experience over an Ethernet connection is finding your dev kit's IP address. This article covers three options:
- From your network router
- Via SSH
- Via the Nmap tool
From your network router
The fastest way to identify your dev kits's IP address is to look it up on your network router.
Plug the Ethernet cable into the dev kit and the other end into the router.
Power on your Azure Percept DK.
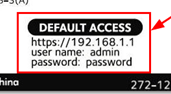
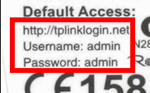
Look for a sticker on the network router specifying access instructions
Here are examples of router stickers
On your computer that is connected to Ethernet or Wi-Fi, open a web browser.
Type the browser address for the router as found on the sticker.
When prompted, enter the name and password for the router as found on the sticker.
Once in the router interface, select My Devices (or something similar, depending on your router).
Find the Azure Percept dev kit in the list of devices
Copy the IP address of the Azure Percept dev kit
Via SSH
It's possible to find your dev kits's IP address by connecting to the dev kit over SSH.
Note
Using the SSH method of identifying your dev kit's IP address requires that you are able to connect to your dev kit's Wi-Fi access point. If this is not possible for you, please use one of the other methods.
Plug the ethernet cable into the dev kit and the other end into the router
Power on your Azure Percept dev kit
Connect to your dev kit over SSH. See Connect to your Azure Percept DK over SSH for detailed instruction on how to connect to your dev kit over SSH.
To list the ethernet local network IP address, type the bellow command in your SSH terminal window:
ip a | grep eth1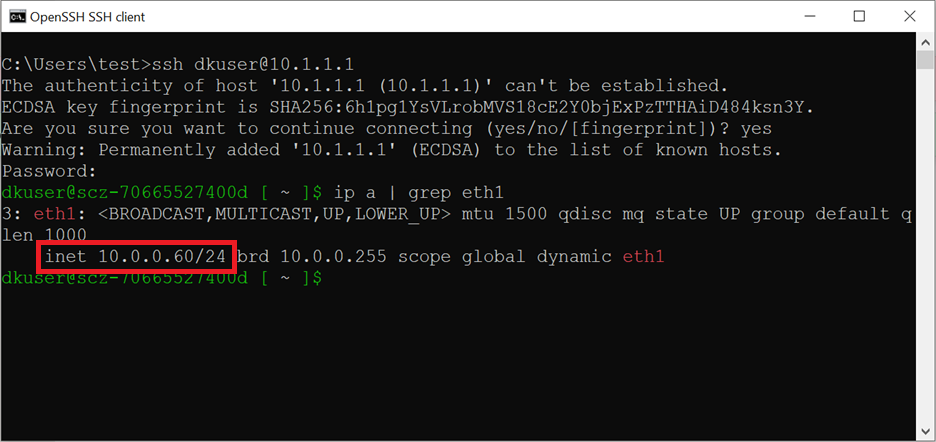
The dev kit's IP address is displayed after ‘inet’. Copy the IP address.
Using the Nmap tool
You can also use free tools found on the Web to identify your dev kit's IP address. In these instructions, we cover a tool called Nmap.
Plug the ethernet cable into the dev kit and the other end into the router.
Power on your Azure Percept dev kit.
On your host computer, download and install the Free Nmap Security Scanner that is needed for your platform (Windows/Mac/Linux).
Obtain your computer’s “Default Gateway” - How to Find Your Default Gateway
Open the Nmap application
Enter your Default Gateway into the Target box and append /24 to the end. Change Profile to Quick scan and select the Scan button.

In the results, find the Azure Percept dev kit in the list of devices – similar to apd-xxxxxxxx
Copy the IP address of the Azure Percept dev kit
Launch the Azure Percept DK setup experience
- Plug the ethernet cable into the dev kit and the other end into the router.
- Power on your Azure Percept dev kit.
- Open a web browser and paste the dev kit's IP address. The setup experience should launch in the browser.