Connect a bot to Facebook
APPLIES TO: SDK v3
Your bot can be connected to both Facebook Messenger and Facebook Workplace, so that it can communicate with users on both platforms. The following tutorial shows how to connect a bot to these two channels.
Note
The Facebook UI may appear slightly different depending on which version you are using.
Connect a bot to Facebook Messenger
To learn more about developing for Facebook Messenger, see the Messenger platform documentation. You may wish to review Facebook's pre-launch guidelines, quick start, and setup guide.
To configure a bot to communicate using Facebook Messenger, enable Facebook Messenger on a Facebook page and then connect the bot.
Copy the Page ID
The bot is accessed through a Facebook Page.
Create a new Facebook Page or go to an existing Page.
Open the Facebook Page's About page and then copy and save the Page ID.
Create a Facebook app
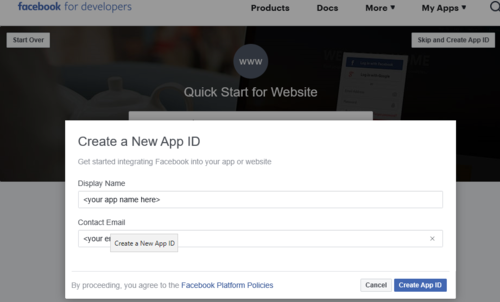
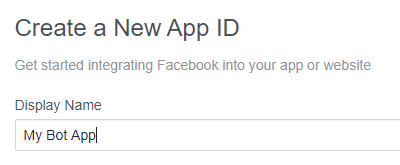
In your browser, navigate to Create a new Facebook App.
Enter the name of your app and click the Create New Facebook App ID button.

In the displayed dialog, enter your email address and click the Create App ID button.
Go through the wizard steps.
Enter the required check information, then click the Skip Quick Start button in the upper right.
In the left pane of the next displayed window, expand Settings and click Basic.
In the right pane, copy and save the App ID and App Secret.

In the left pane, under Settings, click Advanced.
In the right pane, set Allow API Access to App Settings slider to Yes.

In the page bottom right, click the Save Changes button.
Enable messenger
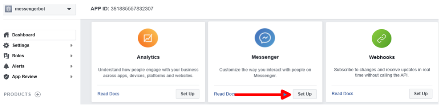
In the left pane, click Dashboard.
In the right pane, scroll down and in the Messenger box, click the Set Up button. The Messenger entry is displayed under the PRODUCTS section in the left pane.
Generate a Page Access Token
In the left pane, under the Messenger entry, click Settings.
In the right pane, scroll down and in the Token Generation section, select the target page.

Click the Edit Permissions button to grant the app pages_messaging in order to generate an access token.
Follow the wizard steps. In the last step accept the default settings and click the Done button. At the end a page access token is generated.
Copy and save the Page Access Token.
Enable webhooks
In order to send messages and other events from your bot to Facebook Messenger, you must enable webhooks integration. At this point, let's leave the Facebook setting steps pending; will come back to them.
In your browser open a new window and navigate to the Azure portal.
In the Resource list, click on the bot resource registration and in the related blade click Channels.
In the right pane, click the Facebook icon.
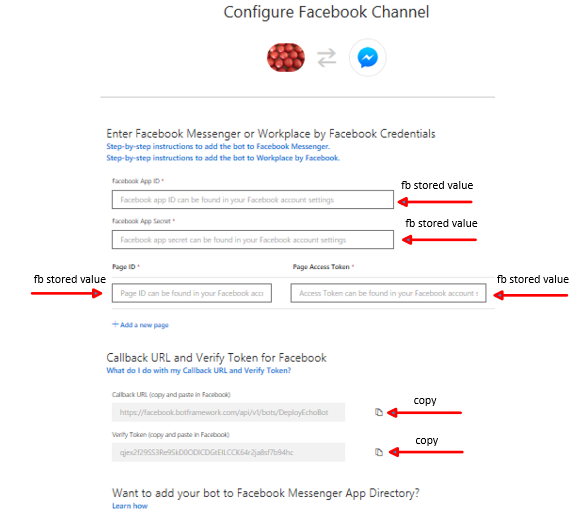
In the wizard enter the Facebook information stored in the previous steps. If the information is correct, at the bottom of the wizard, you should see the callback URL and the verify token. Copy and store them.
Click the Save button.
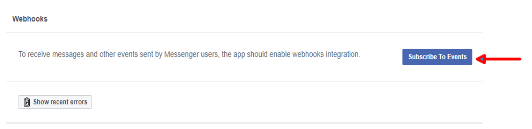
Let's go back to the Facebook settings. In the right pane, scroll down and in the Webhooks section, click the Subscribe To Events button. This is to forward messaging events from Facebook Messenger to the bot.
In the displayed dialog, enter the Callback URL and Verify Token values stored previously. Under Subscription Fields, select message_deliveries, messages, messaging_optins, and messaging_postbacks.
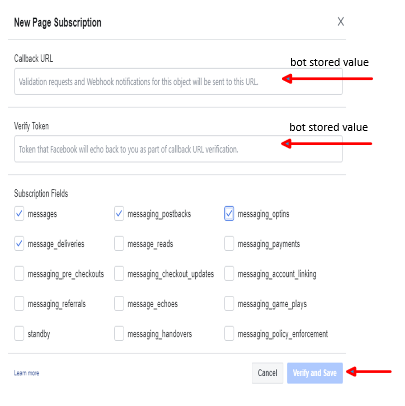
Click the Verify and Save button.
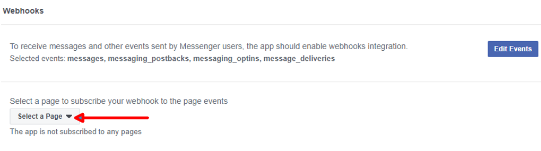
Select the Facebook page to subscribe the webhook. Click the Subscribe button.
Submit for review
Facebook requires a Privacy Policy URL and Terms of Service URL on its basic app settings page. The Code of Conduct page contains third party resource links to help create a privacy policy. The Terms of Use page contains sample terms to help create an appropriate Terms of Service document.
After the bot is finished, Facebook has its own review process for apps that are published to Messenger. The bot will be tested to ensure it is compliant with Facebook's Platform Policies.
Make the App public and publish the Page
Note
Until an app is published, it is in Development Mode. Plugin and API functionality will only work for admins, developers, and testers.
After the review is successful, in the App Dashboard under App Review, set the app to Public. Ensure that the Facebook Page associated with this bot is published. Status appears in Pages settings.
Connect a bot to Facebook Workplace
Note
On December 16, 2019, Workplace by Facebook changed its security model for custom integrations. Prior integrations built using Microsoft Bot Framework v4 need to be updated to use the Bot Framework Facebook adapters per the instructions below prior to February 28, 2020.
Facebook will only consider integrations with limited access to Workplace data (low sensitivity permissions) eligible for continued use until December 31, 2020 if such integrations have completed and passed Security RFI and if the developer reaches out before January 15, 2020 via Direct Support to request continued use of the app.
Bot Framework adapters are available for JavaScript/Node.js and C#/.NET bots.
Facebook Workplace is a business-oriented version of Facebook, which allows employees to easily connect and collaborate. It contains live videos, news feeds, groups, messenger, reactions, search, and trending posts. It also supports:
- Analytics and integrations. A dashboard with analytics, integration, single sign-on, and identity providers that companies use to integrate Workplace with their existing IT systems.
- Multi-company groups. Shared spaces in which employees from different organizations can work together and collaborate.
See the Workplace Help Center to learn more about Facebook Workplace and Workplace Developer Documentation for guidelines about developing for Facebook Workplace.
To use Facebook Workplace with your bot, you must create a Workplace account and a custom integration to connect the bot.
Create a Workplace Premium account
- Submit an application to workplace on behalf of your company.
- Once your application has been approved, you will receive an email inviting you to join. The response may take a while.
- From the e-mail invitation, click Get Started.
- Enter your profile information.
Tip
Set yourself as the system administrator. Remember that only system administrators can create custom integrations.
- Click Preview Profile and verify the information is correct.
- Access Free Trial.
- Create password.
- Click Invite Coworkers to invite employees to sign-in. The employees you invited will become members as soon as they sign. They will go through a similar sign-in process as described in these steps.
Create a custom integration
Create a custom integration for your Workplace following the steps described below. When you create a custom integration, an app with defined permissions and a page of type 'Bot' only visible within your Workplace community are created.
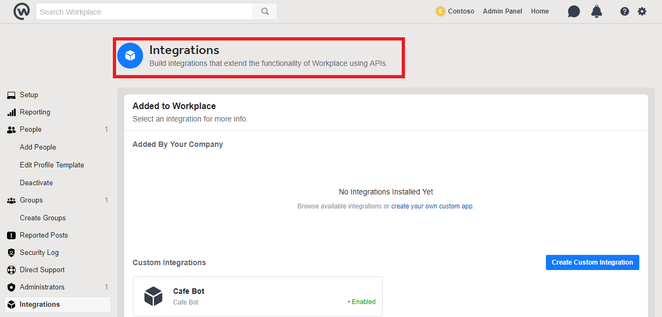
In the Admin Panel, open the Integrations tab.
Click on the Create your own custom App button.
Choose a display name and a profile picture for the app. Such information will be shared with the page of type 'Bot'.
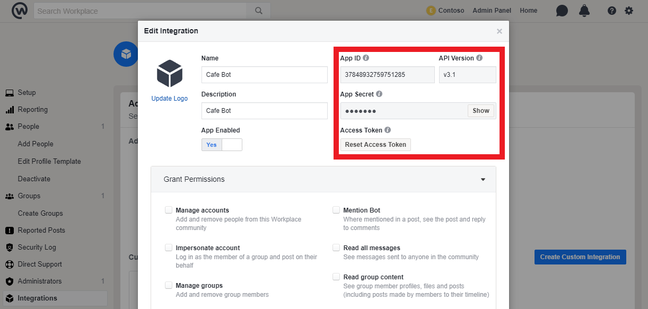
Set the Allow API Access to App Settings to "Yes".
Copy and safely store the App ID, App Secret and App Token that's shown to you.
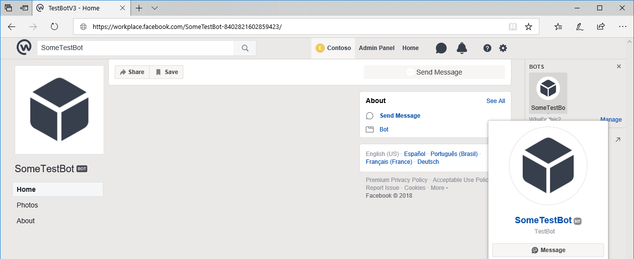
Now you have finished creating a custom integration. You can find the page of type 'Bot' in your Workplace community,as shown below.
Update your bot code with Facebook adapter
Your bot's source code needs to be updated to include an adapter to communicate with Workplace by Facebook. Adapters are available for JavaScript/Node.js and C#/.NET bots.
Provide Facebook credentials
You will need to update appsettings.json of your bot with Facebook App ID, Facebook App Secret and Page Access Token values copied from the Facebook Workplace previously. Instead of a traditional pageID, use the numbers following the integrations name on its About page. Follow these instructions to update your bot source code in JavaScript/Node.js or C#/.NET.
Submit for review
Please refer to the Connect a bot to Facebook Messenger section and Workplace Developer Documentation for details.
Make the App public and publish the Page
Please refer to the Connect a bot to Facebook Messenger section for details.
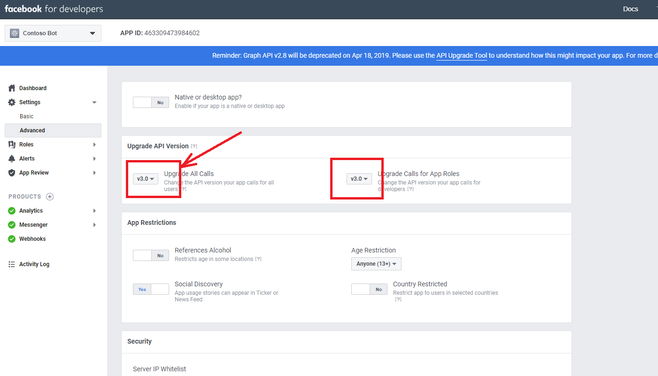
Setting the API version
If you receive a notification from Facebook about deprecation of a certain version of the Graph API, go to Facebook developers page. Navigate to your bot’s App Settings and go to Settings > Advanced > Upgrade API version, then switch Upgrade All Calls to 3.0.
Connect a bot to Facebook using the Facebook adapter
Use the Bot Framework Facebook adapter to connect your bot with Facebook Workplace. To connect to Facebook messenger, you can use the Facebook channel or the Facebook adapter. Facebook adapters are available for JavaScript/Node.js and C#/.NET bots.
In this article you will learn how to connect a bot to Facebook using the adapter. This article will walk you through modifying the EchoBot sample to connect it to Facebook.
The instructions below cover the C# implementation of the Facebook adapter. For instructions on using the JavaScript adapter, part of the BotKit libraries, see the BotKit Facebook documentation.
Prerequisites
- The EchoBot sample code
- A Facebook for Developers account. If you do not have an account, you can create one here.
Create a Facebook app, page and gather credentials
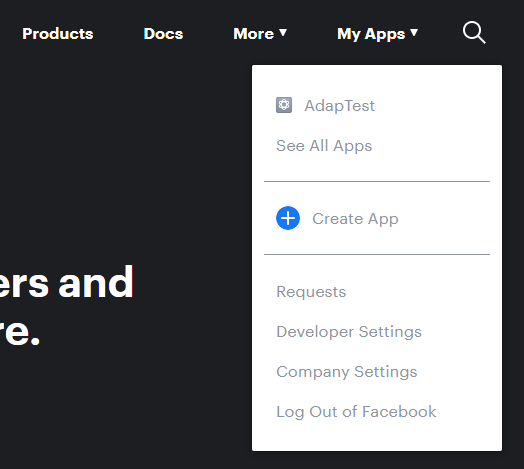
- Log into https://developers.facebook.com. Click My Apps in the main menu and click Create App from the drop down menu.
- In the pop-up window that appears, enter a name for your new app and then click Create App ID.
Set up Messenger and associate a Facebook page
Once your app has been created, you will see a list of products available to set up. Click the Set Up button next to the Messenger product.
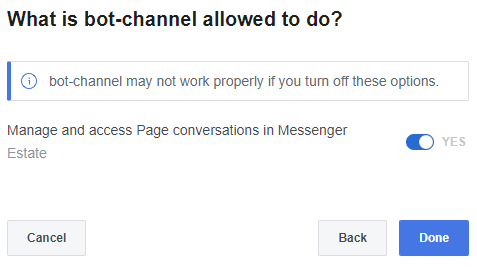
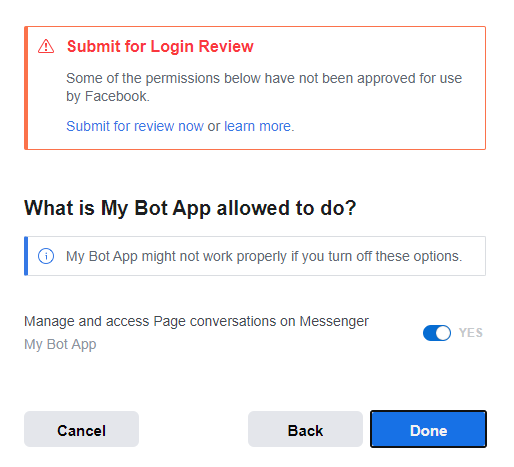
You now need to associate your new app with a Facebook page (if you do not have an existing page you want to use, you can create one by clicking Create New Page in the Access Tokens section). Click Add or Remove Pages, select the page you want to associated with your app and click Next. Leave the Manage and access Page conversations on Messenger setting enabled and click Done.
- Once you have associated your page, click the Generate Token button to generate a page access token. Make a note of this token as you will need it in a later step when configuring your bot application.
Obtain your app secret
In the left hand menu, click Settings and then click Basic to navigate to the basic setting page for your app.
On the basic settings page, click the Show button next to your App Secret. Make a note of this secret as you will need it in a later step when configuring your bot application.
Wiring up the Facebook adapter in your bot
Now that you have your Facebook app, page and credentials, you need to configure your bot application.
Install the Facebook adapter NuGet package
Add the Microsoft.Bot.Builder.Adapters.Facebook NuGet package. For more information on using NuGet, see Install and manage packages in Visual Studio.
Create a Facebook adapter class
Create a new class that inherits from the FacebookAdapter class. This class will act as our adapter for the Facebook channel and include error handling capabilities (similar to the BotFrameworkAdapterWithErrorHandler class already in the sample, used for handling other requests from Azure Bot Service).
public class FacebookAdapterWithErrorHandler : FacebookAdapter
{
    public FacebookAdapterWithErrorHandler(IConfiguration configuration, ILogger<BotFrameworkHttpAdapter> logger)
            : base(configuration, logger)
        {
            OnTurnError = async (turnContext, exception) =>
            {
                // Log any leaked exception from the application.
                logger.LogError(exception, $"[OnTurnError] unhandled error : {exception.Message}");

                // Send a message to the user
                await turnContext.SendActivityAsync("The bot encountered an error or bug.");
                await turnContext.SendActivityAsync("To continue to run this bot, please fix the bot source code.");

                // Send a trace activity, which will be displayed in the Bot Framework Emulator
                await turnContext.TraceActivityAsync("OnTurnError Trace", exception.Message, "https://www.botframework.com/schemas/error", "TurnError");
            };
        }
}
Create a new controller for handling Facebook requests
Create a new controller which will handle requests from Facebook, on a new endpoing 'api/facebook' instead of the default 'api/messages' used for requests from Azure Bot Service Channels. By adding an additional endpoint to your bot, you can accept requests from Bot Service channels, as well as from Facebook, using the same bot.
[Route("api/facebook")]
[ApiController]
public class FacebookController : ControllerBase
{
    private readonly FacebookAdapter _adapter;
    private readonly IBot _bot;

    public FacebookController(FacebookAdapter adapter, IBot bot)
    {
        _adapter = adapter;
        _bot = bot;
    }

    [HttpPost]
    [HttpGet]
    public async Task PostAsync()
    {
        // Delegate the processing of the HTTP POST to the adapter.
        // The adapter will invoke the bot.
        await _adapter.ProcessAsync(Request, Response, _bot);
    }
}
Inject the Facebook adapter in your bot startup.cs
Add the following line to the ConfigureServices method within your startup.cs file. This will register your Facebook adapter and make it available for your new controller class. The configuration settings you added in the previous step will be automatically used by the adapter.
services.AddSingleton<FacebookAdapter, FacebookAdapterWithErrorHandler>();
Once added, your ConfigureServices method shold look like this.
public void ConfigureServices(IServiceCollection services)
{
    services.AddMvc().SetCompatibilityVersion(CompatibilityVersion.Version_2_1);

    // Create the default Bot Framework Adapter (used for Azure Bot Service channels and emulator).
    services.AddSingleton<IBotFrameworkHttpAdapter, BotFrameworkAdapterWithErrorHandler>();

    // Create the Facebook Adapter
    services.AddSingleton<FacebookAdapter, FacebookAdapterWithErrorHandler>();

    // Create the bot as a transient. In this case the ASP Controller is expecting an IBot.
    services.AddTransient<IBot, EchoBot>();
}
Obtain a URL for your bot
Now that you have wired up the adapter in your bot project, you need to provide to Facebook the correct endpoint for your application, so that your bot will receive messages. You also need this URL to complete configuration of your bot application.
To complete this step, deploy your bot to Azure and make a note of the URL of your deployed bot.
Note
If you are not ready to deploy your bot to Azure, or wish to debug your bot when using the Facebook adapter, you can use a tool such as ngrok (which you will likely already have installed if you have used the Bot Framework emulator previously) to tunnel through to your bot running locally and provide you with a publicly accessible URL for this.
If you wish create an ngrok tunnel and obtain a URL to your bot, use the following command in a terminal window (this assumes your local bot is running on port 3978, alter the port numbers in the command if your bot is not).
ngrok.exe http 3978 -host-header="localhost:3978"
Add Facebook app settings to your bot's configuration file
Add the settings shown below to your appSettings.json file in your bot project. You populate FacebookAppSecret and FacebookAccessToken using the values you gathered when creating and configuring your Facebook App. FacebookVerifyToken should be a random string that you create and will be used to ensure your bot's endpoint is authenitic when called by Facebook.
  "FacebookVerifyToken": "",
  "FacebookAppSecret": "",
  "FacebookAccessToken": ""
Once you have populated the settings above, you should redeploy (or restart if running locally with ngrok) your bot.
Complete configuration of your Facebook app
The final step is to configure your new Facebook app's Messenger endpoint, to ensure your bot receives messages.
Within the dashboard for your app, click Messenger in the left hand menu and then click Settings.
In the Webhooks section click Add Callback URL.
In the Callback URL text box enter your bot's URL, plus the
api/facebookendpoint you specified in your newly created controller. For example,https://yourboturl.com/api/facebook. In the Verify Token text box enter the verify token you created earlier and used in your bot application's appSettings.json file.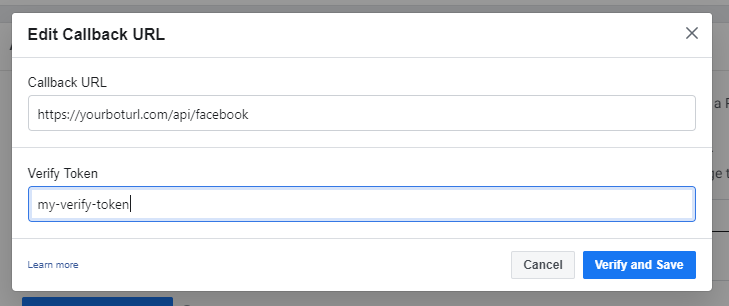
Click Verify and Save. Ensure you bot is running, as Facebook will make a request to your application's endpoint and verify it using your Verify Token.
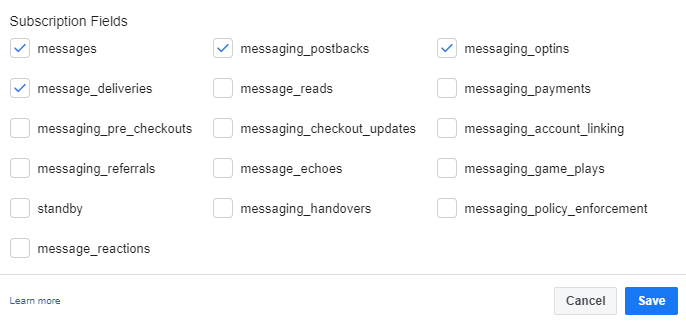
Once your callback URL has been verified, click the Add Subscriptions button that is now shown. In the pop-up window, select the following subscriptions and click Save.
- messages
- messaging_postbacks
- messaging_optins
- messaging_deliveries
Test your bot with adapter in Facebook
You can now test whether your bot is connected to Facebook correctly by sending a message via the Facebook Page you associated with your new Facebook app.
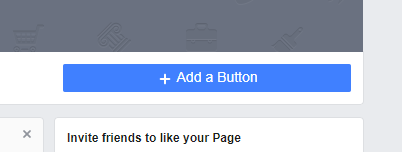
Navigate to your Facebook Page.
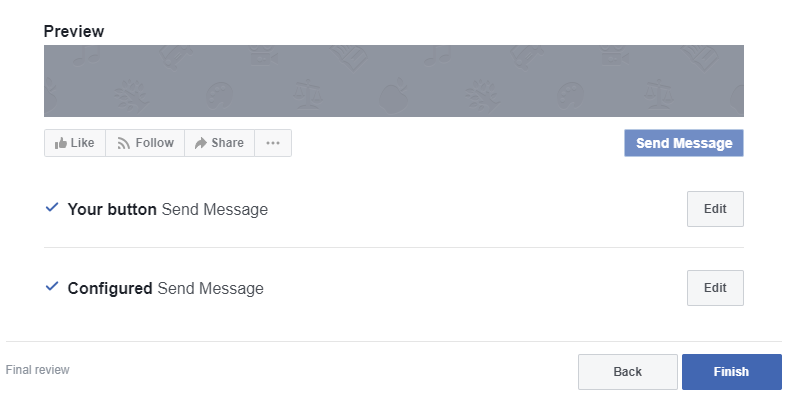
Click Add a Button button.
Select Contact You and Send Message and click Next.
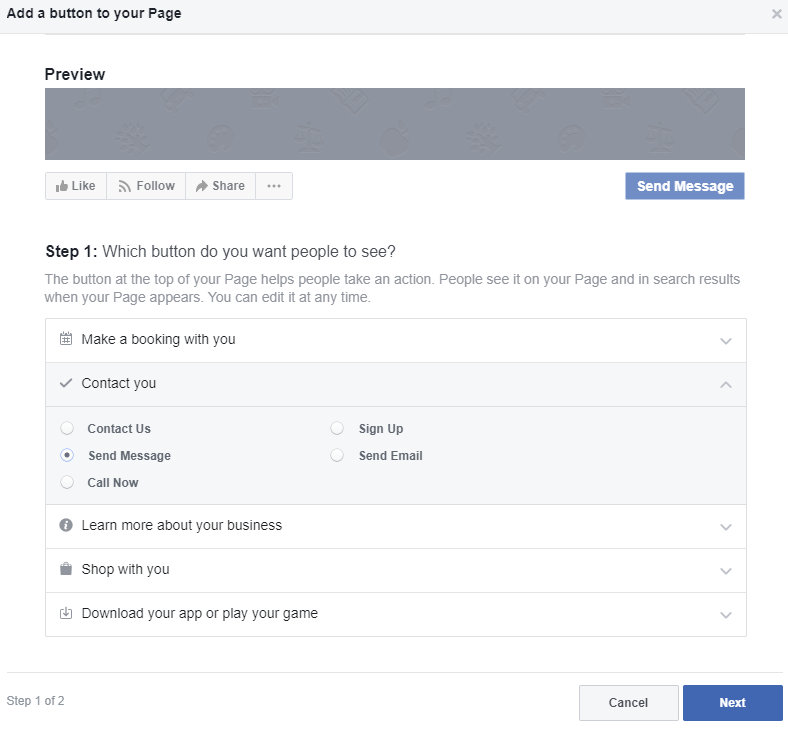
When asked Where would you like this button to send people to? select Messenger and click Finish.
Hover over the new Send Message button that is now shown on your Facebook Page and click Test Button from the pop-up menu. This will start a new conversation with your app via Facebook Messenger, which you can use to test messaging your bot. Once the message is received by your bot, it will send a message back to you, echoing the text from your message.
You can also test this feature using the sample bot for the Facebook adapter by populating the appSettings.json file with the same values described in the steps above.
See also
- Sample code. Use the Facebook-events sample bot to explore the bot communication with Facebook Messenger.