Configure storage accounts for Cloudyn
You can save Cloudyn reports in the Cloudyn portal, Azure storage, or AWS storage buckets. Saving your reports to the Cloudyn portal is free of charge. However, saving your reports to your cloud service provider's storage is optional and incurs additional cost. This article helps you configure Azure storage accounts and Amazon Web Services (AWS) storage buckets to store your reports.
Note
Cloudyn was deprecated on June 30, 2021 and is no longer available.
Customers can use Azure Cost Management to view, analyze and optimize their cloud costs.
Prerequisites
You must have either an Azure storage account or an Amazon storage bucket.
If you don't have an Azure storage account, you need to create one. For more information about creating an Azure storage account, see Create a storage account.
If you don't have an AWS simple storage service (S3) bucket, you need to create one. For more information about creating an S3 bucket, see Create a Bucket.
Configure your Azure storage account
Configuring you Azure storage for use by Cloudyn is straightforward. Gather details about the storage account and copy them in the Cloudyn portal.
Sign in to the Azure portal at https://portal.azure.com.
Click All Services, select Storage accounts, scroll to the storage account that you want to use, and then select the account.
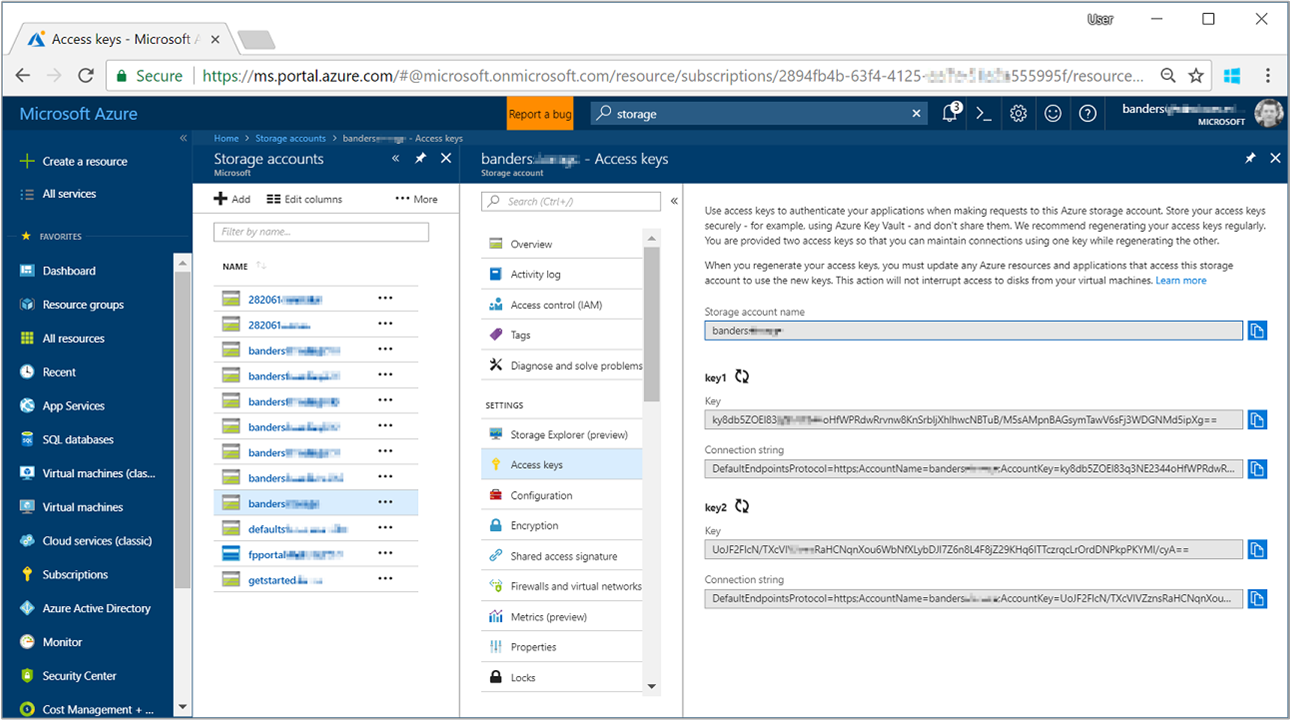
On your storage account page under Settings, click Access Keys.
Copy your Storage account name and Connection string under key1.
Open the Cloudyn portal from the Azure portal or navigate to https://azure.cloudyn.com and sign in.
Click the cog symbol and then select Reports Storage Management.
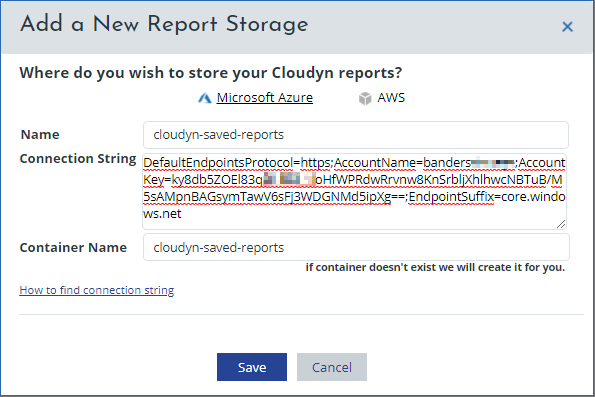
Click Add new + and ensure that Microsoft Azure is selected. Paste your Azure storage account name in the Name area. Paste your connection string in the corresponding area. Enter a container name and then click Save.
Your new Azure report storage entry appears in the storage account list.

You can now save reports to Azure storage. In any report, click Actions and then select Schedule report. Name the report and then either add your own URL or use the automatically created URL. Select Save to storage and then select the storage account. Enter a prefix that gets appended to the report file name. Select either CSV or JSON file format and then save the report.
Configure an AWS storage bucket
The Cloudyn uses existing AWS credentials: User or Role, to save the reports to your bucket. To test the access, Cloudyn tries to save a small text file to the bucket with the file name check-bucket-permission.txt.
You provide the Cloudyn role or user with the PutObject permission to your bucket. Then, use an existing bucket or create a new one to save reports. Finally, decide how to manage the storage class, set lifecycle rules, or remove any unnecessary files.
Assign permissions to your AWS user or role
When you create a new policy, you provide the exact permissions needed to save a report to a S3 bucket.
Sign in to the AWS console and select Services.
Select IAM from the list of services.
Select Policies on the left side of the console and then click Create Policy.
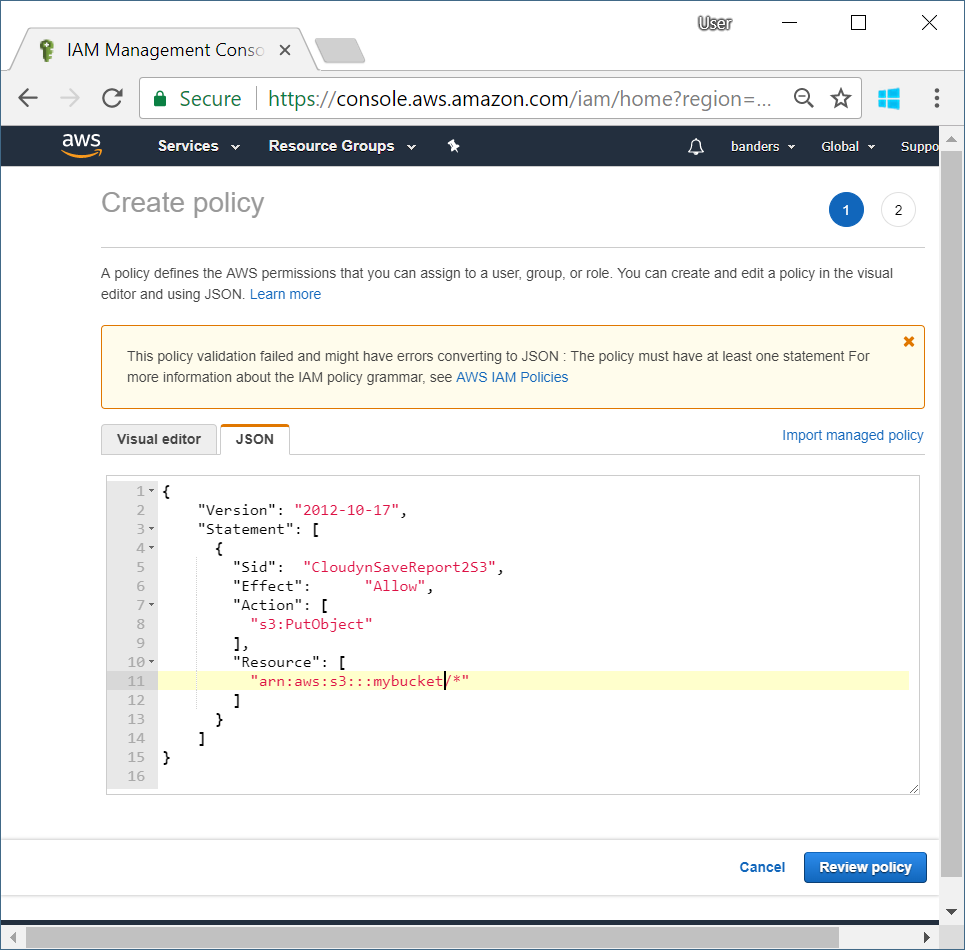
Click the JSON tab.
The following policy allows you to save a report to a S3 bucket. Copy and paste the following policy example to the JSON tab. Replace <bucketname> with your bucket name.
{
 "Version": "2012-10-17",
 "Statement": [
   {
     "Sid":  "CloudynSaveReport2S3",
     "Effect":      "Allow",
     "Action": [
       "s3:PutObject"
     ],
     "Resource": [
       "arn:aws:s3:::<bucketname>/*"
     ]
   }
 ]
}
Click Review policy.
On the Review policy page, type a name for your policy. For example, CloudynSaveReport2S3.
Click Create policy.
Attach the policy to a Cloudyn role or user in your account
To attach the new policy, you open the AWS console and edit the Cloudyn role or user.
- Sign in to the AWS console and select Services, then select IAM from the list of services.
- Select either Roles or Users from the left side of the console.
For roles:
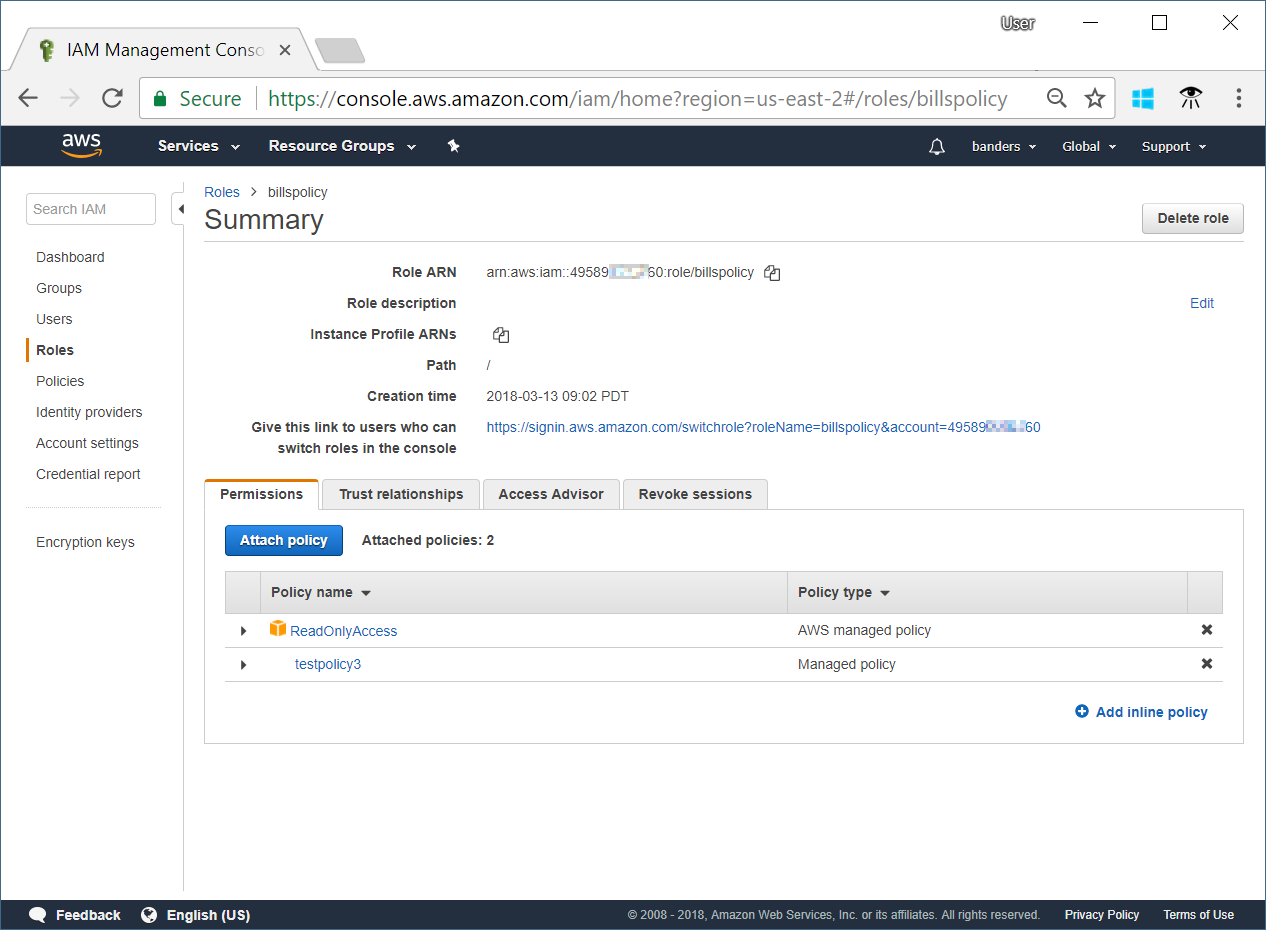
- Click your Cloudyn role name.
- On the Permissions tab, click Attach Policy.
- Search for the policy that you created and select it, then click Attach Policy.
For users:
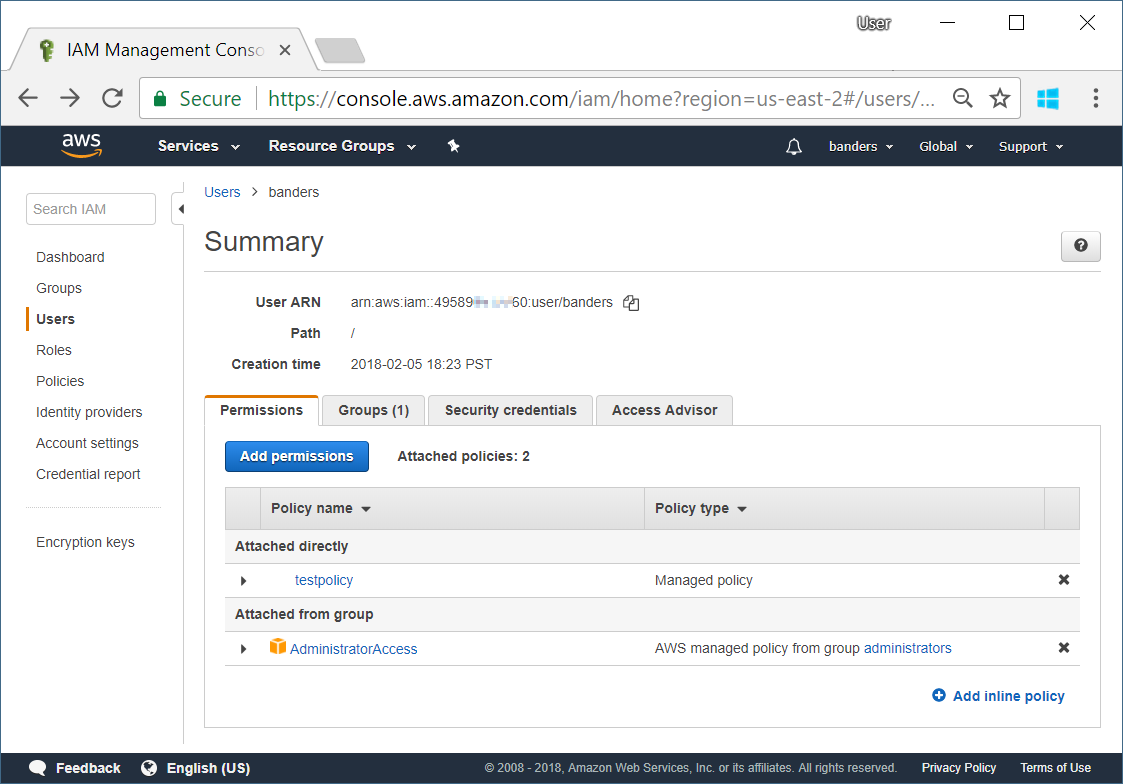
- Select the Cloudyn User.
- On the Permissions tab, click Add permissions.
- In the Grant Permission section, select Attach existing policies directly.
- Search for the policy that you created and select it, then click Next: Review.
- On the Add permissions to role name page, click Add permissions.
Optional: Set permission with bucket policy
You can also set permission to create reports on your S3 bucket using a bucket policy. In the classic S3 view:
Create or select an existing bucket.
Select the Permissions tab and then click Bucket policy.
Copy and paste the following policy sample. Replace <bucket_name> and <Cloudyn_principle> with the ARN of your bucket. Replace the ARN of either the role or user used by Cloudyn.
{
"Id": "Policy1485775646248",
"Version": "2012-10-17",
"Statement": [
 {
   "Sid": "SaveReport2S3",
   "Action": [
     "s3:PutObject"
   ],
   "Effect": "Allow",
   "Resource": "<bucket_name>/*",
   "Principal": {
     "AWS": [
       "<Cloudyn_principle>"
     ]
   }
 }
]
}
In the Bucket policy editor, click Save.
Add AWS report storage to Cloudyn
Open the Cloudyn portal from the Azure portal or navigate to https://azure.cloudyn.com and sign in.
Click the cog symbol and then select Reports Storage Management.
Click Add new + and ensure that AWS is selected.
Select an account and storage bucket. The name of the AWS storage bucket is automatically filled-in.
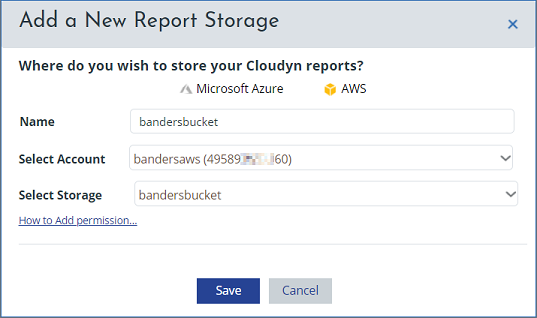
Click Save and then click Ok.
Your new AWS report storage entry appears in the storage account list.

You can now save reports to Azure storage. In any report, click Actions and then select Schedule report. Name the report and then either add your own URL or use the automatically created URL. Select Save to storage and then select the storage account. Enter a prefix that gets appended to the report file name. Select either CSV or JSON file format and then save the report.
Next steps
- Review Understanding Cloudyn reports to learn about the basic structure and functions of Cloudyn reports.