Add and update a work item
TFS 2017 | TFS 2015 | TFS 2013
You add work items to plan and manage your project. Different types of work items track different types of work—such as user stories or product backlog items, tasks, bugs, or issues. Use work items to describe the work to be done, assign work, track status, and coordinate efforts within your team.
Note
This article shows how to add any type of work item. However, the recommended tool for adding backlog or portfolio items—such as, user stories, product backlog items, features, or epics— is to use the backlog or Kanban board to add new items. To learn more, see Create your backlog, Define features and epics and Start using your Kanban board. To create test cases and link them to user stories, see Add, run, and update inline tests and Create test plans and test suites.
For other clients that you can use to add and update work items, see Best tools for adding, updating, and linking work items.
- You must connect to a project. If you don't have a project yet, create one.
- You must be added to a project. To get added, Add users to a project or team.
- To view or modify work items, you must have your View work items in this node and Edit work items in this node permissions set to Allow. By default, the Contributors group has this permission set. To learn more, see Set permissions and access for work tracking.
- To add new tags to add to work items, you must have Basic access or higher and have the project-level Create new tag definition permissions set to Allow. By default, the Contributors group has this permission set. Even if the permission is explicitly set for a Stakeholder, they won't have permission to add new tags, as they are prohibited through their access level. To learn more, see Stakeholder access quick reference.
- All project members, even those who belong to the Readers group, can email work items.
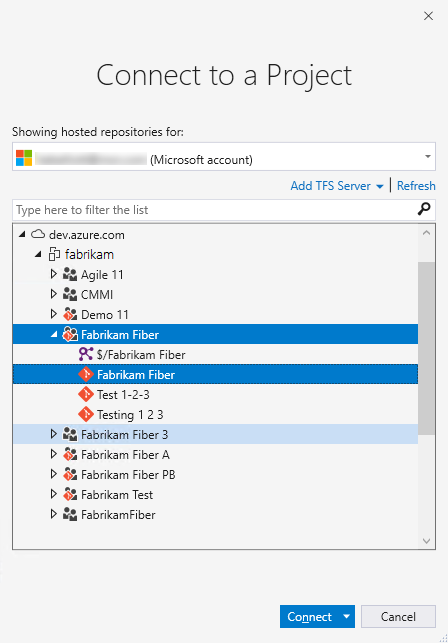
You can start adding work items once you connect to a project.
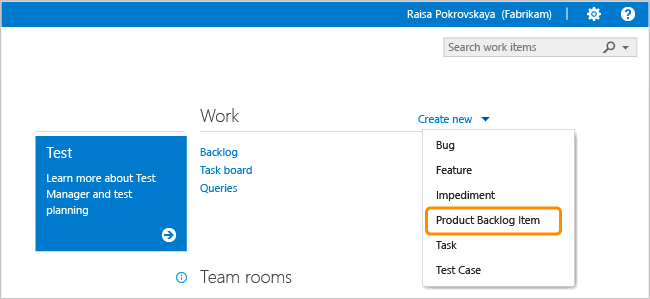
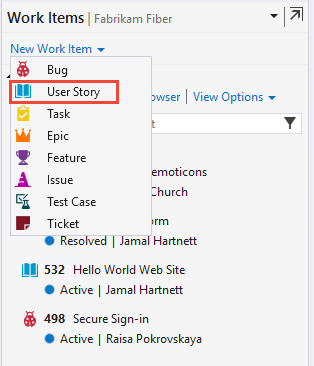
From a web browser, connect to the project that you want to work in. For example, the Fabrikam, Inc. team navigates to
http://fabrikamprime:8080/tfs/DefaultCollection/Fabrikam%20Fiber%20Website/.From a team home page, you can choose the type of work item you want to create.
Work items you add are automatically scoped to your team's area and iteration paths. To change the team context, see Switch project or team focus
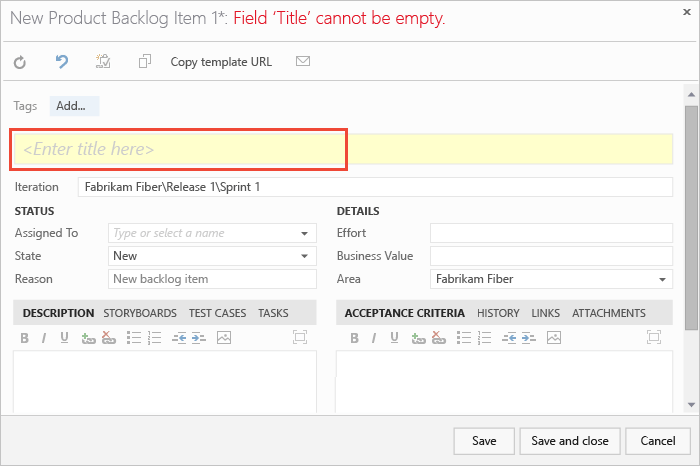
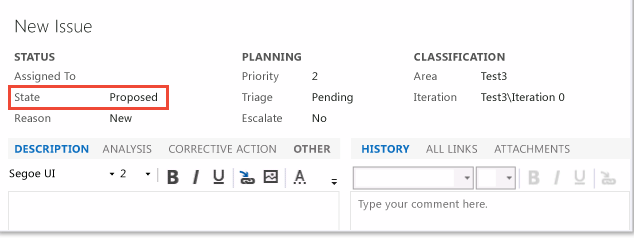
Enter a title and then save the work item. Before you change the default State, you must save it.
You can add tags to any work item to filter backlogs and queries.
As work progresses, team members can update the state and reassign it as needed. While the workflow states differ for different work item types, they usually follow a progression from New or Active to Completed or Done.
The location of the State field may differ depending on the work item type you're updating.
Typical workflow progression:
- The product owner creates a user story in the New state with the default reason, New user story
- The team updates the status to Active when they decide to complete the work during the sprint
- A user story is moved to Resolved when the team has completed all its associated tasks and unit tests for the story pass.
- A user story is moved to the Closed state when the product owner agrees that the story has been implemented according to the Acceptance Criteria and acceptance tests pass.
Atypical transitions:
- Change the State from Active to New.
- Change the State from Resolved to Active.
- Change the State from Resolved to New.
- Change the State from Closed to Active.
- Change the State from New to Removed.
- Change the State from Removed to New.
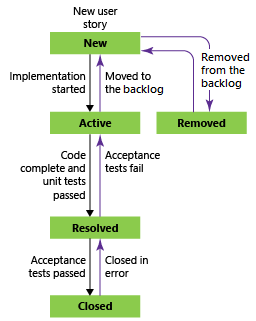
Removed work items remain in the data store and can be reactivated by changing the State.
With each update, changes are recorded in the History field, which you can view through the History tab.
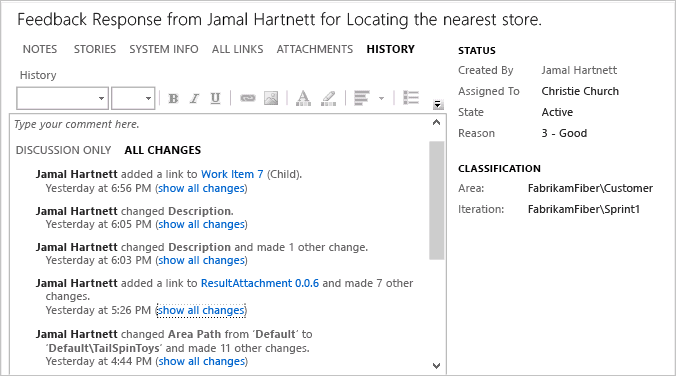
To find work items based on their history, see History & auditing.
To quickly add backlog items, such as user stories, requirements, or bugs, see these articles:
For descriptions of each field and work item form control, see Work item field index and Work item form controls.
Once you've added several work items, you can use additional features to get notified of changes, create queries, define status and trend charts, plus more.
For more clients that you can use to add work items, see Clients that support tracking work items.