Note
Access to this page requires authorization. You can try signing in or changing directories.
Access to this page requires authorization. You can try changing directories.
Azure DevOps Services | Azure DevOps Server | Azure DevOps Server 2022 | Azure DevOps Server 2020
Sometimes, work items get created with the wrong type or assigned to an incorrect project. You can correct these issues by updating individual work items or bulk modifying multiple items. You can also remove irrelevant work items from your backlog or Taskboard.
To change the type of multiple work items, export them using Excel and reimport them with the correct type.
In the web portal, multi-select work items from a backlog or query results page to perform bulk updates. To change, move, delete, or restore multiple work items simultaneously, see Bulk modify work items.Often you find that someone created a work item of the wrong work item type (WIT) or within an incorrect project. You can correct these issues for individual work items or bulk modify several work items. You can also remove work items added to your backlog or Taskboard that aren't relevant anymore.
For instructions on removing, deleting, or restoring work items, see Remove, delete, or restore work items.
Prerequisites
For more information, see Change project-level permissions.
Change the work item type
Changing the work item type refreshes the work item form with the fields defined for the type selected. For example, you can change a bug to a task and the form refreshes with the fields defined for a task.
You can change a single work item or several multi-selected work items to a new type.
Open a work item, choose the
 actions icon, and select the
  Change type... option.
Or, from the backlog or query results page, multi-select several work items whose type you want to change. You can select several work items of the same type or different type so long as you want to change them all to the same work item type.
Choose the
actions icon, and select the
Change type... option.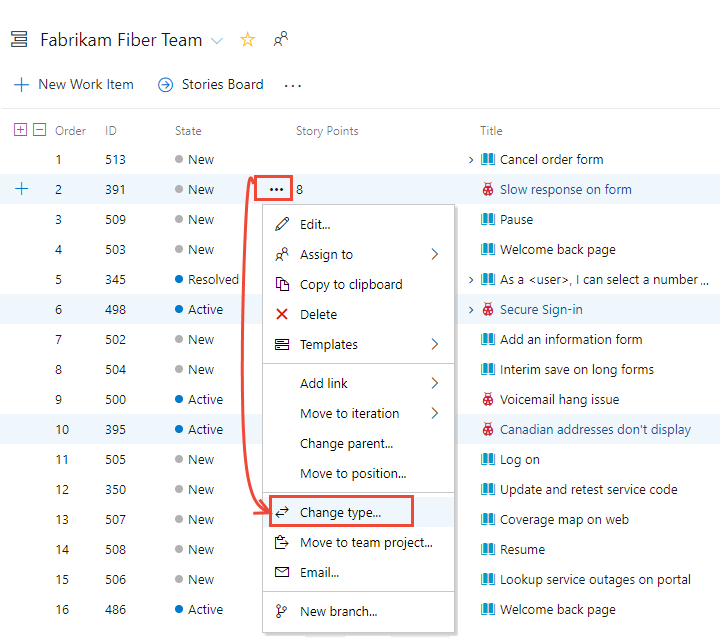
Important
From the Query Results page, the Change type… option becomes unavailable if you checked the Query Editor's Query across projects checkbox.
Select the type and optionally enter a comment.
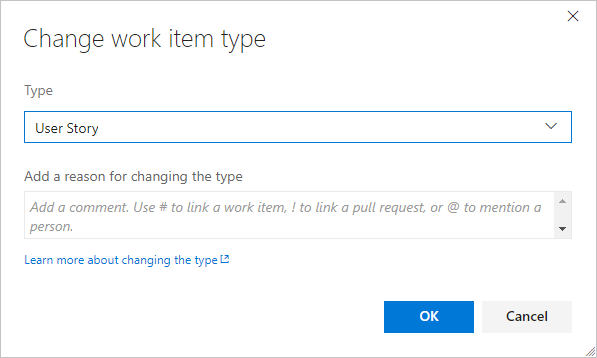
Comments are automatically added to the Discussion and an entry gets made to the History. Also, the system automatically resets the State and Reason fields to the default initial values for the work item type that you move.
Save the work items.
Note
The system automatically resets the State and Reason fields to the default initial values of the specified type. However, in some cases you might need to open the work item to change the State or Reason field to a value supported by the changed-to work item type.
From the Query Results page, save all work items that you bulk-modified. When you bulk modify items from the backlog, they're automatically saved. Work items shown in bold text indicate that local changes aren't saved to the data store. The system automatically saves each work item. To reflect your changes, refresh.
Move a work item to another project
When you realize that a work item is assigned to the wrong project within your organization or collection, you can move it to the appropriate project. You can relocate either a single work item or multiple selected work items.
Important
Permanent and irreversible deletion: Azure DevOps only supports the permanent deletion of test artifacts, including test plans, test suites, test cases, shared steps, and shared parameters. Deleted artifacts can't be restored, and all associated child items, such as test results, are also removed. Additionally, bulk deletion of test artifacts isn't supported; attempting to bulk delete results in the deletion of all other selected work items except the test artifacts.
Ensure you back up any necessary information before deleting test artifacts, as this action can't be undone.
Sign in to your organization (
https://dev.azure.com/{Your_Organization}).Select Boards > Work items
 More actions > Move to team project.
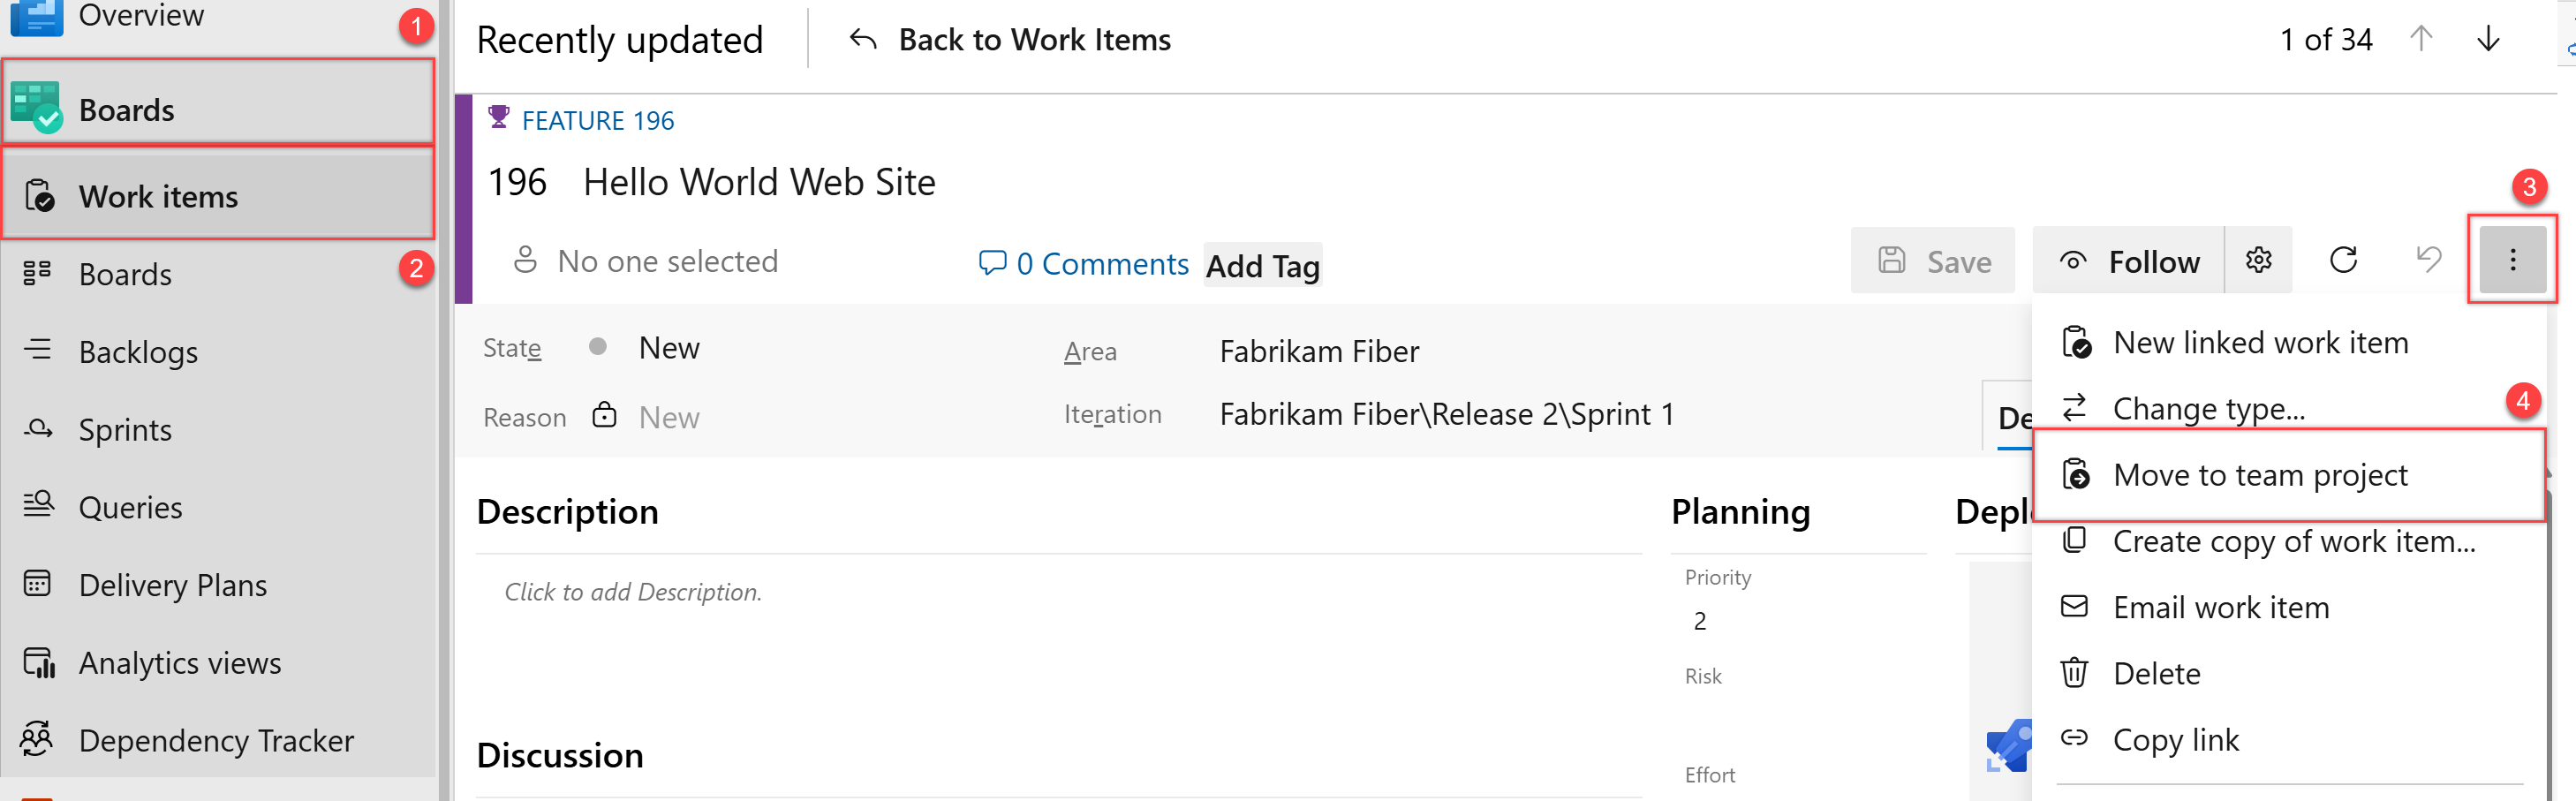
If you don't see the option, then you don't have permissions to move work items out of the project.
Or, from the backlog or query results page, multi-select several work items that you want to move to another project. You can select several work items so long as you want to move them all to the same project.
Choose the
actions icon to open the context menu of one of the selected work items, and choose the  Move… option.
Select the destination project and choose the other options available, including changing the work item type. Optionally enter a comment.
Note
Child work items don't get moved and remain in the origin project, but the Parent-Child links remain in place.
Comments are automatically added to the Discussion and an entry gets made to the History. Also, the system automatically resets the State and Reason fields to the default initial values for the work item type that you move.