Implement a CI/CD pipeline to build and deploy your ASP.NET app to Azure
TFS 2018 - TFS 2015
Azure Pipelines provides a highly customizable continuous integration (CI) and deployment (CD) automation system for your ASP.NET apps. This quickstart shows how to set up CI and CD to deploy an ASP.NET app to a Windows virtual machine in Azure. You create the virtual machine using Azure Powershell, and then you set up CI/CD in Azure Pipelines. In the CI pipeline, you build the app using MSBuild and run tests using VSTest.
Get ready to go
Before you begin, make sure that you are:
A co-administrator of the Azure subscription. If you don't have an Azure subscription, you can get one free through Visual Studio Dev Essentials.
An administrator in Azure DevOps. If you don't yet have an organization, you can create one for free.
Using the New Release pipeline Editor that is currently in preview.

On your dev machine, you need Azure PowerShell module version 4.0 or newer. See Install and configure Azure PowerShell.
Create an Azure Windows VM using Powershell
To provide a platform to run your app, you need a Windows virtual machine that runs IIS. If you don't already have one, see Create a Windows virtual machine with the Azure CLI.
Create a deployment group
Deployment groups in Azure Pipelines make it easier to organize the servers that you want to use to host your app. A deployment group is a collection of machines with an Azure Pipelines agent on each of them. Each machine interacts with Azure Pipelines to coordinate deployment of your app.
Open the Azure Pipelines web portal, navigate to Azure Pipelines, and then click Deployment groups.
Click Add Deployment group (or New if there are already deployment groups in place.
Enter a name for the group, such as myIIS, and then click Create.
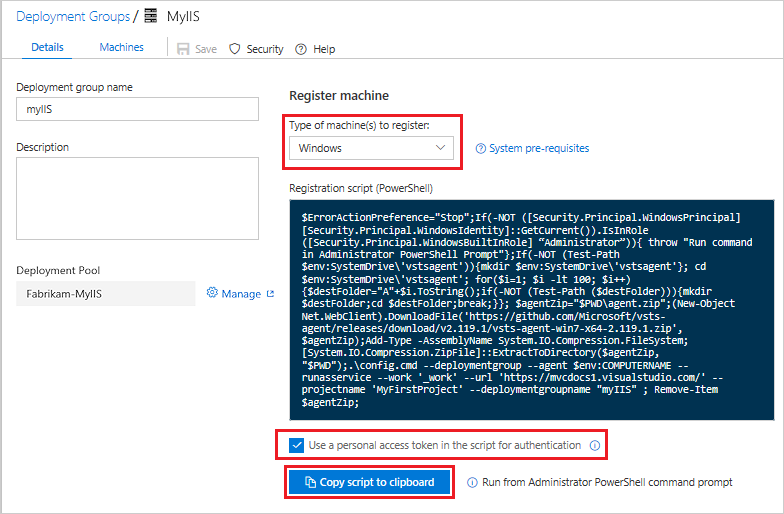
In the Register machine section, make sure that Windows is selected, and that Use a personal access token in the script for authentication is also selected. Click Copy script to clipboard.
The script that you've copied to your clipboard will download and configure an agent on the VM so that it can receive new web deployment packages and apply them to IIS.
On your VM, in an Administrator PowerShell console, paste and run the script.
When you're prompted to configure tags for the agent, press Enter (you don't need any tags).
When you're prompted for the user account, press Enter to accept the defaults.
When the script is done, it displays the message Service vstsagent.account.computername started successfully.
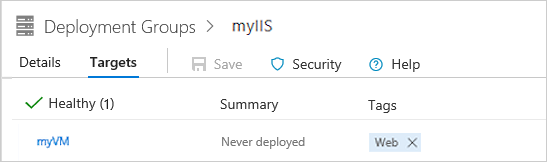
On the Deployment groups page of Azure Pipelines, open the myIIS deployment group. On the Machines tab, verify that your VM is listed.
Import sample code into your Azure Repos Git repo
In the Azure Repos portal, navigate to the Code hub for your new project. Click the default repository and then click Import repository.
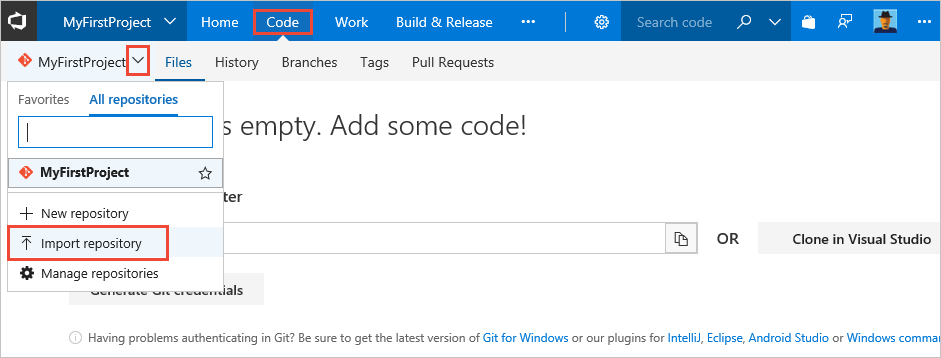
On the Import a Git repository dialog box, paste the following for Clone URL.
https://github.com/adventworks/aspnet4-sample
Click Import to copy the sample app code into your Azure Repos Git repository.
Set up continuous integration
Under the Build and Release menu, select Builds then New to create a new build definition.

Select a source and chose your team project, repository, and default branch then select Continue.
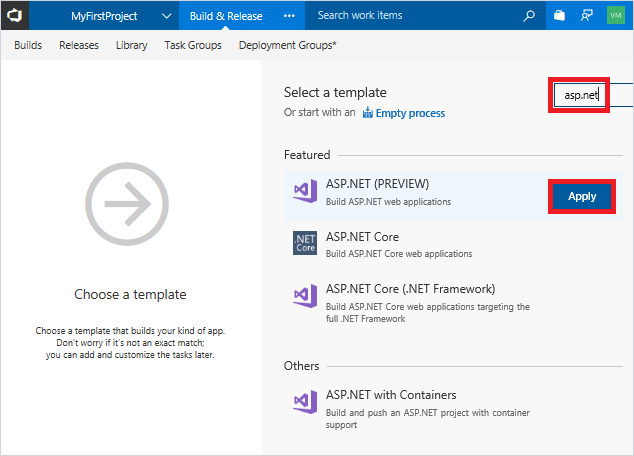
Select a template or start with an Empty process to create your build pipeline.
In the right panel, select ASP.NET, and then click Apply.
You now see all the tasks that were automatically added to the build pipeline by the template. These are the tasks that will automatically run every time you push code changes.
For the Agent queue, select Hosted VS2017.
Click the Triggers tab in the build pipeline. Enable the Continuous Integration trigger. This will ensure that the build pipeline is automatically triggered every time you commit a change to your repository.
Select Save & queue to kick off your first build. On the Save build pipeline and queue dialog, select Save & queue.
A new build is started. You'll see a link to the new build on the top of the page. Click the link to watch the new build as it happens. Wait for the build to complete and succeed before proceeding to the next section.
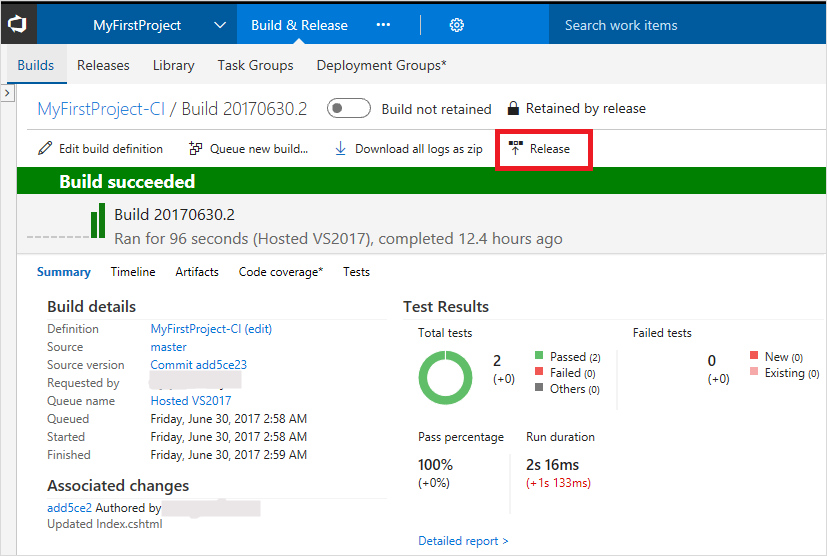
Set up continuous deployment
Once the build succeeds, click the Release action on the build summary page.
In the dialog that prompts to Create release pipeline, select Yes.
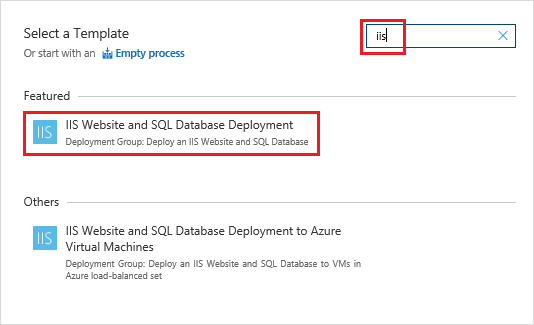
In the Create release pipeline wizard, select the IIS Website and SQL Database deployment template, and click Apply.
Click Tasks, and then select the SQL Deployment phase. Click 'X' to delete this phase. We won't be deploying a database in this quickstart.
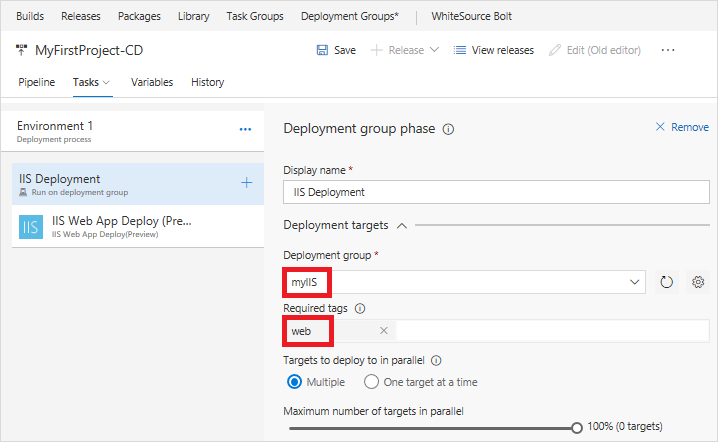
Select IIS Deployment phase. For the Deployment Group, select the deployment group you created earlier, such as myIIS. In the Machine tags box, select Add and choose the Web tag.
Select the IIS Web App Manage task; click 'X' to delete this task. We will not create a new website for this quickstart. Instead, we will deploy to the default web site.
Select the IIS Web App Deploy task to configure your IIS instance settings as follows. For Website Name, enter default web site. Leave all the other default settings.
Select the artifact trigger and make sure the Continuous deployment trigger is enabled.

Click Save. In the Save dialog box, click OK.
To test the release pipeline, click Release and then Create Release.
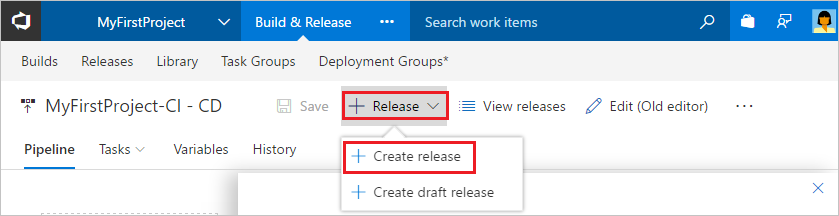
On the Create new release dialog box, click Queue.
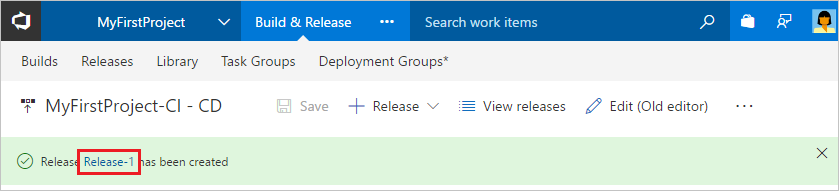
You will notice a new release being created. Select the link to navigate to the release.
You can watch the live logs for the deployment as it happens. Wait for the release to be deployed to the Azure Web App.
Update to redeploy the code
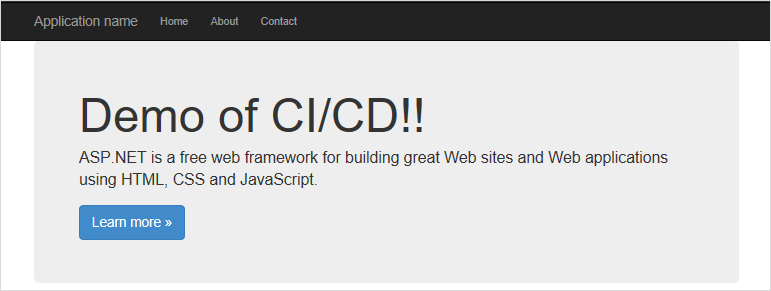
Navigate to the Code hub in the Azure Repos portal. Navigate to Views/Home/Index.cshtml file. Make the following simple change to that file by selecting the edit action.
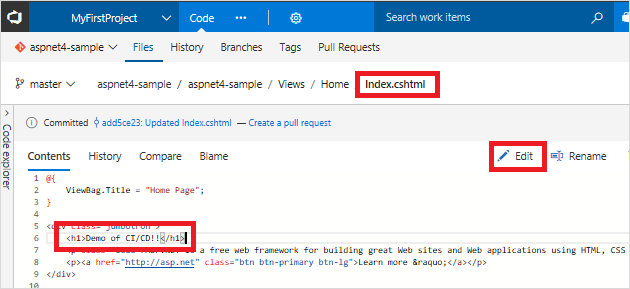
Add the following line of text as indicated in the image above:
<h1>Demo of CI/CD!!</h1>
Commit your changes in Git. This change triggers a CI build, and when the build completes, it triggers an automatic deployment to Azure Web App.
Browse to the app
Once deployment has completed, open the browser and test your web app.
http://<publicIpAddress>
Congratulations! You've deployed changes to your application using CI/CD.
Clean up resources
When no longer needed, you can use the az group delete command to remove the resource group and all related resources.
az group delete --name myResourceGroup