Repeat a test with different data
TFS 2017 | TFS 2015
You add parameters to your manual test to repeat the test with different test data. For example, you can test adding different quantities to a shopping cart from quantities of 1, 5, 10, or 200.
You insert parameters within your test steps for a manual test case. Then, you provide a table of parameter values. You can add shared parameters to test cases or convert parameters you've recently inserted into shared parameters. Shared steps and shared parameters are different work item types that can be shared across multiple test cases. They're linked to test cases through the Test Cases-Shared Steps and Referenced By-References link types as shown in the following illustration.
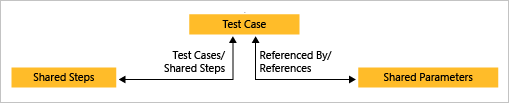
With shared steps and shared parameters, you can run multiple test cases with the same data.
Prerequisites
You must connect to a project. If you don't have a project yet, create one.
You must be added to a project. To get added, Add users to a project or team.
To view test-related work items, you must have Basic access or higher and permissions to view work items under the corresponding Area Path.
To add test plans and test suites, manual test cases, delete test artifacts, and define test configurations you must have Basic + Test Plans access level or have one of the following Visual Studio subscriptions:
To add or edit test-related artifacts, you must have the following permissions:
- To add or modify test plans, test suites, test cases, or other test-based work item types, you must have Edit work items in this node permission set to Allow under the corresponding Area Path.
- To modify test plan properties such as build and test settings, you must have Manage test plans permission set to Allow under the corresponding Area Path.
- To create and delete test suites, add, and remove test cases from test suites, change test configurations associated with test suites, and modify a test suite hierarchy (move a test suite), you must have Manage test suites permission set to Allow under the corresponding Area Path.
To learn more, see Manual test access and permissions.
Add parameters to a test case
Create a parameter by typing a name preceded by "@" in the actions and expected results of your test steps.
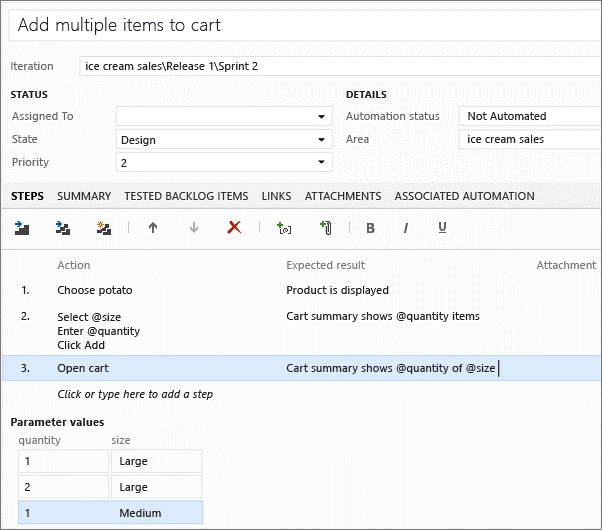
Underneath the list of steps, add combinations of parameter values. You might need to scroll down to see them.
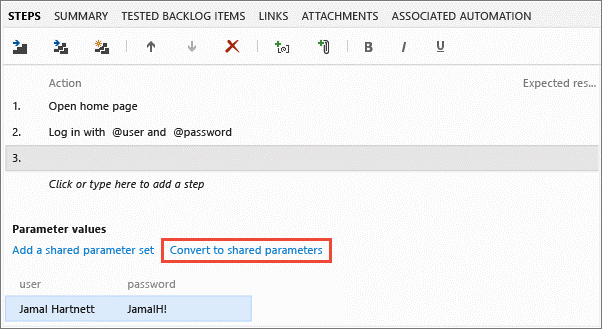
Share parameters between test cases
Convert existing parameters to shared parameters so that you can use them and the associated data in other test cases.
After you've created a shared parameter set, open another test case and add the shared parameter set to that test case. You can search for the shared parameter set by name.
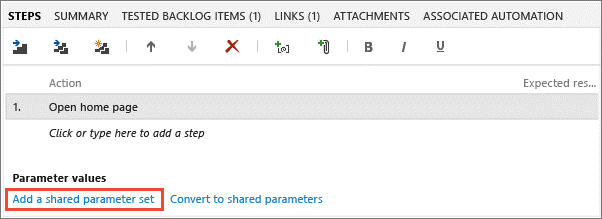
The shared parameter set is displayed in the Parameter values section after you add it. You can now use these parameters in your test case steps.
If the test case has different parameter names for these shared parameters, map the shared parameters to the local parameters to use the shared parameter data.
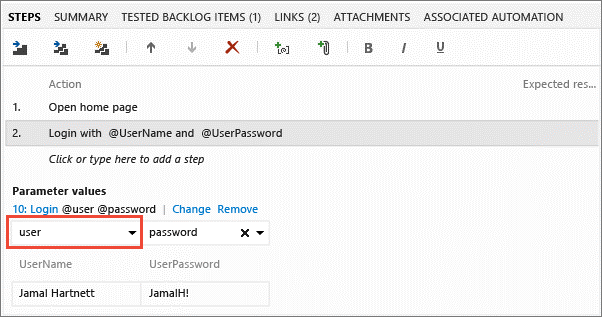
When they are correctly mapped, the data associated with the shared parameter is displayed.
Add, edit, and rename your shared parameter sets in the Parameters page. View the test cases that reference them in the Test cases pane.
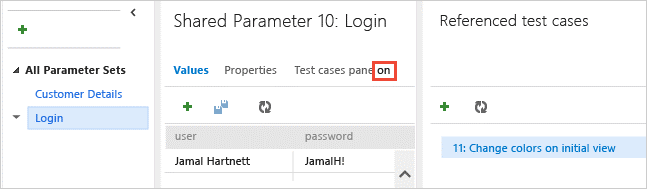
Each shared parameter set is a work item. Open the Properties page to view or make changes to this work item. For example, you can assign owners and track changes.
You can't add more than one shared parameter set to a single test case. If two test cases share similar data, for example, one test case needs customer ID, name, email, and phone, and the second needs customer ID, name and address, you might consider creating a single shared parameter set containing all of the parameters - even though a few of the columns in the set will remain unused in each test case.
You can import parameter values from an Excel spreadsheet to your shared parameter sets. Paste the values into your shared parameters grid. You can also copy the data from your grid back into Excel.
Run a test case with parameters
Select a test case with parameters and start running it. The Test Runner shows the first row of parameter values.
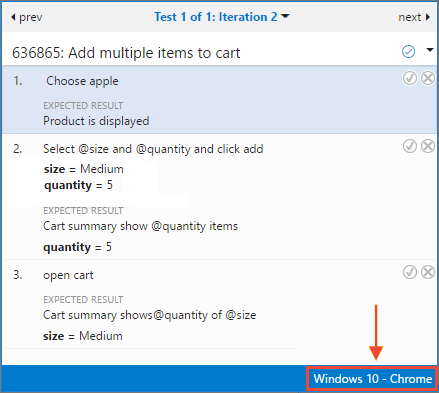
When you've completed the steps, mark the test passed or failed. Then go on to the next iteration of the test, which uses the next row of parameter values.
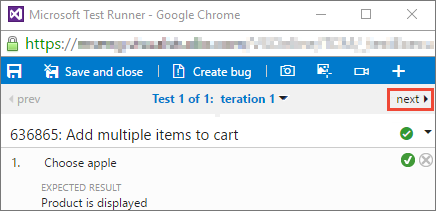
Use the drop-down to navigate to other iterations.

If any of the parameter values are incorrect, fix them without canceling the test by choosing Edit from step's shortcut menu.
Review the test results
The outcome of the test is based on a precedence hierarchy of all the iteration outcomes. The hierarchy order is Paused, Failed, Blocked, Passed, Not Applicable, and Unspecified (Active). For example, if you marked any iteration as failed and all the rest as passed, the outcome of the entire test is shown as failed. This is different from test cases that do not have parameters, where the outcome displays the status of the last run.
Check the test result by opening the details pane.
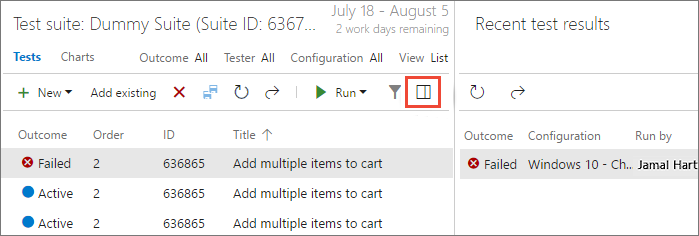
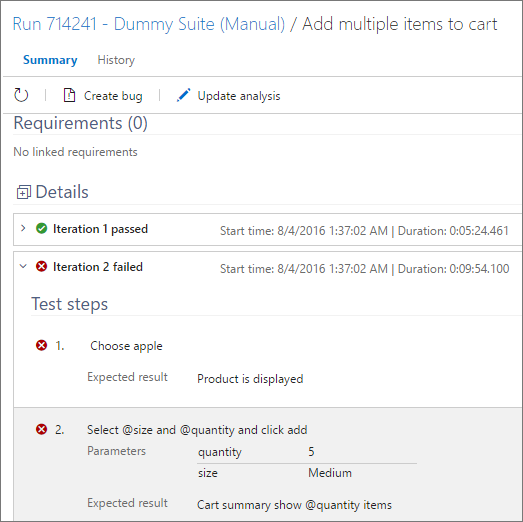
Double-click a test result to view the test run details, and the test results for each iteration.
Speed up test iterations by using record and playback
It can be error-prone and tedious to work through a long table of parameter combinations. To speed up things, create an action recording when you run the test with the first set of parameter values, and then play it back for the other sets.
Use Azure Test Plans to run the test.
Select Create action recording before you choose Start.
Complete the first test iteration and then move on to the next one.
Mark each step as passed or failed as you work. Enter parameter values in the application exactly as displayed in the test script.
Choose Play to run the test with the next set of parameter values. Your actions will be played back automatically, but you must still verify the results.
Record and playback doesn't work with all applications. For details, see Supported configurations and platforms for coded UI tests and action recordings.