Note
Access to this page requires authorization. You can try signing in or changing directories.
Access to this page requires authorization. You can try changing directories.
Provision nodes in the Azure portal. Then you can set up pay-as-you go capacity for your CloudSimple private cloud environment.
Sign in to Azure
Sign in to the Azure portal at https://portal.azure.com.
Add a node to your CloudSimple private cloud
Select All services.
Search for CloudSimple Nodes.
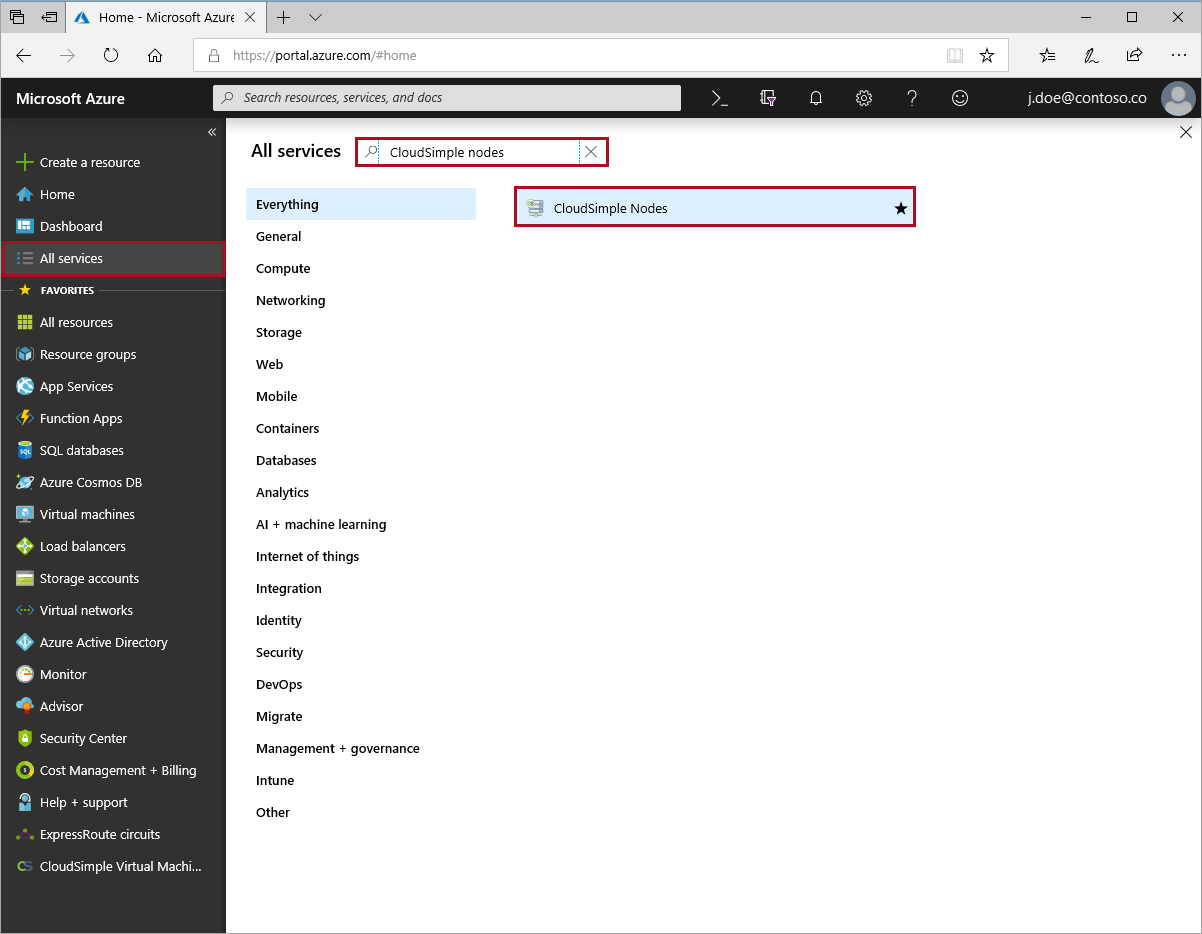
Select CloudSimple Nodes.
Click Add to create nodes.
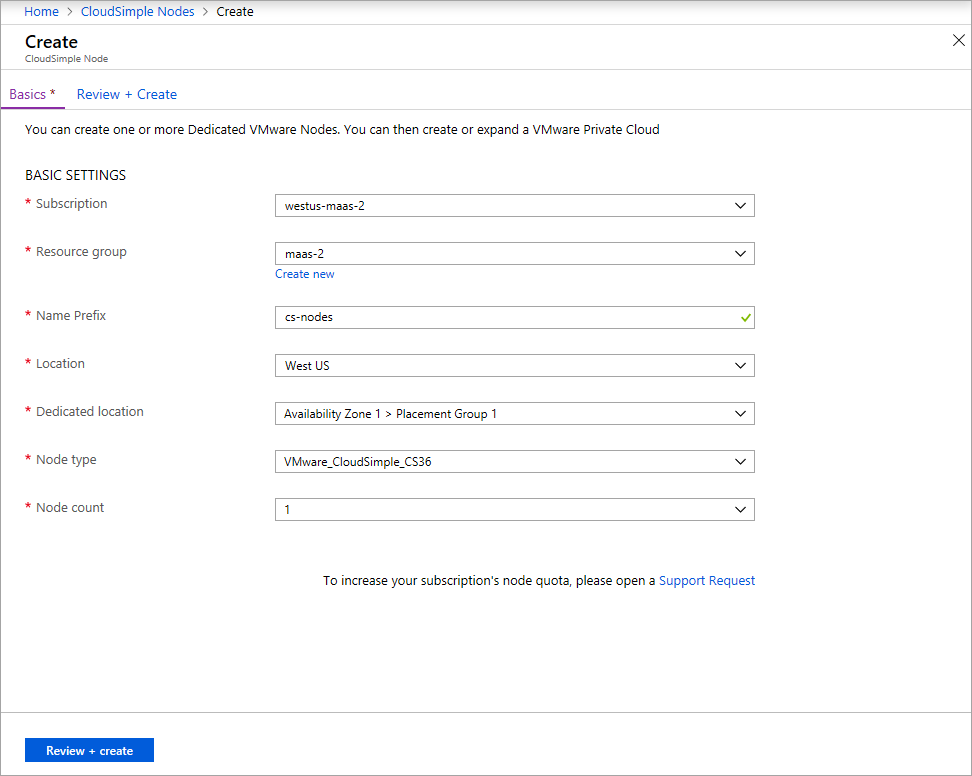
Select the subscription where you want to provision CloudSimple nodes.
Select the resource group for the nodes. To add a new resource group, click Create New.
Enter the prefix to identify the nodes.
Select the location for the node resources.
Select the dedicated location to host the node resources.
Select the node type.
Select the number of nodes to provision.
Select Review + Create.
Review the settings. To modify any settings, click Previous.
Select Create.