Disaster Recovery
Plan Ahead to Save Your Web
Chris Adams
At a Glance:
- Back up your forgotten data
- Back up the metabase
- Don’t forget your content
- Disaster Recovery Automation 101
I am asked at times about strategies for recovering from disasters. My response is always the same: if software or hardware problems put your system in an unusable state, knowing is half the battle.
I started at Microsoft as a systems engineer for Product Support Services (PSS) and in that role I helped our customers many times in disaster recovery situations. It was always intense and pressure packed as the engineer struggled through this backup tape or that backup tape while all along not knowing whether the lost data was even recoverable. Preparation is the key to handling these tough situations. I’ve succeeded sometimes by helping the customers get their systems restored to a suitable state, but I’ve also failed a few times. This article will help you prepare for these tough situations in hopes that if that day comes, you will be ready to succeed. As Vince Lombardi once said, "The only place Success comes before Work is in the dictionary." This is never truer than in disaster situations.
Back Up the Forgotten Data
When restoring from a disaster, the most obvious items are usually the most costly. IIS 6.0 can rely heavily on Windows® system-level features that many Web administrators fail to recognize, and thus often miss in their backup strategy, so let’s discuss them. IIS 6.0 doesn’t require that you use all of these features, so do your homework to determine which ones you are using and need to back up.
HTTP.sys was introduced in Windows Server™ 2003 and is known in the Web world as being the kernel driver that IIS 6.0 relies on for connections, caching, and HTTP compliance. HTTP.sys stores key data in the registry as shown in Figure 1.

Figure 1** HTTP.sys Configuration in the Registry **
Make sure that you have a current version of the registry backed up in case of a disaster. This is important when you have built a custom configuration for HTTP.sys and you need to ensure you have this key backed up. You should be familiar with the default HTTP.sys configuration so you can evaluate whether your servers are using anything custom.
The most common use for a custom configuration is when you are running multiple Web servers on your system. A lot of server software takes advantage of the HTTP protocol, though they all must honor one rule: a service can only own a single IP:Port:HostHeader endpoint per server. When you want to run more than one Web site, you will have to prevent HTTP.sys from listening on each IP address configured on the server, and you do this through a custom configuration setting. The supported method of modifying this behavior is to use Httpcfg.exe on the server to add a particular IP:Port binding to the IP Listen List.
How you modify this behavior isn’t as important as ensuring you have the resulting configuration information available when you restore after a disaster. The easiest way to back up this key is to use Windows Backup (NTBackup), performing a System State backup that captures a copy of the Windows registry, as shown in Figure 2. The following steps will help you do this manually, but it’s a good idea to schedule this as a task to be run as often as your environment calls for.
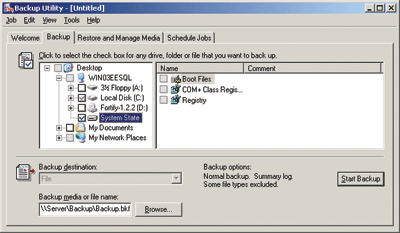
Figure 2** Backing Up System State **
- Choose Start | Programs | Accessories | System Tools | Backup.
- Click the Backup tab.
- Click to select the System State checkbox. (All of the components to be backed up are listed in the right pane. You cannot individually select each item.)
During the system state backup, you must choose to back up the \Winnt\Sysvol folder. You must also select this option during the restore operation to have a working \Sysvol folder after the recovery. For more information, please review the Microsoft® Knowledge Base article "How to Use the Backup Program to Back Up and Restore the System State in Windows 2000".
Another item that’s often forgotten is SSL certificates. You might forget about the certificates because it’s commonly believed that backing up the IIS metabase captures these for you. I am sorry to say this isn’t the case. But, unlike Windows 2000 Server, Windows Server 2003 and IIS 6.0 offer a handy COM+ interface that allows you to manage certificates on your server.
A script that is part of the IIS 6.0 Resource Kit Tools called IIsCertDeploy.vbs can grab all your SSL certificates and export them to a .pfx file. Learn more about the IIS 6.0 Resource Kit Tools and download the resource kit at IIS 6.0 Resource Kit Tools (IIS 6.0).
Assuming you choose the default installation settings, IIsCertDeploy.vbs will be located in %programfiles%\IIS Resources\IIsCertDeploy. You will need to either add this to your path or copy the script to a more convenient location. A certificate might exist at a top level for all sites that are defined in the IIS configuration file Metabase.xml (I will talk about backup of this file a bit later). You will need to call IIsCertDeploy.vbs for each site where a certificate is installed.
iiscertdeploy.vbs -e d:\webbackups\certs\site1.pfx
 -i w3svc/1 -p site1pwd -q On
This will produce a file with the extension .pfx that you can store on disk and safely restore in the case of a disaster. Remember, certificates are not volatile data; usually you don’t have to back these up each time. Instead, you can capture them only when you have recently added SSL to a site or renewed your certificate.
Certificate backups will require you to fully export the certificate, including the private key. If you fail to export the private key, your certificate will be unusable in the case of disaster. I mention this because you might choose to back up using the Certificate Manager MMC snap-in, as described in the Microsoft Knowledge Base article "How to Back Up a Server Certificate in Internet Information Services 5.0", and fail to export the private key. And be careful when exporting your certificates with your private key: if lost or stolen, these certificates are fully usable.
Back Up the Metabase
You were probably worried when I didn’t start with backing up the IIS configuration file, more commonly known as the metabase. The metabase is composed of the raw IIS configuration file Metabase.xml as well as the IIS schema stored in Mbschema.xml. These files are located in the %windir%\System32\Inetsrv directory and are protected by administrator-only privileges.
From my PSS days, I remember how to restore IIS 4.0 after a disaster occurred.
- Install Windows NT® 4.0 SP 6a.
- Install IIS 4.0.
- Reinstall Windows NT 4.0 SP 6a.
- Rebuild the metabase.
- Install the latest FrontPage® Server Extensions (if used).
- Install the latest Microsoft Data Access Components (MDAC).
Rinse and repeat if running in a Web farm environment. All kidding aside, we have come a long way. During the old days, if you failed to do this in the correct order, you would often get mismatched DLLs leading to failures when you attempted to get your IIS services to start. The reason this was so painful is that the installer failed to include a copy of the default metabase upon completing the install. It was only with blood, sweat, and tears that this core problem was resolved. IIS 5.0 offered the first opportunity to back up the metabase using the Internet Information Services Manager. Many admins didn’t realize this feature had been added and thus did not take advantage of it. If you did, pat yourself on the back.
For IIS 6.0, one key user request was to make this functionality support automation without you having to write a single line of code (or script). Now you have a mechanism to back up your server easily and effectively whether you have one IIS Web server or many. IIS 6.0 shipped a command-line script called iisback.vbs, aimed at making the backup and restore process of the IIS 6.0 metabase much easier. This tool, located in the system path by default (%windir%\System32), will back up the IIS configuration locally or remotely, making it very useful in large Web farms or on single-server installations. The following sample provides you with a quick and easy command to back up your IIS 6.0 server’s metabase configuration in a single server scenario:
iisback /backup /b MyMetaBackup /e BackupPass /overwrite
Why is all this necessary? Why can’t you just copy the file itself? Or, better yet, why not use the backup your backup program already has backed up? You can’t do this because the IIS configuration includes machine-specific settings like IP:Port bindings, paths to custom ISAPI filters and extensions, log file and custom error paths, and even credentials such as the anonymous user account. Upon installation of Windows Server 2003, you make some fundamental decisions such as the IP address of the server, the system directory (%windir%), and even down to the Web root path if you are automating the installation.
For example, the installation of IIS automatically creates two accounts on your local server—IWAM_MachineName and IUSR_MachineName—where MachineName is replaced with the server’s name. This fundamentally breaks your ability in IIS 6.0 to copy the file from server to server with no loss of service.
This machine-specific information isn’t detrimental to the backup process but creates more work for you. IIS 6.0 offers you the ability to back up with or without a password, just to ensure you have a valid metabase configuration in case of a disaster. If you choose to not use a password, IIS does not remove the machine-specific data that is stored in the metabase encrypted. What’s used to encrypt it? The data is stored using the Windows APIs for encrypting data and is based on the machine key of the operating system. In case you didn’t know, each installation of Windows has a unique machine key that isn’t reproducible unless you have a full backup of the system. Thus, the IIS 6.0 configuration can’t be decrypted and will cause services to fail if the machine key isn’t correct or is unavailable. If you want a backup just for the sake of having a backup (you’re not as concerned, for whatever reason, with disaster recovery) then select the Do not use Password option.
If, on the other hand, you do plan to be prepared in case of loss of operating system, select the password option. The primary difference here is what is used to protect access to the sensitive or otherwise encrypted data. Instead of using the operating system’s machine key, the system uses the password you provided.
Is this helpful? You bet it is. Now you can have a generic backup of your IIS 6.0 server’s configuration, supply key data into that file when you need to, and off you go with the restore. It isn’t the most straightforward backup-and-restore approach but it works. Future releases of IIS should improve this process and hopefully make your life that much easier.
Don’t Forget Your Content
The most obvious aspect of all backups is the backup of files and directories. Nothing changes here for IIS 6.0. Without your content, your users will probably be upset. I often find, though, that many people don’t really understand the full range of items that are considered content. It goes way beyond the images or the .css files, and also into your business logic. Developers today build very robust and powerful applications and they each do it differently.
Prior to Microsoft releasing ASP.NET, many developers built applications using the Microsoft Windows DNA architecture. This architecture advised developers to separate the presentation layer (browser), business logic (COM+), and data (SQL Server™). These designs are still prevalent in the community, but what is most important to you now is identifying the business-logic layer. Do you have any COM+ applications stored on the server or servers?
Poke around and you might succeed in locating these applications. Start by using the Component Services MMC snap-in and navigating into the applications for this particular system (see Figure 3). Unfortunately, in many cases you will have to depend on your developers to help you find where they installed these bits. But be prepared, because without this business logic your site might be restored, your services running, but your clients and management will still be unhappy. The nice thing is that you have the ability to back these up as well if you do locate them.
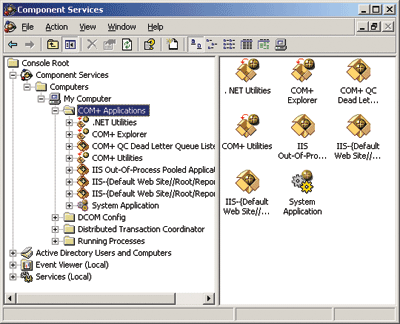
Figure 3** Apps in the Component Services Snap-In **
Using the same Component Services MMC snap-in, you can export the COM+ application to an .msi installer that can be installed on other servers if necessary. Double-click on Component Services, then on Computers. Click to expand the My Computer node and then the COM+ Applications node. Now locate the app that represents your business logic, right-click and choose Export. In the Welcome to COM+ Application Export Wizard, click Next, then enter a full path for the export file for the app, along with any other pertinent options (discuss with your developer) and click Next. Click Finish to close the COM+ Application Export Wizard.
This is very similar to SSL Certificates in not needing massive automation, as the data isn’t often volatile enough to warrant it. In some environments, business logic is added, modified, or changed often; in this case you would be better off using the APIs provided to do this automatically. For most Web administrators, though, the procedure I described should suffice.
At the end of the day, you now have your files, directories, and your business logic all packaged up and ready for deployment when the time comes (if it does).
Disaster Recovery Automation 101
I have hopefully cleared up the "what." Now it is time to close down on the final key—how. How can you be efficient and protect yourself with the least amount of effort? Figure 4 shows the simplest of batch files I created to help you. The vast majority of the work is up to you: find the data, understand how to grab the data, and centralize it in a safe place. Centralize as much as possible and always know where this central location is. When I backed up my system while writing this article, I created a single directory on the server called WebBackup where I can quickly and easily tell my backup program to put the files during the backup. This one directory will get my operating system components, IIS configuration, and also my content.
Figure 4 WebBackup Script
REM Backup to Remote Share (WebBackup.bat)
REM =============================================
REM

REM Connect to Remote Backup Server
net use s: \\[server ip address\name]\WebBackups

REM Get SSL Certificate
cd \
cd %programfiles%\"iis resources"\iiscertdeploy
iiscertdeploy -e [pathtostorefile]\mySSLCert.pfx -p 1 -i w3svc/[SitePath] -q on
cd \

REM Backup IIS Metadata
iisback /backup /b MyMetaBackup /e BackupPass /overwrite
xcopy %windir%\system32\inetsrv\metaback\MyMeta*.* c:\WebBackups\metadata /y

REM Copy Content & Export App...
xcopy /o /x /e /h /y /c c:\webbackups\metadata\*.* s:\Metabase\
xcopy /o /x /e /h /y /c c:\webbackups\ContentAppDir\*.* s:\Content\
xcopy /o /x /e /h /y /c c:\webbackups\Certs\*.* s:\Certs\

REM Delete connection to Remote Backup Server
net use s: /delete /y
When you put all the data in one place, the restoration process becomes almost silly. All you have to do at this point is to use a few easy commands and everything is snapped right back into place. In Figure 5, I use a simple batch file that will restore of all my key data.
Figure 5 Restoring Your Data after a Disaster
REM Restore from Remote Share (Recovery.bat)
REM =============================================
REM

REM Connect to Remote Deployment Server
net use s: \\[server ip address\name]\WebBackups

REM Restore Web site
xcopy /o /x /e /h /y /c s:\metabase\*.* %windir%\system32\inetsrv\metaback
iisback /restore /b [BackupName] /e [BackupPass]

REM Restore Content
xcopy /o /x /e /h /y /c s:\Content\*.* [SiteWebRoot] (i.e. c:\inetpub\wwwroot)

REM Restore SSL Certificates
REM Either add to server path or go directly to path for IIsCertDeploy.vbs
cd \
cd %programfiles%\"iis resources"\iiscertdeploy
xcopy /o /x /e /h /y /c s:\certs\ c:\webbackups\certs\
iiscertdeploy.vbs -c c:\webbackups\[pfxfilenamecreatedduringexport].pfx
    -i w3svc/[SitePath] -p 1 -q on

REM Delete Connection to Remote Backup Server
net use s: /delete /y
Wrap-Up
The result of this process is you sleeping more soundly while avoiding downtime for your customers. Web farms can be your saving grace, protecting you from having to work under the gun while customers can’t use your system. But executing a broad, inclusive backup and recovery strategy for IIS means you are prepared to succeed whether one system goes down or your entire server room is in an unusable state. All the essential data needed to get your Web sites back up will be ready at your fingertips.
Chris Adams is the Web Platform Supportability Lead at Microsoft. Chris is currently certified as a MCP, MCSA, and MCSE on Windows NT 4.0, Windows 2000, and Windows Server 2003. Reach him at chrisad@microsoft.com.
© 2008 Microsoft Corporation and CMP Media, LLC. All rights reserved; reproduction in part or in whole without permission is prohibited.