Note
Access to this page requires authorization. You can try signing in or changing directories.
Access to this page requires authorization. You can try changing directories.
This article is the first Step in a five part tutorial series that demonstrates how to work with Django in Visual Studio. Django is a high-level Python framework designed for rapid, secure, and scalable web development. Visual Studio provides project templates that you can use to streamline the creation of Django-based web applications. This tutorial series explores the Django framework in the context of the Visual Studio project templates.
In Step 1 of the tutorial, you learn how to:
- Create a Django web app project by using the Blank Django Web Project template
- Examine the boilerplate code and run the app
- Create a Git repository for the Django web app
- Work with Git source code controls
- Create a virtual environment for the Django web app
Prerequisites
Django project templates in Visual Studio are included with all earlier versions of Python Tools for Visual Studio. The template details might differ from the descriptions in this tutorial series, especially for earlier versions of the Django web framework.
Visual Studio for Mac isn't supported. For more information, see What's happening to Visual Studio for Mac? Visual Studio Code on Windows, Mac, and Linux works well with Python through available extensions.
Visual Studio projects and Django projects
In Django terminology, a Django project has several site-level configuration files along with one or more "apps." To create a full web application, you can deploy these apps to a web host. A Django project can contain multiple apps, and the same app can be in multiple Django projects.
A Visual Studio project can contain the Django project along with multiple apps. In this tutorial series, the term "project" refers to the Visual Studio project. When the content refers to the "Django project" portion of the web application, it's referring to a "Django project" specifically.
Create Visual Studio project and solution
In Step 1 of this tutorial series, you create a single Visual Studio solution to contain multiple Django projects. Each project contains a single Django app. You create the projects by using different Django project templates included with Visual Studio. By keeping the projects in the same solution, you can easily switch back and forth between different files for comparison.
When you work with Django from the command line, you usually start a project by running the django-admin startproject <project_name> command. In Visual Studio, the Blank Django Web Project template provides the same structure within a Visual Studio project and solution.
Follow this procedure to create the solution and project:
Examine Git controls
As you work through this tutorial series, get into the habit of periodically using the Git controls in Visual Studio to commit and push changes. The tutorial Steps remind you at the appropriate points.
Use source control from beginning
There are several advantages to using source control from the beginning of a project. When you use source control from the start of a project, especially if you also use a remote repository, you gain regular offsite backup of your project. Unlike maintaining a project just on a local file system, source control also provides a complete change history and the easy ability to revert a single file or the whole project to a previous state. The change history helps determine the cause of regressions (test failures).
Source control is essential if multiple people are working on a project, because it manages overwrites and provides conflict resolution. Source control is fundamentally a form of automation, sets you up well for automating builds, testing, and release management. It's the first step in using Azure DevOps for a project, and because the barriers to entry are so low, there's really no reason to not use source control from the beginning.
For more information on source control as automation, see The Source of Truth: The Role of Repositories in DevOps, an article in MSDN Magazine written for mobile apps that applies also to web apps.
Prevent Visual Studio from auto-committing projects
Follow these steps to prevent Visual Studio from auto-committing a new project:
Create virtual environment and exclude source control
After you configure source control for your project, you can create the virtual environment with the necessary Django packages that the project requires. You can then use the Git Changes window to exclude the environment's folder from source control.
Understand purpose of virtual environments
A virtual environment is a great way to isolate your application's exact dependencies. This method of isolation avoids conflicts within a global Python environment, and aids both testing and collaboration. Over time, as you develop an app, you invariably bring in many helpful Python packages. By keeping packages in a project-specific virtual environment, you can easily update the project's requirements.txt file that describes that environment, which is included in source control. When you copy the project to other computers, including build servers, deployment servers, and other development computers, it's easy to recreate the environment. You can recreate the environment by using only the requirements.txt file, which is why the environment doesn't need to be in source control. For more information, see Use virtual environments.
Remove virtual environment under source control
You can remove a virtual environment after it's under source control. Follow these steps:
Edit your .gitignore file to exclude the folder:
Open the file by selecting File > Open > File.
You can also open the file from Team Explorer. On the Settings page, select Repository Settings. Go to the Ignore & Attributes Files section and select the Edit link next to .gitignore.
Locate the section at the end that has the comment
# Python Tools for Visual Studio (PTVS).After that section, add a new line for the virtual environment folder, such as
/BasicProject/env.
Open a command window and go to the folder (such as BasicProject) that has the virtual environment folder, such as env.
Run the
git rm -r envcommand to remove the virtual environment that's currently under source control.Commit your changes with the
git commit -m 'Remove venv'command, or commit them from the Changes page of Team Explorer.
Examine boilerplate code
In this section, you examine the boilerplate code in the Project file (.py) that Visual Studio creates based on your template selection.
Note
The boilerplate code is the same whether you create the project in Visual Studio from the Django template, or generate the project by using the CLI command django-admin startproject <project_name>.
Open Solution Explorer to view your solution and project files. The initial project contains only two files, manage.py and requirements.txt:
The requirements.txt file specifies the Django package dependencies. The presence of this file is what invites you to create a virtual environment when first creating the project.
The manage.py file is the Django command-line administrative utility that Visual Studio automatically sets as the project startup file. You run the utility on the command line by using
python manage.py <command> [options]command.For common Django tasks, Visual Studio provides convenient menu commands. Right-click the project in Solution Explorer and select Python to see the list of commands. You use several of these commands in this tutorial series.
In addition to the two files, the project also has a subfolder with the same name as the project. This folder contains the basic Django project files:
- __init__.py: An empty file that tells Python that this folder is a Python package.
- settings.py: The settings for the Django project, which you modify when you develop a web app.
- urls.py: A table of contents for the Django project, which you modify as you develop your web app.
- wsgi.py: An entry point for WSGI-compatible web servers to serve your project. You usually leave this file as-is because it provides the hooks for production web servers.
Generate requirements after package install
Visual Studio can generate a requirements.txt file from a virtual environment after you install other packages.
- In Solution Explorer, expand the Python Environments node, right-click your virtual environment, and select Generate requirements.txt.
It's a good practice to use this command periodically as you modify the environment. Commit changes to your requirements.txt file to source control along with any other code changes that depend on that environment. If you set up continuous integration on a build server, you should generate the file and commit changes whenever you modify the environment.
Run the project
Now you're ready to run your project in Visual Studio by following this procedure:
In Visual Studio, select Debug > Start Debugging (F5) or select Web Server on the main toolbar (the browser you see might vary):

Either command runs the server by using the command
manage.py runserver <port>, which starts the built-in web server in Django.The code starts the application by using the specified port within the Django development server.
If Visual Studio posts the message Failed to start debugger and indicates no startup file is found, right-click the manage.py file in Solution Explorer and select Set as Startup File.
When the server starts, a console window opens to display the server log. Visual Studio automatically opens a browser to
http://localhost:<port>. Because your Django project has no apps, Django shows only a default page to confirm the current code is working as expected.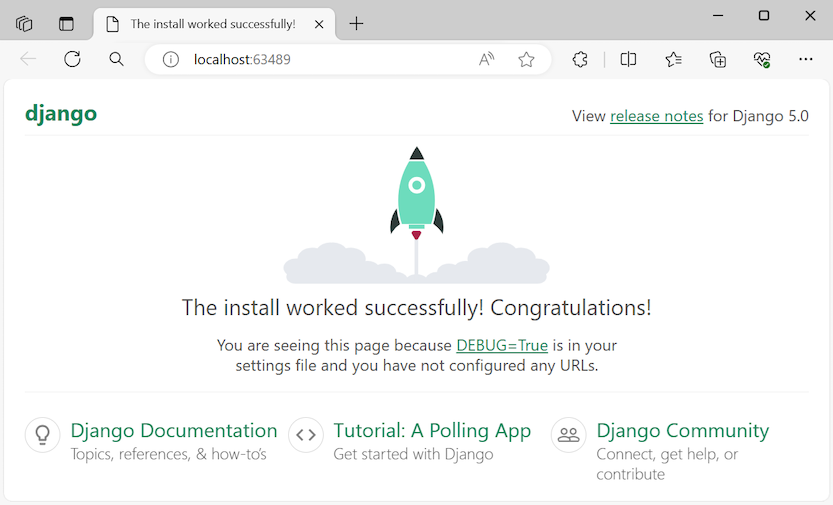
When you're done, close the console window, which stops the Django development server. You can also select Debug > Stop Debugging.


Use Django web server and framework
Django has a built-in web server that you can use for development purposes. When you run your Django web app locally, you use the built-in Django web development server. An example of this scenario is when you debug your Django web app in Visual Studio.
When you deploy your Django web app to a web host, you use the web server on the host rather than the built-in Django web server. The wsgi.py module in the Django project takes care of hooking into the production servers.
Compare Debug commands with project Python commands,
There's a difference between using the Debug menu commands and the server commands listed on the project's Python submenu.
Both commands open a console window in which you see the local URL (localhost:port) for the running server. However, you must manually open a browser with that URL, and running the debug server doesn't automatically start the Visual Studio debugger. You can attach a debugger to the running process later, if you want by using the Debug > Attach to Process command.