Note
Access to this page requires authorization. You can try signing in or changing directories.
Access to this page requires authorization. You can try changing directories.
This topic contains instructions about how to configure a Visual Studio project to use the Rights Management Services SDK 2.1.
Prerequisites
Instructions
Step 1: Configure a Visual Studio project to use RMS SDK 2.1
These instructions are specific to Microsoft Visual Studio 2010. If you are using a different version of Microsoft Visual Studio, your settings dialog boxes may appear slightly different.
These instructions apply to building a native 32-bit application.
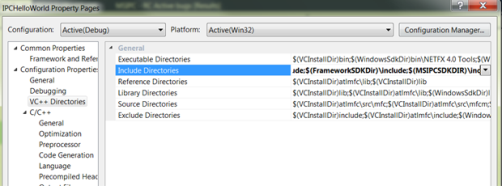
Add the RMS SDK 2.1 include directory to your Visual Studio 2010 project.
Under Configuration Properties select VC++ Directories and add the RMS SDK 2.1 include directory, $(MSIPCSDKDIR)\inc, to the Include Directories field.
Add the RMS SDK 2.1 library directory to your Visual Studio 2010 project.
Under Configuration Properties select VC++ Directories and add the RMS SDK 2.1 library directory, to the Library Directories field for your platform.
- For Win32, use $(MSIPCSDKDIR)\lib
- For x64, use $(MSIPCSDKDIR)\lib\x64

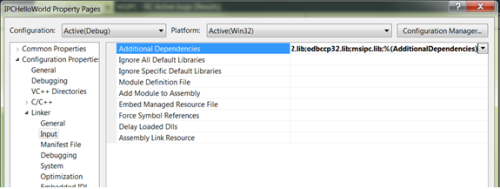
Add the RMS SDK 2.1 library files as Visual Studio 2010 dependencies.
Under Linker, select Input and add the RMS SDK 2.1 library files; Msipc.lib and Msipc_s.lib, to the Additional Dependencies field.
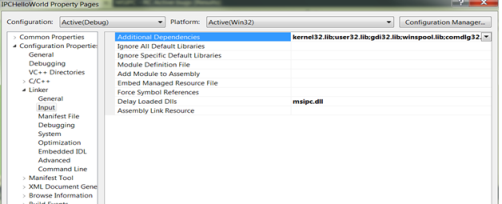
Add the RMS SDK 2.1 Dynamic Link Library (DLL) as a delay-loaded DLL.
Under Linker, select Input, and add the RMS SDK 2.1 DLL file, Msipc.dll, to the Delay Loaded Dlls field.
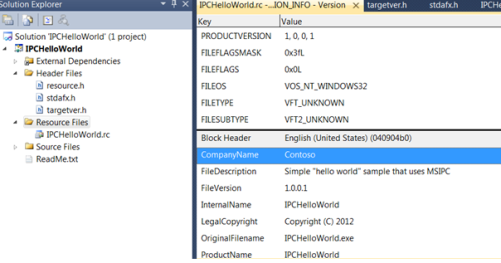
Create version information for your resulting binary.
Under Solution Explorer select Resource Files and add your binary name to the OriginalFileName field.
Related topics