Enhance your projects with the Project Management Office Accelerator
Project for the web is convenient and easy-to-use. Because it's based on the Microsoft Power Platform, it's easy to customize using solutions. We've created a solution that adds six project management scenarios—the Project Management Office Accelerator (PMO Accelerator). This article explains how to use it to enhance your projects in Project for the web.
Note
This article is intended for people using Project for the web to work on projects.
Prerequisites
- Your environment must have the PMO Accelerator solution deployed and enabled by your admin.
- You'll need to belong to a group that has the security roles required for creating or editing projects in Project for the web.
Accelerator scenarios for extending overall project management
💡 Project Requests Adds an idea incubator: You can capture ideas for potential new projects, and spend some time developing a business case for turning them into projects. Change the State to advance the request. When State is set to Active a flow automatically creates a new project with Stage set to Create.
💼 Programs Adds a level at the top of the hierarchy: You can add projects to a program to improve coordination of resources and efforts, and to create a bigger picture of your organizational initiatives.
Scenario: Project Requests
The Accelerator uses a Project Request table that your teams can use to propose new projects, and a Power Automate cloud flow to create a project when a project request is approved.
Note
Your admin must turn the cloud flow on so the approval of a request will create a new project. However, you can still add project ideas to the Project Request table. When the cloud flow is turned on, your ideas can be approved and become projects.
Add a project request
In the navigation pane, select Project Request.
On the command bar, select New.
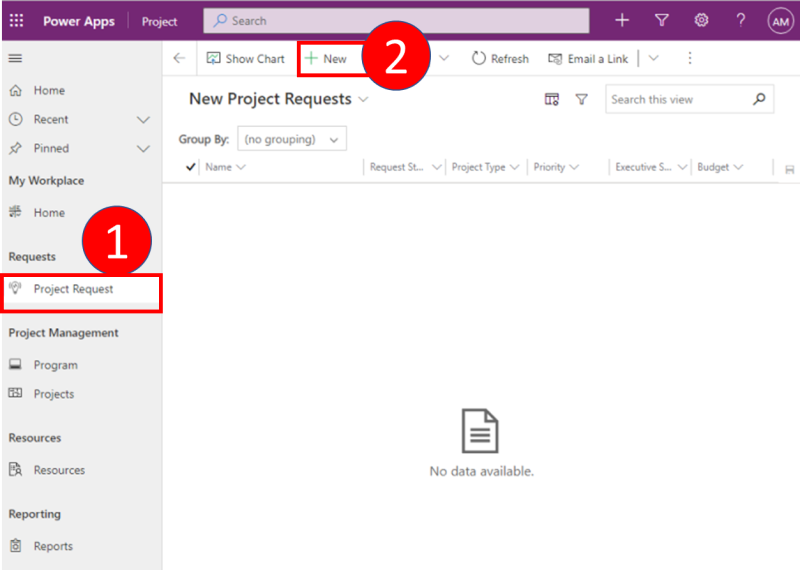
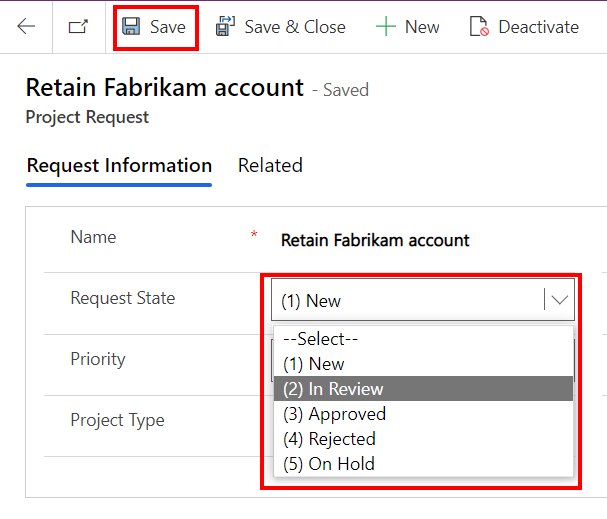
The proposal's Request State is New.

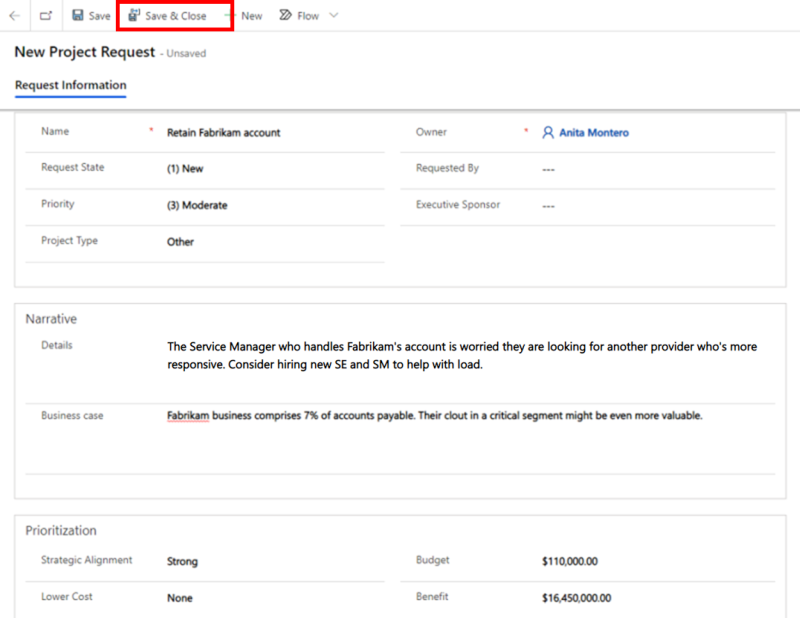
Enter a value for Name, then provide as much additional information about the request as you can. The person who can approve proposals will use it to decide whether to approve this one.
After you finish adding more data, on the command bar select Save and Close.
Review a project request
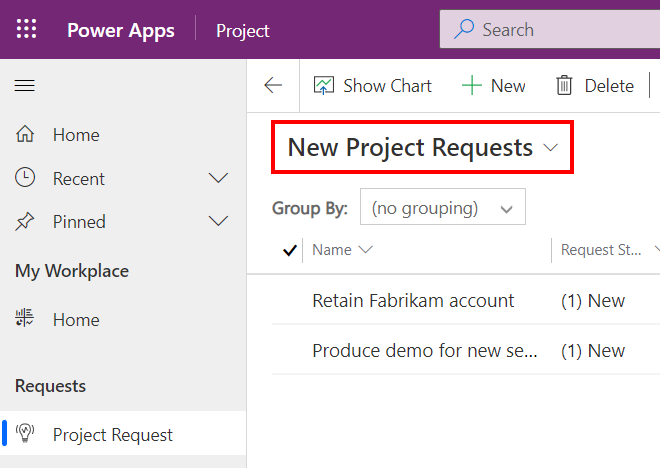
In the navigation pane, select Project Request.
Switch to the New Project Requests view.
Select the request, and then on the command bar select Edit.
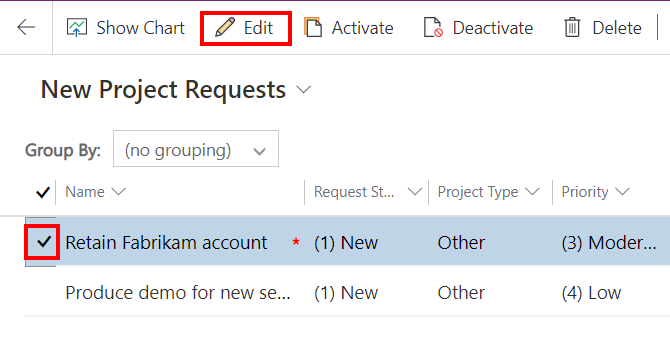
Set Request State to In Review, and then on the command bar select Save. The request stops appearing in the New Project Requests view, so others won't think it still needs reviewing.
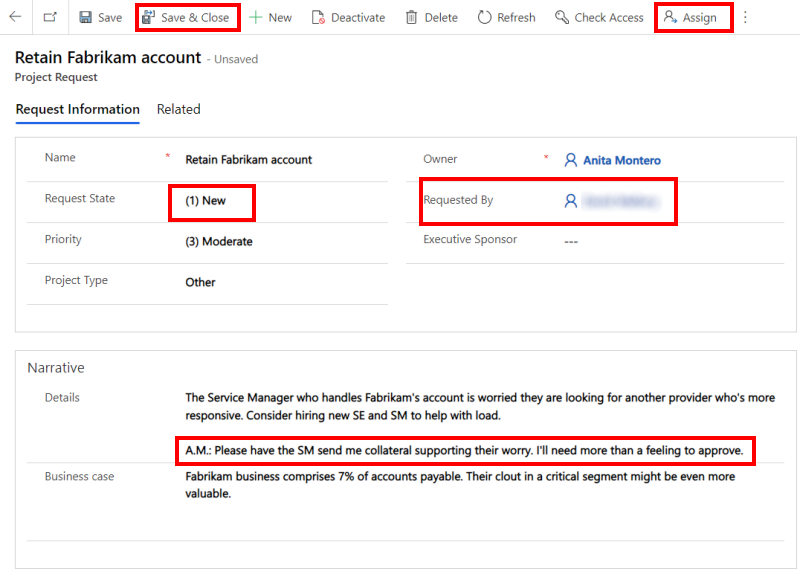
Review the Project Request's details, and then act accordingly:
To ask the requestor for more details, set Request Status back to New, and specify what details are missing by editing Details. Then on the command bar select Assign, assign it to the person listed in Requested By, and then select Save and Close.
To have someone else decide, select Assign on the command bar, choose the new reviewer, and then select Save and Close
If you've got enough detail and can make the decision, set Request Status to Approved or Rejected per your decision, and then select Save and Close.
If you approved the request, in a few moments, the project request appears as a new record in Project with Stage set to Create. You can sort projects by the value of Stage or even create a view that filters by that value.

Scenario: Programs
The Accelerator uses a Program table that enables summary tracking of related projects. You can thereby create a hierarchy for your organization to review ongoing related projects without opening each project to review the details. You can then prioritize efforts across projects on the basis of such things as expected financial returns and current status.
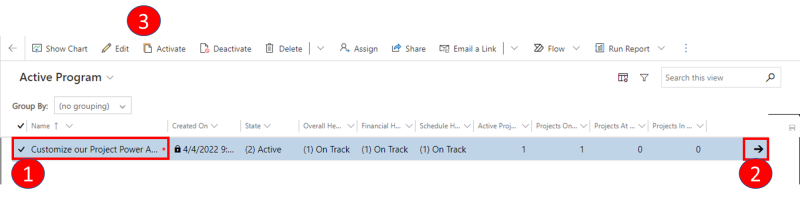
- Set the checkmark to select a program.
- Select the arrow to open the selected program.
- Or, use the command bar to choose an action for the selected program.
Note
When you resize your browser, the command bar changes: it only displays as many commands as it can legibly render. To see more commands, select the vertical dots on the right edge of the command bar to open a menu.
Create a program
Open Project for the web.
In the navigation pane, select Program.
The default main form opens (Information) and displays the default view of programs (Active Programs). You can switch to a different view if you aren't finding the program you want.
Note
Your admin can change both the default form and the default view, so your experience may differ somewhat. Most of the time, the Information form opens, and if the default view changes you can select the view that you want. It's best to see as many programs as possible so that you don't create duplicate or substantially similar programs.
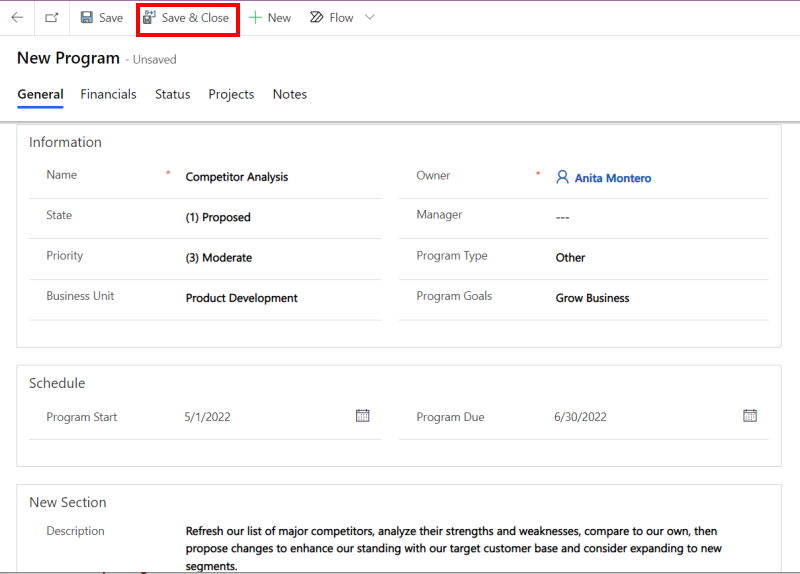
On the command bar, select + New.

Provide as much data as you can, and then on the command bar, select Save and Close.
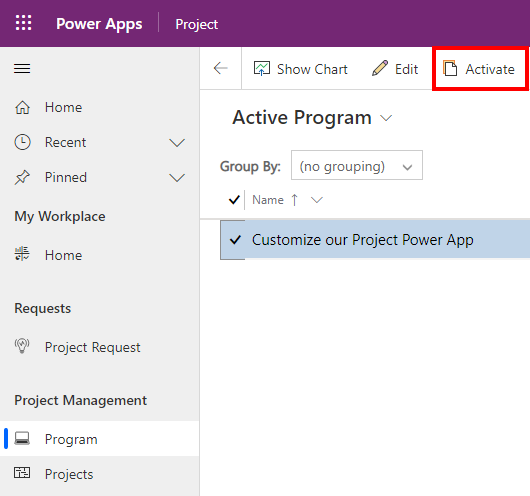
After you create a project, you need to activate it before it will start monitoring the projects it includes. Your business process may require that someone else reviews each program before it's activated. Either way, the process is simple: set the State to Active. It's possible to edit the data directly, but there's also a button on the command bar.
Add projects to a program
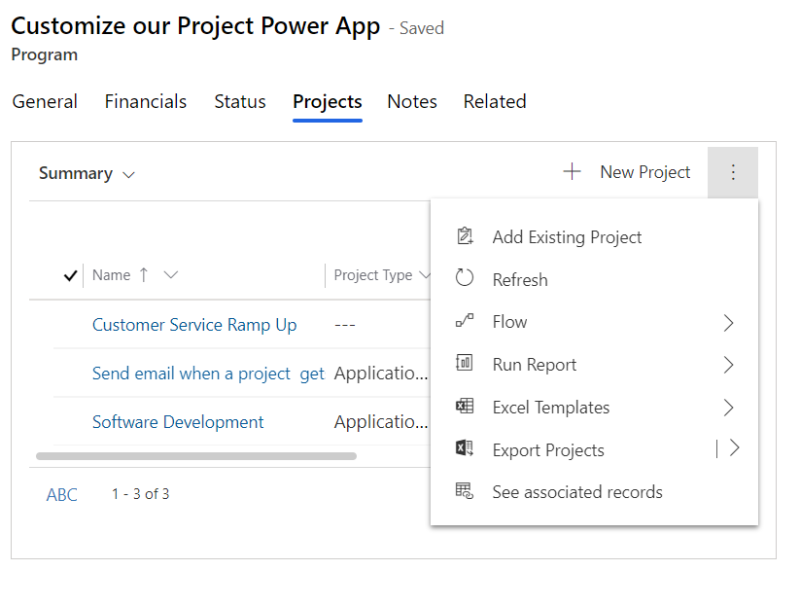
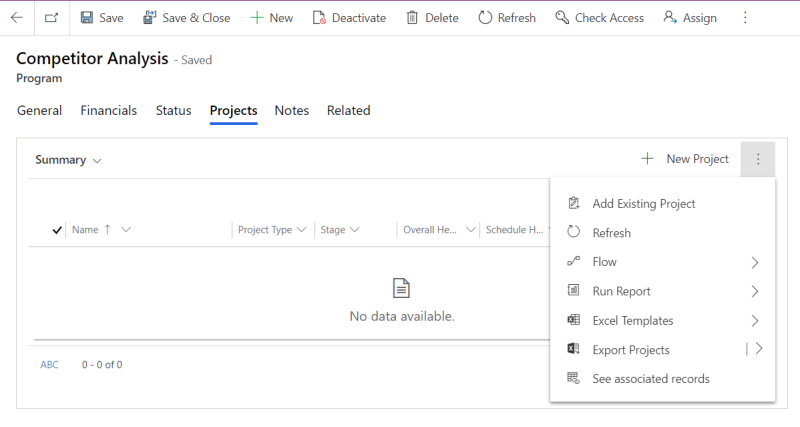
Open the program where you want to add a new project, and then select the Projects tab.
On the command bar of the list on the Projects tab, do one of the following:
- To create a new project for the program, select + New Project.
- To add a project that already exists, select Add Existing Project. If you don't see the command you want, select the vertical dots on the right edge of the command bar to open the menu of available commands.
Refresh a program's project data
When you review a program, it might not display all the latest project information. Refresh it to get the most recent data.
With the program open, select the Projects tab.
On the list's command bar, select Refresh.

Program Reporting
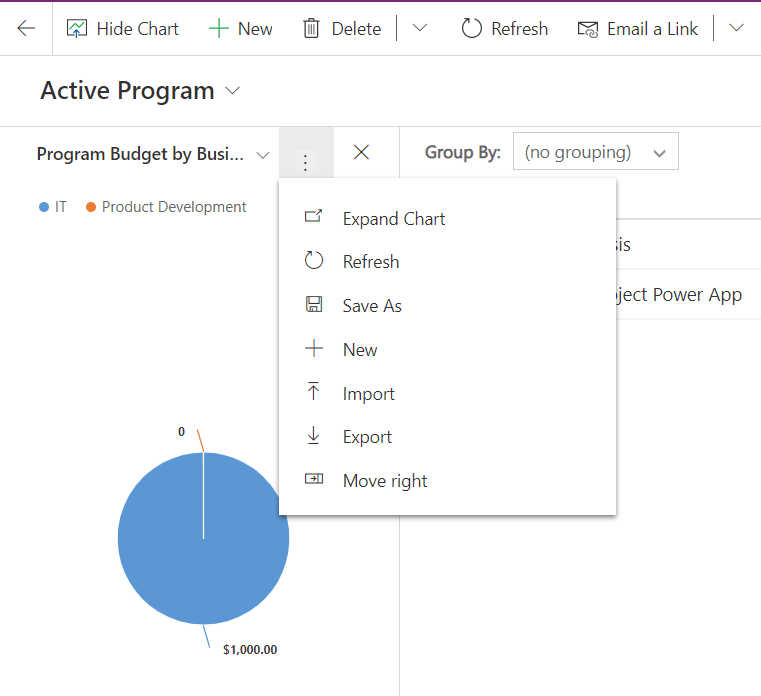
Each program you create has charts depicting various aspects of the program's status and value.
With the Program open, on the command bar, select Show Chart.
The charts appear in a pane to the left of the main form. Several charts are available—to choose a different one, select the drop-down on the chart's name.
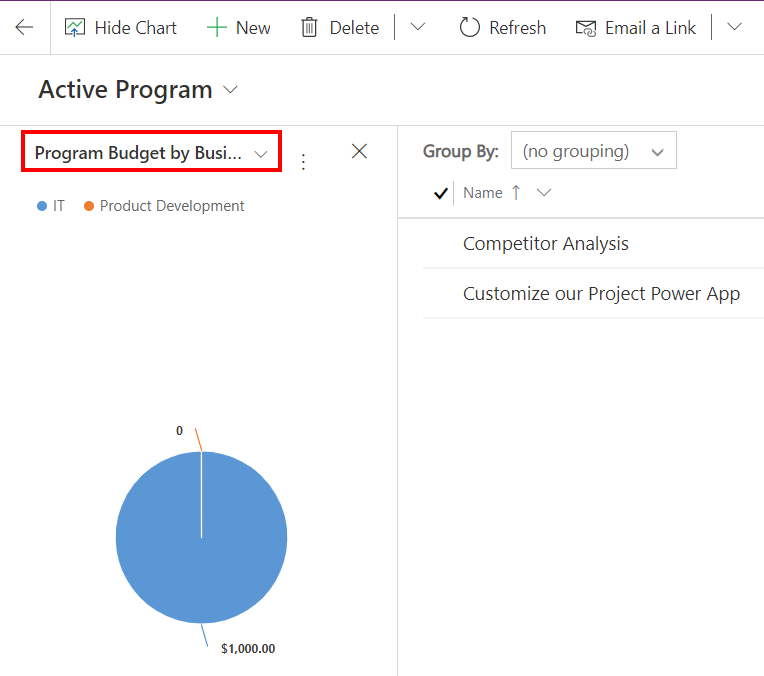
Select the vertical dots just right of the chart name to open a menu of available actions.
The Home Dashboard also has two charts that summarize your programs.
- In the navigation pane, under My Workplace, select Home.
- Review the tiles labeled Program Health.
Tip
If your admin has deployed the Power BI template for the Accelerator, in the navigation pane, select Reports to see what's available.
Accelerator scenarios to track more details about each project
Four Accelerator scenarios add depth—they provide deeper functionality within projects.
🔥 Risks Adds tracking for significant potential threats with financial implications. Periodically review these risks with the right stakeholders to develop mitigation and contingency plans, and decide when it's time to implement them.
🐛 Issues Adds management of unexpected problems that pop-up. Create and assign them to quickly minimize any impacts to your project schedule.
🚧 Changes Adds change tracking processes to manage potential changes to a project and keep a history of how the project has changed over time.
📝 Status Adds detailed status information, and lets you create reports about a project to keep stakeholders up-to-date.
Project tabs with list views: Risks, Issues, Changes, and Status
For each of these scenarios, the Accelerator adds a tab to the Project Information form, with a list view on the tab. There, you can add items that provide a focused perspective on project progress. For the Risks, Issues, and Changes tabs these work basically the same.
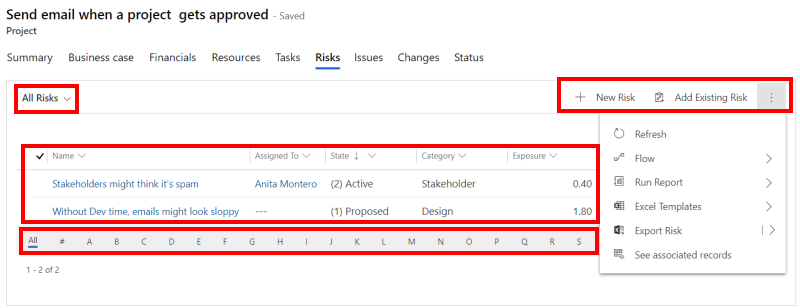
- The view selector lets you choose a different view that lists different items, such as My Active Risks.
- The list displays key fields for each item, and lets you sort the listed items by field values.
- The row of letters lets you filter the items using their names' first letter.
- The list command bar offers commands for creating and working with listed items.
The Status tab displays additional fields above the list view.
Add an item in a tab's list view
Note
To save you time reading, this procedure uses the Changes tab as an example, but it also works on the Risks and Issues, and Status tabs—the command text will reflect the type of item you add.
Open the relevant project.
Select the Changes tab.
On the view selector select All Changes.
The list's command bar displays available commands. If the command you want isn't displayed, select the vertical dots at the right edge of the command bar to open a menu:
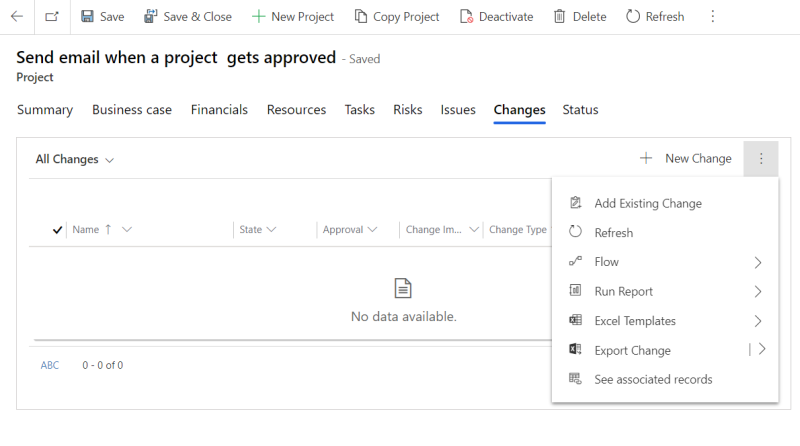
- To create a new item, select + New Change.
- To add a change that already exists in another project, select Add Existing Change.
Edit an item in a list view
Note
To save you time reading, this procedure uses the Changes tab as an example, but it also works on the Risks, Issues, and Status tabs—the command text will reflect the type of item you edit.
Open the project and select the Changes tab.
Switch views if needed, and then select the item's row in the list.
On the list's command bar, select Edit.
If the item isn't Activated, the record will be read-only. To edit, select Activate on the command bar.

Scenario: Risks
Risks can wreak havoc on a project's budget or schedule. That's why it's vital to identify significant risks early, track them, and develop mitigation and contingency plans. The Information form for Risks helps you do just that.
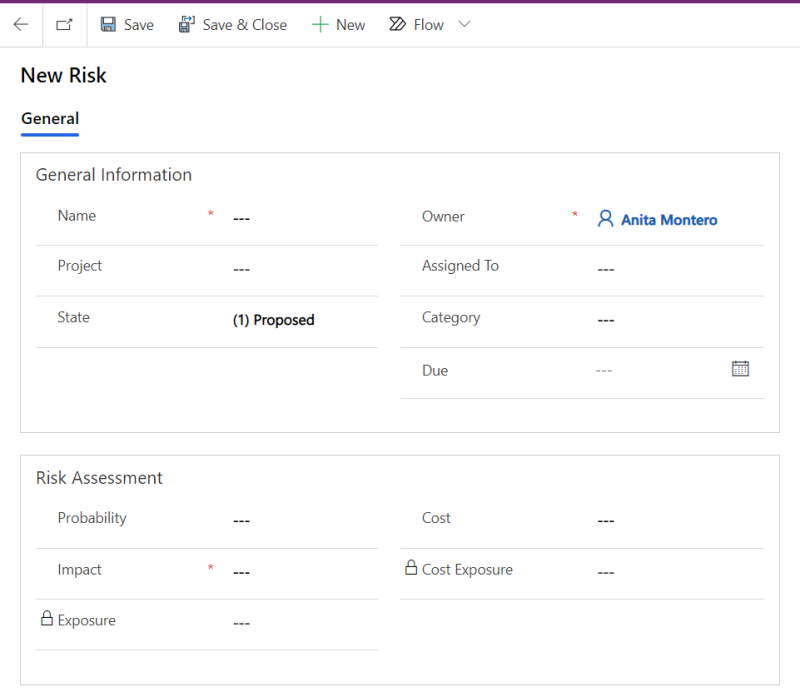
Add a risk to a project
Follow the steps to create a new list view item.
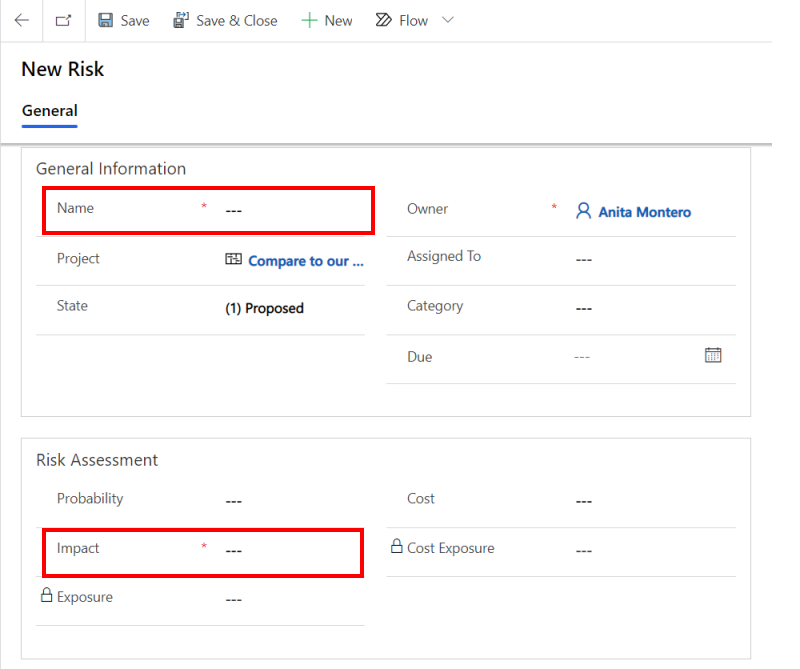
Enter values in all the required fields (they're marked with asterisks).
- For Impact, you should perform some analysis to arrive at a defensible value. Don't just guess, because other fields use this value in calculations, and decision-makers use it to justify mitigation and contingency plans.
- By creating the risk, you are listed as Owner, but you can change that to someone who is a valid delegate.
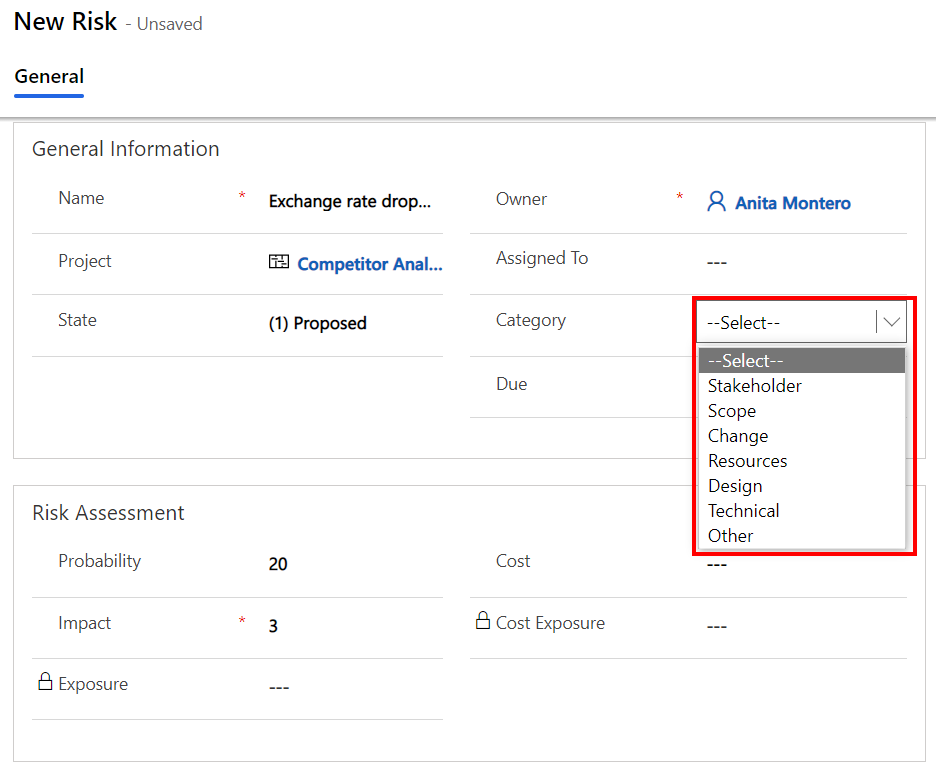
Fill out as much additional information as you can support with data or documentation. Try to select the most appropriate value for Category or just leave it empty. Views might include Category as a means of filtering or sorting lists of risks.
Tip
If your projects are prone to a certain variety of risk, consider creating a risk "template": When you're done editing a risk, on the command bar select Save and then select New. A new risk opens with no value for Project. Add values for the required fields and any others you want in your "template", and then on the command bar select Save and Close. Your "template" risk will be available as an existing risk you can add to projects.
Scenario: Issues
Sometimes things don't go as planned: a resource might suddenly become unavailable, a planned change to one thing breaks something else—issues pop-up. When an unpleasant surprise arrives, track it as an issue to minimize the impact to your project.
Note
Risks and Issues may seem quite alike, but there are some key differences:
- An issue has already happened, whereas a risk is a possibility.
- A risk involves some degree of financial threat, whereas any costs associated with an issue have either already been incurred or are insignificant.
- Risks are usually broader in scope than issues.
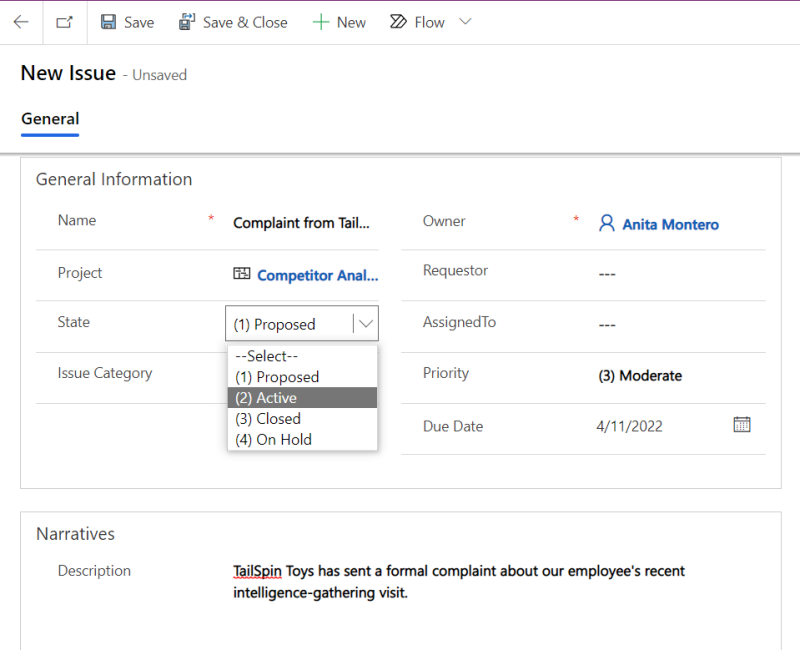
Add an issue to a project
Follow the steps to create a new list view item.
Enter a value for Name.
By creating the risk, you are listed as Owner, but you can change that to someone who is a valid delegate.
Although you can save an issue with just a name and an owner, you should enter a Description sufficient for suggesting the eventual Resolution.
If you have suitable delegates, you can choose values for AssignedTo and Due Date, set State to Active, and then on the command bar select Save and Close.
Scenario: Changes
During project execution, you might need to change course—perhaps a spark of inspiration hits (or maybe a grim realization). The Changes scenario provides an incubator for ideas within projects (somewhat like the Project Request scenario).
Changes also provide a history of the execution of a project, a way for you to examine your project post-completion and learn how you might adjust your methods and practices.
Propose a change to a project
- Follow the steps to create a new list view item.
- Enter values in all the required fields (they're marked with asterisks).
- Add as much detail as you can, then save and close.
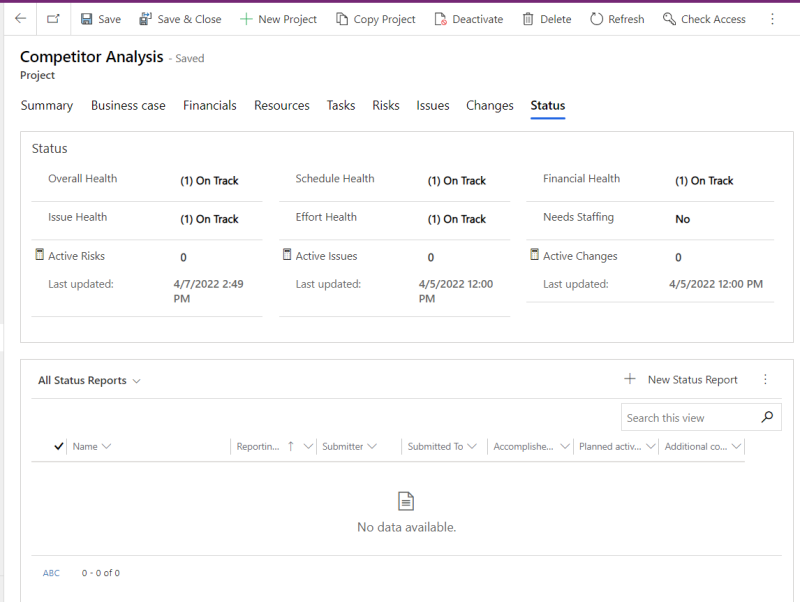
Scenario: Status
The Accelerator uses the Status table to add a Status tab to the Project table's Information form. Various indicators occupy the upper portion of the tab, and the lower portion contains a list view for Status Reports.
Create a new status report
- Follow the steps to create a new list view item.
- Enter values in all the required fields (they're marked with asterisks).
- Much of the value of the report is its narrative quality, so you might want to complete it during several editing sessions. If so, on the command bar select Save if you plan to begin composing now, or Save and Close if you have a more immediate task at hand.
- When you have completed your report, choose a value for Submitted To, and then on the command bar select Save and Close.
Next steps
- Get the big picture from the Home dashboard
- Analyze your projects in Power BI
Feedback
Coming soon: Throughout 2024 we will be phasing out GitHub Issues as the feedback mechanism for content and replacing it with a new feedback system. For more information see: https://aka.ms/ContentUserFeedback.
Submit and view feedback for