Note
Access to this page requires authorization. You can try signing in or changing directories.
Access to this page requires authorization. You can try changing directories.
After setting up Customer Key, the next step is to create and assign one or more data encryption policies (DEPs). Once assigned, you can manage your encryption keys and policies as described in this article.
Microsoft Purview Customer Key also supports Windows 365 Cloud PCs. For more information, see Microsoft Purview Customer Key for Windows 365 Cloud PCs.
Prerequisites
Before managing Customer Key, ensure you have:
- Completed setup: Finish all steps in Set up Customer Key
- Key Vault URIs: Obtain the URIs for your Azure Key Vault keys. See Obtain the URI for each Azure Key Vault key
- Permissions: Exchange admin permissions (all DEP operations run through Exchange Online PowerShell)
- PowerShell modules:
- Exchange Online PowerShell for DEP operations
- Azure PowerShell for Key Vault operations
Important
Microsoft recommends that you use roles with the fewest permissions. Minimizing the number of users with the Global Administrator role helps improve security for your organization. Learn more about Microsoft Purview roles and permissions.
Quick reference: Commands by task
Use the following tables to quickly find the command you need.
Create and assign DEPs
| Task | Workload | Command |
|---|---|---|
| Create a DEP | Multi-workload | New-M365DataAtRestEncryptionPolicy -Name <Name> -AzureKeyIDs <KeyURI1>,<KeyURI2> |
| Create a DEP | Exchange | New-DataEncryptionPolicy -Name <Name> -AzureKeyIDs <KeyURI1>,<KeyURI2> |
| Create a DEP | SharePoint/OneDrive | Register-SPODataEncryptionPolicy -PrimaryKeyVaultName <Name> -PrimaryKeyName <Name> -PrimaryKeyVersion <Version> -SecondaryKeyVaultName <Name> -SecondaryKeyName <Name> -SecondaryKeyVersion <Version> |
| Assign a DEP | Multi-workload | Set-M365DataAtRestEncryptionPolicyAssignment -DataEncryptionPolicy <PolicyName> |
| Assign a DEP | Exchange mailbox | Set-Mailbox -Identity <Mailbox> -DataEncryptionPolicy <PolicyName> |
| Assign a DEP | Hybrid mailbox | Set-MailUser -Identity <MailUser> -DataEncryptionPolicy <PolicyName> |
View and verify DEPs
| Task | Workload | Command |
|---|---|---|
| List all DEPs | Multi-workload | Get-M365DataAtRestEncryptionPolicy |
| List all DEPs | Exchange | Get-DataEncryptionPolicy |
| View DEP assignment | Multi-workload | Get-M365DataAtRestEncryptionPolicyAssignment |
| View mailbox DEP | Exchange | Get-MailboxStatistics -Identity <Mailbox> \| fl DataEncryptionPolicyID |
| View encryption status | SharePoint/OneDrive | Get-SPODataEncryptionPolicy <SPOAdminSiteUrl> |
| Check mailbox encryption | Exchange | Get-MailboxStatistics -Identity <Mailbox> \| fl IsEncrypted |
Manage and disable DEPs
| Task | Workload | Command |
|---|---|---|
| Disable a DEP | Multi-workload | Set-M365DataAtRestEncryptionPolicy -Identity <Policy> -Enabled $false |
| Unassign a DEP | Exchange | Set-Mailbox -Identity <Mailbox> -DataEncryptionPolicy $null |
Key Vault operations
| Task | Command |
|---|---|
| View Key Vault permissions | Get-AzKeyVault -VaultName <VaultName> |
| Remove user access | Remove-AzKeyVaultAccessPolicy -VaultName <VaultName> -UserPrincipalName <UPN> |
| Restore a key | Restore-AzKeyVaultKey -VaultName <VaultName> -InputFile <BackupFile> |
Create a DEP for use with multiple workloads for all tenant users
On your local computer, sign in using a work or school account with Compliance Administrator permissions, and connect to Exchange Online PowerShell.
Run the following cmdlet to create a multi-workload data encryption policy:
New-M365DataAtRestEncryptionPolicy -Name <PolicyName> -AzureKeyIDs <KeyVaultURI1, KeyVaultURI2> [-Description <String>]Parameter definitions:
-Name: The name you want to use for the policy. No spaces allowed.-AzureKeyIDs: URIs of the two Azure Key Vault keys used in the policy, separated by commas.Example:
"https://contosoCentralUSvault1.vault.azure.net/keys/Key_02""https://contosoWestUSvault1.vault.azure.net/keys/Key_01"Description(optional): A human-readable description of the policy.Example:
"Policy for multiple workloads for all users in the tenant."
New-M365DataAtRestEncryptionPolicy -Name "Contoso_Global" -AzureKeyIDs "https://contosoWestUSvault1.vault.azure.net/keys/Key_01","https://contosoCentralUSvault1.vault.azure.net/keys/Key_02" -Description "Policy for multiple workloads for all users in the tenant."
Assign multi-workload policy
After creating a multi-workload data encryption policy (DEP), assign it using the Set-M365DataAtRestEncryptionPolicyAssignment cmdlet. Once assigned, Microsoft 365 encrypts your organization's data using the keys specified in the DEP.
Set-M365DataAtRestEncryptionPolicyAssignment -DataEncryptionPolicy <PolicyName or ID>
Replace <PolicyName or ID> with the name or GUID of the policy.
Example:
Set-M365DataAtRestEncryptionPolicyAssignment -DataEncryptionPolicy "Contoso_Global"
Windows 365 Cloud PCs:
After assigning the policy, allow 3–4 hours for the Intune admin center to reflect the update. Once updated, follow the steps in the admin center to encrypt existing Cloud PCs.
For more information, see Set up Customer Keys for your Windows 365 Cloud PCs.
Create a DEP for use with Exchange mailboxes
Before you begin, complete the required setup steps. For details, see Set up Customer Key. To create the DEP, you’ll need the Azure Key Vault URIs obtained during setup. For more info, see Obtain the URI for each Azure Key Vault key.
To create a DEP for Exchange mailboxes, follow these steps:
On your local computer, using a work or school account that has Exchange admin permissions, connect to Exchange Online PowerShell.
Create a DEP using the
New-DataEncryptionPolicycmdlet:New-DataEncryptionPolicy -Name <PolicyName> -Description "Policy Description" -AzureKeyIDs <KeyVaultURI1>, <KeyVaultURI2>Parameter Description Example -NameEnter a name for the policy. Names can't contain spaces. USA_mailboxes-AzureKeyIDsEnter the URIs for two keys in separate Azure Key Vaults. Separate them with a comma and a space. https://contosoEastUSvault01.vault.azure.net/keys/USA_key_01,https://contosoEastUS2vault01.vault.azure.net/keys/USA_key_02-DescriptionA user-friendly description that helps identify the policy’s purpose. "Root key for mailboxes in USA and its territories"Example:
New-DataEncryptionPolicy -Name USA_mailboxes -Description "Root key for mailboxes in USA and its territories" -AzureKeyIDs https://contoso_EastUSvault02.vault.azure.net/keys/USA_key_01, https://contoso_CentralUSvault02.vault.azure.net/keys/USA_Key_02For syntax and parameter information, see New-DataEncryptionPolicy.
Assign a DEP to a mailbox
Assign the DEP with the Set-Mailbox cmdlet. Once assigned, Microsoft 365 encrypts the mailbox with the keys in the DEP.
Set-Mailbox -Identity <MailboxIdParameter> -DataEncryptionPolicy <PolicyName>
For more information, see Set-Mailbox.
Assign a DEP to hybrid mailboxes
In hybrid environments, assign a DEP to synchronized on-premises mailbox data using Set-MailUser:
Set-MailUser -Identity <MailUserIdParameter> -DataEncryptionPolicy <PolicyName>
For more information, see Set-MailUser and on-premises mailboxes using Outlook for iOS and Android with hybrid Modern Authentication.
Assign a DEP before you migrate a mailbox to the cloud
Assigning a DEP before migration encrypts your mailbox contents during the move, which is more efficient than assigning a DEP after migration.
Connect to Exchange Online PowerShell using a work or school account with proper permissions.
Run the following command:
Set-MailUser -Identity <GeneralMailboxOrMailUserIdParameter> -DataEncryptionPolicy <DataEncryptionPolicyIdParameter>
View the DEPs you created for Exchange mailboxes
To list all DEPs in your organization, connect to Exchange Online PowerShell and run:
Get-DataEncryptionPolicy
For detailed cmdlet information, see Get-DataEncryptionPolicy.
Determine the DEP assigned to a mailbox
To find the DEP assigned to a mailbox, connect to Exchange Online PowerShell and run:
Get-Mailbox -Identity <MailboxIdParameter> | fl DataEncryptionPolicy
To get the friendly name from the returned GUID:
Get-DataEncryptionPolicy <GUID>
For more information, see Get-MailboxStatistics.
Create a DEP for use with SharePoint and OneDrive
Before you begin, make sure you complete the required setup steps. For more information, see Set up Customer Key.
To configure Customer Key for SharePoint and OneDrive, use SharePoint PowerShell.
A DEP uses two keys from separate Azure Key Vaults in different regions. Single-geo tenants need one DEP; multi-geo tenants need one DEP per geo with different keys. You need the Key Vault URIs for both keys (see Obtain the URI for each Azure Key Vault key).
On your local computer, using a work or school account that has proper permissions in your organization, connect to SharePoint PowerShell.
Use the
Register-SPODataEncryptionPolicycmdlet to register the DEP.Register-SPODataEncryptionPolicy -PrimaryKeyVaultName <PrimaryKeyVaultName> -PrimaryKeyName <PrimaryKeyName> -PrimaryKeyVersion <PrimaryKeyVersion> -SecondaryKeyVaultName <SecondaryKeyVaultName> -SecondaryKeyName <SecondaryKeyName> -SecondaryKeyVersion <SecondaryKeyVersion>Example:
Register-SPODataEncryptionPolicy -PrimaryKeyVaultName 'stageRG3vault' -PrimaryKeyName 'SPKey3' -PrimaryKeyVersion 'f635a23bd4a44b9996ff6aadd88d42ba' -SecondaryKeyVaultName 'stageRG5vault' -SecondaryKeyName 'SPKey5' -SecondaryKeyVersion '2b3e8f1d754f438dacdec1f0945f251a'If using Managed HSM: Use the full URL of the key including version for each vault.
Register-SPODataEncryptionPolicy -PrimaryKeyVaultUri <PrimaryKeyVaultURL> -SecondaryKeyVaultUri <SecondaryKeyVaultURL>Example:
Register-SPODataEncryptionPolicy -PrimaryKeyVaultURL https://M365-Test.managedhsm.azure.net/keys/Sharepoint-01/aaaa5513974f4780ea67b2f5d8c3dd -SecondaryKeyVaultURL https://M365-Test-02.managedhsm.azure.net/keys/Sharepoint-02/7d8f30343bed4e44a57225bae2012388Note
Once the DEP is registered, encryption of the geo's data begins. This process might take some time.
For full cmdlet reference, see Register-SPODataEncryptionPolicy.
Verify that encryption with Customer Key is complete
After rolling a Customer Key, assigning a new data encryption policy (DEP), or migrating a mailbox, follow the steps in this section to confirm that encryption is complete.
Verify encryption completes for Exchange mailboxes
Encrypting a mailbox with Customer Key can take time. To verify that encryption is complete, determine the DEP assigned to the mailbox and confirm that the returned data encryption policy ID matches the policy you assigned.
Verify encryption completes for SharePoint and OneDrive
Check on the status of encryption by running the Get-SPODataEncryptionPolicy cmdlet as follows:
Get-SPODataEncryptionPolicy <SPOAdminSiteUrl>
The output includes primary/secondary key URIs, encryption status, and percentage of sites onboarded. Status values:
| Status | Description |
|---|---|
| Unregistered | Customer Key encryption not applied |
| Registering | Encryption in progress (shows percentage complete) |
| Registered | Encryption complete |
| Rolling | Key roll in progress (shows percentage complete) |
Get details about DEPs you use with multiple workloads
To view multi-workload DEPs, connect to Exchange Online PowerShell with Compliance Administrator permissions and run:
Get-M365DataAtRestEncryptionPolicy
For details about a specific DEP:
Get-M365DataAtRestEncryptionPolicy -Identity "Contoso_Global"
Get multi-workload DEP assignment information
To identify which DEP is assigned to your tenant, connect to Exchange Online PowerShell and run:
Get-M365DataAtRestEncryptionPolicyAssignment
Disable a multi-workload DEP
Before disabling, unassign the DEP from workloads in your tenant. Then connect to Exchange Online PowerShell and run:
Set-M365DataAtRestEncryptionPolicy -Identity "PolicyName" -Enabled $false
Restore Azure Key Vault keys
Before restoring, try using soft delete to recover keys (available for up to 90 days). Full restoration is only needed if a key or vault is permanently lost.
To restore a key using Azure PowerShell, run the following command:
Restore-AzKeyVaultKey -VaultName <vault name> -InputFile <filename>
Example:
Restore-AzKeyVaultKey -VaultName Contoso-O365EX-NA-VaultA1 -InputFile Contoso-O365EX-NA-VaultA1-Key001-Backup-20170802.backup
Important
If the key vault already contains a key with the same name, the restore operation fails. The Restore-AzKeyVaultKey cmdlet restores all versions of the key, including its metadata and name.
Manage key vault permissions
Use Azure PowerShell to view or remove key vault permissions (for example, when a user leaves the team).
To view permissions:
Get-AzKeyVault -VaultName <vault name>
Example:
Get-AzKeyVault -VaultName Contoso-O365EX-NA-VaultA1
To remove a user's access:
Remove-AzKeyVaultAccessPolicy -VaultName <vault name> -UserPrincipalName <UPN of user>
Roll back from Customer Key to Microsoft managed Keys
You can revert to Microsoft-managed keys, which re-encrypts your data using the default encryption method for each workload.
Important
Rolling back reverts encryption but doesn't delete data. A data purge permanently crypto-deletes data and can't be performed on multi-workload policies.
Roll back from Customer Key for multiple workloads
Important
Rolling back from Customer Key for multiple workloads is not supported in Gallatin.
If you no longer want to use Customer Key with multi-workload data encryption policies (DEPs), submit a support request through Microsoft Support. Include the following information in your request:
- Tenant fully qualified domain name (FQDN)
- Tenant contact for the rollback request
- Reason for discontinuing Customer Key
- Incident number
Important
You must retain your Azure Key Vaults (AKVs) and encryption keys with the appropriate permissions. This action is required so that data can be rewrapped using Microsoft-managed keys.
Roll back from Customer Key for Exchange
Important
Rolling back from Customer Key for Exchange is not supported in Gallatin.
If you no longer want to encrypt individual mailboxes using mailbox-level data encryption policies (DEPs), you can unassign those DEPs from all mailboxes.
To unassign a mailbox-level DEP, follow these steps:
Use a work or school account that has the necessary Exchange Online PowerShell permissions, and connect to Exchange Online PowerShell.
Run the following cmdlet.
Set-Mailbox -Identity <mailbox> -DataEncryptionPolicy $null
This command unassigns the current DEP and re-encrypts the mailbox using the default Microsoft-managed keys.
Note
You can't unassign the DEP associated with Microsoft-managed keys. If you don't want to use Microsoft-managed keys, assign a different DEP to the mailbox instead.
Roll back from Customer Key for SharePoint and OneDrive
Rolling back from Customer Key to Microsoft-managed keys isn't supported for SharePoint or OneDrive.
Revoke your keys and start the data purge path
You control revocation of all root keys, including the availability key. When you revoke keys to purge data and exit the service, the availability key is deleted after the purge completes. This functionality is only supported for DEPs assigned to individual mailboxes.
Microsoft 365 audits and validates the data purge process. For more information, see the SSAE 18 SOC 2 Report, Risk Assessment and Compliance Guide for Financial Institutions, and Microsoft 365 Exit Planning Considerations.
Important
Purging a multi-workload DEP isn't supported. These policies encrypt data across multiple workloads and users within your tenant. Purging such a DEP would make data across all workloads inaccessible.
If you're exiting Microsoft 365 services entirely, see how to delete a tenant in Microsoft Entra ID.
Revoke your Customer Keys and the availability key for Exchange
When you initiate the data purge path for Exchange, you place a permanent data purge request on a data encryption policy (DEP). This action permanently deletes encrypted data in all mailboxes assigned to that DEP.
Because the PowerShell cmdlet works on only one DEP at a time, consider reassigning a single DEP to all mailboxes before starting the data purge process.
Warning
Don't use the data purge path to delete a subset of mailboxes. This process is intended only for organizations that are fully exiting the service.
Important
Rolling back from Customer Key for Exchange, is not supported in Gallatin.
To initiate the data purge path, follow these steps:
Remove wrap and unwrap permissions for O365 Exchange Online from your Azure Key Vaults.
Use a work or school account with the appropriate Exchange Online PowerShell permissions, and connect to Exchange Online PowerShell.
For each DEP that includes mailboxes you want to purge, run the
Set-DataEncryptionPolicycmdlet:Set-DataEncryptionPolicy <Policy ID> -PermanentDataPurgeRequested -PermanentDataPurgeReason <Reason> -PermanentDataPurgeContact <ContactName>If the command fails, confirm that Exchange Online permissions were removed from both keys in the Azure Key Vault, as noted earlier. After you run the
Set-DataEncryptionPolicycmdlet with the-PermanentDataPurgeRequestedswitch, the DEP can't be assigned to mailboxes anymore.Contact Microsoft Support and request the Data Purge eDocument.
Microsoft sends a legal document to confirm and authorize the data purge. The person who signs this is usually an executive or other legally authorized representative.
After your representative signs the document, return it to Microsoft (usually via e-signature).
Once Microsoft receives the signed eDocument, it verifies the authenticity of the signature and signee. Once verified, they run the necessary cmdlets to complete the data purge. This process deletes the DEP, marks affected mailboxes for permanent deletion, and removes the availability key. After the process finishes, the data is purged, inaccessible to Exchange, and can't be recovered.
Revoke your Customer Keys and the availability key for SharePoint and OneDrive
Purging DEPs for SharePoint and OneDrive isn't supported in Customer Key. If you're exiting Microsoft 365 services entirely, you can follow the documented process to delete your tenant.
For details, see how to delete a tenant in Microsoft Entra ID.
Migrate your Key Vaults from the legacy access policy model to RBAC
If you onboarded to Customer Key using the legacy access policy model, follow these steps to migrate all Azure Key Vaults to use role-based access control (RBAC). To compare the two models and understand why Microsoft recommends RBAC, see Azure role-based access control (Azure RBAC) vs. access policies (legacy).
Remove legacy access policies
To remove the existing access policies from your Key Vaults, use the Remove-AzKeyVaultAccessPolicy cmdlet.
Sign in to your Azure subscription with Azure PowerShell. For guidance, see Sign in with Azure PowerShell.
Run the following command to remove access for the Microsoft 365 Service principal:
Remove-AzKeyVaultAccessPolicy -VaultName <VaultName> -ServicePrincipalName c066d759-24ae-40e7-a56f-027002b5d3e4Run the following command to remove access for the Exchange Online principal:
Remove-AzKeyVaultAccessPolicy -VaultName <VaultName> -ServicePrincipalName 00000002-0000-0ff1-ce00-000000000000Run the following command to remove access for the SharePoint and OneDrive for work or school service principal:
Remove-AzKeyVaultAccessPolicy -VaultName <VaultName> -ServicePrincipalName 00000003-0000-0ff1-ce00-000000000000
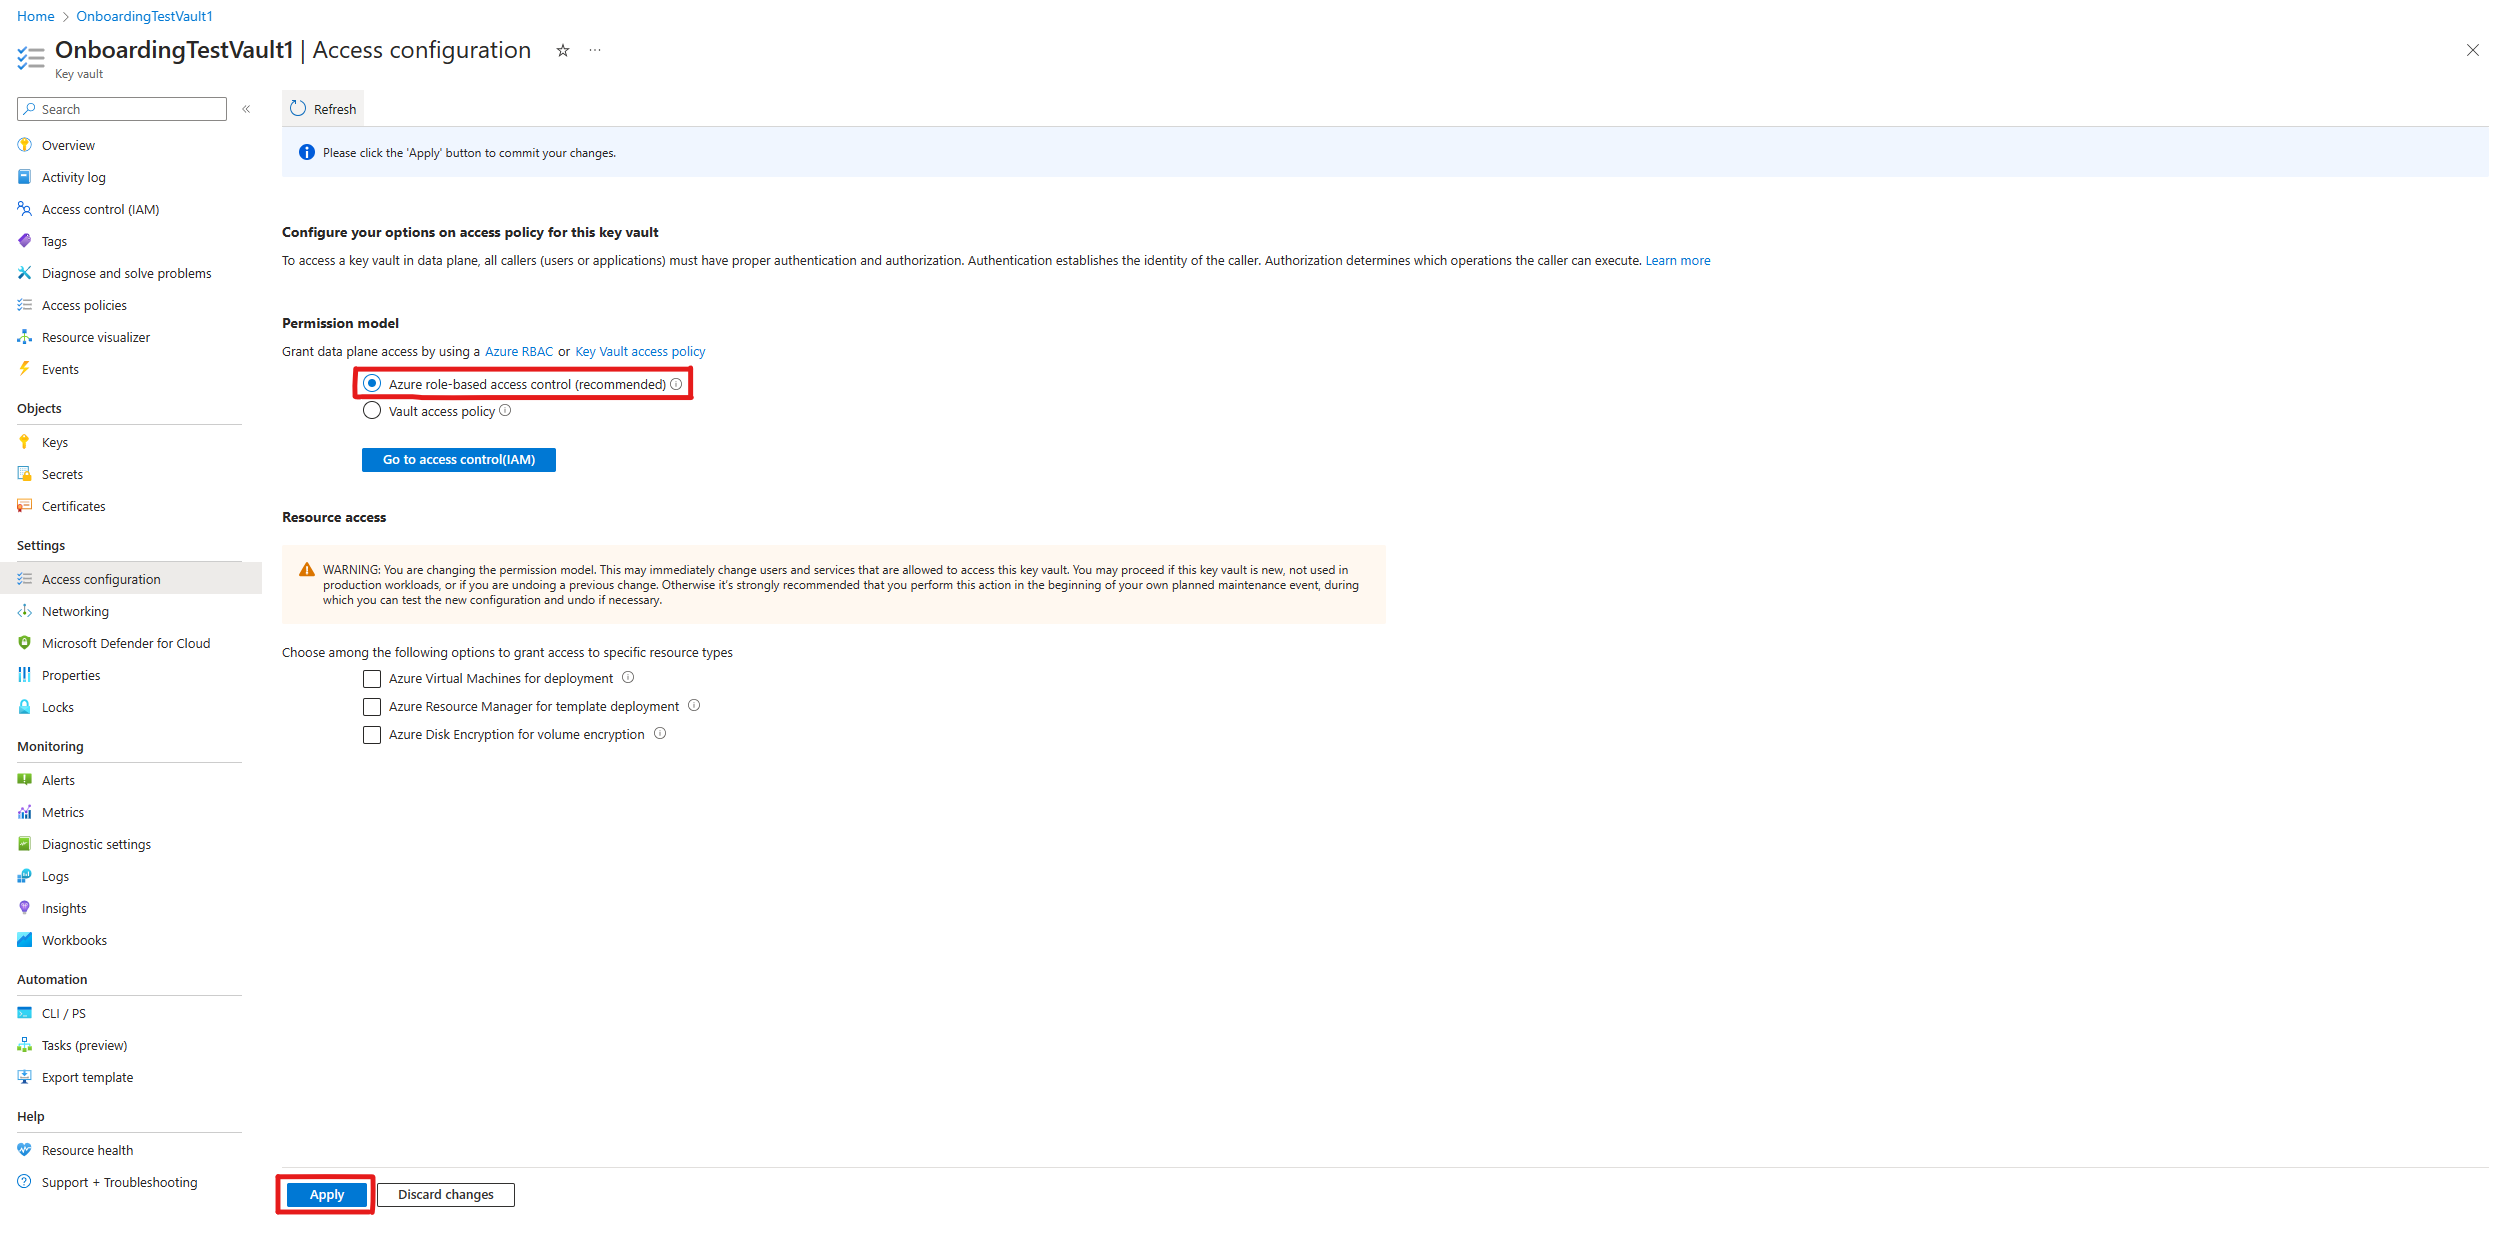
Changing the Access configuration permission model
After removing the access policies, update the permission model for each Key Vault in the Azure portal:
In the Azure portal, navigate to your Key Vault.
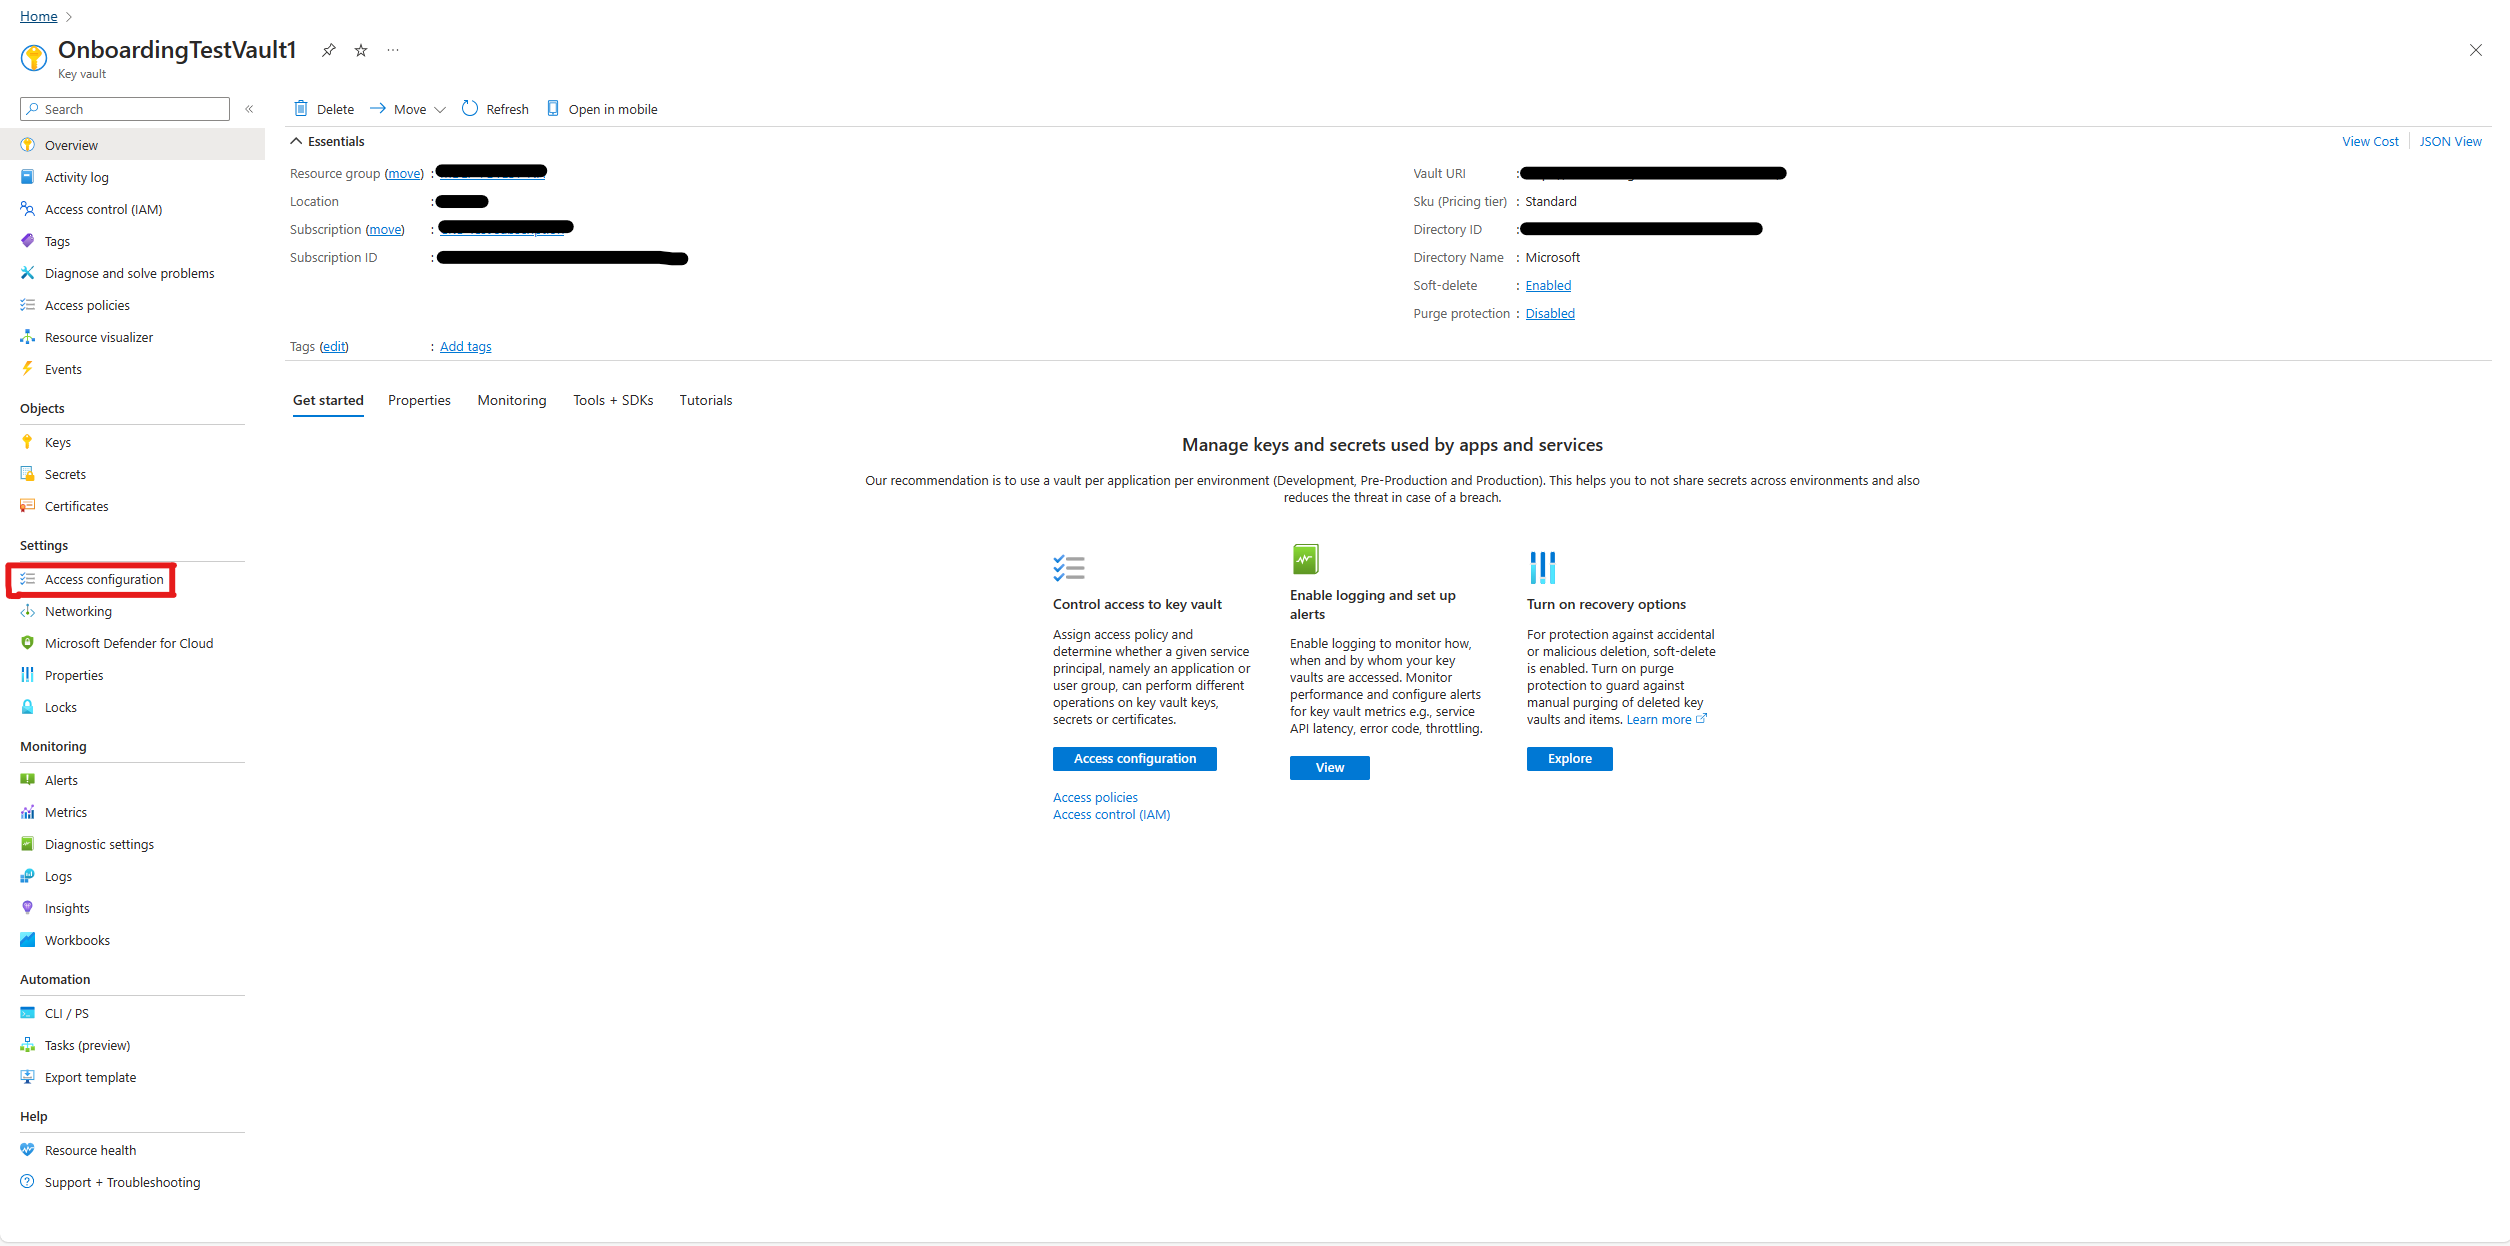
In the left-hand menu, under Settings, select Access configuration.
Under Permission model, choose Azure role-based access control.
Select Apply at the bottom of the screen.
Assigning RBAC permissions
After you switch the permission model, follow the steps in Assign permissions to each Key Vault to grant the necessary roles.
Troubleshooting
| Issue | Possible cause | Resolution |
|---|---|---|
| DEP creation fails | Invalid Key Vault URI | Verify the URI format and that the key exists in the vault |
| DEP assignment fails | Insufficient permissions | Ensure you have Exchange admin permissions |
| Mailbox not encrypted after one week | Database move not complete | Contact Microsoft Support |
Get-MailboxStatistics returns no DataEncryptionPolicyID |
DEP not assigned | Assign a DEP using Set-Mailbox |
| SharePoint encryption stuck at "Registering" | Large tenant or key access issue | Verify key permissions; for large tenants, encryption can take time |
| Key restore fails | Key with same name exists | Use a different vault or remove the existing key first |
| Can't connect to Exchange Online PowerShell | Module not installed or outdated | Install or update the Exchange Online PowerShell module |