Note
Access to this page requires authorization. You can try signing in or changing directories.
Access to this page requires authorization. You can try changing directories.
Not all documents that you need to analyze in Microsoft Purview eDiscovery are in Microsoft 365. With the import external data feature in eDiscovery with premium features, you can upload documents that aren't in Microsoft 365 to a review set. This article shows you how to bring your external data into eDiscovery for analysis.
Requirements to import external data
To use the import external data feature in eDiscovery, you need the following requirements:
eDiscovery premium features enabled in your organization.
All custodians that you want to associate external data to must have the appropriate license. For more information, see Get started with eDiscovery.
An existing eDiscovery case.
External data must be a file type supported by eDiscovery. For more information, see Supported file types in eDiscovery.
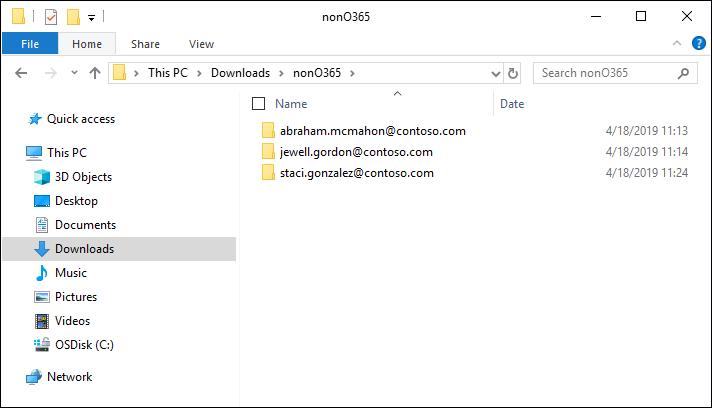
All files that you upload to a review set must be located in folders, where each folder is associated with a specific custodian. The names for these folders must use the following naming format: alias@domainname. The alias@domainname must be the user's Microsoft 365 alias and domain. You can collect all the alias@domainname folders in a root folder. The root folder can only contain the alias@domainname folders. Loose files in the root folder aren't supported.
The folder structure for the external data that you want to upload is similar to the following example:
- c:\nonO365\abraham.mcmahon@contoso.com
- c:\nonO365\jewell.gordon@contoso.com
- c:\nonO365\staci.gonzalez@contoso.com
Where abraham.mcmahon@contoso.com, jewell.gordon@contoso.com, and staci.gonzalez@contoso.com are the SMTP addresses of custodians in the case.
An account that's assigned to the eDiscovery Manager role group (and added as eDiscovery Administrator). For more information about role groups, see Assign permissions in eDiscovery.
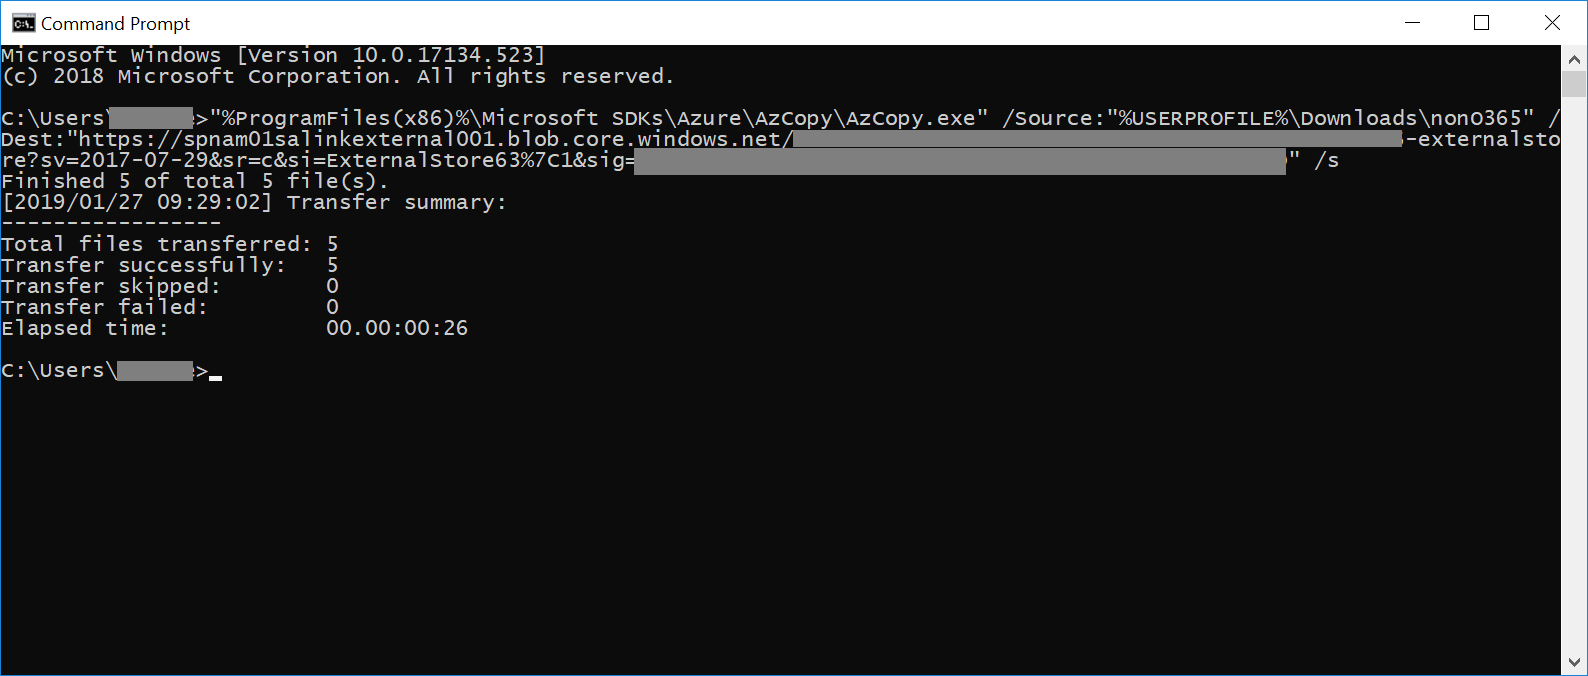
The AzCopy tool installed on a computer that has access to the external data folder structure. To install AzCopy, see Get started with AzCopy. Be sure to install AzCopy in the default location, which is %ProgramFiles(x86)%\Microsoft SDKs\Azure\AzCopy. Use the latest version of AzCopy. Other versions of AzCopy might not work when loading external data in eDiscovery.
Import external data into eDiscovery
To import external data content into eDiscovery, complete the following steps:
Go to the Microsoft Purview portal and sign in with the credentials for a user account assigned eDiscovery Administrator permissions.
Select the eDiscovery solution card and then select Cases in the left navigation.
Select a case, then select the Review sets tab.
Select the review set that you want to import.
In the review set, select Manage, and then select Import external data.
Select Upload files to start the data import workflow. The first step in the workflow prepares a secure Microsoft-provided Azure Storage location to upload the files to. When the preparation is completed, Next: Upload files becomes active.
Select Next: Upload files.
On the Upload files page, complete the following steps:
- In the Path to location of files box, verify or type the location of the root folder where you stored the external data you want to upload. For example, for the location of the example files shown in the Before you begin section, type %USERPROFILE\Downloads\nonO365. Providing the correct location ensures the AzCopy command displayed in the box under the path is properly updated.
- Select Copy to clipboard to copy the command that is displayed in the box.
Start a Windows command prompt, paste the command that you copied in the previous step, and then select Enter to start the AzCopy command. After you start the command, the external data files are uploaded to the Azure Storage location that was prepared in step 4.
Important
Use the latest version of AzCopy to successfully use the command that's provided on the Upload files page.
Go back to the Microsoft Purview portal, and select Next: Process files in the workflow. This action initiates processing, text extraction, and indexing of the external data files that you uploaded to the Azure Storage location.
Track the progress of processing the files on the Process files page or on the Process manager by viewing a job named Adding external data to a review set. After the job finishes, the new files are available in the review set.
After the processing finishes, you can close the workflow.
Review the upload process report
Use Process Manager to track the upload process. When the process finishes, download a report that provides information about the imported external data.
The upload Non-Office 365 process report includes both a Summary CSV and an Items CSV report. These reports provide details about the upload process and a list of items added to the review set and associated metadata.