Note
Access to this page requires authorization. You can try signing in or changing directories.
Access to this page requires authorization. You can try changing directories.
This article outlines how to register a Power BI tenant in a same-tenant scenario, and how to authenticate and interact with the tenant in Microsoft Purview. For more information about Microsoft Purview, read the introductory article.
Note
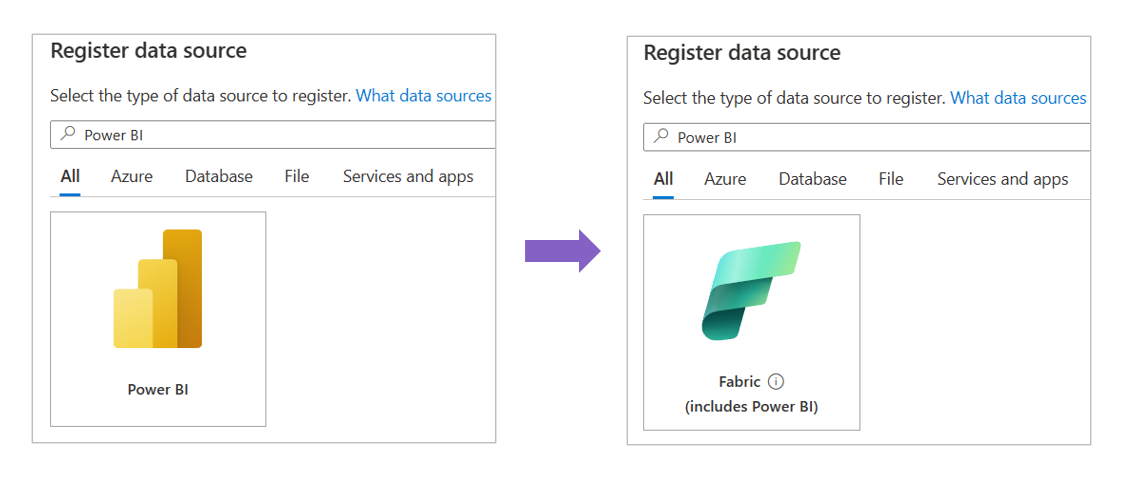
The Power BI data source in Microsoft Purview has been renamed to Fabric in all regions. You can still use “Power BI” as the keyword to quickly locate the source to register a Power BI tenant and set up a scan.
Starting from December 13th 2023, scanning Fabric tenants registered with the Fabric data source in Microsoft Purview will capture metadata and lineage from Fabric items including Power BI. There are no other configuration steps needed to enable scanning Fabric items besides Power BI for existing scans. Fabric tenants and Power BI tenants will share the same data source and same experience to set up scans. For scanning a Fabric tenant, see our Fabric documentation.
Supported capabilities
Scanning capabilities
| Metadata Extraction | Full Scan | Incremental Scan | Scoped Scan |
|---|---|---|---|
| Yes | Yes | Yes | Yes |
When scanning Power BI source, Microsoft Purview supports:
Extracting technical metadata including:
- Workspaces
- Dashboards
- Reports
- Datasets including the tables and columns
- Dataflows
- Datamarts
Fetching static lineage on assets relationships among above Power BI artifacts and external data source assets. Learn more from Power BI lineage.
See a list of metadata available for Power BI.
Other capabilities
For classifications, sensitivity labels, policies, data lineage, and live view, see the list of supported capabilities.
Supported scenarios for Power BI scans
| Scenarios | Microsoft Purview public access allowed/denied | Power BI public access allowed /denied | Runtime option | Authentication option | Deployment checklist |
|---|---|---|---|---|---|
| Public access with Azure IR | Allowed | Allowed | Azure Runtime | Managed Identity / Delegated authentication / Service principal | Review deployment checklist |
| Public access with Self-hosted IR | Allowed | Allowed | Self-hosted runtime | Delegated authentication / Service principal | Review deployment checklist |
| Private access | Denied | Allowed | Managed VNet IR (v2 only) | Managed Identity / Delegated authentication / Service principal | Review deployment checklist |
| Private access | Allowed | Denied | Self-hosted runtime | Delegated authentication / Service principal | Review deployment checklist |
| Private access | Denied | Allowed | Self-hosted runtime | Delegated authentication / Service principal | Review deployment checklist |
| Private access | Denied | Denied | Self-hosted runtime | Delegated authentication / Service principal | Review deployment checklist |
Known limitations
- If Power BI tenant is protected behind a private endpoint, standard or kubernetes supported self-hosted runtimes are the only options to scan.
- Delegated authentication and service principal are the only supported authentication options when a self-hosted integration runtime is used during the scan.
- If Power BI dataset schema isn't shown after scan, it's due to one of the current limitations with Power BI Metadata scanner.
- Empty workspaces are skipped.
- Other limits please refer to Microsoft Purview limits.
Prerequisites
Before you start, make sure you have the following prerequisites:
An Azure account with an active subscription. Create an account for free.
An active Microsoft Purview account.
Authentication options
- Managed Identity
- Delegated Authentication
- Service Principal
Deployment checklist
Use any of the following deployment checklists during the setup or for troubleshooting purposes, based on your scenario:
- Public access with Azure IR
- Public access with Self-hosted IR
- Private access with Managed VNet IR (v2 only)
- Private access with Self-hosted IR
Scan same-tenant Power BI using Azure IR and Managed Identity in public network
Make sure Power BI and Microsoft Purview accounts are in the same tenant.
Make sure Power BI tenant ID is entered correctly during the registration.
Make sure your Power BI Metadata model is up to date by enabling metadata scanning.
From Azure portal, validate if Microsoft Purview account Network is set to public access.
From Power BI tenant Admin Portal, make sure Power BI tenant is configured to allow public network.
In Microsoft Entra tenant, create a security group.
From Microsoft Entra tenant, make sure Microsoft Purview account MSI is member of the new security group.
On the Power BI Tenant Admin portal, validate if Allow service principals to use read-only Power BI admin APIs is enabled for the new security group.
Register Power BI tenant
This section describes how to register a Power BI tenant in Microsoft Purview for same-tenant scenario.
Select the Data Map on the left navigation.
Then select Register.
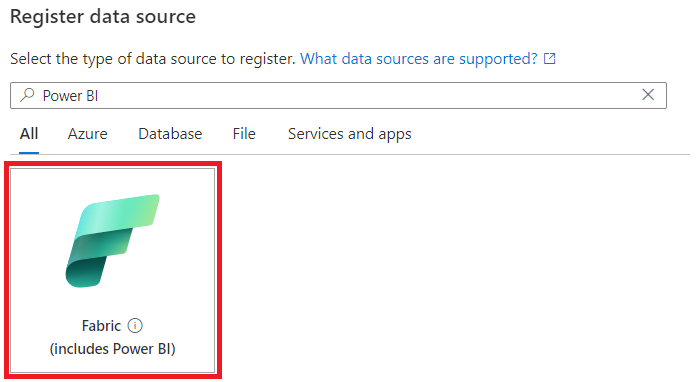
Select Fabric as your data source. It includes Power BI sources and assets.
Give your data source a name.
The name must be between 3-63 characters long and must contain only letters, numbers, underscores, and hyphens. Spaces aren't allowed.
By default, the system will find the Fabric tenant that exists in the same Microsoft Entra tenant.
Select the collection where you want to register the source.
Select Register.
Scan same-tenant Power BI
Tip
To troubleshoot any issues with scanning:
- Confirm you have completed the deployment checklist for your scenario.
- Review our scan troubleshooting documentation.
Authenticate to Power BI tenant
In Microsoft Entra tenant, where Power BI tenant is located:
In the Azure portal, search for Microsoft Entra ID.
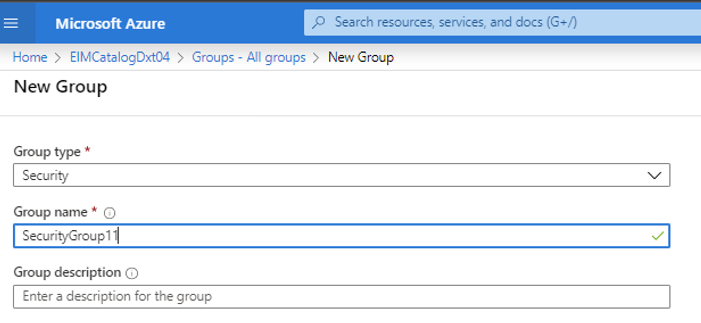
Create a new security group in your Microsoft Entra ID, by following Create a basic group and add members using Microsoft Entra ID.
Tip
You can skip this step if you already have a security group you want to use.
Select Security as the Group Type.
Add relevant user to the security group:
If you're using Managed Identity as authentication method, add your Microsoft Purview managed identity to this security group. Select Members, then select + Add members.
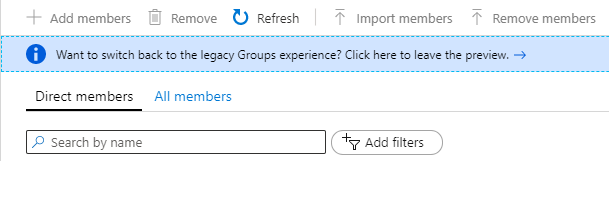
If you're using delegated authentication or service principal as authentication method, add your service principal to this security group. Select Members, then select + Add members.
Search for your Microsoft Purview managed identity or service principal and select it.
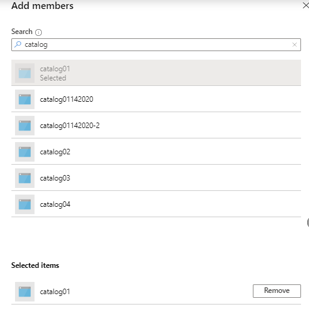
You should see a success notification showing you that it was added.

Associate the security group with Power BI tenant
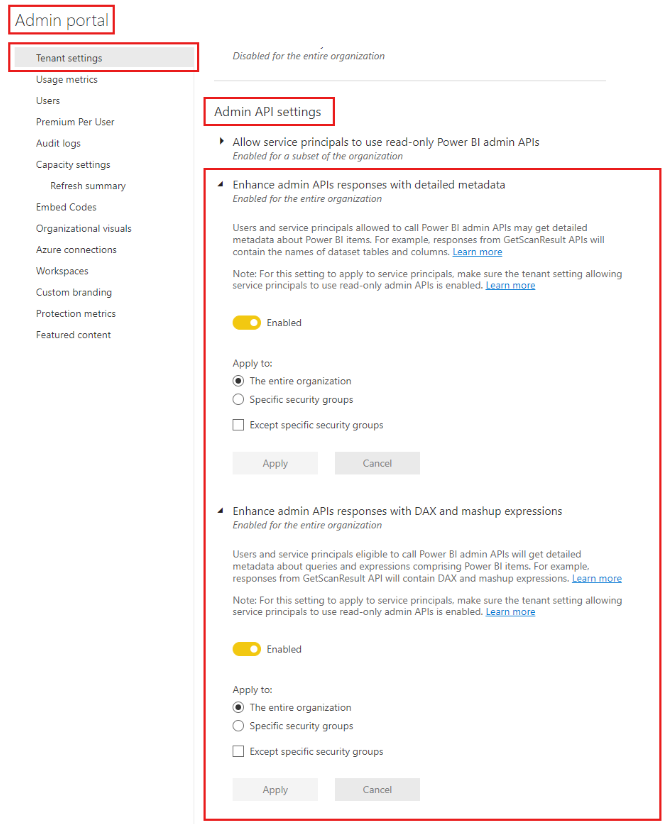
Log into the Power BI admin portal.
Select the Tenant settings page.
Important
You need to be a Power BI Admin to see the tenant settings page.
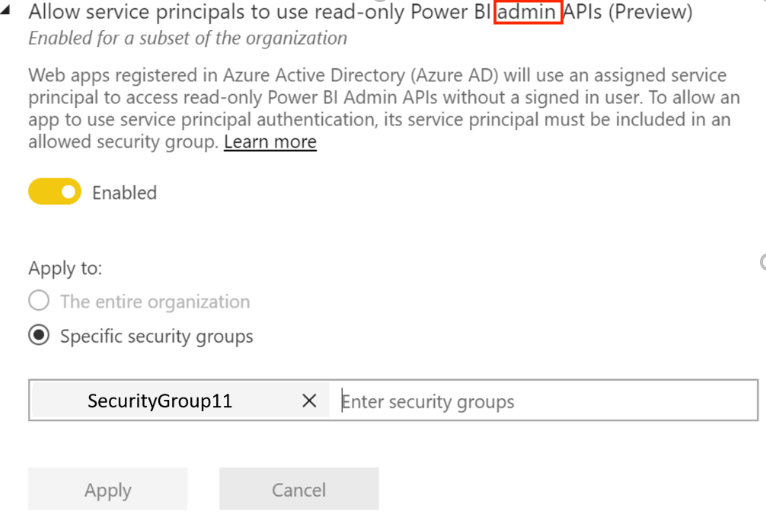
Select Admin API settings > Allow service principals to use read-only Power BI admin APIs (Preview).
Select Specific security groups.
Select Admin API settings > Enhance admin APIs responses with detailed metadata and Enhance admin APIs responses with DAX and mashup expressions > Enable the toggle to allow Microsoft Purview Data Map automatically discover the detailed metadata of Power BI datasets as part of its scans.
Important
After you update the Admin API settings on your power bi tenant, wait around 15 minutes before registering a scan and test connection.
Caution
When you allow the security group you created (that has your Microsoft Purview managed identity as a member) to use read-only Power BI admin APIs, you also allow it to access the metadata (e.g. dashboard and report names, owners, descriptions, etc.) for all of your Power BI artifacts in this tenant. Once the metadata has been pulled into the Microsoft Purview, Microsoft Purview's permissions, not Power BI permissions, determine who can see that metadata.
Note
You can remove the security group from your developer settings, but the metadata previously extracted won't be removed from the Microsoft Purview account. You can delete it separately, if you wish.
Create scan for same-tenant Power BI using Azure IR and Managed Identity
This is a suitable scenario, if both Microsoft Purview and Power BI tenant are configured to allow public access in the network settings.
To create and run a new scan, do the following:
In the Microsoft Purview Studio, navigate to the Data map in the left menu.
Navigate to Sources.
Select the registered Power BI source.
Select + New scan.
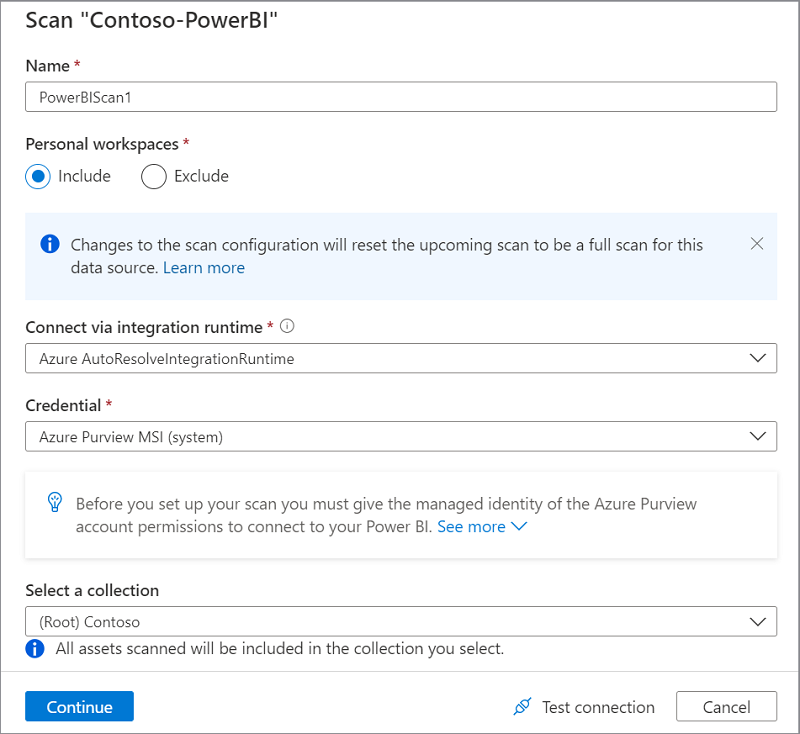
Give your scan a name. Then select the option to include or exclude the personal workspaces.
Note
Switching the configuration of a scan to include or exclude a personal workspace will trigger a full scan of Power BI source.
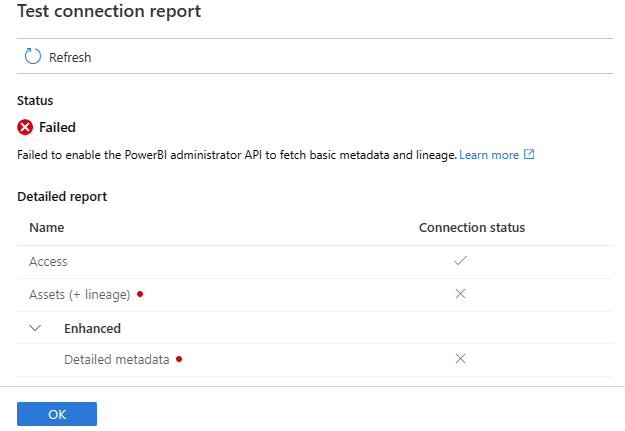
Select Test Connection before continuing to next steps. If Test Connection failed, select View Report to see the detailed status and troubleshoot the problem.
- Access - Failed status means the user authentication failed. Scans using managed identity will always pass because no user authentication required.
- Assets (+ lineage) - Failed status means the Microsoft Purview - Power BI authorization has failed. Make sure the Microsoft Purview managed identity is added to the security group associated in Power BI admin portal.
- Detailed metadata (Enhanced) - Failed status means the Power BI admin portal is disabled for the following setting - Enhance admin APIs responses with detailed metadata
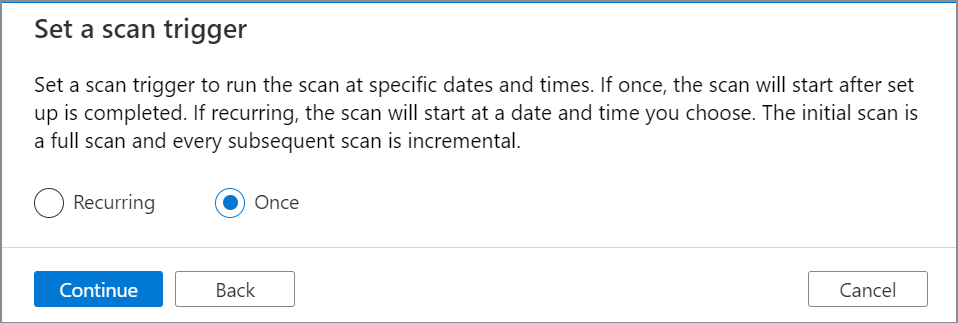
Set up a scan trigger. Your options are Recurring, and Once.
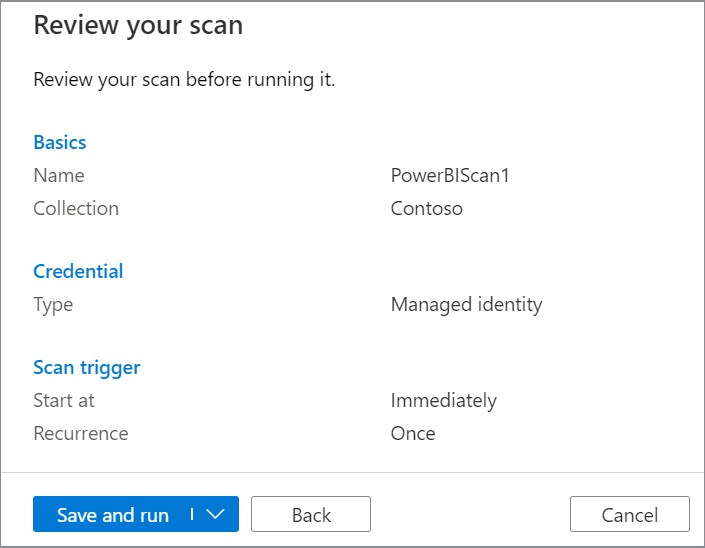
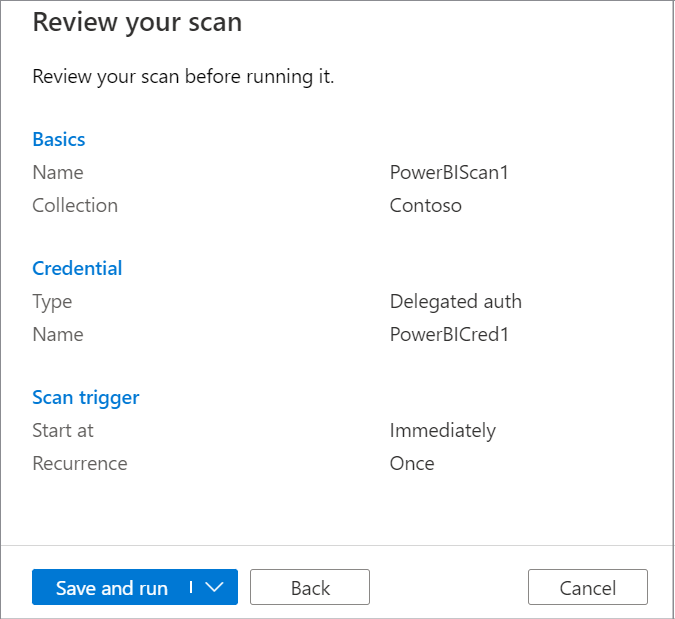
On Review new scan, select Save and run to launch your scan.
Create scan for same-tenant using self-hosted IR with service principal
This scenario can be used when Microsoft Purview and Power BI tenant or both, are configured to use private endpoint and deny public access. Additionally, this option is also applicable if Microsoft Purview and Power BI tenant are configured to allow public access.
For more information related to Power BI network, see How to configure private endpoints for accessing Power BI.
For more information about Microsoft Purview network settings, see Use private endpoints for your Microsoft Purview account.
To create and run a new scan, do the following:
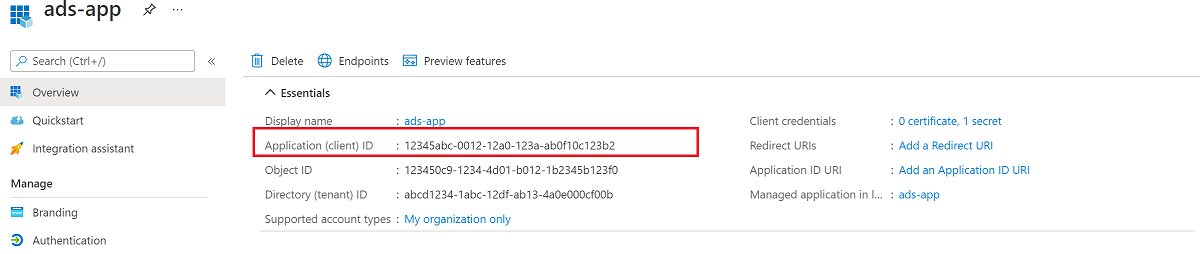
In the Azure portal, select Microsoft Entra ID and create an App Registration in the tenant. Provide a web URL in the Redirect URI. For information about the Redirect URI see this documentation from Microsoft Entra ID.
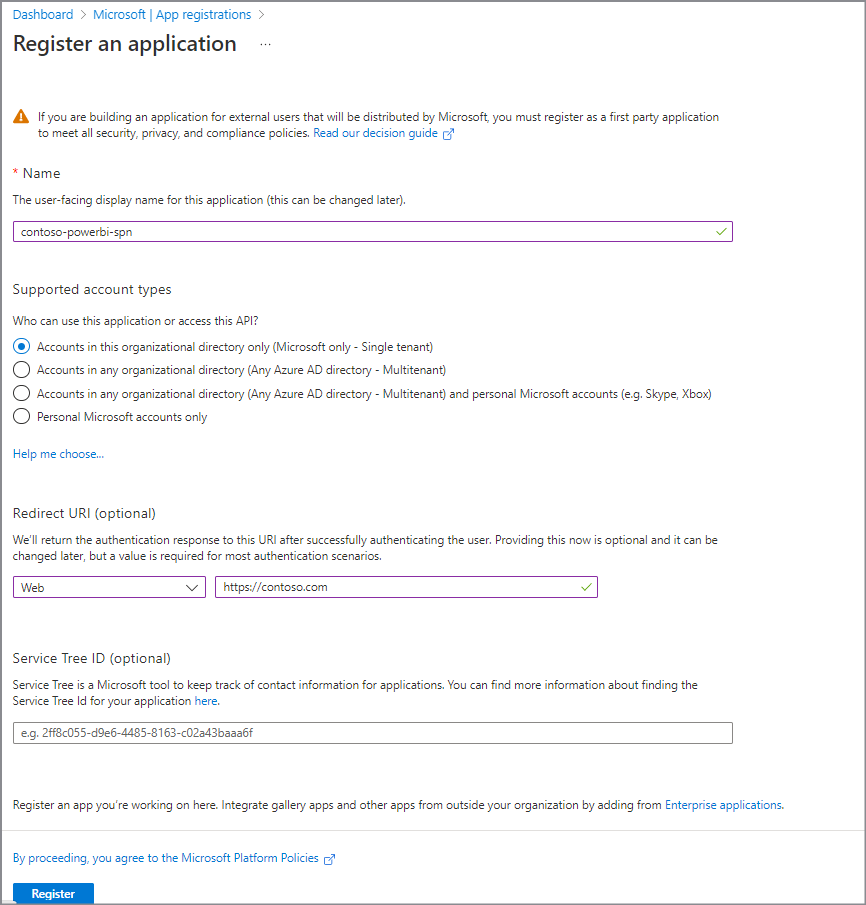
Take note of Client ID(App ID).
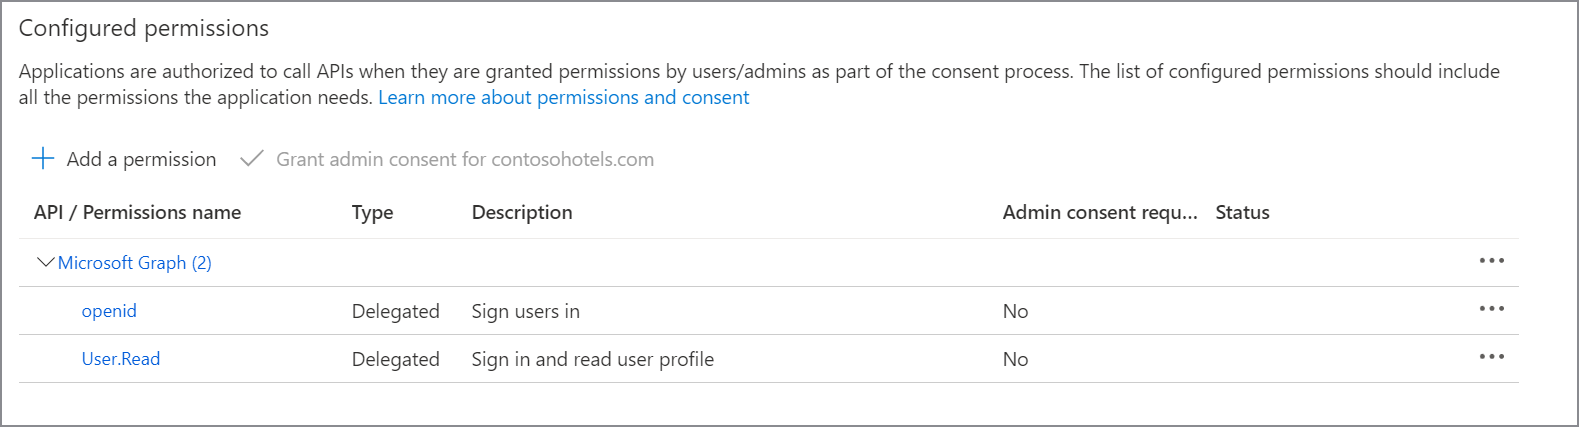
From Microsoft Entra dashboard, select newly created application and then select App registration. From API Permissions, assign the application the following delegated permissions:
- Microsoft Graph openid
- Microsoft Graph User.Read
Under Advanced settings, enable Allow Public client flows.
Under Certificates & secrets, create a new secret and save it securely for next steps.
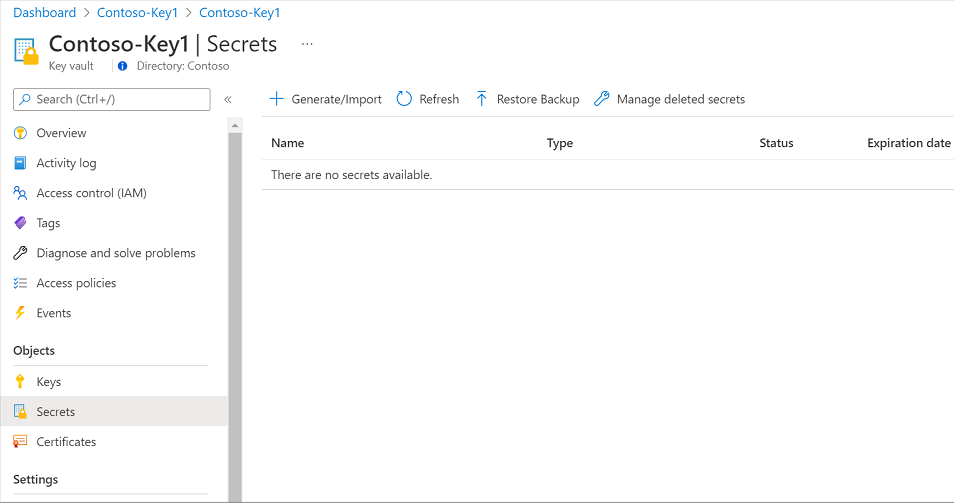
In Azure portal, navigate to your Azure key vault.
Select Settings > Secrets and select + Generate/Import.
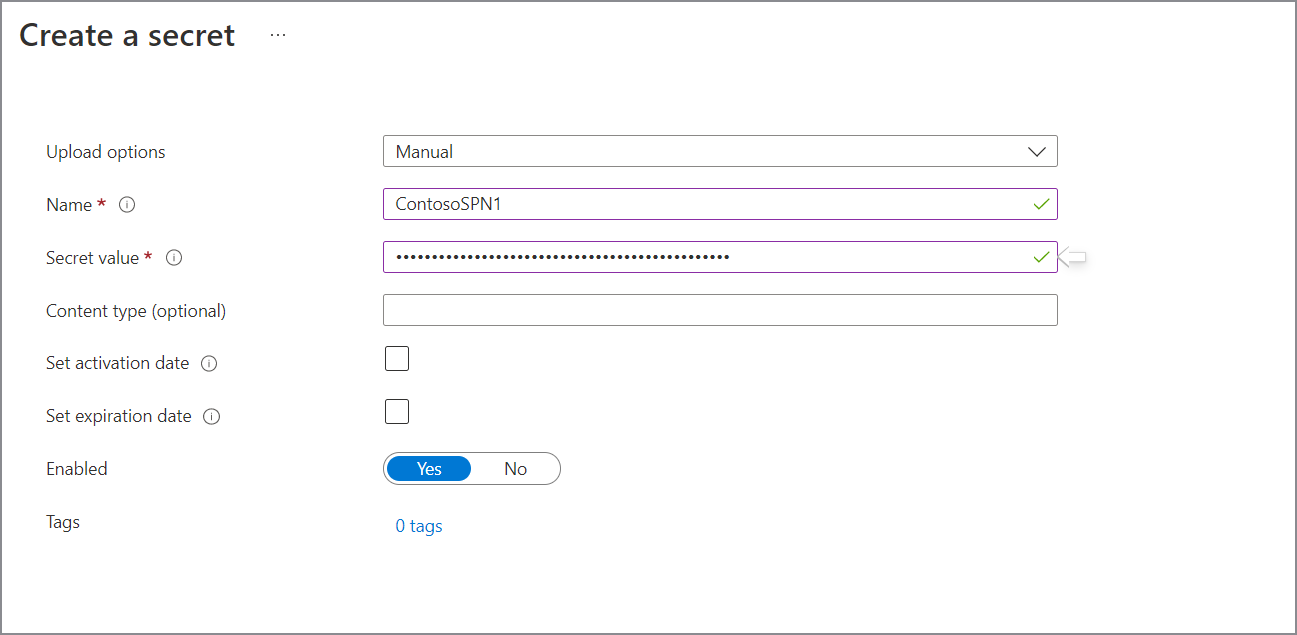
Enter a name for the secret and for Value, type the newly created secret for the App registration. Select Create to complete.
If your key vault isn't connected to Microsoft Purview yet, you'll need to create a new key vault connection
In the Microsoft Purview Studio, navigate to the Data map in the left menu.
Navigate to Sources.
Select the registered Power BI source.
Select + New scan.
Give your scan a name. Then select the option to include or exclude the personal workspaces.
Note
Switching the configuration of a scan to include or exclude a personal workspace will trigger a full scan of Power BI source.
Select your self-hosted integration runtime from the drop-down list.
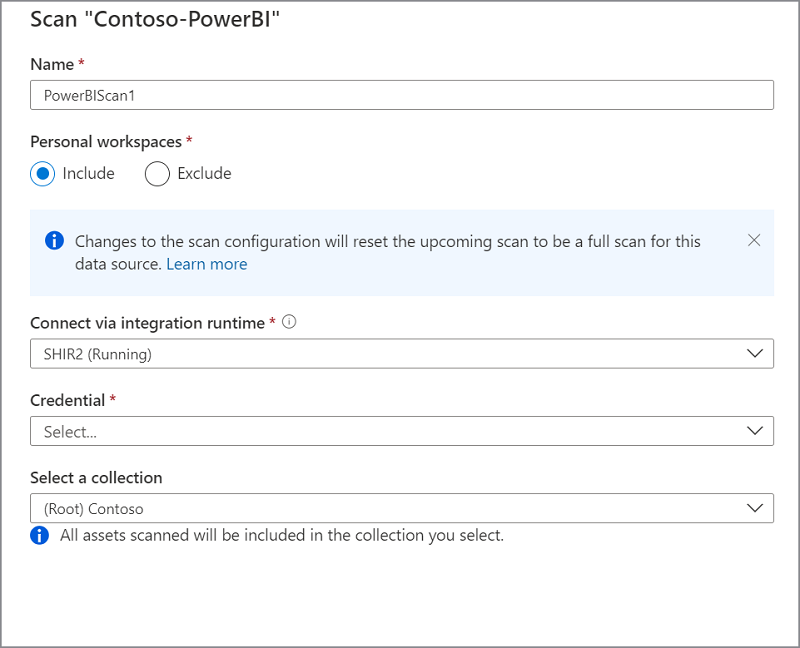
For the Credential, select service principal and select + New to create a new credential.
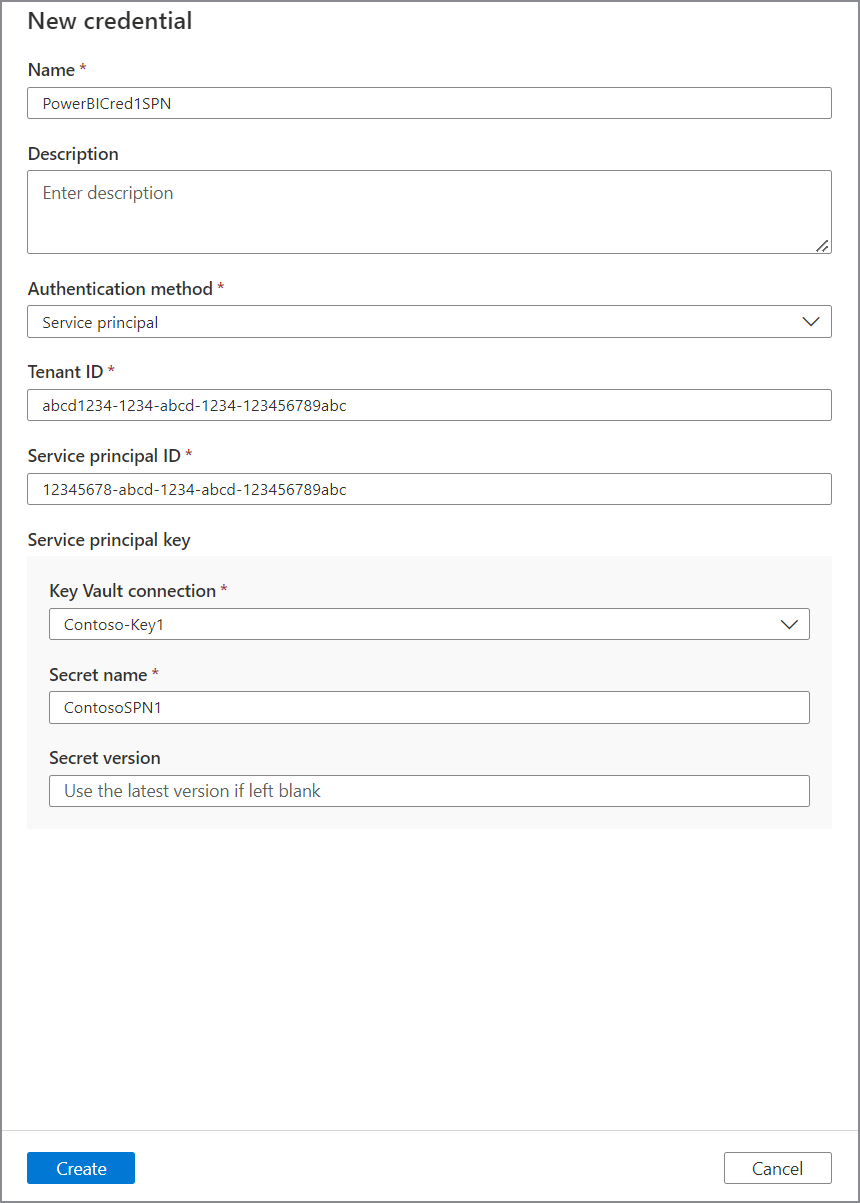
Create a new credential and provide required parameters:
- Name: Provide a unique name for credential
- Authentication method: Service principal
- Tenant ID: Your Power BI tenant ID
- Client ID: Use Service Principal Client ID (App ID) you created earlier
Select Test Connection before continuing to next steps. If Test Connection failed, select View Report to see the detailed status and troubleshoot the problem
- Access - Failed status means the user authentication failed. Scans using managed identity will always pass because no user authentication required.
- Assets (+ lineage) - Failed status means the Microsoft Purview - Power BI authorization has failed. Make sure the Microsoft Purview managed identity is added to the security group associated in Power BI admin portal.
- Detailed metadata (Enhanced) - Failed status means the Power BI admin portal is disabled for the following setting - Enhance admin APIs responses with detailed metadata
Set up a scan trigger. Your options are Recurring, and Once.
On Review new scan, select Save and run to launch your scan.
Create scan for same-tenant using self-hosted IR with delegated authentication
This scenario can be used when Microsoft Purview and Power BI tenant or both, are configured to use private endpoint and deny public access. Additionally, this option is also applicable if Microsoft Purview and Power BI tenant are configured to allow public access.
For more information related to Power BI network, see How to configure private endpoints for accessing Power BI.
For more information about Microsoft Purview network settings, see Use private endpoints for your Microsoft Purview account.
To create and run a new scan, do the following:
Create a user account in Microsoft Entra tenant and assign the user to Microsoft Entra role, Fabric Administrator. Take note of username and sign in to change the password.
Assign proper Power BI license to the user.
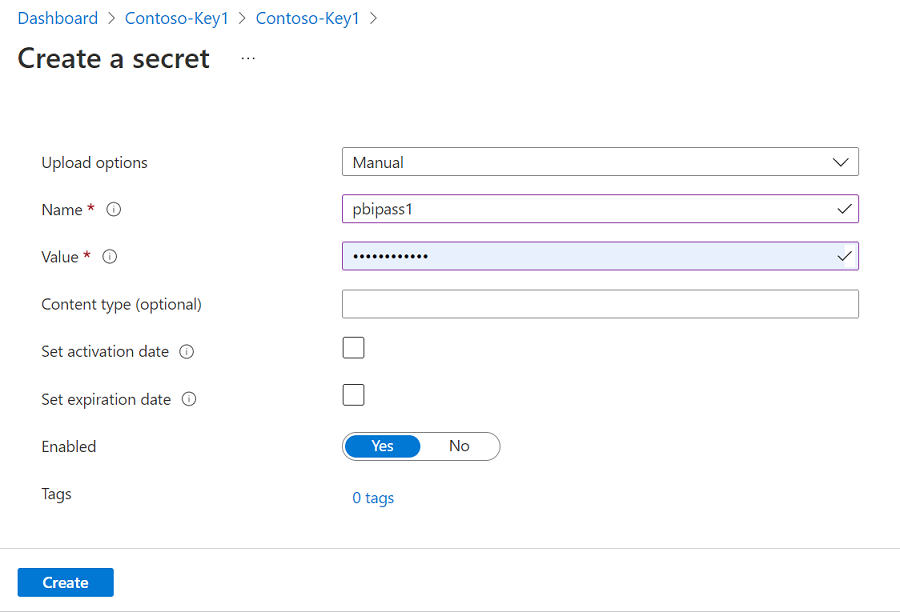
Navigate to your Azure key vault.
Select Settings > Secrets and select + Generate/Import.
Enter a name for the secret and for Value, type the newly created password for the Microsoft Entra user. Select Create to complete.
If your key vault isn't connected to Microsoft Purview yet, you'll need to create a new key vault connection
Create an App Registration in your Microsoft Entra tenant. Provide a web URL in the Redirect URI.
Take note of Client ID(App ID).
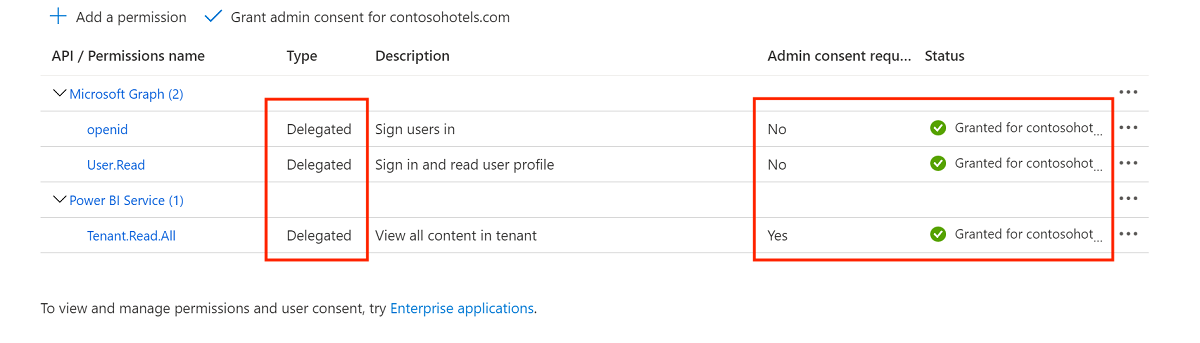
From Microsoft Entra dashboard, select newly created application and then select App registration. Assign the application the following delegated permissions, and grant admin consent for the tenant:
- Power BI Service Tenant.Read.All
- Microsoft Graph openid
- Microsoft Graph User.Read
Under Advanced settings, enable Allow Public client flows.
In the Microsoft Purview Studio, navigate to the Data map in the left menu.
Navigate to Sources.
Select the registered Power BI source.
Select + New scan.
Give your scan a name. Then select the option to include or exclude the personal workspaces.
Note
Switching the configuration of a scan to include or exclude a personal workspace will trigger a full scan of Power BI source.
Select your self-hosted integration runtime from the drop-down list.
For the Credential, select Delegated authentication and select + New to create a new credential.
Create a new credential and provide required parameters:
- Name: Provide a unique name for credential
- Authentication method: Delegated auth
- Client ID: Use Service Principal Client ID (App ID) you created earlier
- User name: Provide the username of Fabric Administrator you created earlier
- Password: Select the appropriate Key vault connection and the Secret name where the Power BI account password was saved earlier.

Select Test Connection before continuing to next steps. If Test Connection failed, select View Report to see the detailed status and troubleshoot the problem
- Access - Failed status means the user authentication failed. Scans using managed identity will always pass because no user authentication required.
- Assets (+ lineage) - Failed status means the Microsoft Purview - Power BI authorization has failed. Make sure the Microsoft Purview managed identity is added to the security group associated in Power BI admin portal.
- Detailed metadata (Enhanced) - Failed status means the Power BI admin portal is disabled for the following setting - Enhance admin APIs responses with detailed metadata
Set up a scan trigger. Your options are Recurring, and Once.
On Review new scan, select Save and run to launch your scan.
Scope your scan
This feature is currently in preview. The Supplemental Terms of Use for Microsoft Azure Previews include additional legal terms that apply to Azure features that are in beta, in preview, or otherwise not yet released into general availability.
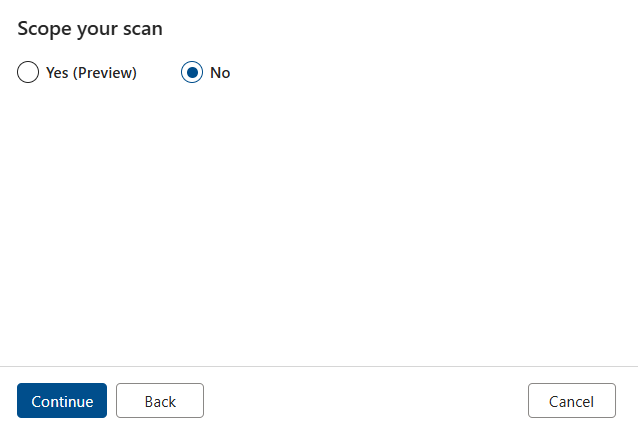
In the Scope your scan stage, data source administrators can scope the scans by specifying the workspaces as needed. Data source administrators can either select from the workspace list under the tenant or directly input the workspace GUIDs to scope the scan. No additional permission is required to use the scoped scan. There are two options available and by default the option "No" is selected and you can directly click on "Continue" to proceed to run a full scan or select the "Yes" to enable the scoped scan experience.
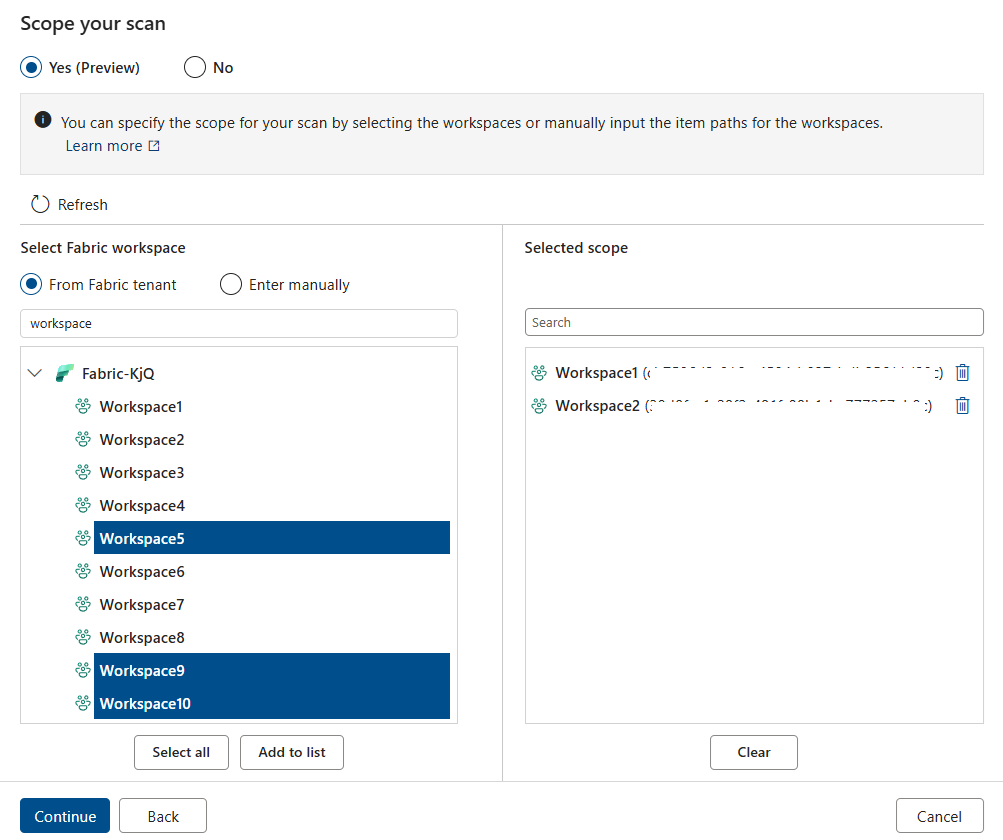
If the scoped scan is enabled, you will see a list of existing workspaces under the tenant on the left hand side (currently there’s a limitation that the UI selection experience only supports less than 5000 workspaces) and you can select the workspaces and add to the list on the right hand side. If personal workspace is configured as "Include", personal workspaces will show in the workspace list with a prefix "PersonalWorkspace ". You can directly click on the workspace(s) and click on the button "Add to list" to put the workspaces to the list of selected workspaces. You can input keyword of the workspace name or workspace GUID in the search box to filter out the workspace(s) for selection.
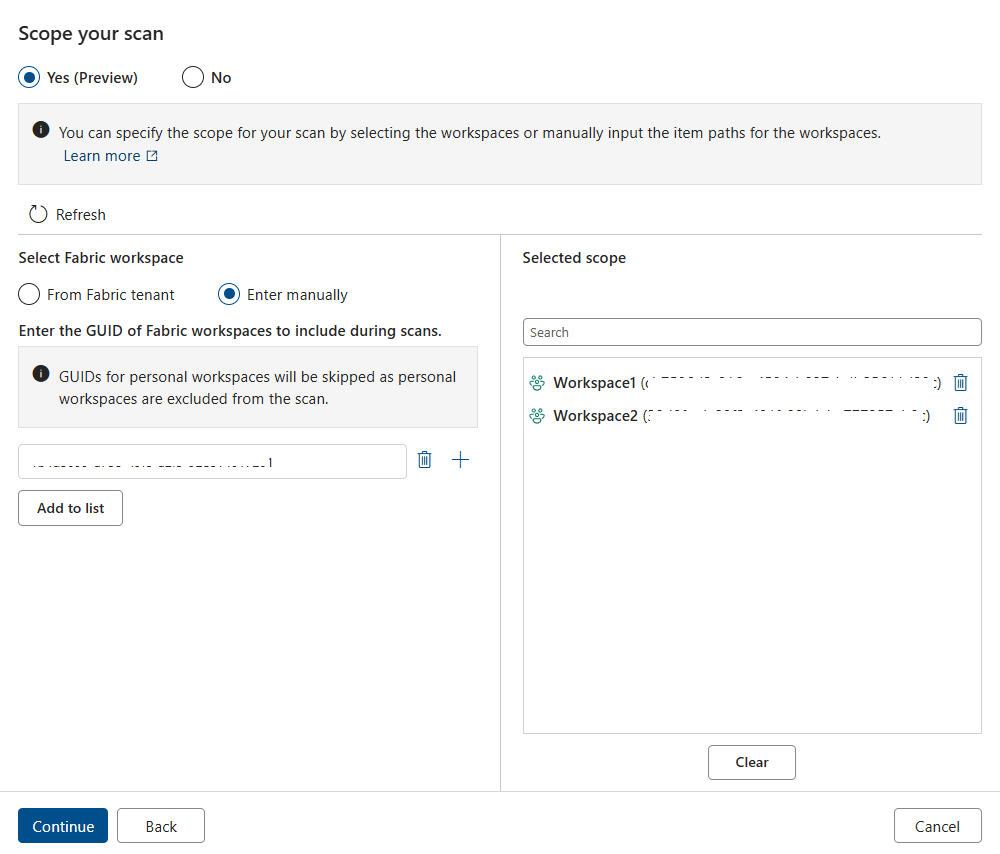
You can also directly input the workspace GUID and add it to the list of selected workspaces.
Note
- Scoping scan by selecting from Microsoft Fabric or Power BI tenant is only supported when the total number of workspaces is less than 5000 (include or exclude personal workspaces will be considered), or you need to switch to manual input of workspace GUIDs to scope your scan.
- You can switch between selecting workspaces from Microsoft Fabric or Power BI tenant, or entering workspace GUID manually and the input will be merged into the same list of selected workspaces.
- Microsoft Purview will check whether the GUID input by user has a correct format but will not check whether the GUID represents a valid workspace in the Microsoft Fabric or Power BI tenant. If invalid GUIDs are included in scoped scan, the scan will complete with exceptions and you can find those invalid GUIDs in the scan log.
- If personal workspace is configured as “Exclude”, the GUIDs for personal workspaces can still be added to the list of selected workspaces but will be skipped in the scan and these GUIDs will be included in the scan log.
- If self-hosted integration runtime is used, version 5.40.8836.1 and above is required and only manual input of workspace GUIDs is supported in the scoped scan.
- If managed VNet integration runtime (v2) is used, only manual input of workspace GUIDs is supported in the scoped scan.
Next steps
Now that you've registered your source, follow the below guides to learn more about Microsoft Purview and your data.