Deploys a 2 node master/slave MySQL replication cluster
This template deploys a MySQL replication environment with one master and one slave servers. It has the following capabilities:
- Supports CentOS 6 and MySQL 5.6
- Supports GTID based replication
- Deploys 2 VMs in an Azure VNet, each has 2 data disks striped into Raid0
- Deploys a load balancer in front of the 2 VMs, so that the VMs are not directly exposed to the internet. MySQL and SSH ports are exposed through the load balancer using Network Security Group rules
- Configures a http based health probe for each MySQL instance that can be used to monitor MySQL health
- Installs LIS4 driver on each VM. Note that the VMs are not automatically rebooted, so LIS4 will not take effect until the next time a VM reboots
How to Access MySQL
- Access MySQL using the public DNS name. By default, the master server can be accessed at port 3306, and the slave server 3307. By default, a user "admin" is created with all privileges to access from remote hosts. For example, access the master with the following command:
> mysql -h mysqldns.eastus.cloudapp.azure.com -u admin -p
- You can access the VMs through ssh. By default, public ssh ports are 64001 and 64002 for the 2 VMs. Within the VM you can check MySQL health probe by running, for example, the following command, and it should return 200 to indicate MySQL is healthy.
> wget http://10.0.1.4:9200
> wget http://10.0.1.5:9200
- Ensure replication topology is properly configured, assuming master is 10.0.1.4:
> mysqlrplshow --master=admin:secret@10.0.1.4 --discover-slaves-login=admin:secret
How to Monitor MySQL Health
- MySQL health can be checked by issuing HTTP query to the MySQL probes and verify that the query returns 200 status code. Replace the following command with your own dns name and location.
> wget http://mysqldns.eastus.cloudapp.azure.com:9200
> wget http://mysqldns.eastus.cloudapp.azure.com:9201
How to Failover
High availability and failover are no different from other GTID based MySQL replication. What's specific to Azure is that in order for the applications to access the current master server without changing their configurations, the NAT rules of the load balancer must be updated in the case of failover:
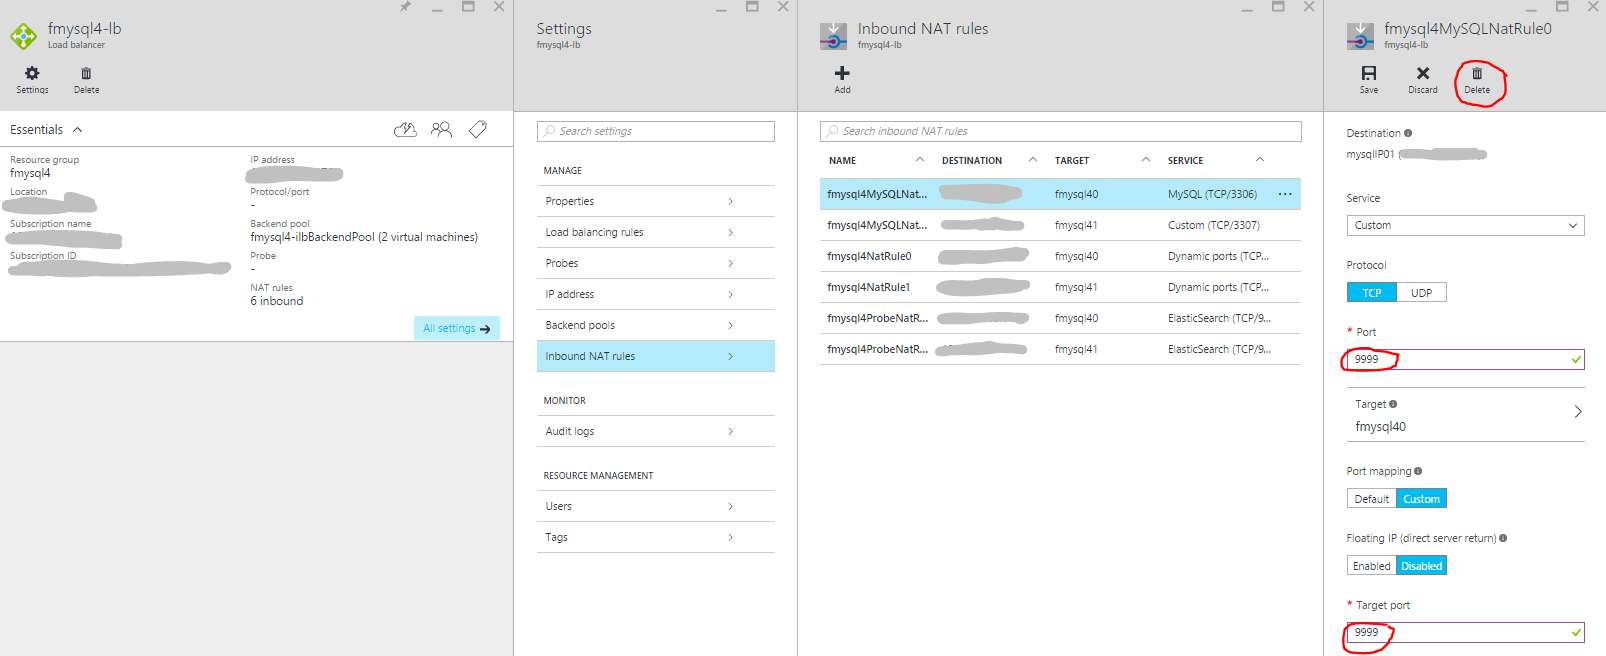
- Remove the NAT rule for the old master from the load balancer so that applications can't access the failed master, assuming master has $mysqlrg-nic0. For full powershell script, please see switchMySQLNatRule.ps1.
> $nic0=Get-AzureNetworkInterface -Name mysqldns-nic0 -ResourceGroupName mysqlrg
> $nic1=Get-AzureNetworkInterface -Name mysqldns-nic1 -ResourceGroupName mysqlrg
...
# $i is the index of the target nat rule
...
> $rule0=$nic0.IpConfigurations[0].LoadBalancerInboundNatRules[$i]
> $nic0.IpConfigurations[0].LoadBalancerInboundNatRules.removeRange($i,1)
> Set-AzureNetworkInterface -NetworkInterface $nic0
You can also do this in the Azure portal. Find the current master's MySQL NSG, either delete it or set the ports to some invalid value:

- Fail over MySQL from the old master to the new master. On the slave, run the following, assuming slave 10.0.1.5 is to become the new master:
mysql> stop slave;
mysql> change master to master_host='10.0.1.5', master_user='admin', master_password='secret', master_auto_position=1;
- Switch the old master's NAT rule with the new master
...
# $j is the index of the target nat rule
...
> $rule1=$nic1.IpConfigurations[0].LoadBalancerInboundNatRules[$j]
> $nic1.IpConfigurations[0].LoadBalancerInboundNatRules.removeRange($j,1)
> $nic1.IpConfigurations[0].LoadBalancerInboundNatRules.add($rule0)
> Set-AzureNetworkInterface -NetworkInterface $nic1

> $nic0.IpConfigurations[0].LoadBalancerInboundNatRules.add($rule1)
> Set-AzureNetworkInterface -NetworkInterface $nic0
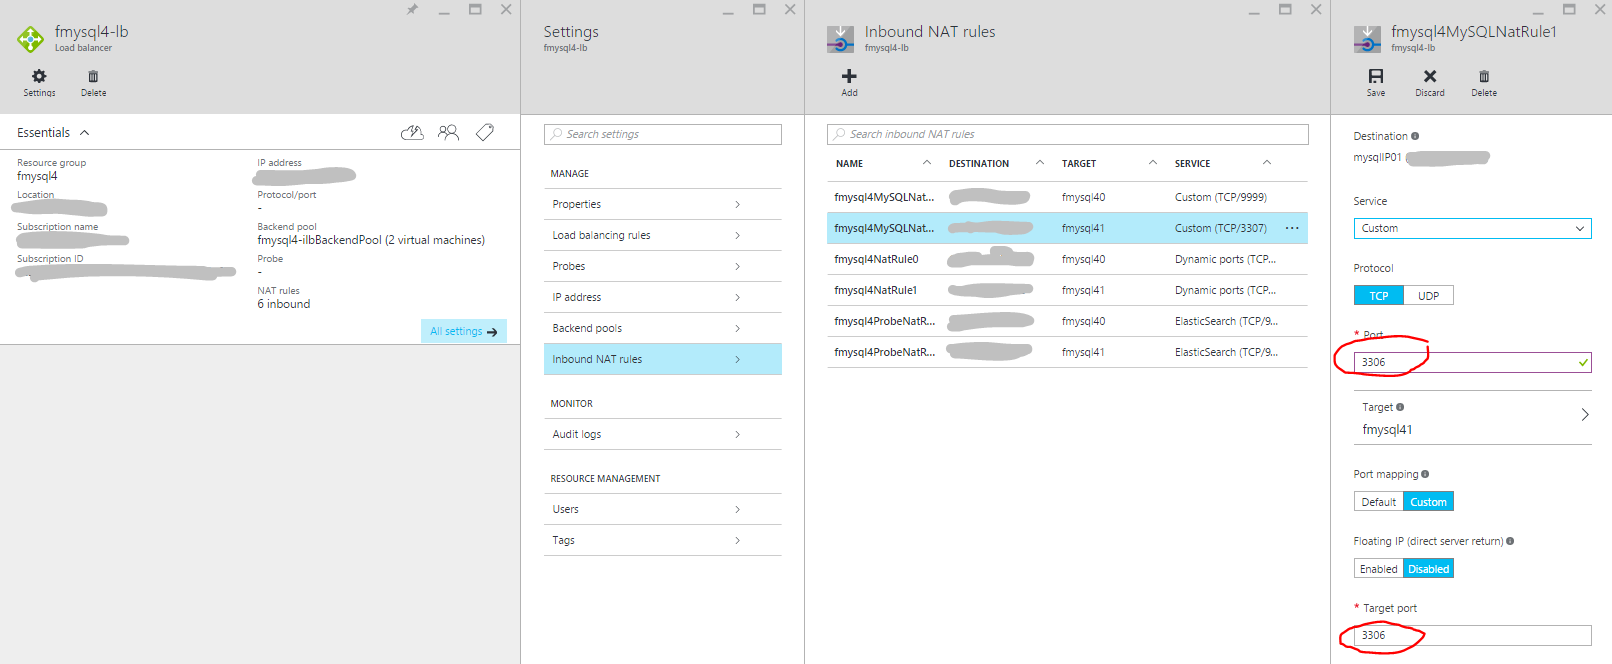
Similarly, this can also be done in the Azure portal. First update the NSG for the new master:
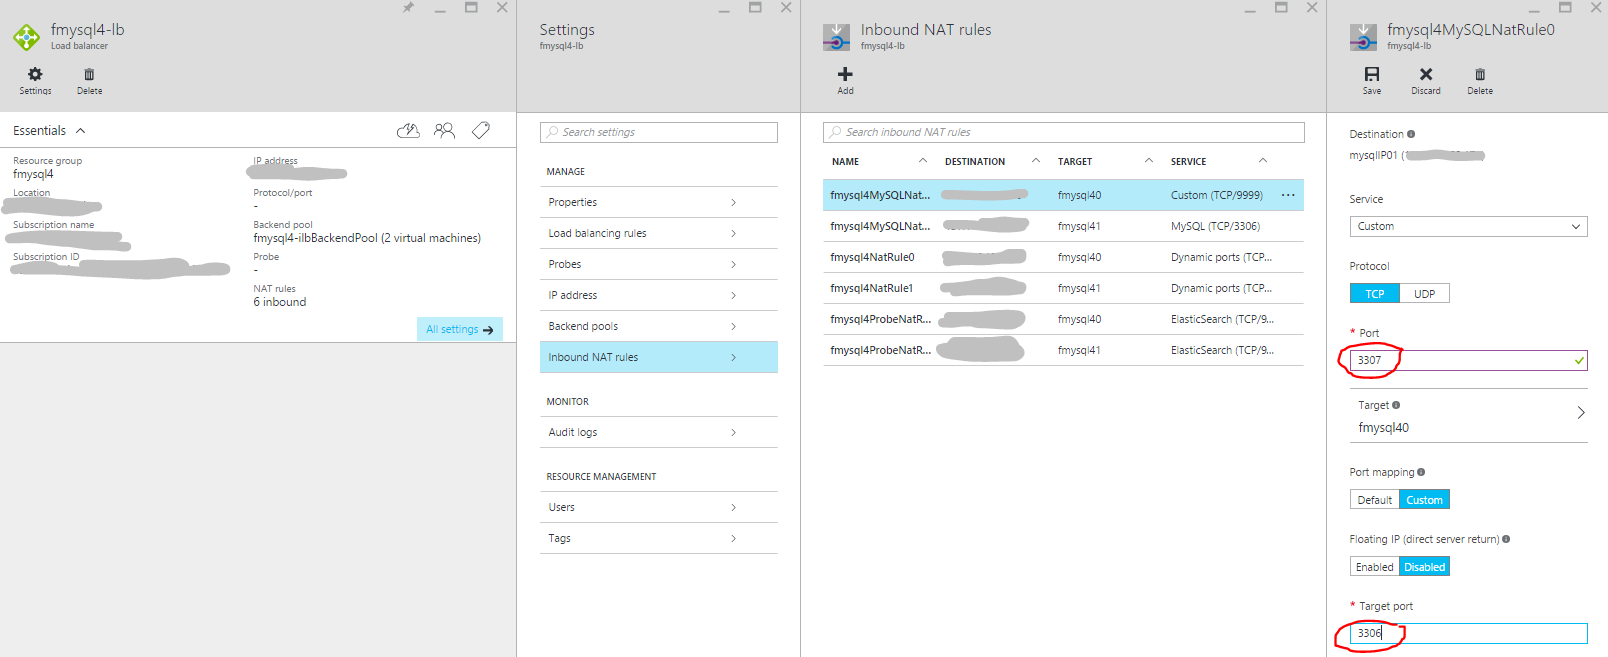
 Then update the NSG for the old master back to valid values:

- Add the old master back to replication as a slave, on the old master, run the following, assuming the new master is 10.0.1.5:
mysql> stop slave;
mysql> change master to master_host='10.0.1.5', master_user='admin', master_password='secret', master_auto_position=1;
mysql> start slave;
- Verify replication is properly restored by running the following command and make sure there is no error, assuming the new master is 10.0.1.5:
> mysqlrplshow --master=admin:secret@10.0.1.5 --discover-slaves-login=admin:secret
on the master:
mysql> show master status\G;
on the slave:
mysql> show slave status\G;
How to backup databases to Azure blob storage
- There are several ways to take mysql backups as shown at Mysql Backup and Recovery. The example below shows mysql dump from the slave.
# Create backups directory if not already created (modify folder as required)
>mkdir  /home/admin/backups/

# Install npm and azure-cli
# For latest instructions for installing azure cli see https://azure.microsoft.com/documentation/articles/xplat-cli-install/. (sample commands below)
> sudo yum update -y
> sudo yum upgrade -y
> sudo yum install epel-release -y
> sudo yum install nodejs -y
> sudo yum install npm -y
> sudo npm install -g azure-cli

# Login to azure account using azure cli
> azure login

# Environment settings for your system
> export AZURE_STORAGE_ACCOUNT=mysqlbkp
> export AZURE_STORAGE_ACCESS_KEY=<your access key>
> export image_to_upload=/home/admin/backups/db_bkp.sql.gz
> export container_name=<your azure container name>
> export blob_name=db-backup-$(date +%m-%d-%Y-%H%M%S).sql.gz
> export destination_folder=<your azure destination folder name>

> cd /home/admin/backups/

# Stop replication to slave
> mysqladmin stop-slave -u admin -p

# Take mysql backup for all databases
> mysqldump --all-databases > alldbs.sql -u admin -p

# Compress the mysql backup
> gzip alldbs.sql

# Start slave replication
> mysqladmin start-slave -u admin -p

# Remove previous backup file
> rm -Rf $image_to_upload

# Move compressed mysql backup to the to be uploaded file
> mv alldbs.sql.gz $image_to_upload

# Move the backup to Azure Blob storage
> azure storage blob upload $image_to_upload $container_name $blob_name
Tags: Microsoft.Network/virtualNetworks, Microsoft.Network/publicIPAddresses, Microsoft.Compute/availabilitySets, Microsoft.Network/networkInterfaces, Microsoft.Compute/virtualMachines, Microsoft.Compute/virtualMachines/extensions, CustomScript, Microsoft.Network/loadBalancers


