Change Notifications For Team and Channel Using Microsoft Graph Node.js
This sample application demonstrates how to manage notifications for shared channel events in Microsoft Teams, such as users being added, removed, or having their membership updated and when channel is shared/unshared with a team. The application leverages Node.js and the Microsoft Graph API to deliver real-time notifications. It includes comprehensive setup instructions covering Azure AD registration, self-signed certificate management, and deployment using the Microsoft 365 Agents Toolkit for Visual Studio Code.
Included Features
- Tabs
- Graph API
- RSC Permissions
- Change Notifications
Interaction with bot

Prerequisites
- Microsoft Teams is installed and you have an account (not a guest account)
- NodeJS
- dev tunnel or ngrok latest version or equivalent tunneling solution
- M365 developer account or access to a Teams account with the appropriate permissions to install an app.
- Microsoft 365 Agents Toolkit for VS Code or TeamsFx CLI
Run the app (Using Microsoft 365 Agents Toolkit for Visual Studio Code)
The simplest way to run this sample in Teams is to use Microsoft 365 Agents Toolkit for Visual Studio Code.
- Ensure you have downloaded and installed Visual Studio Code
- Install the Microsoft 365 Agents Toolkit extension
- Select File > Open Folder in VS Code and choose this samples directory from the repo
- Using the extension, sign in with your Microsoft 365 account where you have permissions to upload custom apps
- Before running this sample using toolkit, we need to update the .env file values in your code for 'Base64EncodedCertificate' and 'PRIVATE_KEY_PATH'. Follow this documentation for the steps to get the values - Create and install Self-Signed certificate
- Select Debug > Start Debugging or F5 to run the app in a Teams web client.
- In the browser that launches, select the Add button to install the app to Teams.
If you do not have permission to upload custom apps (sideloading), Microsoft 365 Agents Toolkit will recommend creating and using a Microsoft 365 Developer Program account - a free program to get your own dev environment sandbox that includes Teams.
Note: Please create and install self-signed certificate before running this sample using toolkit or manually.
Setup
Note these instructions are for running the sample on your local machine.
Run ngrok - point to port 3978
ngrok http 3978 --host-header="localhost:3978"Alternatively, you can also use the
dev tunnels. Please follow Create and host a dev tunnel and host the tunnel with anonymous user access command as shown below:devtunnel host -p 3978 --allow-anonymousSetup for Azure AD application
Register your application with Azure AD
- Register a new application in the Microsoft Entra ID - App Registrations portal.
- On the overview page, copy and save the Application (client) ID, Directory (tenant) ID. You'll need those later when updating your Teams application manifest and in the .env file.
- Navigate to API Permissions, and make sure to add the follow permissions:
Select Add a permission
Select Microsoft Graph -> Application permissions.
Channel.ReadBasic.All,ChannelSettings.Read.All,Directory.ReadWrite.All,Group.ReadWrite.AllTeam.ReadBasic.All,TeamSettings.Read.All,TeamSettings.ReadWrite.AllClick on Add permissions. Please make sure to grant the admin consent for the required permissions.
- Navigate to the Certificates & secrets. In the Client secrets section, click on "+ New client secret". Add a description (Name of the secret) for the secret and select "Never" for Expires. Click "Add". Once the client secret is created, copy its value, it need to be placed in the appsettings.json file.
Create and install Self-Signed certificate
To include resource data of graph notifications, this Graph API require self-signed certificate. Follow the below steps to create and manage certificate.
You can self-sign the certificate, since Microsoft Graph does not verify the certificate issuer, and uses the public key for only encryption.
Use Azure Key Vault as the solution to create, rotate, and securely manage certificates. Make sure the keys satisfy the following criteria:
- The key must be of type
RSA - The key size must be between 2048 and 4096 bits
- The key must be of type
Follow this documentation for the steps - Create and install Self-Signed certificate
Clone the repository
git clone https://github.com/OfficeDev/Microsoft-Teams-Samples.git
A) If you are using Visual Studio Code
- Launch Visual Studio code
- File -> Open Folder
- Navigate to
samples/graph-change-notification-team-channelfolder. - Select
nodejsfolder.
Instruction for .env
1. Provide Update configuration with the MicrosoftAppId, MicrosoftAppPassword, MicrosoftAppTenantId,
Base64EncodedCertificate, EncryptionCertificateId, PRIVATE_KEY_PATH in the .env that is created in Azure.
2. Provide the tunnel url as "BaseUrl" in appsetting on which application is running on.
3. You should be having Base64EncodedCertificate from Create and install Self-Signed certificate step.
4. Use Certificate "PEM" format and add the certificate name for PRIVATE_KEY_PATH For eg PRIVATE_KEY_PATH=PrivateKeyFileName.pem" in .env file. Also make sure the private key file is stored inside helper folder of this project.
Note : notificationUrl will be updated automatically from m365agents.local.yml file when you run application by Microsoft 365 Agents Toolkit. And when you run locally through npm start then your notificationUrl will be like : https://1234.ngrok-free.app/api/notifications and if you are using dev tunnels, your notificationUrl will be like: https://12345.devtunnels.ms/api/notifications.
Install node modules
Inside node js folder, open your local terminal and run the below command to install node modules. You can do the same for client folder by opening the project in Visual Studio code.
npm installRun your app
npm start
B) This step is specific to Teams.
Edit the
manifest.jsoncontained in theappManifestfolder to replace your Microsoft App Id (that was created when you registered your bot earlier) everywhere you see the place holder string<<YOUR-MICROSOFT-APP-ID>>(depending on the scenario the Microsoft App Id may occur multiple times in themanifest.json).Edit the
manifest.jsonforvalidDomainswith base Url domain. E.g. if you are using ngrok it would behttps://1234.ngrok-free.appthen your domain-name will be1234.ngrok-free.appand if you are using dev tunnels then your domain will be like:12345.devtunnels.ms.Zip up the contents of the
appManifestfolder to create amanifest.zip(Make sure that zip file does not contains any subfolder otherwise you will get error while uploading your .zip package)Upload the
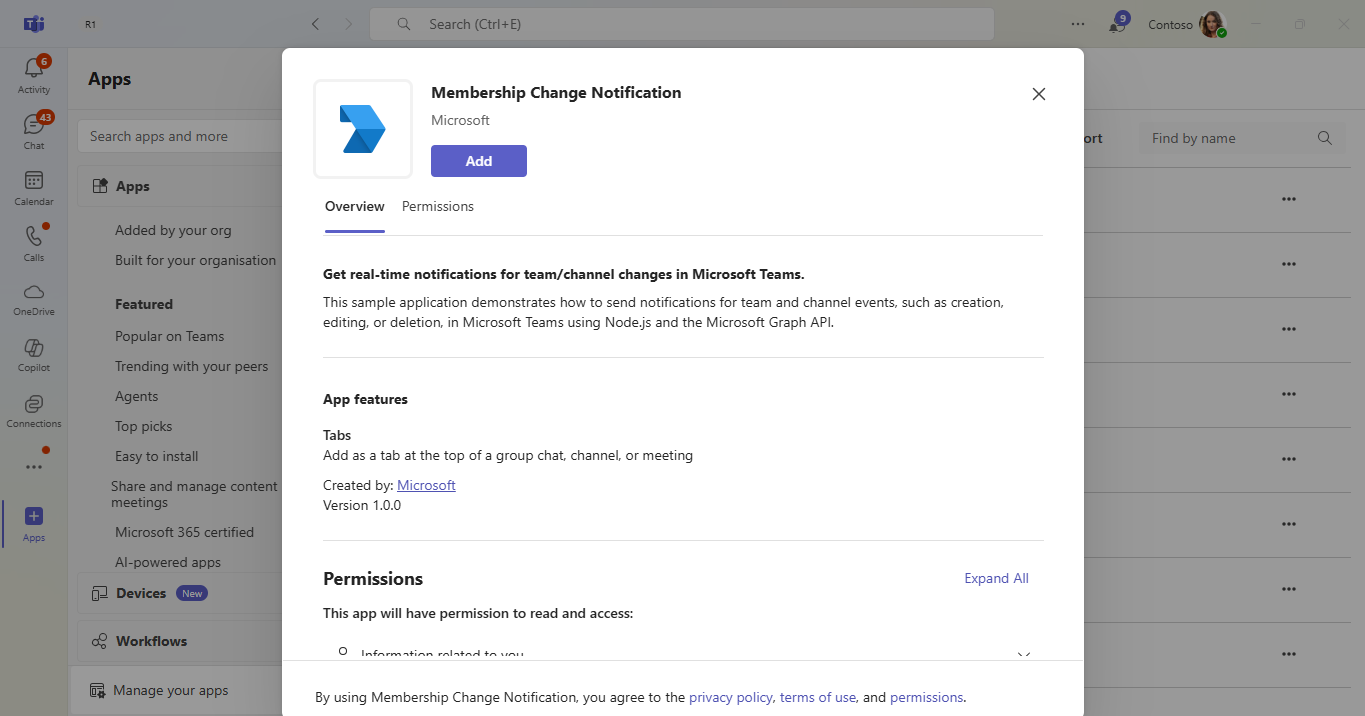
manifest.zipto Teams (In Teams Apps/Manage your apps click "Upload an app". Browse to and Open the .zip file. At the next dialog, click the Add button.)Add the app to personal/team/groupChat scope (Supported scopes).
Using RSC Permissions
If you prefer to use Resource-Specific Consent (RSC) permissions instead of application permissions, you can skip the "API Permissions" steps described earlier in the Azure AD registration section. Instead, update your Teams app manifest with the following properties to leverage RSC permissions:
"webApplicationInfo": {
    "id": "${{AAD_APP_CLIENT_ID}}",
    "resource": ""
  },
  "authorization": {
		"permissions": {
			"resourceSpecific": [
				{
					"name": "TeamsAppInstallation.Read.User",
					"type": "Application"
				},
				{
					"name": "Member.Read.Group",
					"type": "Application"
				},
				{
					"name": "ChannelSettings.Read.Group",
					"type": "Application"
				},
				{
					"name": "ChannelMember.Read.Group",
					"type": "Application"
				},
				{
					"name": "ChannelMember.ReadWrite.Group",
					"type": "Application"
				}
			]
		}
	}
Running the sample
You can interact with Teams Tab by subscribing the teams/channel for notifications.
App Install
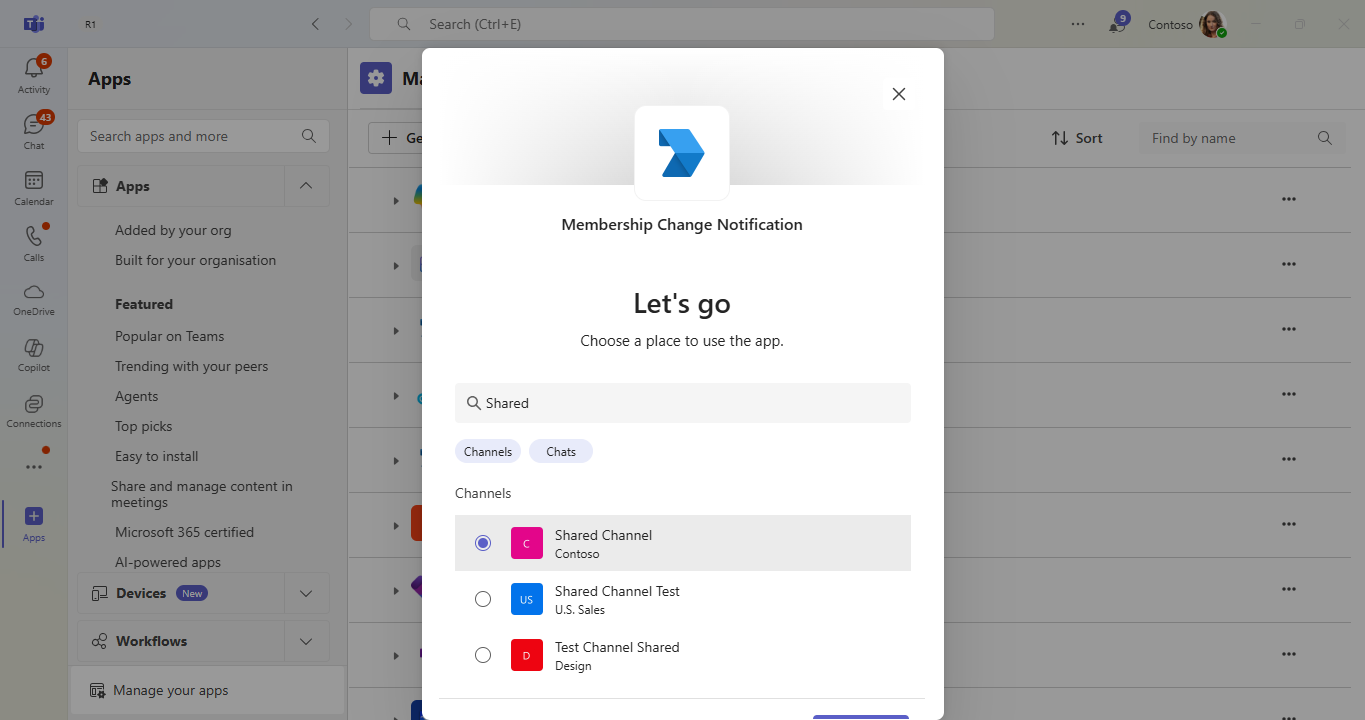
Select Shared Channel
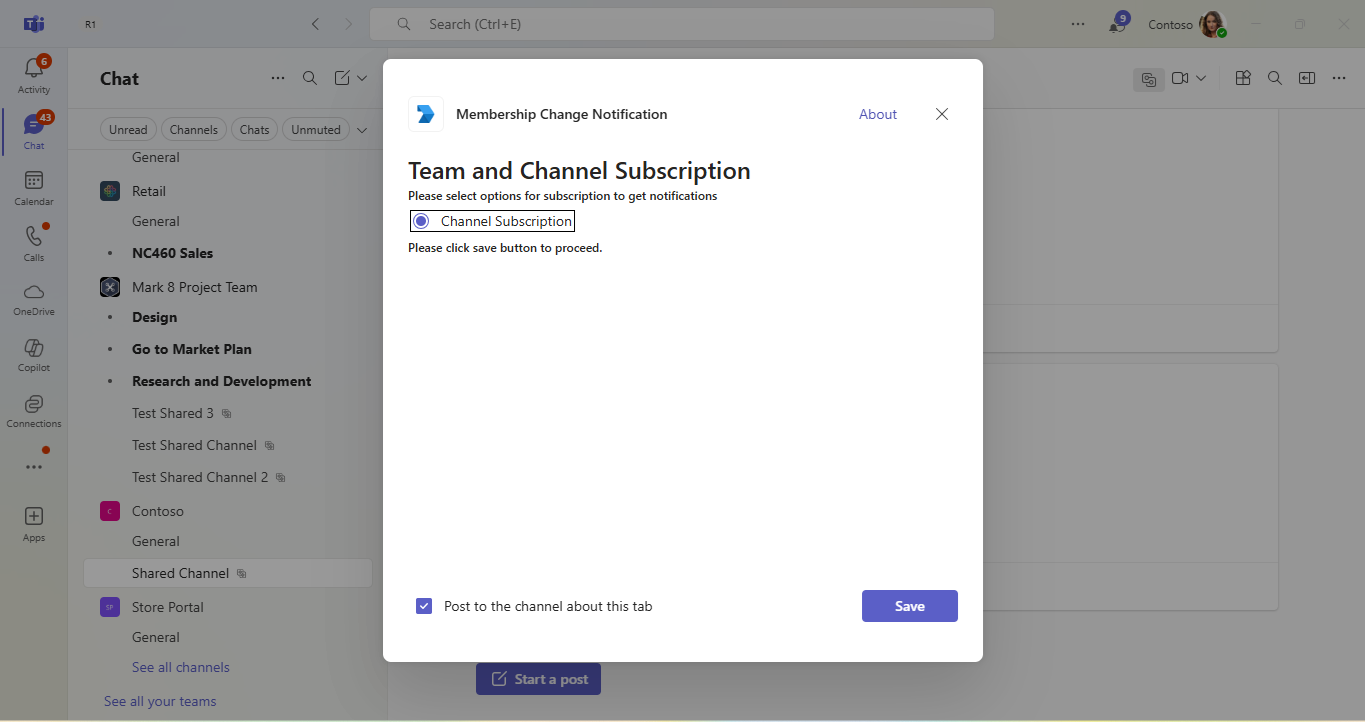
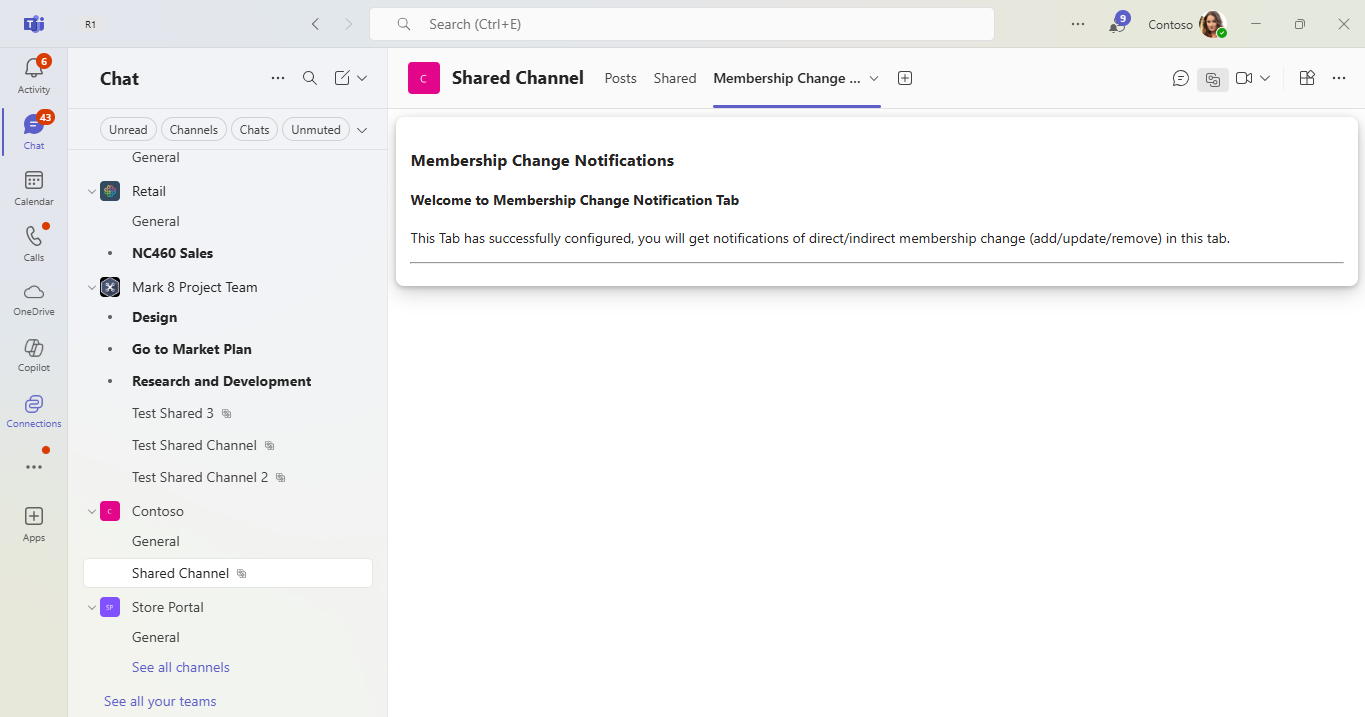
Configure Page
Welcome Page
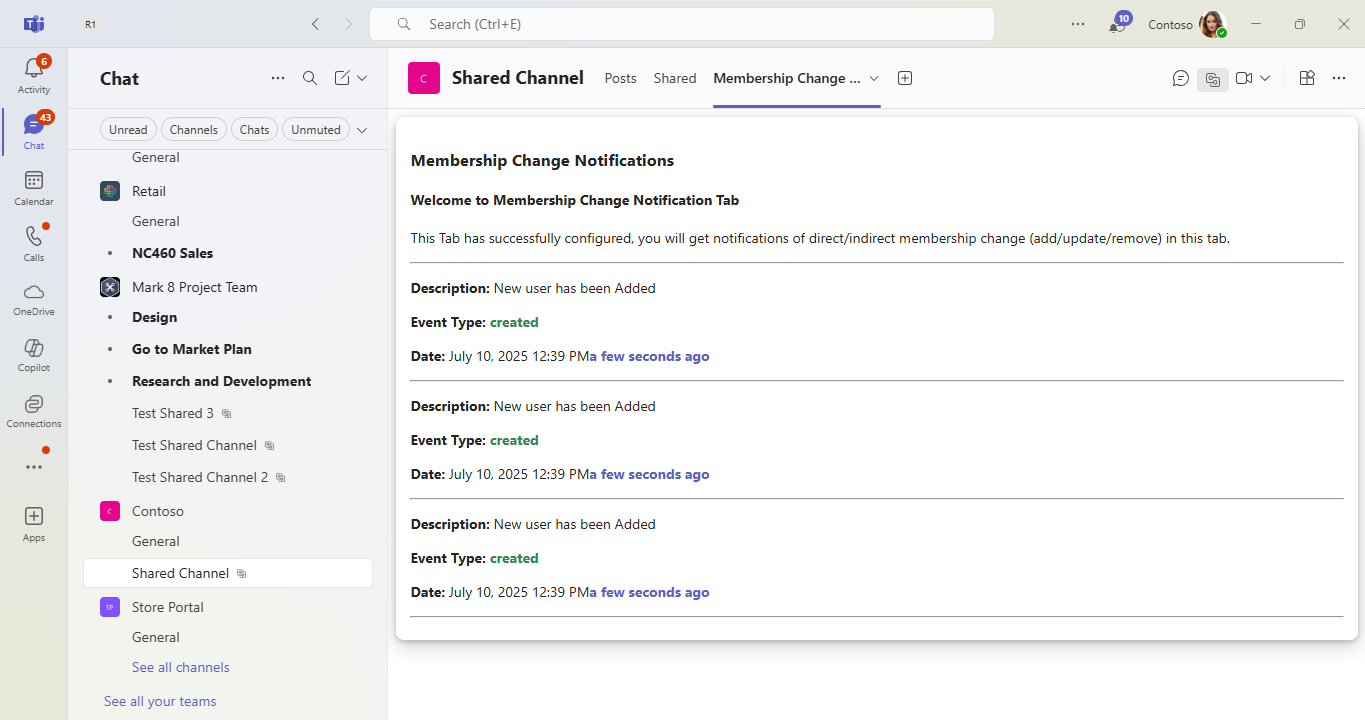
User Added
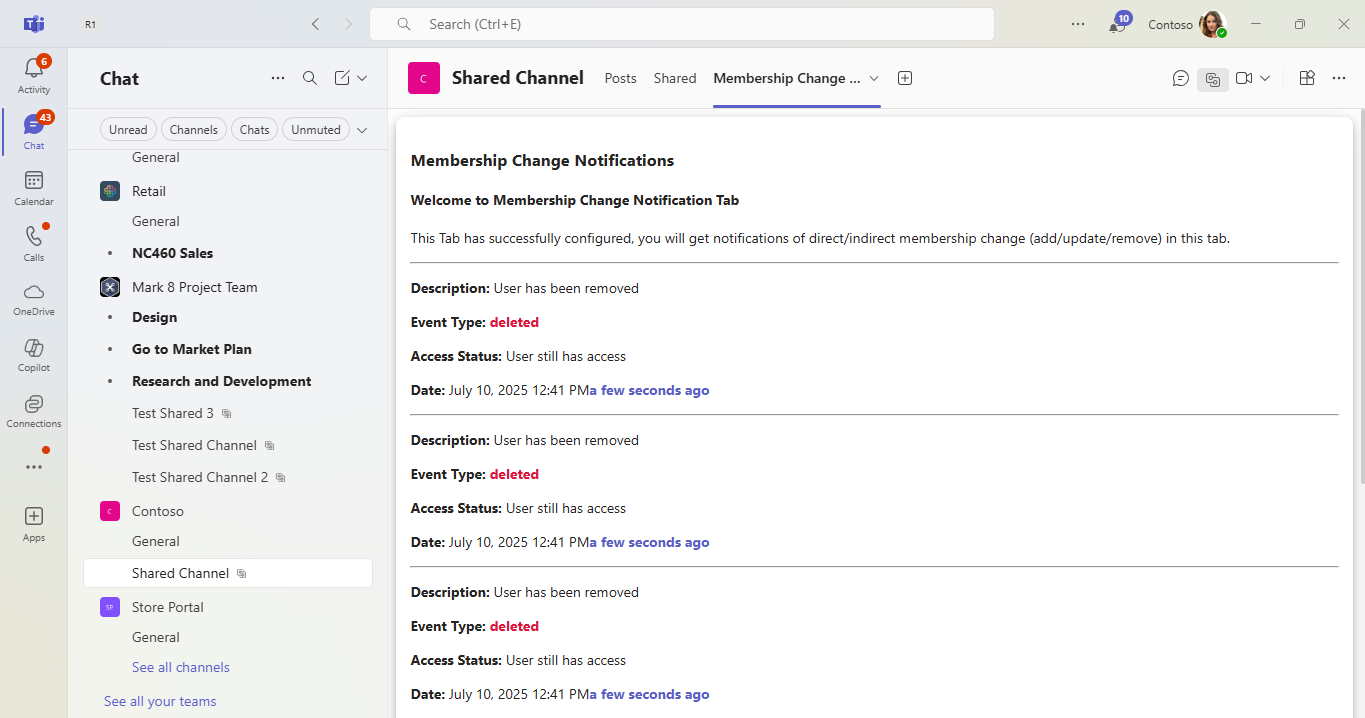
User Removed
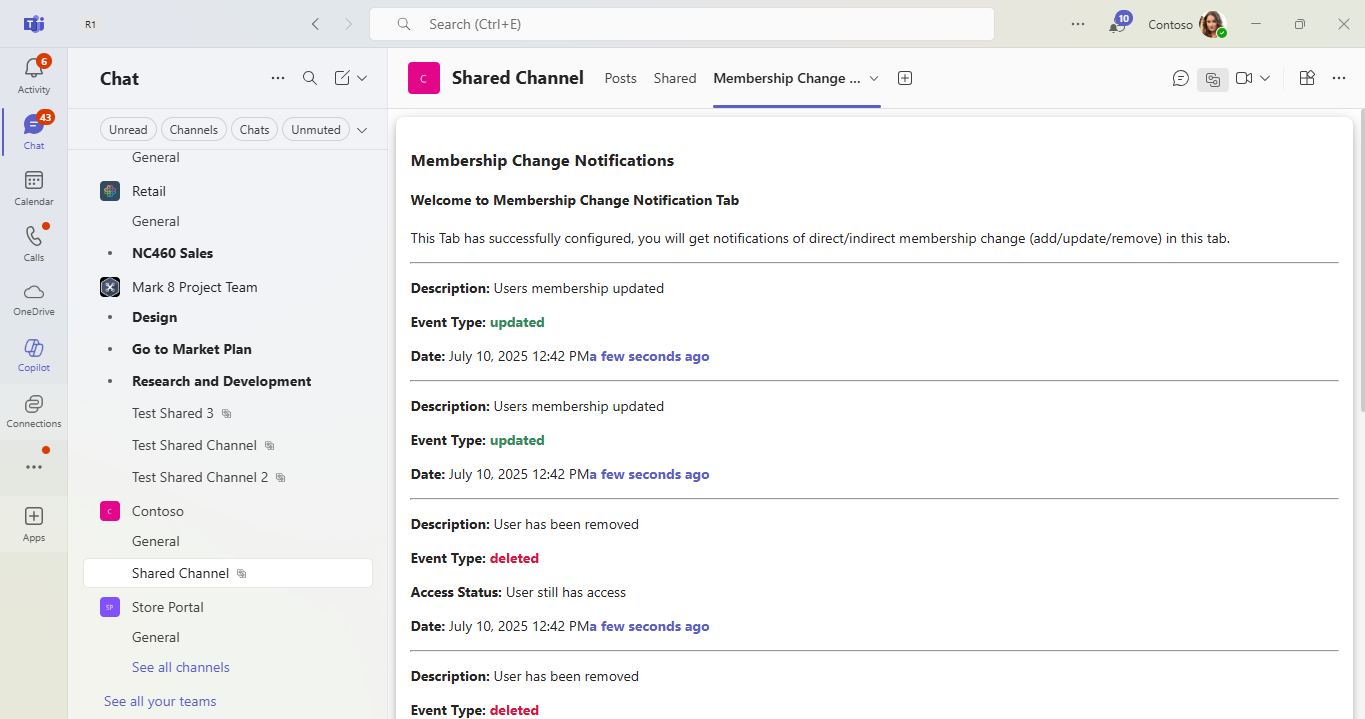
User Membership Updated
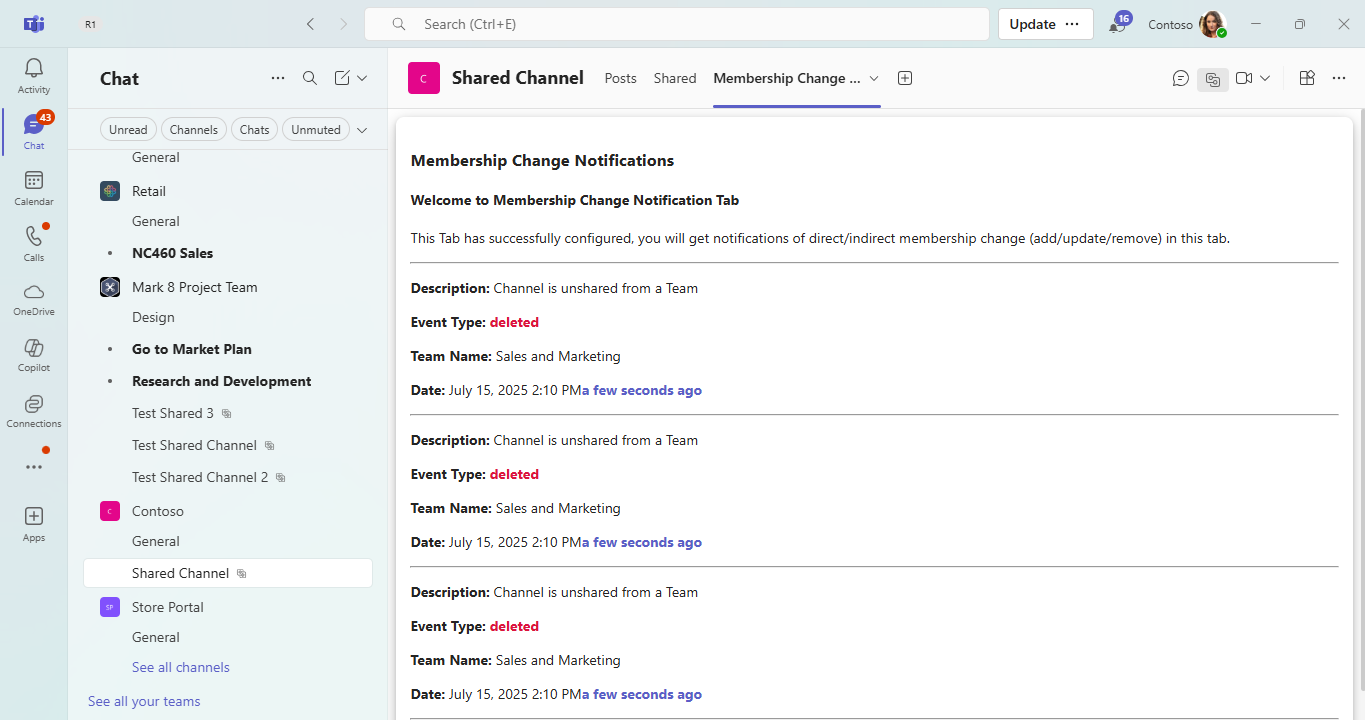
Shared with a Team

Unshared with a Team