Insert an external Excel file and populate it with JSON data
Summary
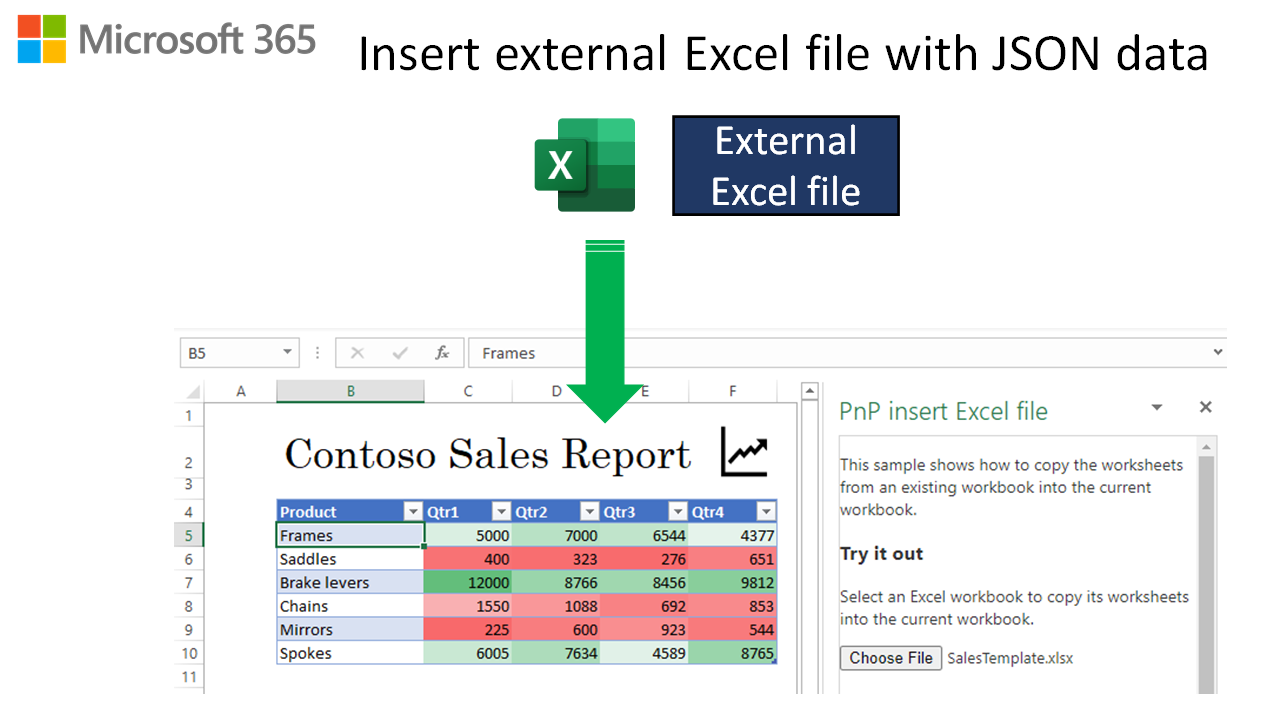
This sample shows how to insert an existing template from an external Excel file into the currently open Excel file. Then it retrieves data from a JSON web service and populates the template for the customer.
Note: If you don't already have an Microsoft 365 subscription, you might qualify for a Microsoft 365 E5 developer subscription through the Microsoft 365 Developer Program; for details, see the FAQ. Alternatively, you can sign up for a 1-month free trial or purchase a Microsoft 365 plan.
Features
- Use insertWorksheetsFromBase64 to insert a worksheet from another Excel file into the open Excel file.
- Get JSON data and add it to the worksheet.
Applies to
- Excel on Windows, Mac, and on the web.
Prerequisites
- Microsoft 365
Solution
| Solution | Author(s) |
|---|---|
| Insert an external Excel file and populate it with JSON data | Microsoft |
Version history
| Version | Date | Comments |
|---|---|---|
| 1.0 | 5-18-2021 | Initial release |
| 1.1 | 8-17-2023 | Fix localhost setup steps |
| 1.2 | 7-31-2024 | Use release version of office.js instead of preview |
Run the sample
To run the sample you just need to sideload the manifest. The add-in web files are served from this repo on GitHub.
Download the manifest.xml and SalesTemplate.xlsx files from this sample to a folder on your computer.
Open Office on the web.
Choose Excel, and then open a new document.
Under Home > Add-ins, select More Add-ins.
On the Office Add-ins dialog, select MY ADD-INS , choose the Manage My Add-ins drop-down, and then choose Upload My Add-in.
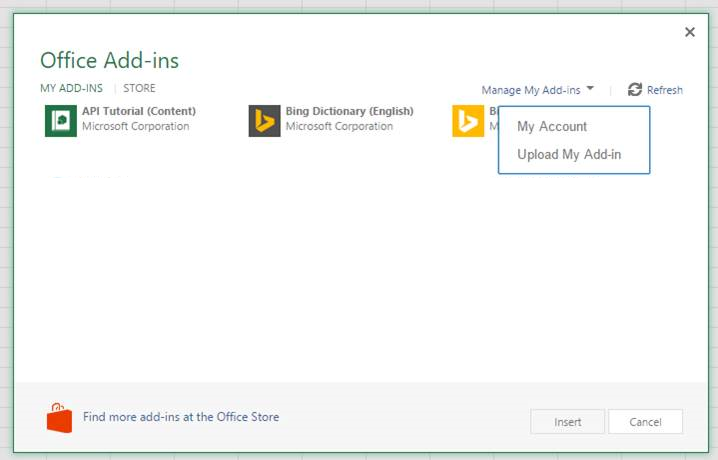
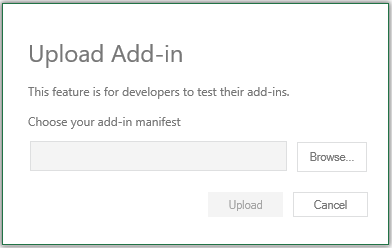
Browse to the add-in manifest file, and then select Upload.
Verify that the add-in loaded successfully. You'll see a PnP Insert Excel file button on the Home tab.
Once the add-in is loaded, use the following steps to try out the functionality.
- On the Home tab, choose PnP Insert Excel file.
- In the task pane, select the Choose file button.
- In the dialog box that opens, select the SalesTemplate.xlsx file that you downloaded previously, and choose Open.
A Contoso Sales Report will be inserted with a table and chart populated with data.
Key parts of this sample
When you select the SalesTemplate.xlsx file, the following code in index.js inserts the template. It sets up an object named options to identify the sheet by name (Template). Then it calls the Office.js insertWorksheetsFromBase64 API to insert the template into the current worksheet.
// STEP 1: Insert the template into the workbook.
const workbook = context.workbook;

// Set up the insert options.
const options = {
  sheetNamesToInsert: ["Template"], // Insert the "Template" worksheet from the source workbook.
  positionType: Excel.WorksheetPositionType.after, // Insert after the `relativeTo` sheet.
  relativeTo: "Sheet1",
}; // The sheet relative to which the other worksheets will be inserted. Used with `positionType`.

// Insert the external worksheet.
workbook.insertWorksheetsFromBase64(workbookContents, options);
Next, it gets the JSON which is in the data.json file in this repo.
// STEP 2: Add data from the "Service".
const sheet = context.workbook.worksheets.getItem("Template");

  // Get data from your REST API. For this sample, the JSON is fetched from a file in the repo.
  let response = await fetch(dataSourceUrl + "/data.json");
  if (response.ok) {
    const json = await response.json();
  } else {
    console.error("HTTP-Error: " + response.status);
  }
Finally, it adds the JSON to the table.
// Map JSON to table columns.
  const newSalesData = json.salesData.map((item) => [
    item.PRODUCT,
    item.QTR1,
    item.QTR2,
    item.QTR3,
    item.QTR4
  ]);

  // We know that the table in this template starts at B5, so we start with that.
  // Next, we calculate the total number of rows from our sales data.
  const startRow = 5;
  const address = "B" + startRow + ":F" + (newSalesData.length + startRow - 1);

  // Write the sales data to the table in the template.
  const range = sheet.getRange(address);
  range.values = newSalesData;
  sheet.activate();
Configure a localhost web server and run the sample from localhost
If you prefer to run the web server and host the add-in's web files from your computer, use the following steps:
Clone or download this sample to a folder on your computer. Then go to that folder in a console or terminal window.
Open the index.js file.
Edit line 4 to refer to the localhost:3000 endpoint as shown in the following code.
const dataSourceUrl = "https://localhost:3000";Save the file.
Install a recent version of npm and Node.js on your computer. To verify if you've already installed these tools, run the commands
node -vandnpm -vin your terminal.You need http-server to run the local web server. If you haven't installed this yet you can do this with the following command:
npm install --global http-serverYou need Office-Addin-dev-certs to generate self-signed certificates to run the local web server. If you haven't installed this yet you can do this with the following command:
npm install --global office-addin-dev-certsRun the following command to generate a self-signed certificate that you can use for the web server.
npx office-addin-dev-certs installThe previous command will display the folder location where it generated the certificate files.
Go to the folder location where the certificate files were generated. Copy the localhost.crt and localhost.key files to the excel-insert-file sample folder.
Run the following command:
http-server -S -C localhost.crt -K localhost.key --cors . -p 3000The http-server will run and host the current folder's files on localhost:3000.
Follow the steps in Run the sample, but upload the
manifest-localhost.xmlfile for step 6.
Questions and feedback
- Did you experience any problems with the sample? Create an issue and we'll help you out.
- We'd love to get your feedback about this sample. Go to our Office samples survey to give feedback and suggest improvements.
- For general questions about developing Office Add-ins, go to Microsoft Q&A using the office-js-dev tag.
Copyright
Copyright (c) 2021 Microsoft Corporation. All rights reserved.
This project has adopted the Microsoft Open Source Code of Conduct. For more information, see the Code of Conduct FAQ or contact opencode@microsoft.com with any additional questions or comments.