CyberArk Privilege Cloud
Important
Some information in this article relates to a prereleased product which may be substantially modified before it's commercially released. Microsoft makes no warranties, express or implied, with respect to the information provided here.
CyberArk Privilege Cloud is a SaaS solution that provides a simplified path to securely store, rotate and isolate credentials (for both human and non-human users), monitor sessions, and quickly deliver scalable risk reduction to the business. You can use the CyberArk plugin with Microsoft Copilot for Security to:
- List privileged accounts in Copilot for Security using natural language.
- Leverage Copilot generative AI abilities to interact with privileged accounts data.
Set up the CyberArk plugin
Integration with Copilot for Security requires an OAuth service user account for authentication.
Sign in to your CyberArk Identity Security Platform Shared Services (ISPSS) with a user account that has permissions to manage users in CyberArk Identity.
Configure a new OAuth service user account by following these steps:
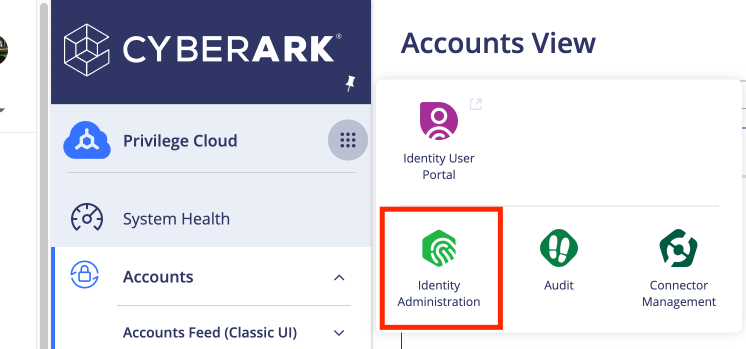
From the service picker, choose Identity Administration.
Expand Core Services, and then select Users.
In the Users screen, select Add User, and then fill in the required details.
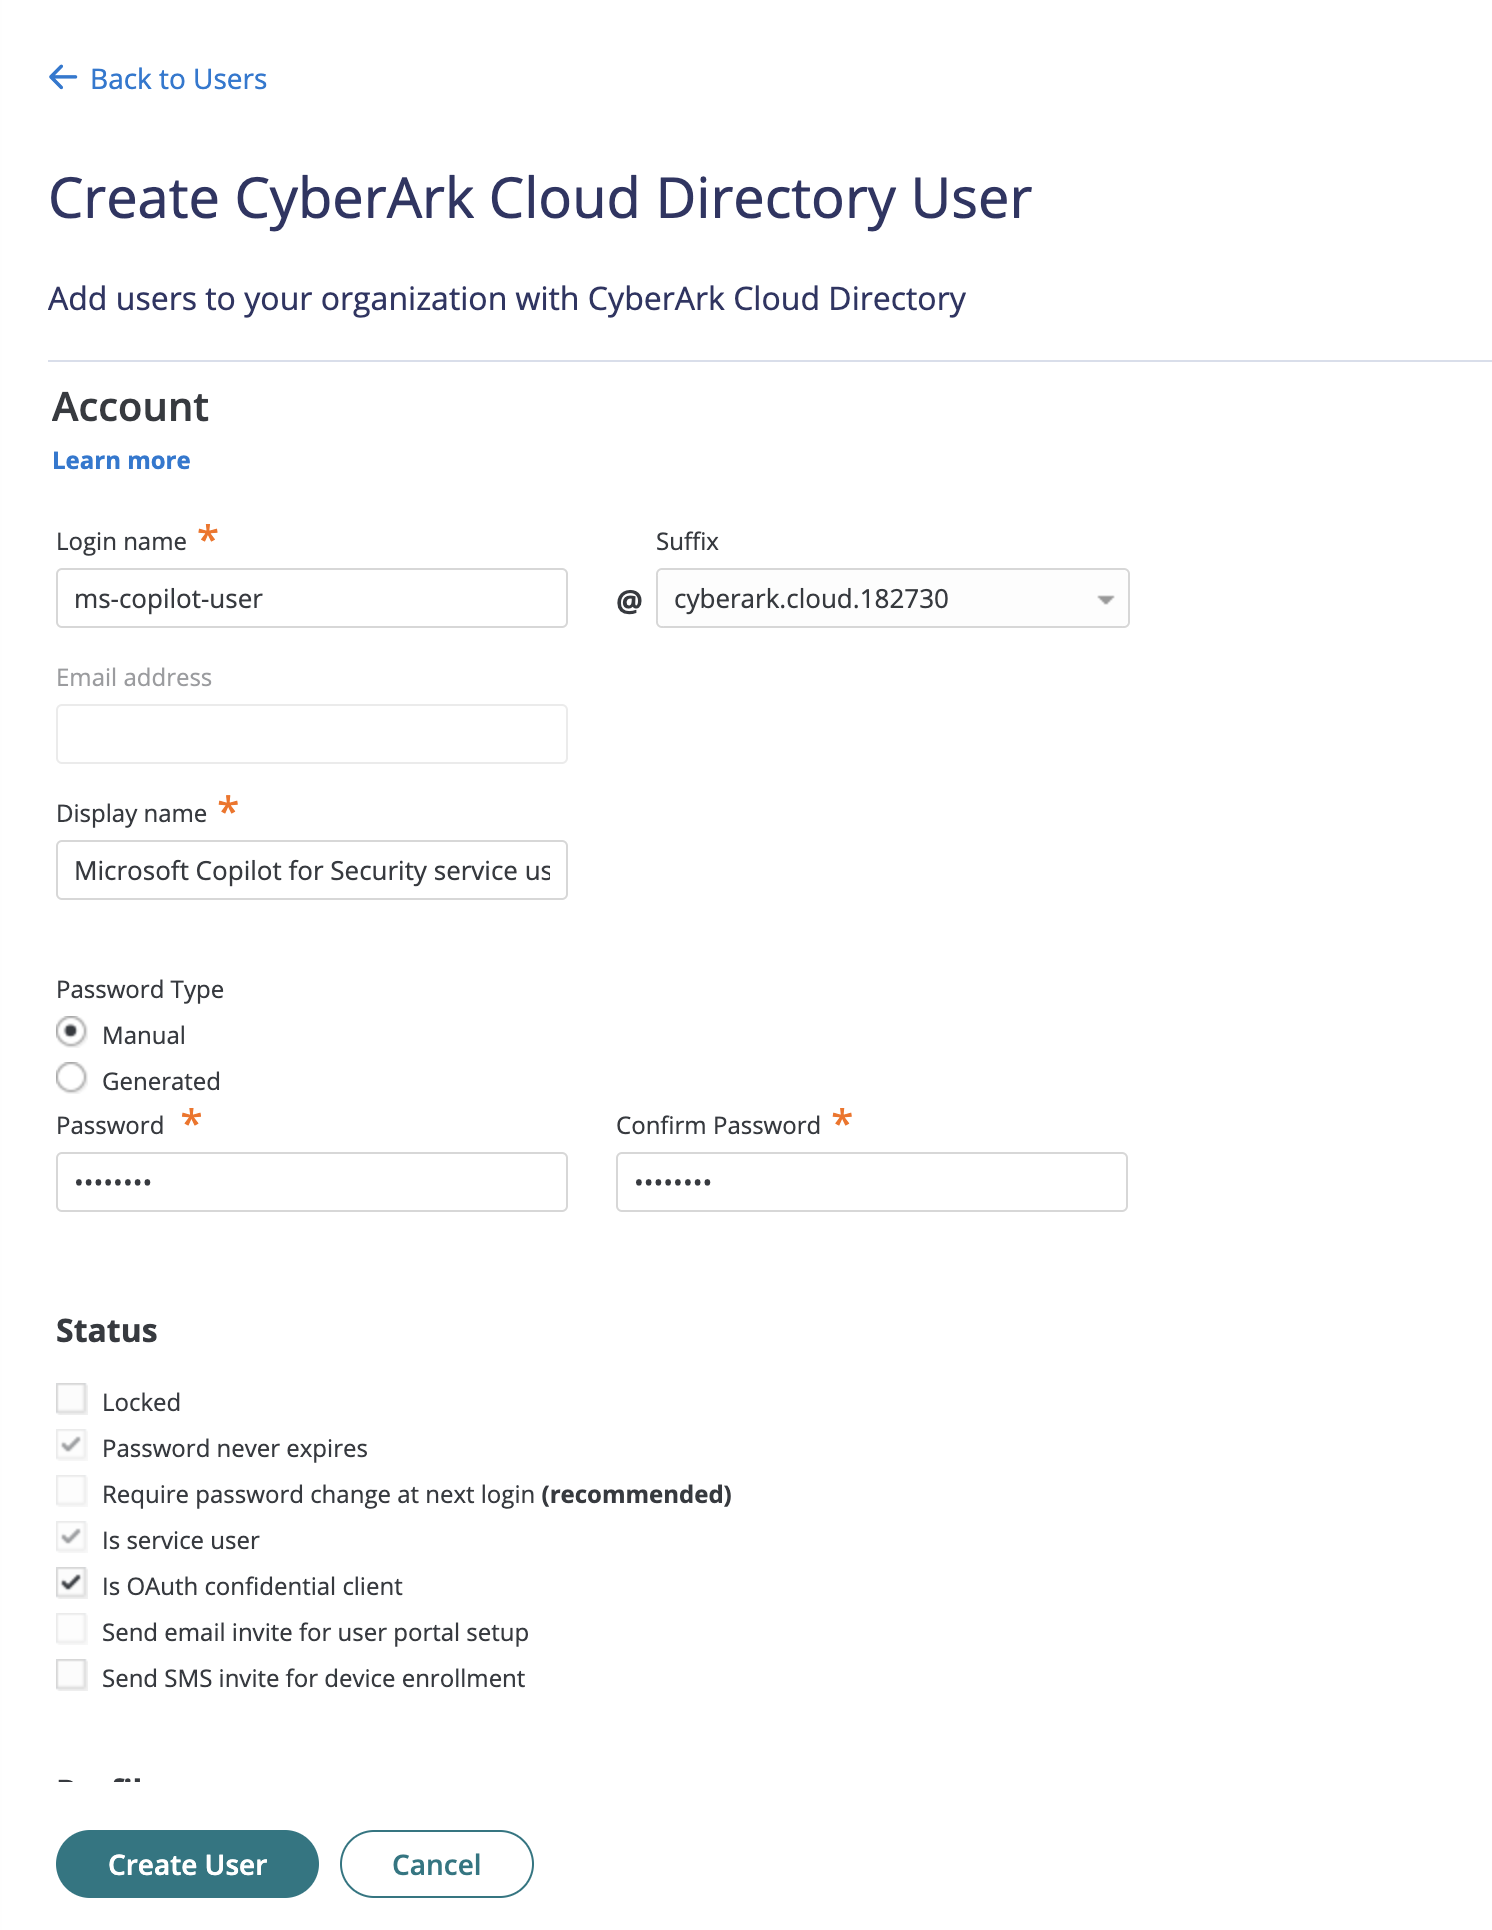
Under Status mark the checkbox next to Is OAuth confidential client, and then select Create User.
In the menu, select Roles, and then assign the new user account to a Privilege Cloud Users role.
Configure CyberArk Privilege Cloud to work with the Copilot for Security plugin. Follow these steps:
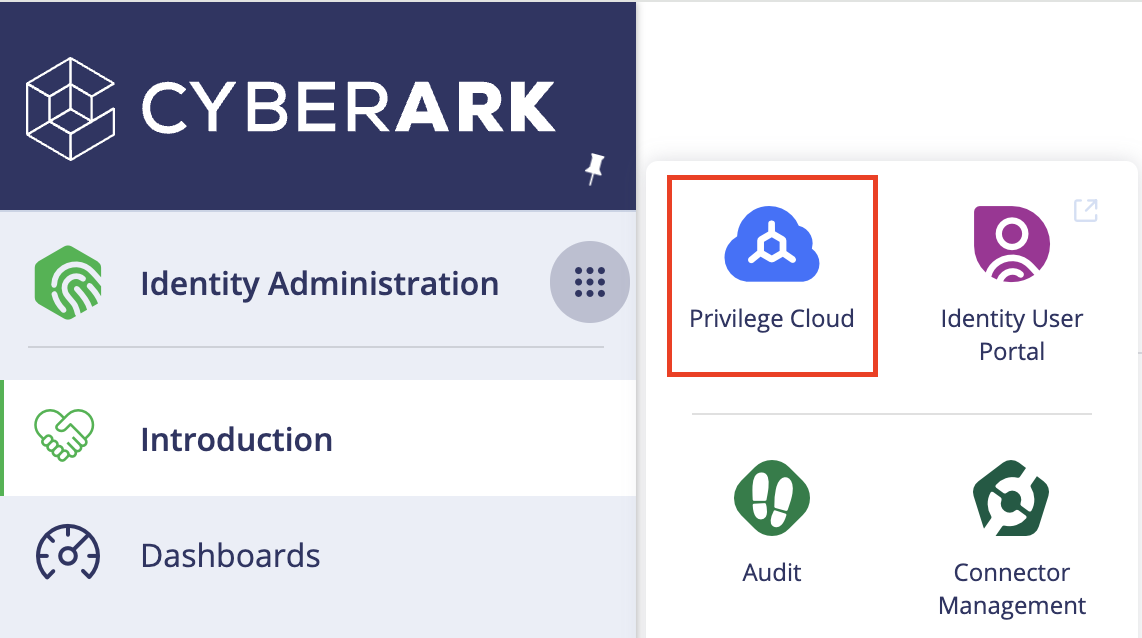
In the service picker, select Privilege Cloud.
In the menu, expand Policies, select Safes, and then choose the safe you want to grant permissions for.
In the Safe pane, select the Members tab. Select Add members, and select the user account you created earlier, and then select Next.
Assign appropriate permissions, and then select Add.
Sign in to Microsoft Copilot for Security.
Access Manage Plugins by selecting the Plugin button from the prompt bar.
Next to CyberArk, select the toggle to enable it.
Provide your CyberArk Privilege Cloud instance URL and user account information.
Save your changes.
Use the CyberArk plugin
After the CyberArky plugin is configured, you can use it by typing CyberArk in your Copilot for Security prompt bar, followed by an action. You can use the plugin to list privileged accounts and get account details. The following table lists some example prompts to try and their expected output:
| Prompt example | Expected output |
|---|---|
Find an account with the username test_user |
Get all account details about an account with the username “test_user”. |
Get all account details about an account with the username “test_user” |
Get a positive or negative answer whether an account with the username “test_user” and an address “10.0.1.103” is managed by CyberArk. |
Get all accounts and show the results in a table |
Get details about all accounts, displayed in a table format. |