What are agents?
Agents are software based entities that leverage AI models to do works for you. They are built to perform a wide range of tasks and called different names based on the jobs they do.
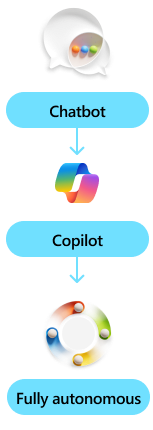
For example, an agent built to answer questions is referred to as a chatbot due to it’s chat-based experience. These agents are typically grounded in your own data, like company documents.
An agent built to work along side you is typically called a copilot. These agents help you complete tasks like writing emails or creating other office artifacts by providing recommendations that you choose to either accept or reject.
An agent built to handle repetitive tasks are usually labeled as fully autonomous. They respond to events and perform actions without needing intervention. This is different from a copilot in that it’s doing work for you instead of alongside you.
Semantic Kernel provides you with the infrastructure to build any kind of agent you need without being an expert in AI.
Building your first agent
An agent is made up of three core building blocks that harmoniously work together to complete tasks for you. Let’s take a closer look by building a copilot that helps you write and send an email.
A copilot to write and send emails
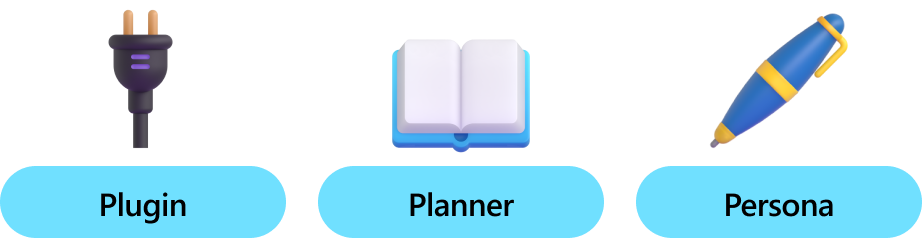
To create this copilot you’ll need to create a plugin that can send emails, a planner that generates a plan to write an email, and a persona that interacts with you to get the information needed to send the email.
| Step | Description |
|---|---|
| 1 | Get the user's email address and name |
| 2 | Get the email address of the recipient |
| 3 | Get the topic of the email |
| 4 | Generate the subject and body of the email |
| 5 | Review the email with the user |
| 6 | Send the email |
To enable this scenario, we would need to create a plugin that can send emails, a planner that can generate a plan to write an email, and a persona that can interact with the user to get the necessary information.
The following sections will walk you through the conceptual building blocks and how to put them together to build your first agent. Afterwards, you can refer to the specific guides for each building block to learn more about how to build them.
Plugins: giving your agent skills
To generate the above plan, the copilot first needs the capabilities necessary to perform these steps. This is where plugins come in. Plugins allow you to give your agent skills via code. For example, you could create a plugin that sends emails, retrieves information from a database, asks for help, or even saves and retrieves memories from previous conversations.
In our example, we can build a simple plugin that sends emails using native code. Our plugin just has a single function, send_email, that takes in the email address, subject, and body of the email. It would then use this information to send the email.
using System.ComponentModel;
using Microsoft.SemanticKernel;

public class EmailPlugin
{
    [KernelFunction("send_email")]
    [Description("Sends an email to a recipient.")]
    public async Task SendEmailAsync(
        Kernel kernel,
        List<string> recipientEmails,
        string subject,
        string body
    )
    {
        // Add logic to send an email using the recipientEmails, subject, and body
        // For now, we'll just print out a success message to the console
        Console.WriteLine("Email sent!");
    }
}
from semantic_kernel.functions import kernel_function

class EmailPlugin:
    @kernel_function(
        name="send_email",
        description="Sends an email to a recipient."
    )
    async def send_email(self, recipient_emails: List[str], subject: str, body: str):
        # Add logic to send an email using the recipient_emails, subject, and body
        # For now, we'll just print out a success message to the console
        print("Email sent!")
There are other ways to create plugins. For example, if you have a RestAPI that can send emails, you can automatically create a plugin using its OpenAPI specification. To learn more about other ways to author plugins, see the plugins section.
Planning: completing multi-step tasks
To actually use this plugin (and to wire them up with other steps), the copilot would then need to generate a plan. This is where planning comes in. Planning comes from the built-in ability of LLMs to determine how to iteratively complete a task.
Note
In the past, special prompts were created by AI app developers to guide the AI in generating a plan that could be consumed by an SDK like Semantic Kernel. However, with the advent of LLMs, AIs can now generate plans directly from a conversation with a user with the aid of function calling.
With built-in planning support form LLMs, using Semantic Kernel is now as easy as invoking a chat completion service with auto function calling enabled.
using Microsoft.SemanticKernel;
using Microsoft.SemanticKernel.ChatCompletion;
using Microsoft.SemanticKernel.Connectors.OpenAI;

// Create kernel with an email plugin
var builder = Kernel.CreateBuilder();
builder.Plugins.AddFromType<EmailPlugin>();
Kernel kernel = builder.Build();

// Create chat completion service
AzureOpenAIChatCompletionService chatCompletionService = new (
    deploymentName: "gpt-4",
    apiKey: "YOUR_API_KEY",
    endpoint: "YOUR_AZURE_ENDPOINT"
);

// Enable planning
OpenAIPromptExecutionSettings openAIPromptExecutionSettings = new()
{
    ToolCallBehavior = ToolCallBehavior.AutoInvokeKernelFunctions
};

// Create chat history
var history = new ChatHistory();
history.AddUserMessage("Can you help me write an email for my boss?");

// Get the response from the AI
var result = await chatCompletionService.GetChatMessageContentAsync(
    history,
    executionSettings: openAIPromptExecutionSettings,
    kernel: kernel
);
import asyncio

from semantic_kernel import Kernel
from semantic_kernel.functions import kernel_function
from semantic_kernel.connectors.ai.open_ai import AzureChatCompletion
from semantic_kernel.connectors.ai.function_call_behavior import FunctionCallBehavior
from semantic_kernel.connectors.ai.chat_completion_client_base import ChatCompletionClientBase
from semantic_kernel.contents.chat_history import ChatHistory
from semantic_kernel.functions.kernel_arguments import KernelArguments

from semantic_kernel.connectors.ai.open_ai.prompt_execution_settings.azure_chat_prompt_execution_settings import (
    AzureChatPromptExecutionSettings,
)

async def main():
    # Initialize the kernel
    kernel = Kernel()

    # Add Azure OpenAI chat completion
    kernel.add_service(AzureChatCompletion(
        deployment_name="your_models_deployment_name",
        api_key="your_api_key",
        base_url="your_base_url",
    ))

    # Set the logging level for  semantic_kernel.kernel to DEBUG.
    logging.basicConfig(
        format="[%(asctime)s - %(name)s:%(lineno)d - %(levelname)s] %(message)s",
        datefmt="%Y-%m-%d %H:%M:%S",
    )
    logging.getLogger("kernel").setLevel(logging.DEBUG)

    # Add a plugin (the LightsPlugin class is defined below)
    kernel.add_plugin(
        LightsPlugin(),
        plugin_name="Lights",
    )

    chat_completion : AzureChatCompletion = kernel.get_service(type=ChatCompletionClientBase)

    # Enable planning
    execution_settings = AzureChatPromptExecutionSettings(tool_choice="auto")
    execution_settings.function_call_behavior = FunctionCallBehavior.EnableFunctions(auto_invoke=True, filters={})

    # Create a history of the conversation
    history = ChatHistory()
    history.add_user_message("Can you help me write an email for my boss?")

    result = (await chat_completion.get_chat_message_contents(
        chat_history=history,
        settings=execution_settings,
        kernel=kernel,
        arguments=KernelArguments(),
    ))[0]

# Run the main function
if __name__ == "__main__":
    asyncio.run(main())
To learn more about planning with Semantic Kernel, see the planning article.
Personas: giving your agent a job description
In most cases, using the built-in planning capabilities of LLMs with plugins is sufficient to building an agent, but as you build more domain-specific agents, you may want to add a persona to your agent.
A persona is the instructions that you provide your agent so they can more effectively perform the role you want them to play. At its simplest, the persona could instruct the AI to be polite, ask for clarification when needed, or role-play as a specific job title (e.g., a customer service representative).
For enterprise scenarios, however, you may want to provide more detailed instructions to your agent. For example, you may want to instruct your agent to follow specific rules, ask for approval before taking actions, or escalate to a human if the AI is unable to complete a task.
To provide a persona to your agent, simply pre-pend a system message to the chat history that describes the persona. The AI will then use this persona to guide its interactions with the user.
// Create chat history
ChatHistory chatMessages = new ChatHistory("""
    You are a friendly assistant who likes to follow the rules. You will complete required steps
    and request approval before taking any consequential actions. If the user doesn't provide
    enough information for you to complete a task, you will keep asking questions until you have
    enough information to complete the task.
    """);
chatMessages.AddUserMessage("Can you help me write an email for my boss?");

// Get the response from the AI
var result = await chatCompletionService.GetChatMessageContentAsync(
    history,
    executionSettings: openAIPromptExecutionSettings,
    kernel: kernel
);
# Create a history of the conversation
history = ChatHistory("""
    You are a friendly assistant who likes to follow the rules. You will complete required steps
    and request approval before taking any consequential actions. If the user doesn't provide
    enough information for you to complete a task, you will keep asking questions until you have
    enough information to complete the task.
    """)
history.add_user_message("Can you help me write an email for my boss?")

# Get the response from the AI
result = (await chat_completion.get_chat_message_contents(
    chat_history=history,
    settings=execution_settings,
    kernel=kernel,
    arguments=KernelArguments(),
))[0]
To learn more about authoring effective personas, refer to the personas article.
Putting the pieces together
Now that we understand the core building blocks of an agent, we can now combine them together to build our first agent. To do so, we'll initialize our Kernel object with our plugins, planners, and persona. Afterwards, we'll use the Kernel object to generate a plan and then execute that plan.
// Create the kernel
var builder = Kernel.CreateBuilder();
builder.Services.AddLogging(c => c.SetMinimumLevel(LogLevel.Trace).AddDebug());
builder.Services.AddChatCompletionService(kernelSettings);
builder.Plugins.AddFromType<EmailPlugin>();
Kernel kernel = builder.Build();

// Retrieve the chat completion service from the kernel
IChatCompletionService chatCompletionService = kernel.GetRequiredService<IChatCompletionService>();

// Create the chat history
ChatHistory chatMessages = new ChatHistory("""
    You are a friendly assistant who likes to follow the rules. You will complete required steps
    and request approval before taking any consequential actions. If the user doesn't provide
    enough information for you to complete a task, you will keep asking questions until you have
    enough information to complete the task.
    """);

// Start the conversation
while (true)
{
    // Get user input
    System.Console.Write("User > ");
    chatMessages.AddUserMessage(Console.ReadLine()!);

    // Get the chat completions
    OpenAIPromptExecutionSettings openAIPromptExecutionSettings = new()
    {
        FunctionCallBehavior = FunctionCallBehavior.AutoInvokeKernelFunctions
    };
    var result = chatCompletionService.GetStreamingChatMessageContentsAsync(
        chatMessages,
        executionSettings: openAIPromptExecutionSettings,
        kernel: kernel);

    // Stream the results
    string fullMessage = "";
    await foreach (var content in result)
    {
        if (content.Role.HasValue)
        {
            System.Console.Write("Assistant > ");
        }
        System.Console.Write(content.Content);
        fullMessage += content.Content;
    }
    System.Console.WriteLine();

    // Add the message from the agent to the chat history
    chatMessages.AddAssistantMessage(fullMessage);
}
import asyncio

from semantic_kernel import Kernel
from semantic_kernel.contents.chat_history import ChatHistory
from semantic_kernel.connectors.ai.open_ai import AzureChatCompletion
from semantic_kernel.connectors.ai.function_call_behavior import FunctionCallBehavior
from semantic_kernel.connectors.ai.chat_completion_client_base import ChatCompletionClientBase
from semantic_kernel.connectors.ai.open_ai.prompt_execution_settings.azure_chat_prompt_execution_settings import (
    AzureChatPromptExecutionSettings,
)

async def main():
    # Initialize the kernel
    kernel = Kernel()

    # Add Azure OpenAI chat completion
    kernel.add_service(AzureChatCompletion(
        deployment_name="your_models_deployment_name",
        api_key="your_api_key",
        base_url="your_base_url",
    ))

    # Add a plugin (the LightsPlugin class is defined below)
    kernel.add_plugin(
        LightsPlugin(),
        plugin_name="Lights",
    )

    chat_completion : AzureChatCompletion = kernel.get_service(type=ChatCompletionClientBase)

    # Enable planning
    execution_settings = AzureChatPromptExecutionSettings(tool_choice="auto")
    execution_settings.function_call_behavior = FunctionCallBehavior.EnableFunctions(auto_invoke=True, filters={})

    # Create a history of the conversation
    history = ChatHistory()

    # Start the conversation
    while True:
        # Get user input
        user_input = input("User > ")
        history.add_user_message(user_input)

        # Get the response from the AI
        result = (await chat_completion.get_chat_message_contents(
            chat_history=history,
            settings=execution_settings,
            kernel=kernel,
            arguments=KernelArguments(),
        ))[0]

        # Print the response
        print("Assistant > " + result)
        history.add_assistant_message(result)

# Run the main function
if __name__ == "__main__":
    asyncio.run(main())
Trying out your agent
Now that we've completed our program, we can give it a test run. Below is a sample conversation with our agent while using gpt-4 model.
| Role | Message |
|---|---|
| 🔵 User | Can you help me write an email for my boss? |
| 🔴 Assistant | Of course, I'd be happy to help you write an email to your boss. Could you please provide me with more details? Specifically, I need to know: 1. The topic or purpose of the email. 2. Your boss's email address. |
| 🔵 User | I want to give her an update on last months sales. We broke a bunch of records that I want to share with her, but we did have a challenge selling the X4321 model. |
| 🔴 Assistant | That sounds like a great topic for an email. Could you please provide me with your boss's email address so I can assist you further? |
| 🔵 User | Sure! It's sarah@contoso.com |
| 🔴 Assistant | Great! Here's a plan for your email: 1. Start with a Clear Subject Line and Greeting: The subject line should be concise and informative, such as "Update on Last Month's Sales & X4321 Model Challenges". Start the email with a professional greeting, like "Dear Sarah,". 2. Highlight Achievements and Challenges in Separate Paragraphs: Begin with the positive news about the record-breaking achievements. Use specific data and examples to illustrate the success. Then, transition to the challenges with the X4321 model. Be honest and clear about the issues, but also suggest potential solutions or steps being taken to address these challenges. 3. End with a Call to Action and Professional Closing: If you need Sarah to take any actions, state this clearly towards the end of the email. This could be asking for her input, a meeting to discuss further, or any other relevant action. Close the email professionally with a phrase like "Best regards" or "Sincerely", followed by your name. Remember to proofread the email for any grammatical errors or unclear statements before sending it. This will help ensure the message is professional and easy to understand. Would you like me to draft the email for you based on these steps? |
| 🔵 User | Yes please! |
| 🔴 Assistant | Sure, here's a draft based on the steps we discussed: Subject: Update on Last Month's Sales & X4321 Model Challenges Dear Sarah, I hope this email finds you well. I am writing to update you on our sales performance for the past month. I am pleased to report that we broke several sales records last month. Our team's hard work and dedication have paid off, resulting in significant growth in our overall sales figures. [Here, you can add specific data or examples of the records broken] However, we did face some challenges with the X4321 model. Despite our best efforts, the sales for this model did not meet our expectations. [Here, you can explain more about the challenges faced] We are currently working on strategies to improve the sales of the X4321 model. [Here, you can mention any specific steps or plans you have to address the issue] I would appreciate your input on this matter. If you would like, we can schedule a meeting to discuss this further. Thank you for your continued support and guidance. Best regards, [Your Name] Please review this draft and let me know if you would like to make any changes before I send it. |
| 🔵 User | Can you add that we increased our revenue by 20%? You can also share that the X4321 didn't sell as well since most customers upgraded to the Y5000 model, but this isn't too bad since it's what helped increase our revenue. |
| 🔴 Assistant | Absolutely, here's the updated draft: Subject: Update on Last Month's Sales & X4321 Model Challenges Dear Sarah, I hope this email finds you well. I am writing to update you on our sales performance for the past month. I am pleased to report that we broke several sales records last month. Our team's hard work and dedication have paid off, resulting in a significant 20% increase in our overall revenue. This growth is a testament to our team's commitment and the quality of our products. However, we did face some challenges with the X4321 model. Despite our best efforts, the sales for this model did not meet our expectations. Interestingly, most customers upgraded to the Y5000 model, which contributed significantly to our increased revenue. While we aim to improve the sales of all our models, this shift in customer preference is not entirely negative. We are currently analyzing this trend and working on strategies to leverage it for future sales. Your insights and suggestions would be greatly appreciated. Thank you for your continued support and guidance. Best regards, Stephen Please review this updated draft and let me know if you would like to make any changes before I send it. |
| 🔵 User | Please sign it with Stephen and then you can go ahead and send it to Sarah |
| 🟢 Tool | Email sent! |
| 🔴 Assistant | The email has been sent to Sarah. If there's anything else you need assistance with, feel free to ask! |
Next steps
Now that you've built your first agent, you can now deep dive into the different components of Semantic Kernel.
| Section | Description |
|---|---|
| Kernel | Setting up and using the core Kernel object |
| AI Services | Integration and usage of various AI services |
| Plugins | Integrate native code and APIs with Semantic Kernel |
| Planners | Enabling your AI agents to complete multi-step tasks |
| Personas | Customize your AI agents to better collaborate with others |