Note
Access to this page requires authorization. You can try signing in or changing directories.
Access to this page requires authorization. You can try changing directories.
Important
Support experiences:
Enhanced: This is the new self-help support request creation process.
Support AI Assistant: The Support AI Assistant is the new AI-assisted self-help support request creation process.
Use the following section of this article to identify which support process you have.
Select the correct experience
At the top of this article, you can see a row of two selectors:

These allow you to select the correct set of instructions for your support request creation experience. Here's how to identify which set of instructions you need:
Sign in to Services Hub, and select Support from the ribbon along the top of the page.
Select Use the new support experience in Services Hub, then continue on to the step three in this article to determine which set of instructions you should follow.
Once you select Use the new support experience in Services Hub, you should see one of two new views:
A support request creation form

If you see this support request creation form after you select Use the new support experience in Services Hub, select Enhanced experience from the tabs at the top of this article, then follow the provided instructions.
An AI assistant prompt

If you see this AI assistant prompt after you select Use the new support experience in Services Hub, select Support AI Assistant from the tabs at the top of this article, then follow the provided instructions.
Important
Make sure you also review our connectivity guide and allowlist the necessary URLs.
Allowlist websites
Depending on your company network configuration, you might need to add certain URLs to your allowlist to use the new platform.
For more information, see Microsoft Engage Center (Services Hub) connectivity guide.
Video overview
The following video provides an overview and walkthrough of our enhanced Support request creaton experience.
Continue on to the following section for written instructions on how to open a support request through the enhanced experience.
Begin the process for the enhanced experience
Note
If you encounter an error about entitlement when you try to open a support request in the enhanced experience, it's likely that the workspace you're using needs to be configured correctly.

To resolve this error, reach out to your CSAM and let them know you received the message. Once your CSAM replies and confirms that the necessary changes have been made, go back to the enhanced support request creation process and verify that you have access to create support requests.
To open a new support request:
-

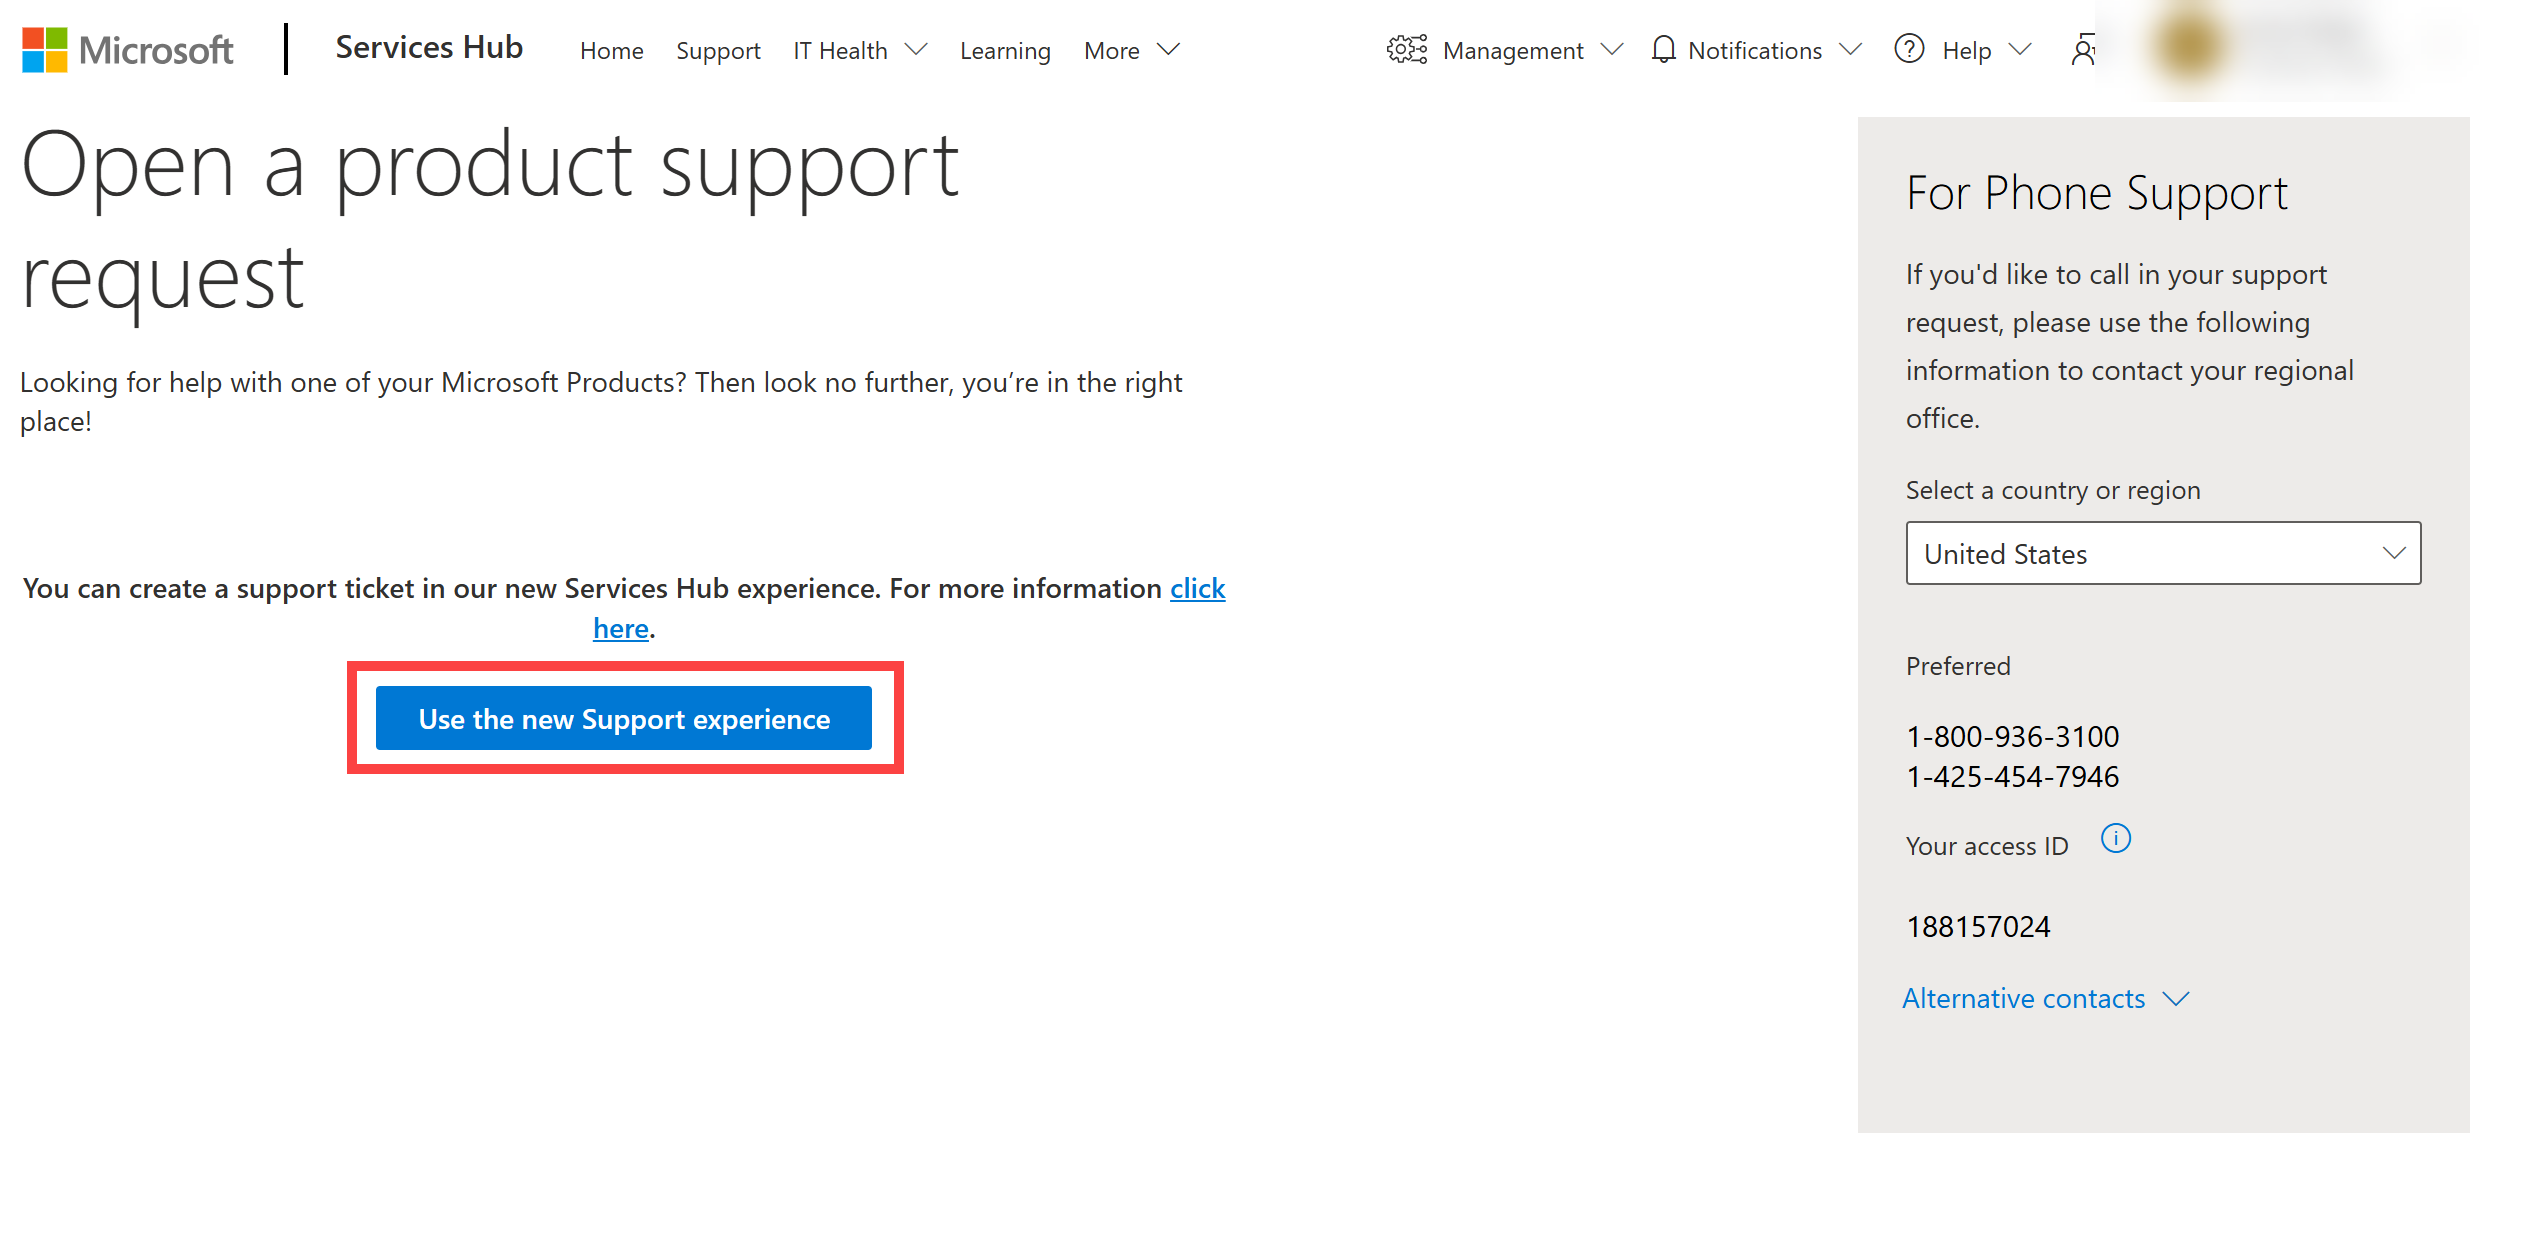
Select "Support" from the primary navigation ribbon along the top of the page.

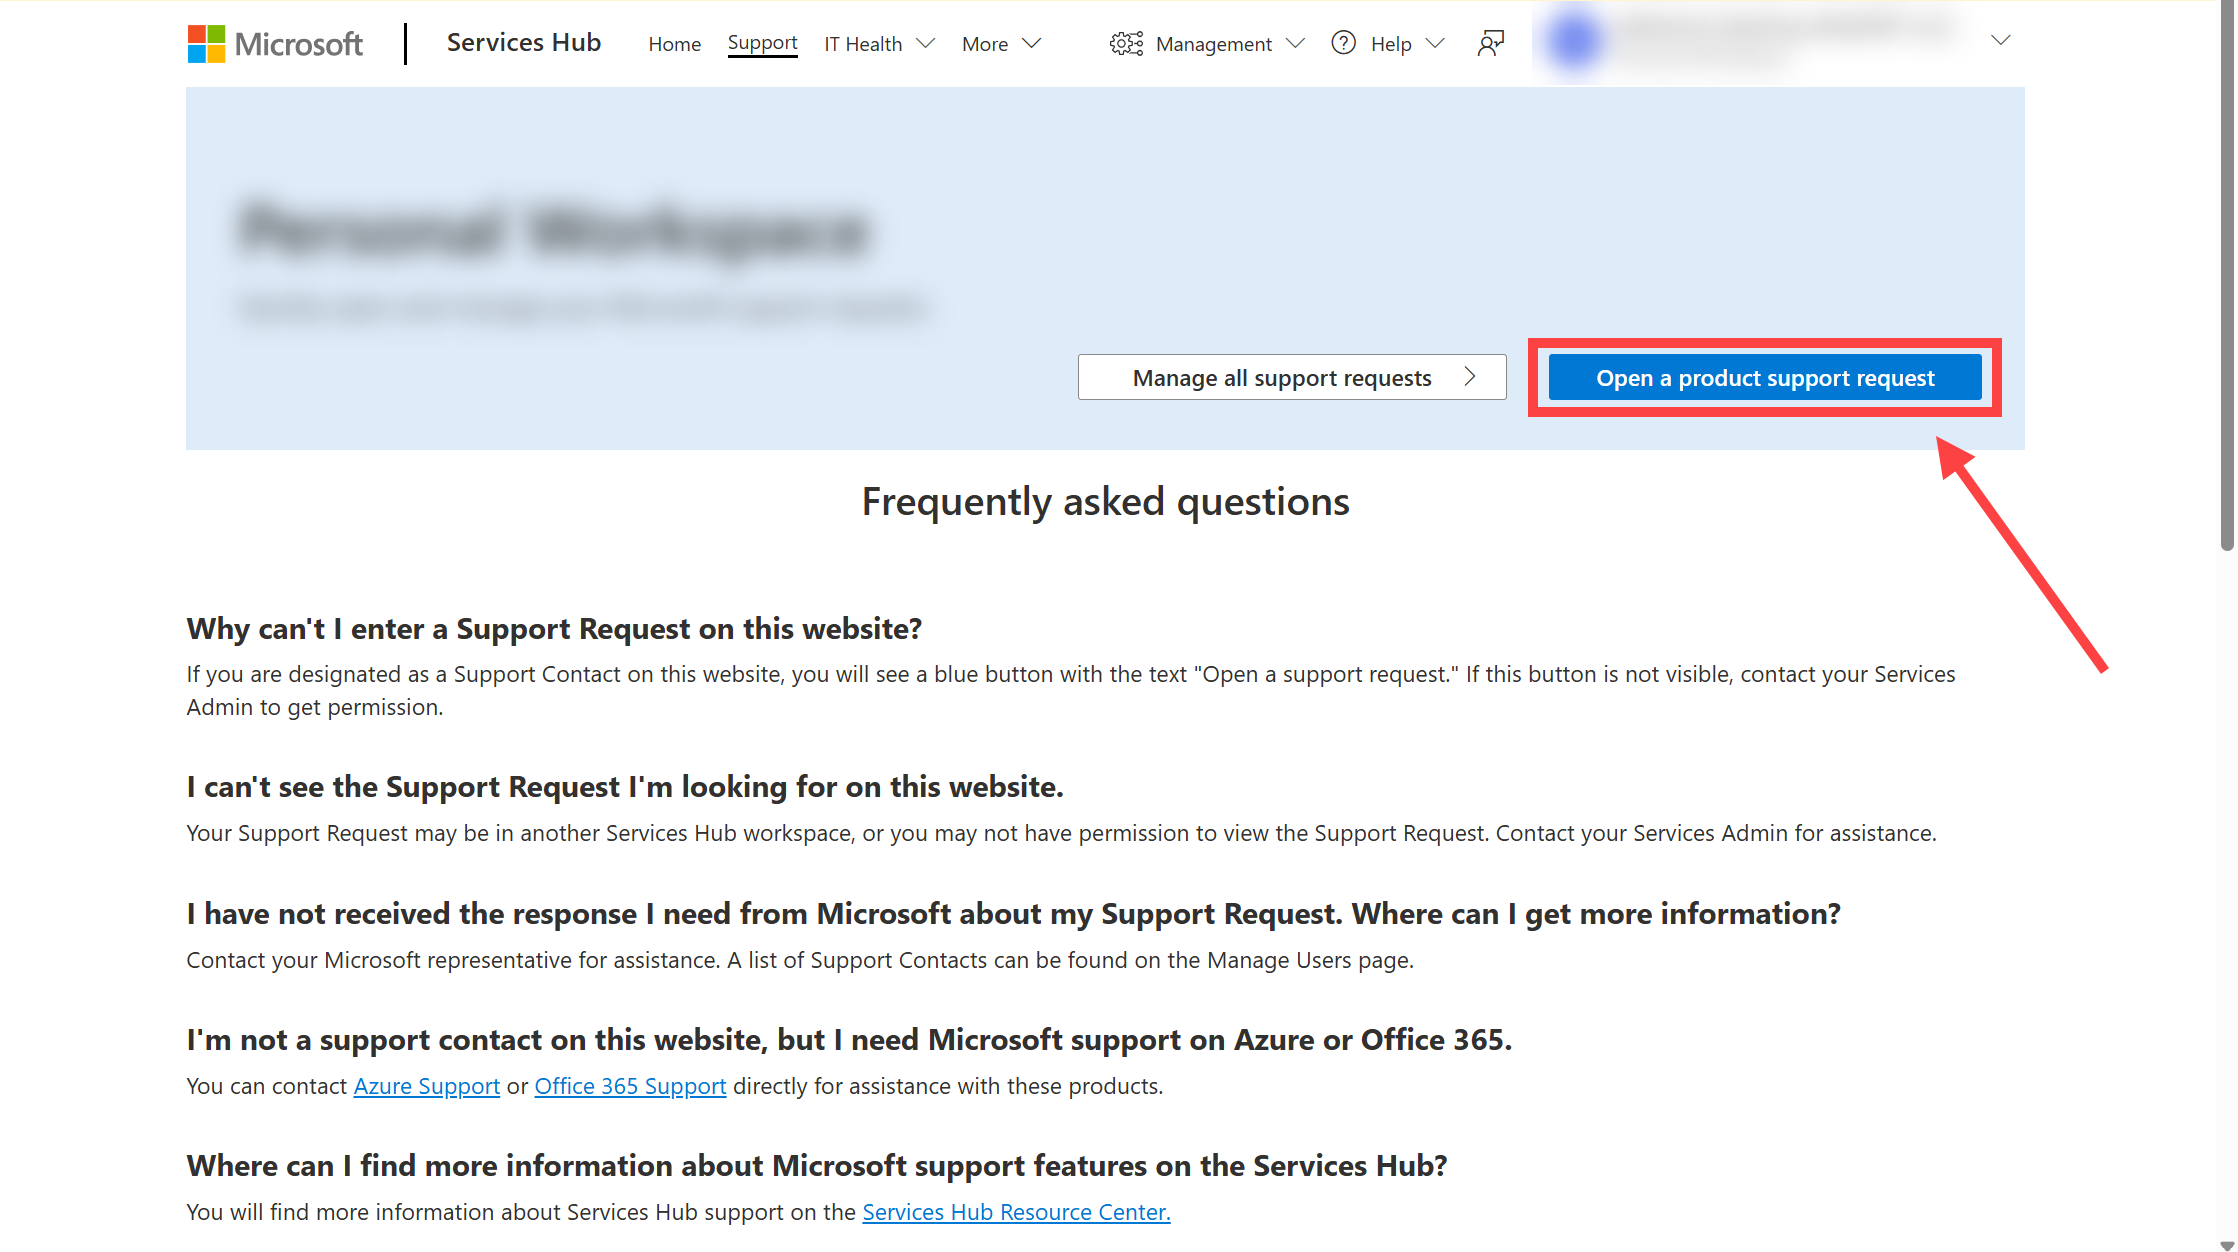
Select the blue “Open a support request" button.


Enter the new experience
Select "Use the new Support Experience".

This leads you to the new support request creation process. The following section provides instructions for you to follow once you arrive there.
Follow the new process
Note
The new self-help process is available in 19 languages. For a list of the supported languages, see Services Hub Support self-help localization.
The self-help function is built on Azure self-help capabilities within a modernized platform. Microsoft empowers you with rich articles to self-serve based off your product and problem selections.
Select a Product Family from the dropdown.

Select a Service Type, Product Version, problem type, and problem subtype.
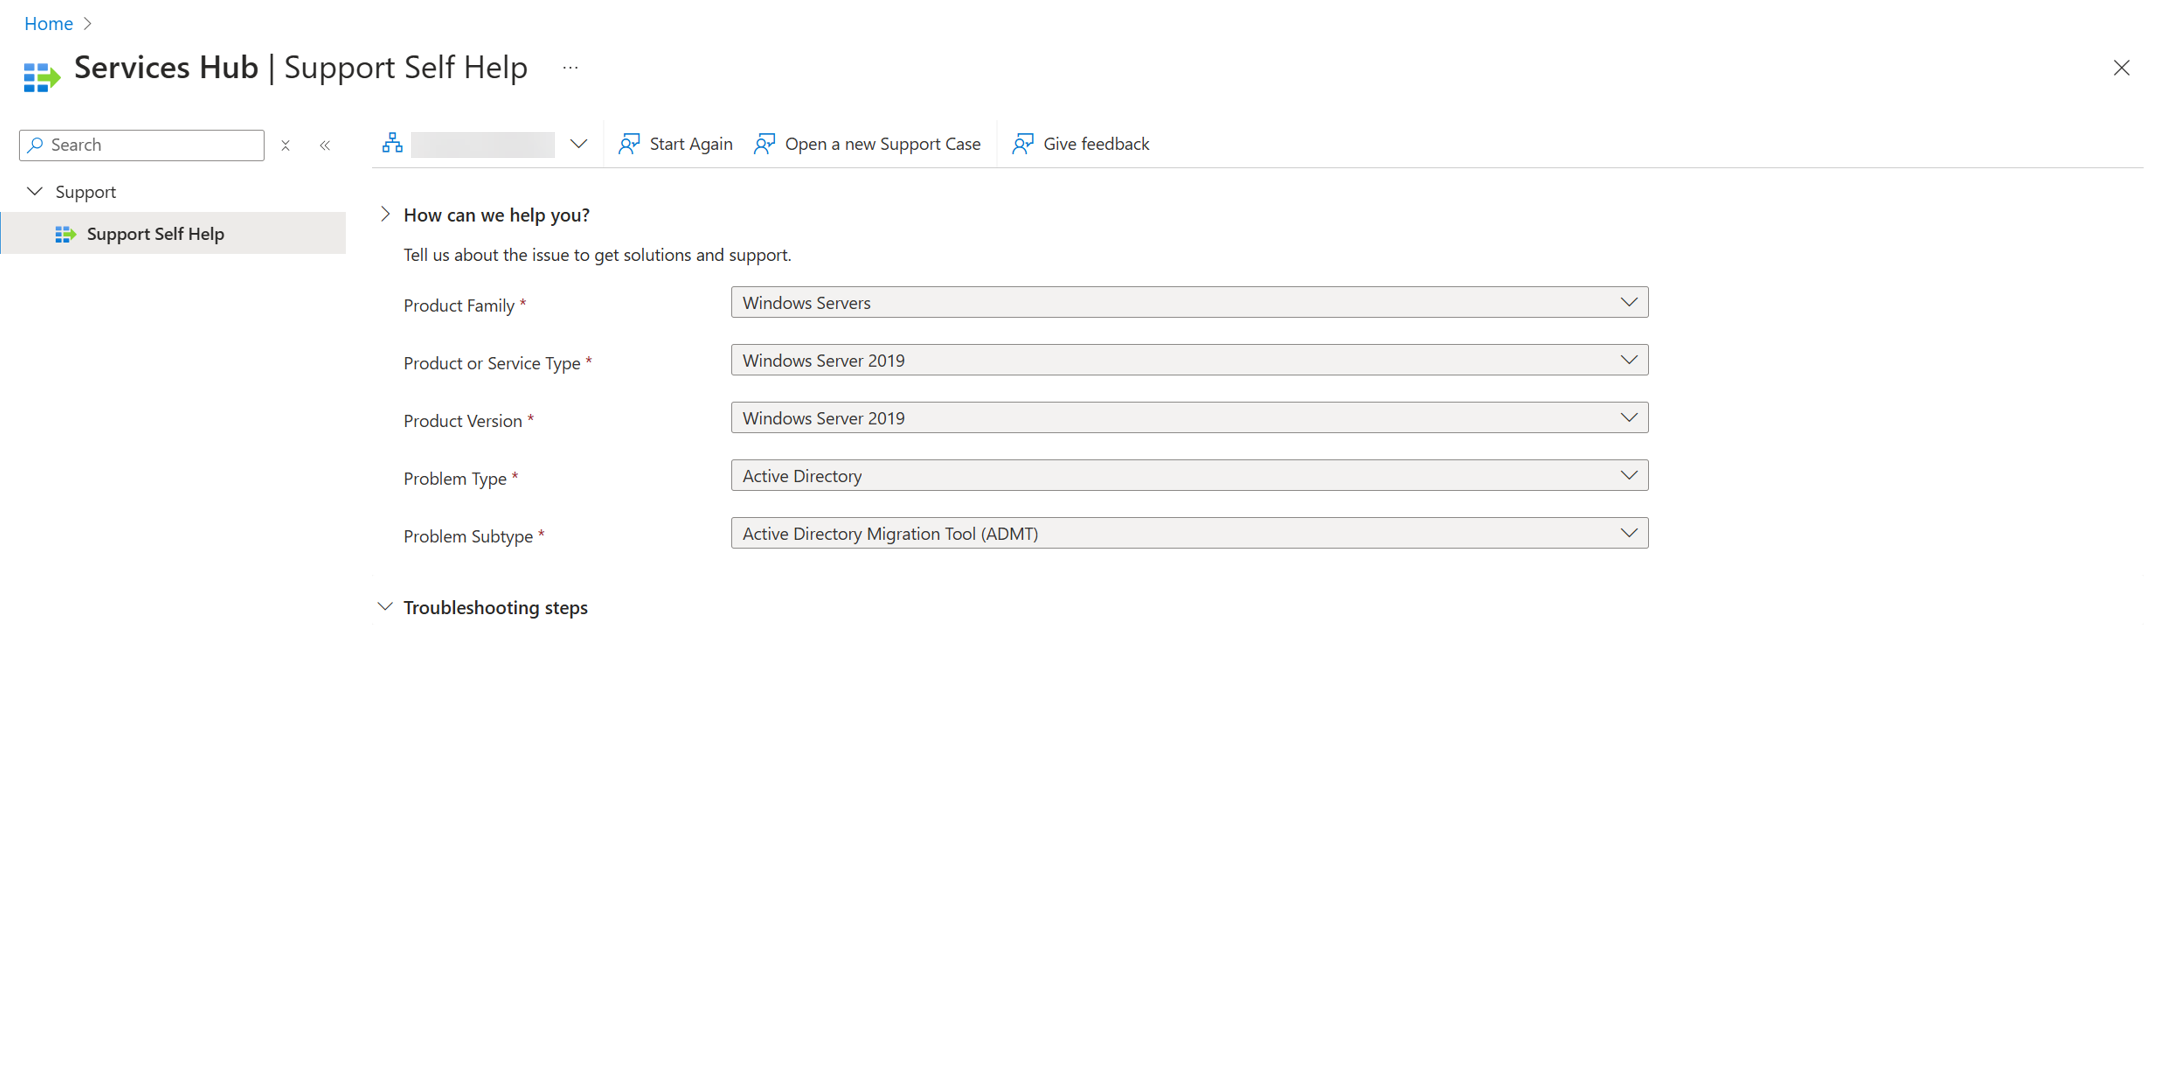
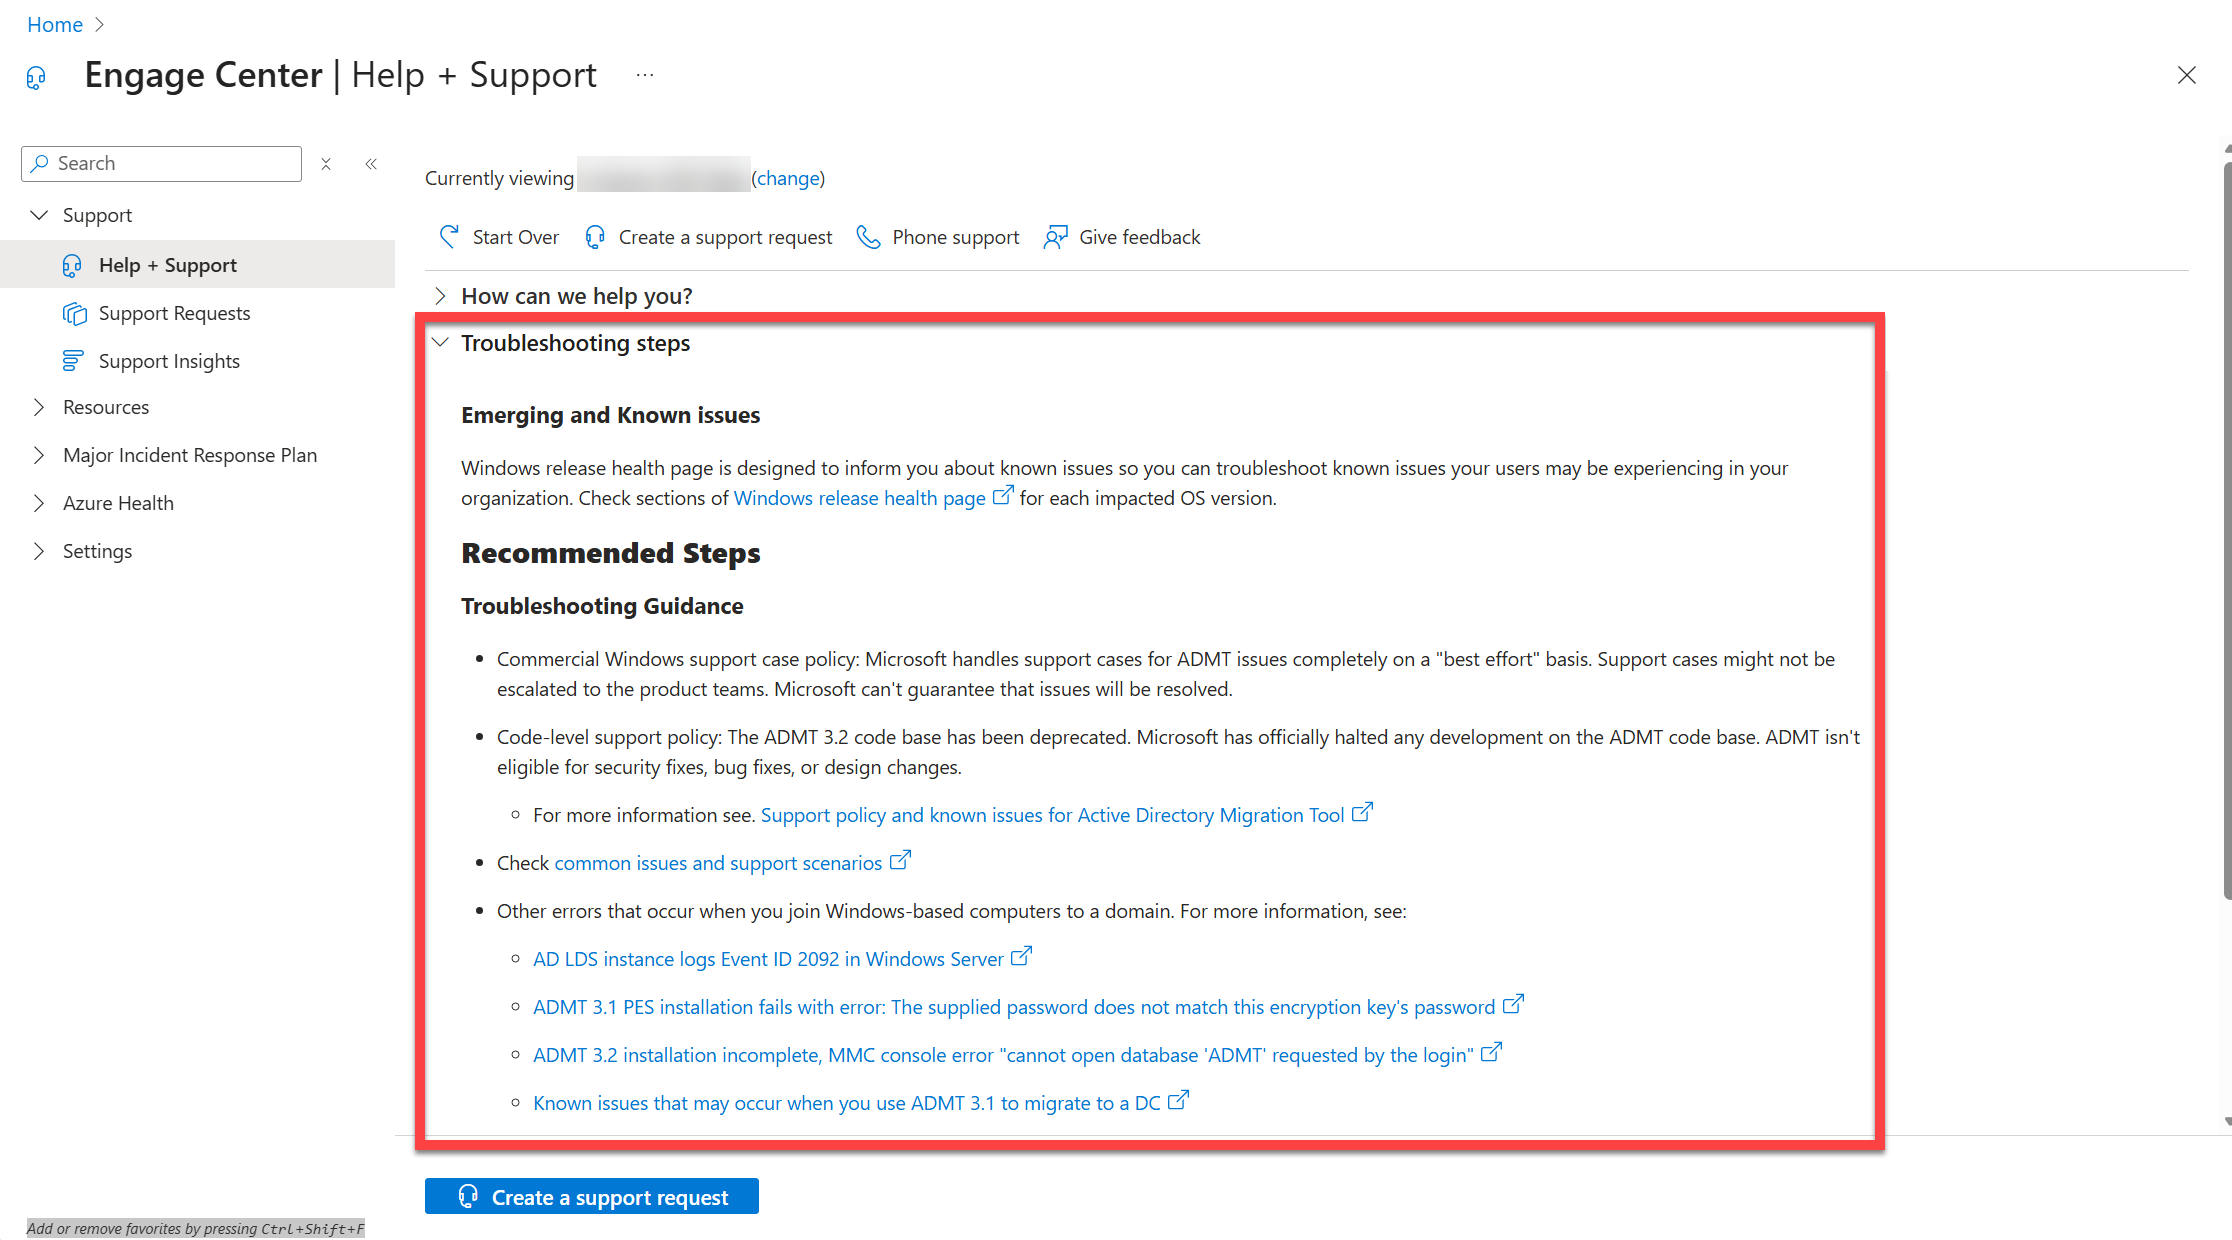
If we have appropriate articles, the self-help feature recommends them to you after you enter your product and problem.

If there are no applicable self-help articles and recommended steps for your problem, or if the provided self-help content doesn't solve your problem, you can continue to submit a new support request.


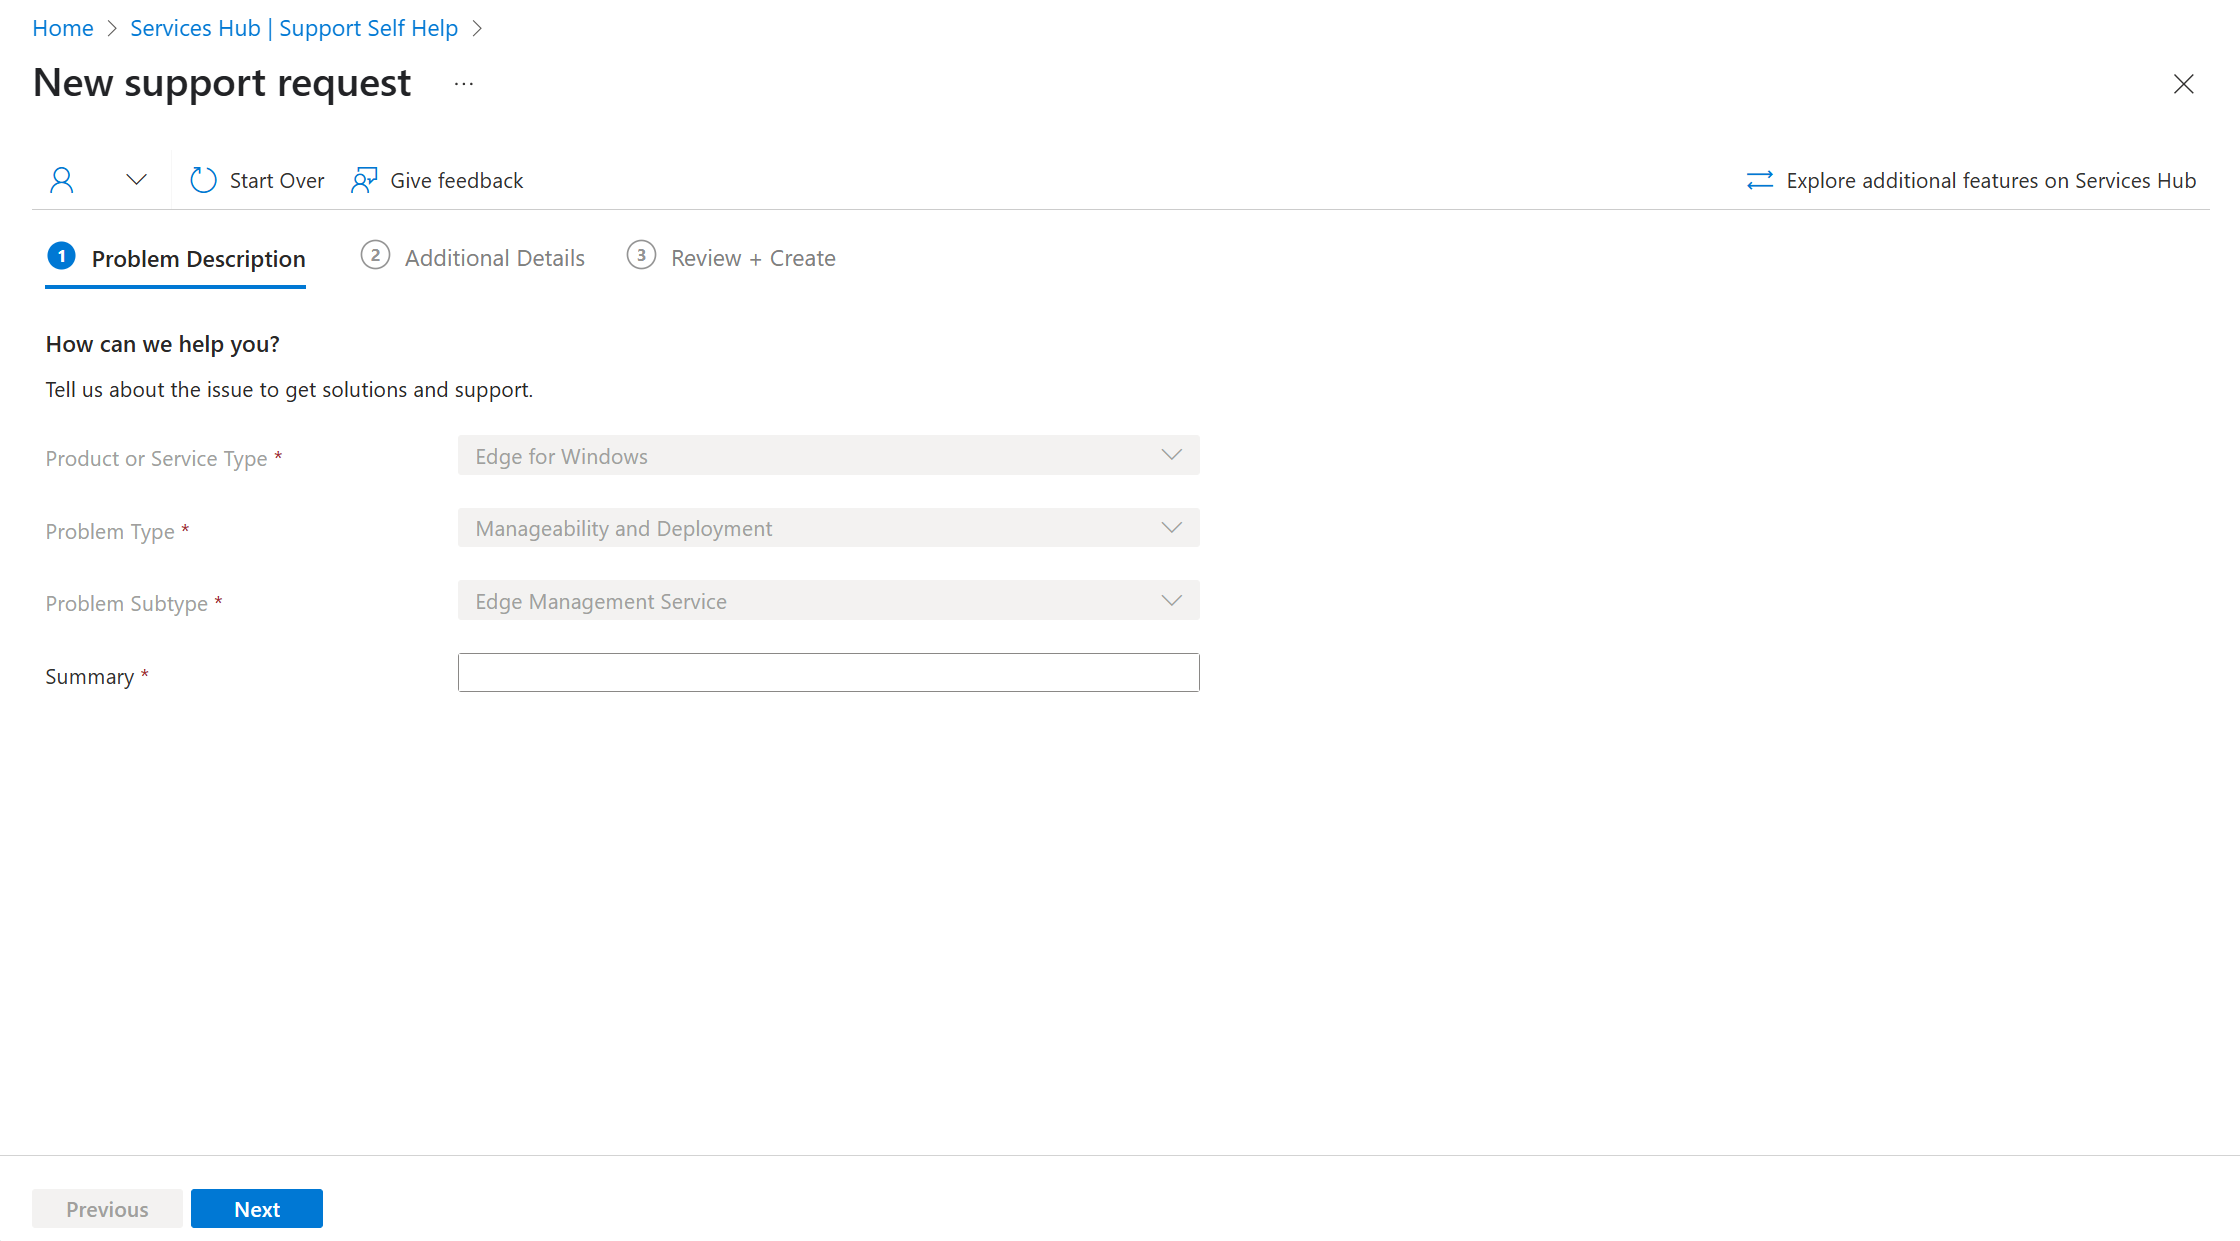
Fill in your new support request form
The new support request form has three main sections:
- Problem Description
- Additional Details
- Review + Create
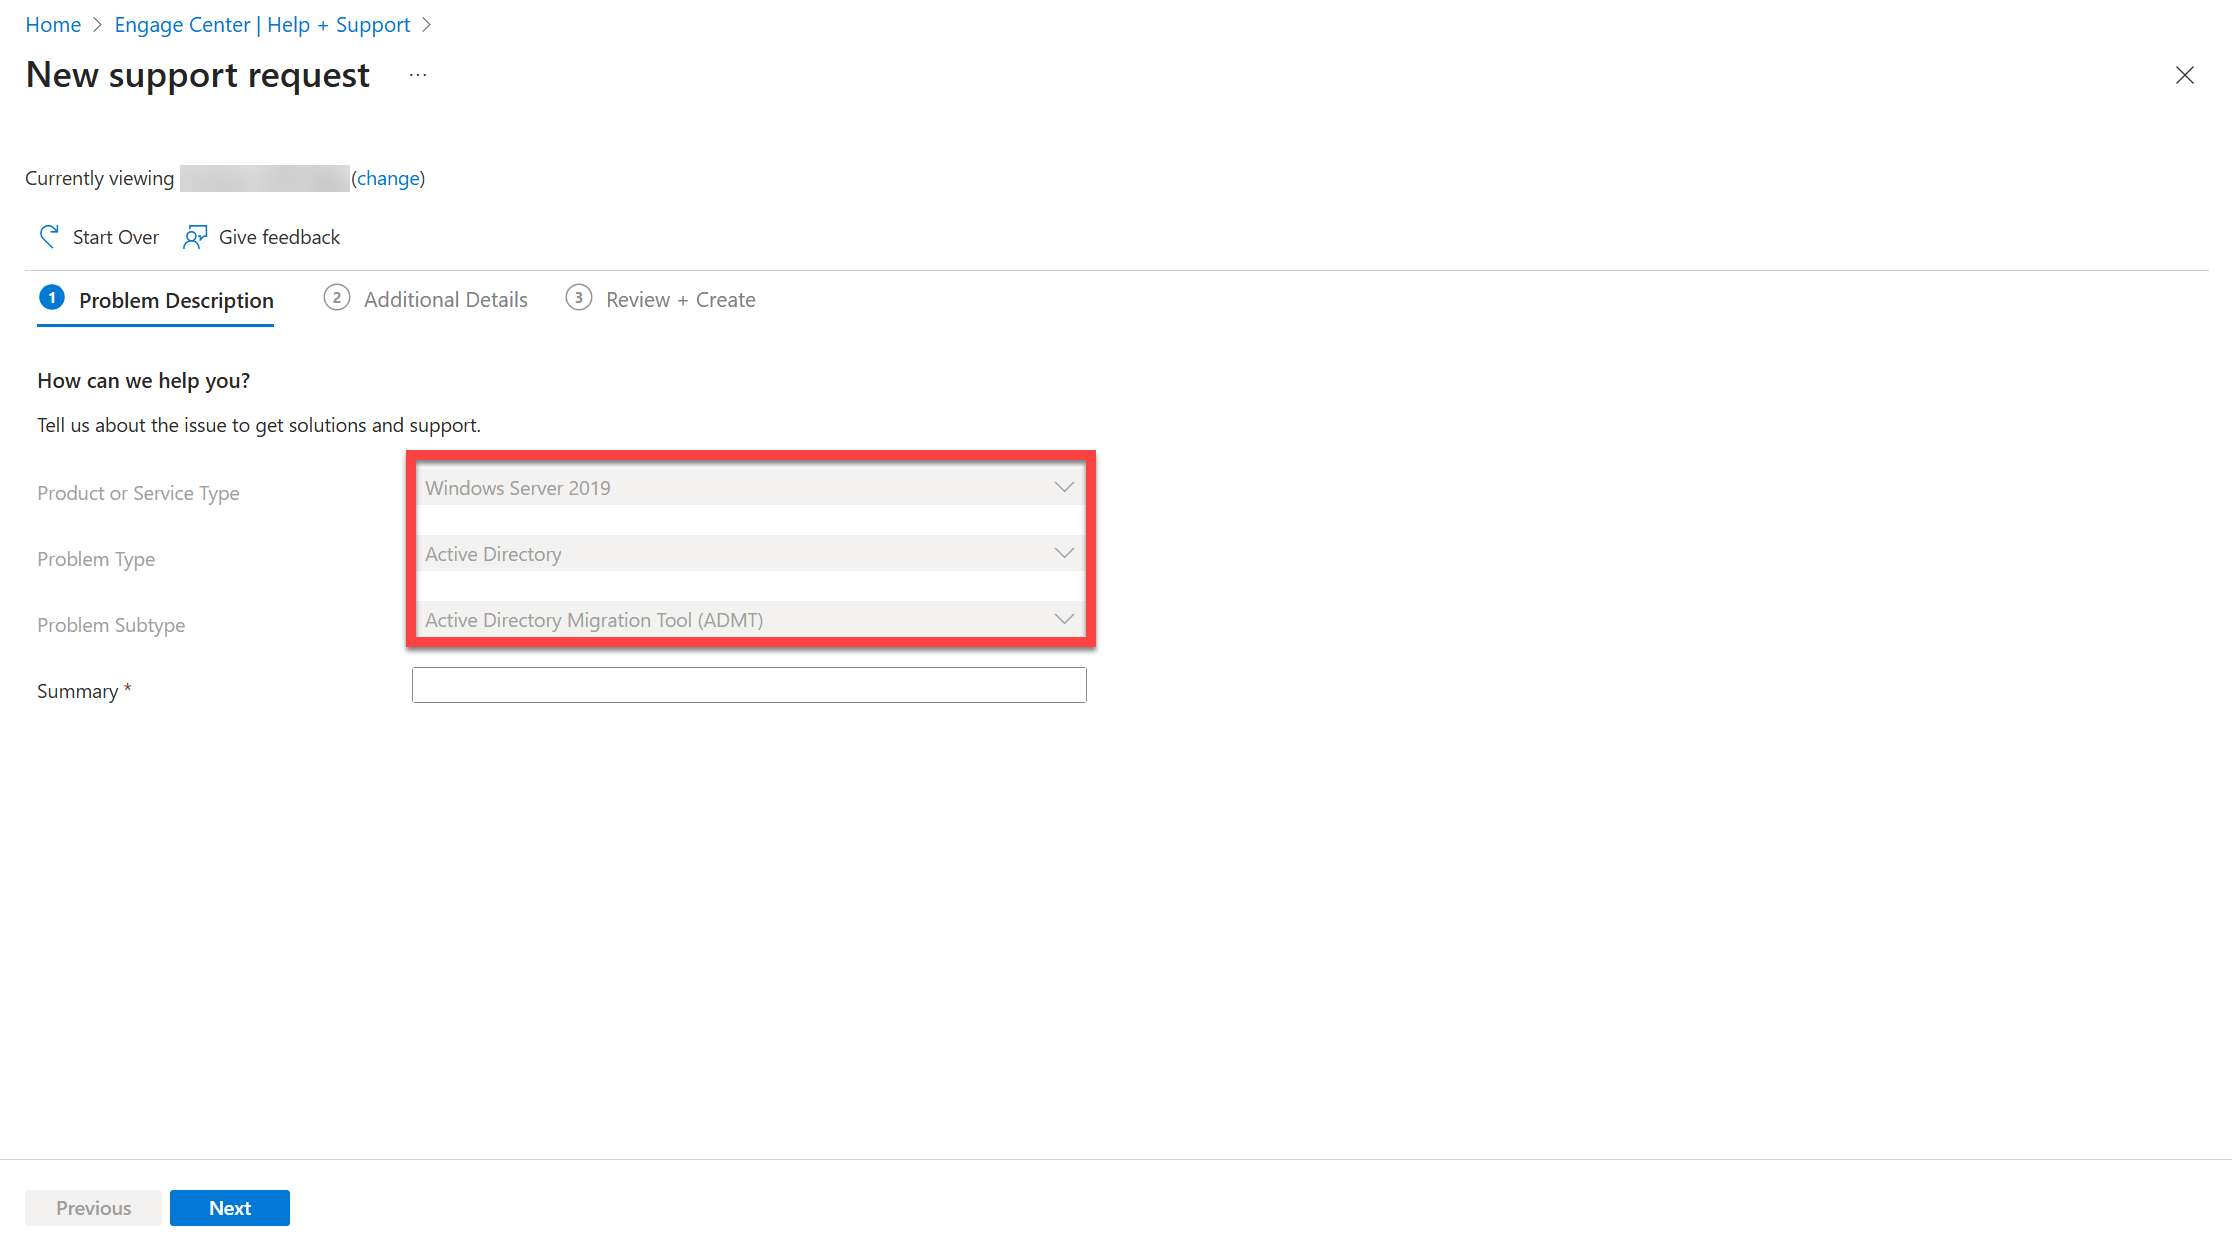
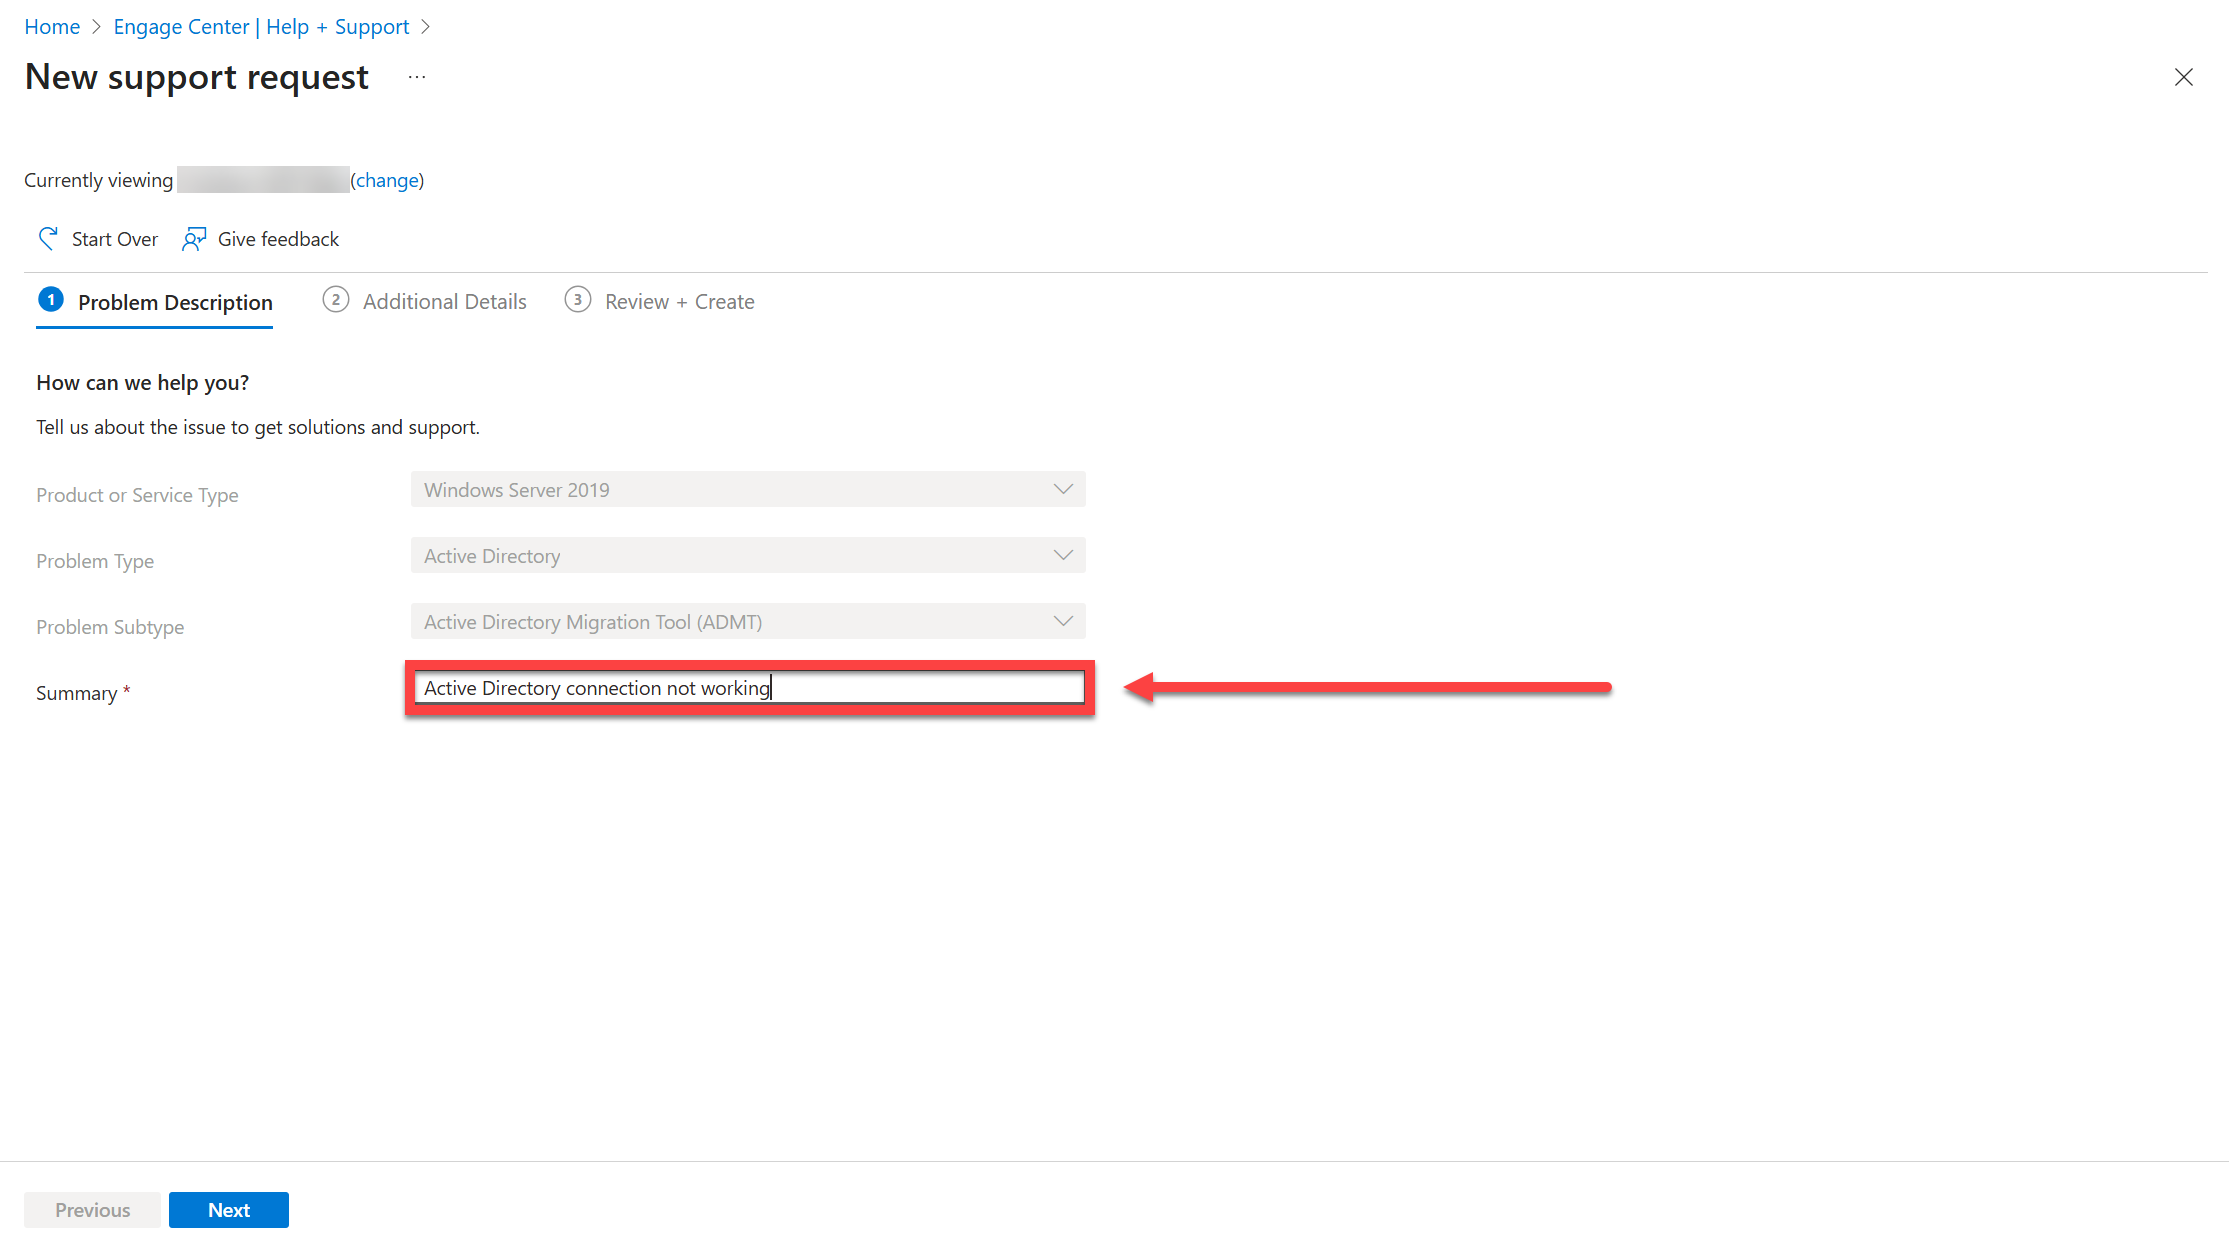
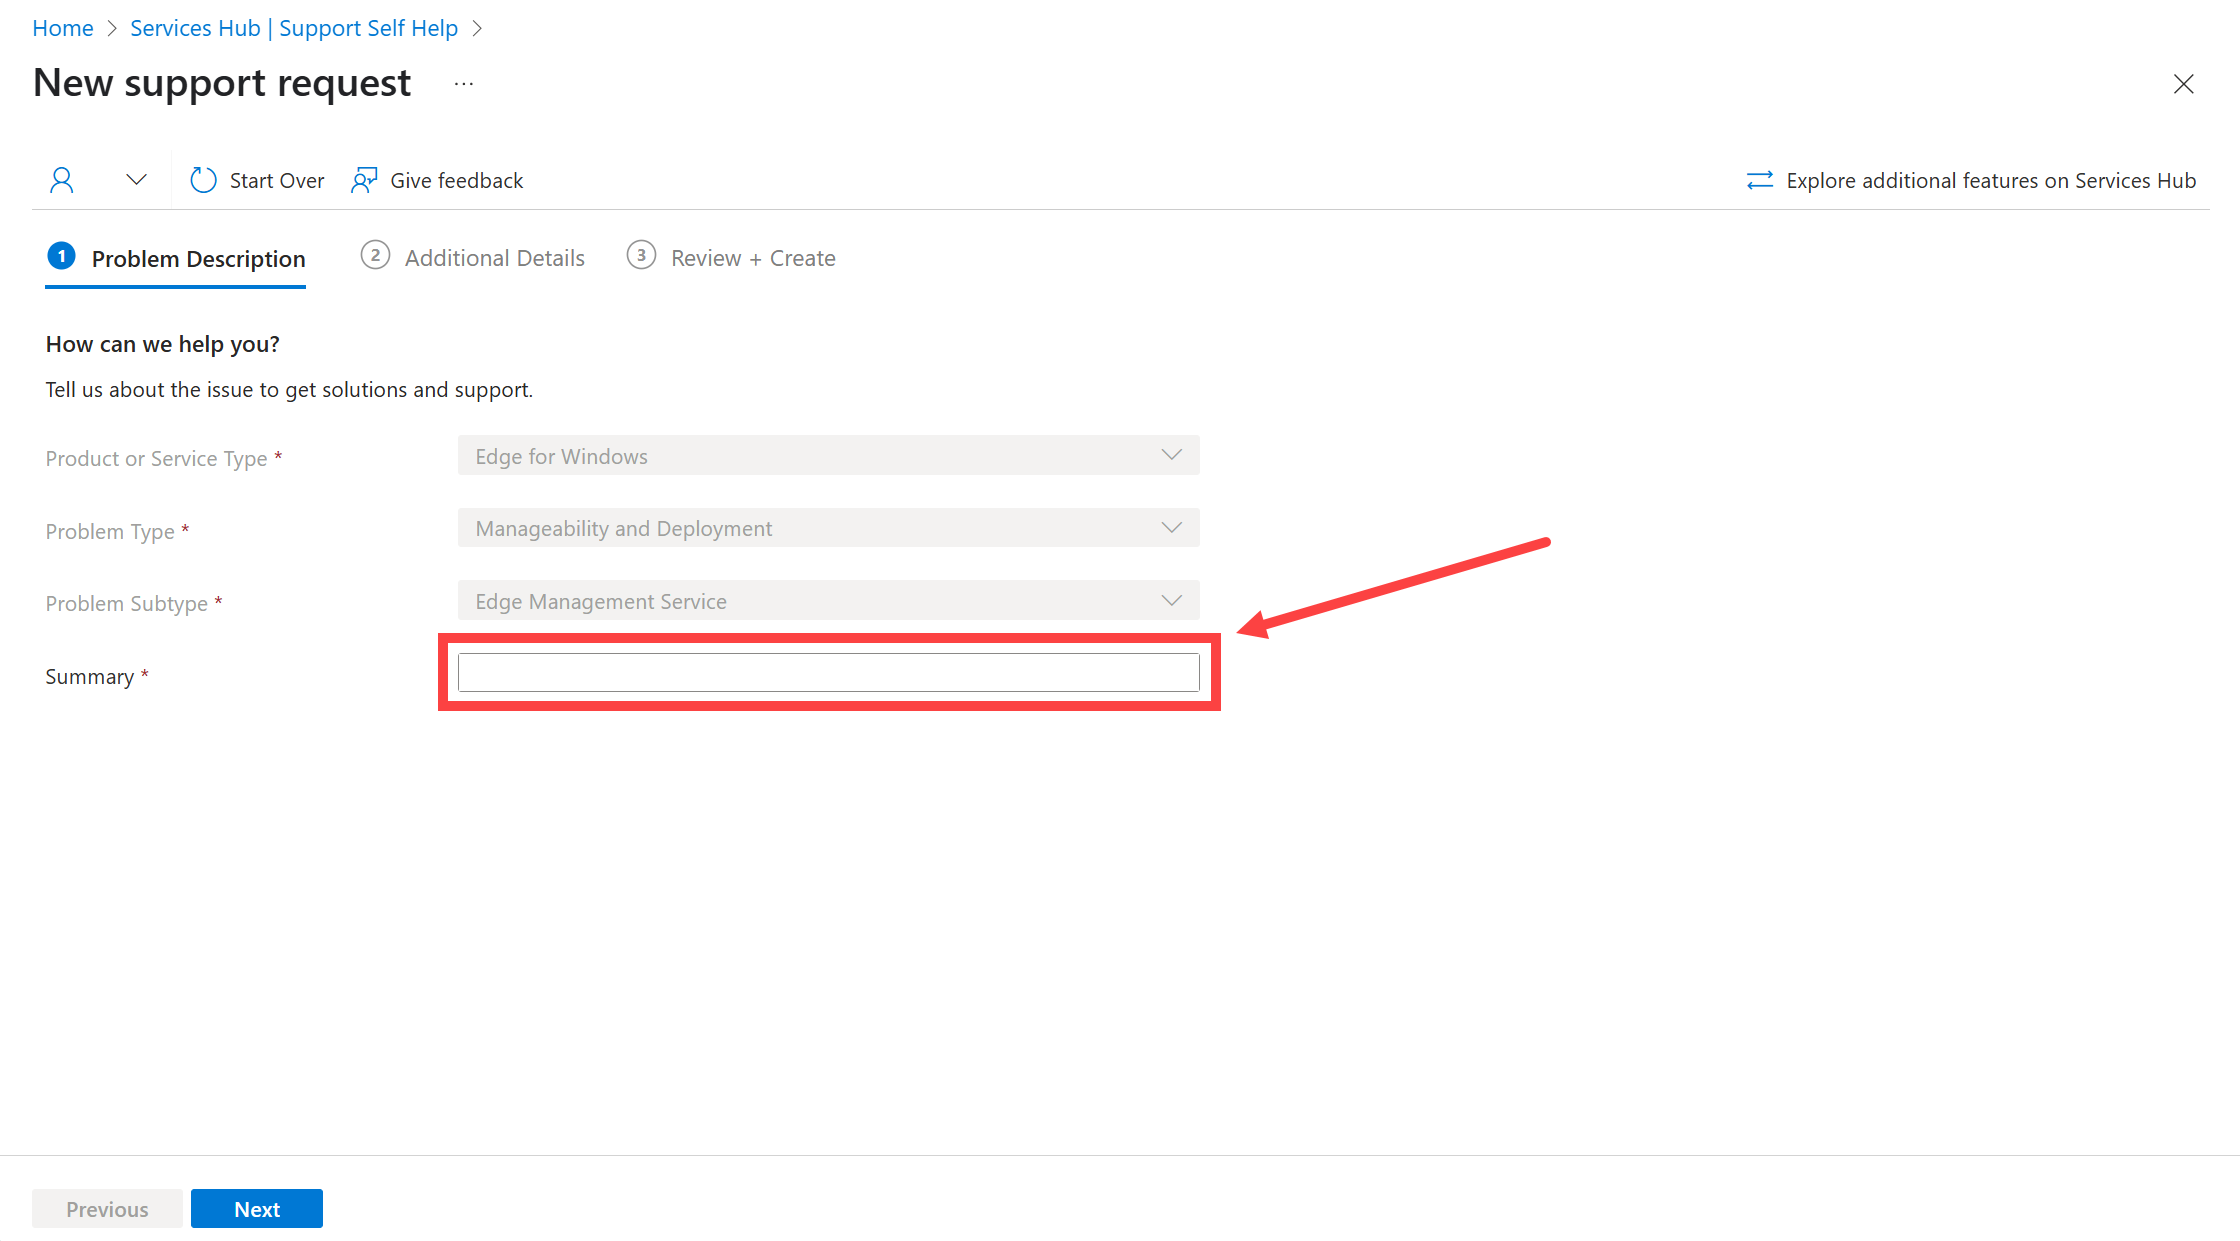
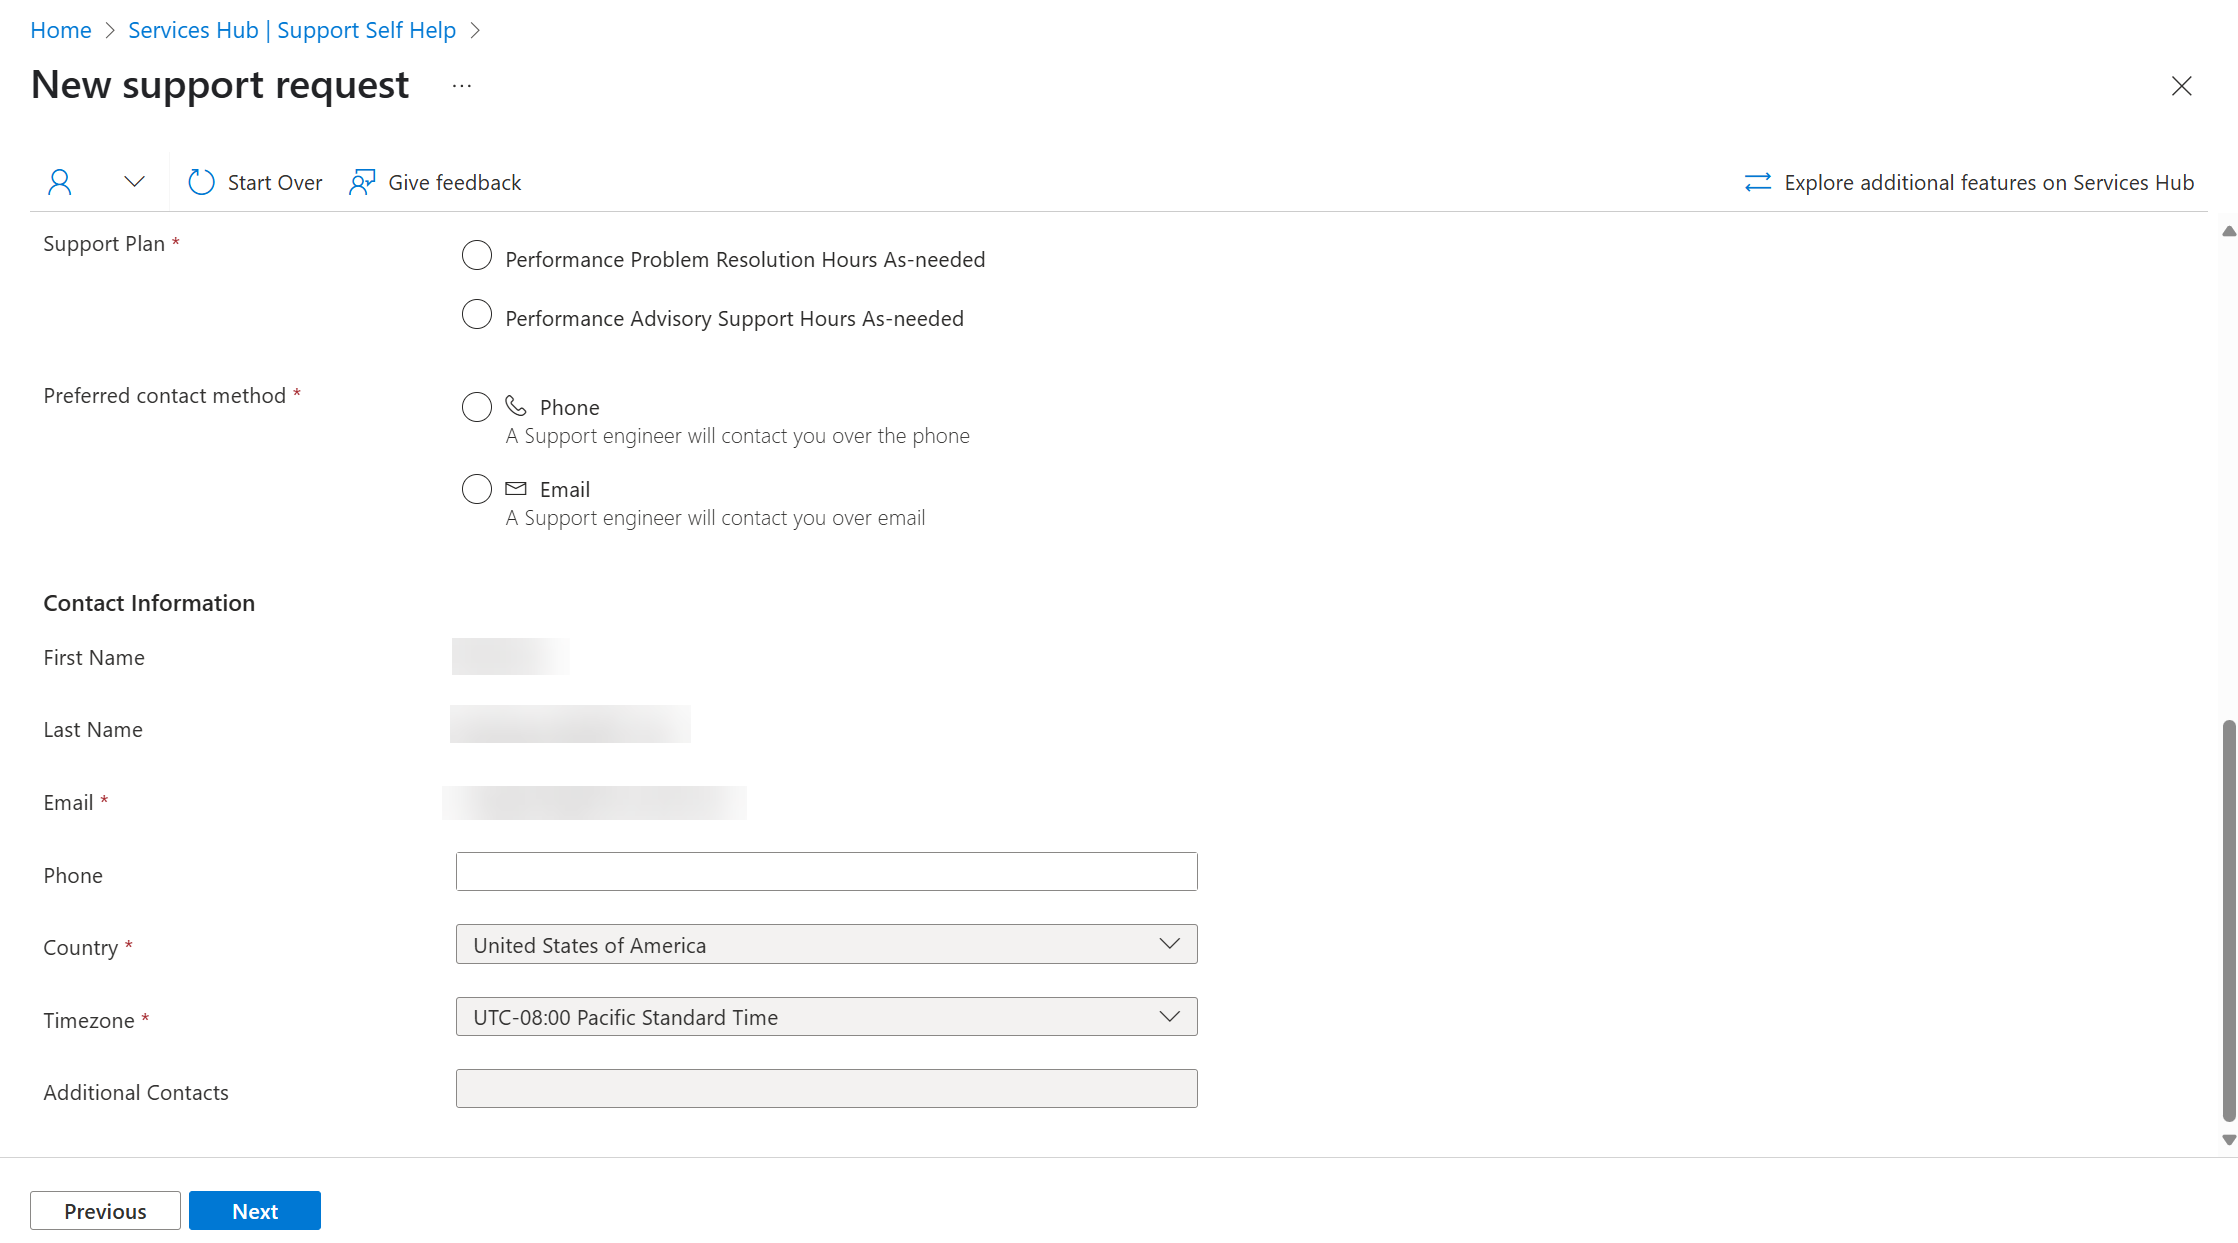
In the Problem Description section, select your Service type, Problem type, and Problem subtype from the dropdown lists. Then provide a summary of your current problem.
Note
Depending on your screen settings, you may need to scroll down to see and select "Next".
Select "Next".
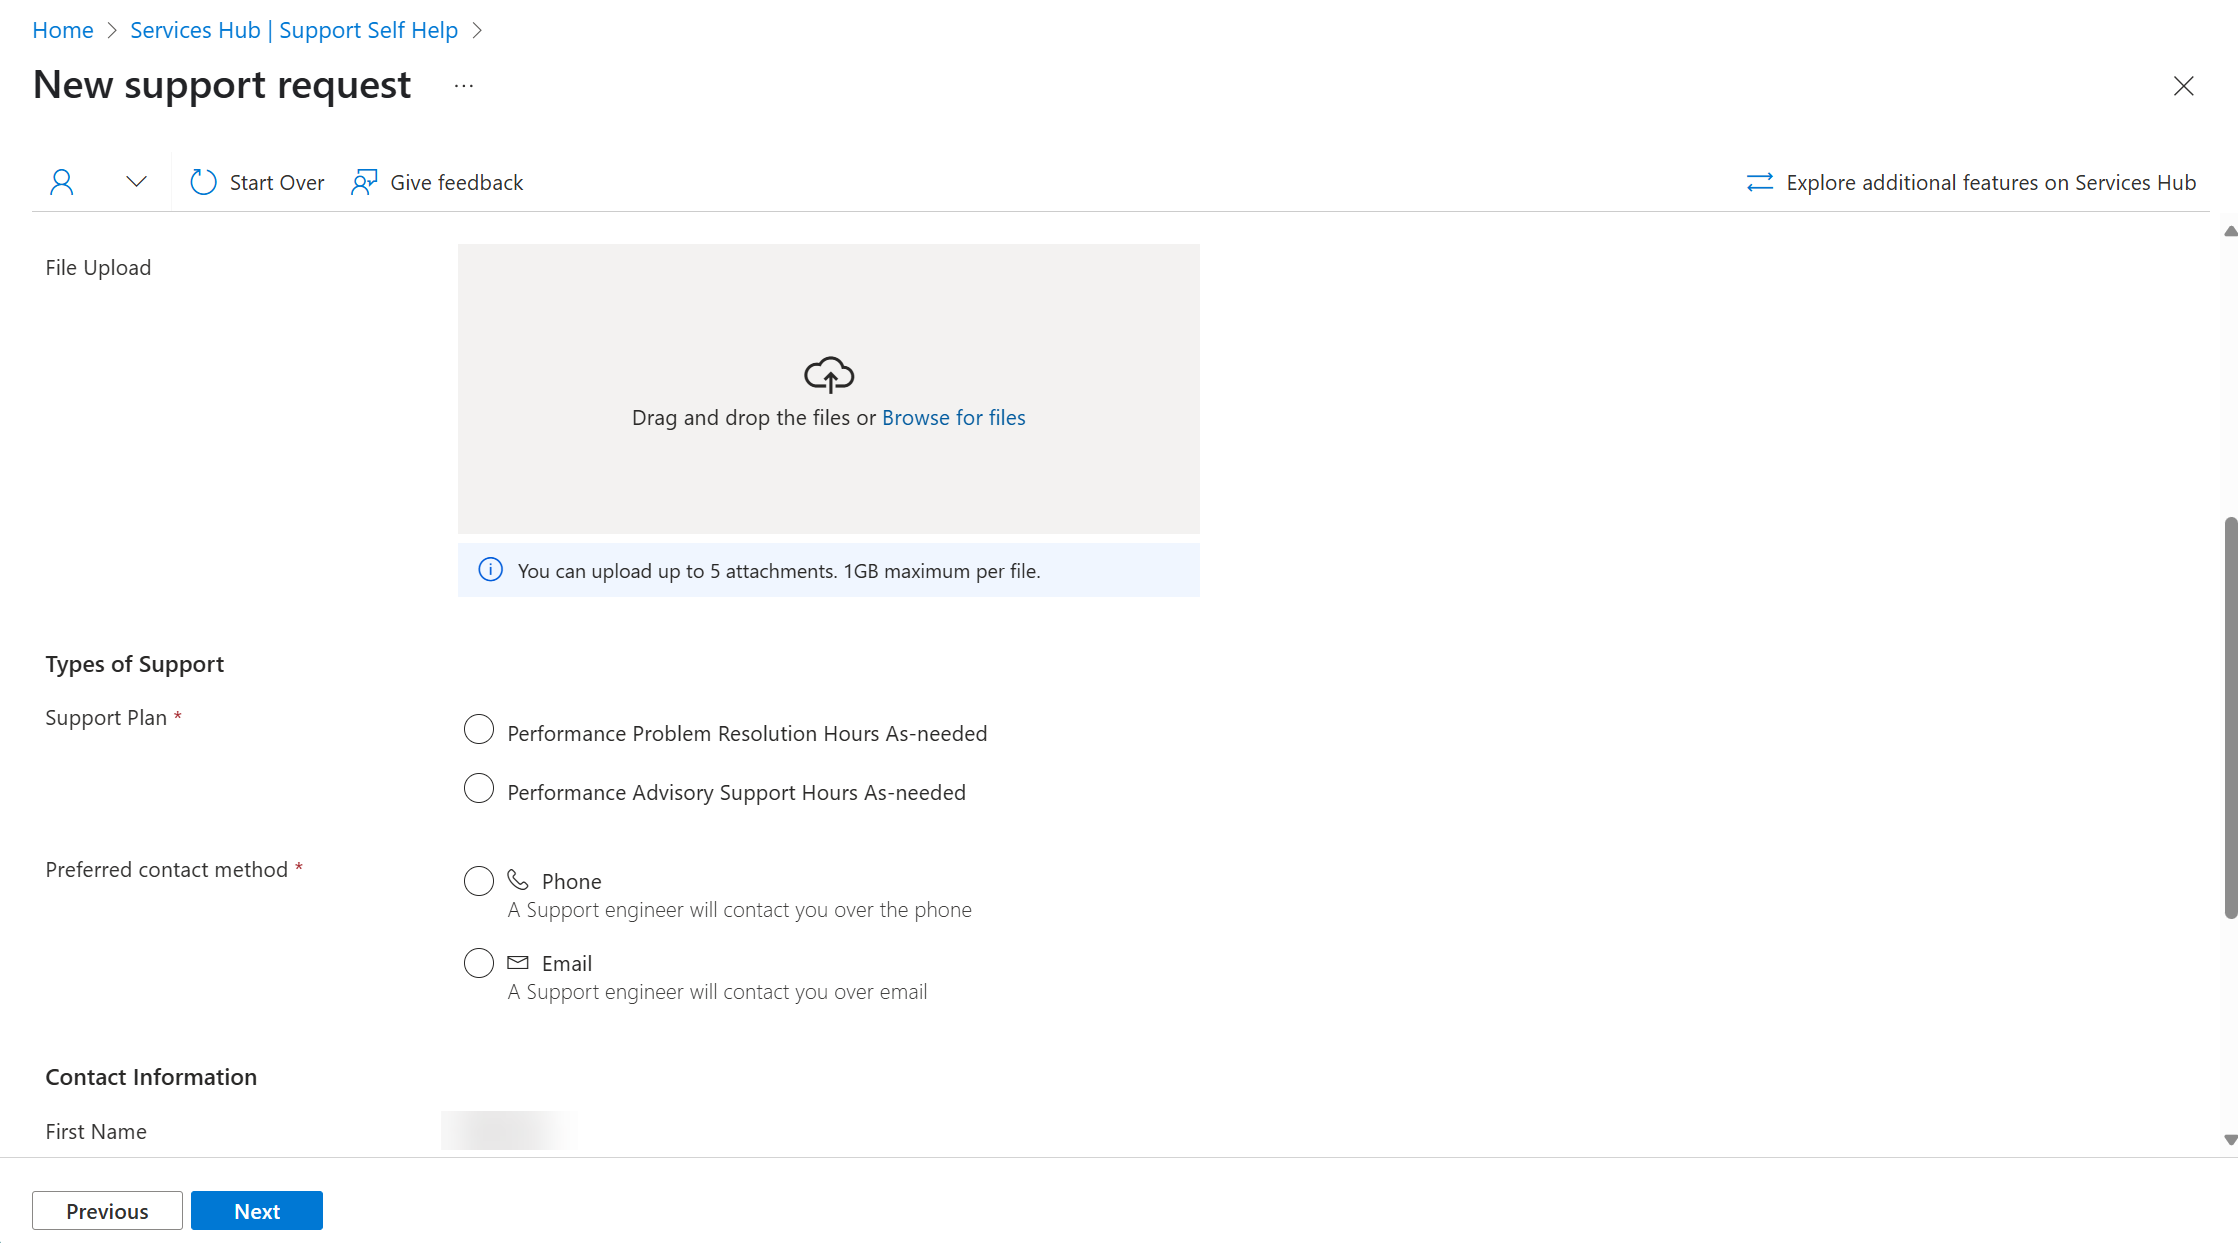
In the Additional Details section, fill in all the required boxes to provide additional details related to your problem support request.
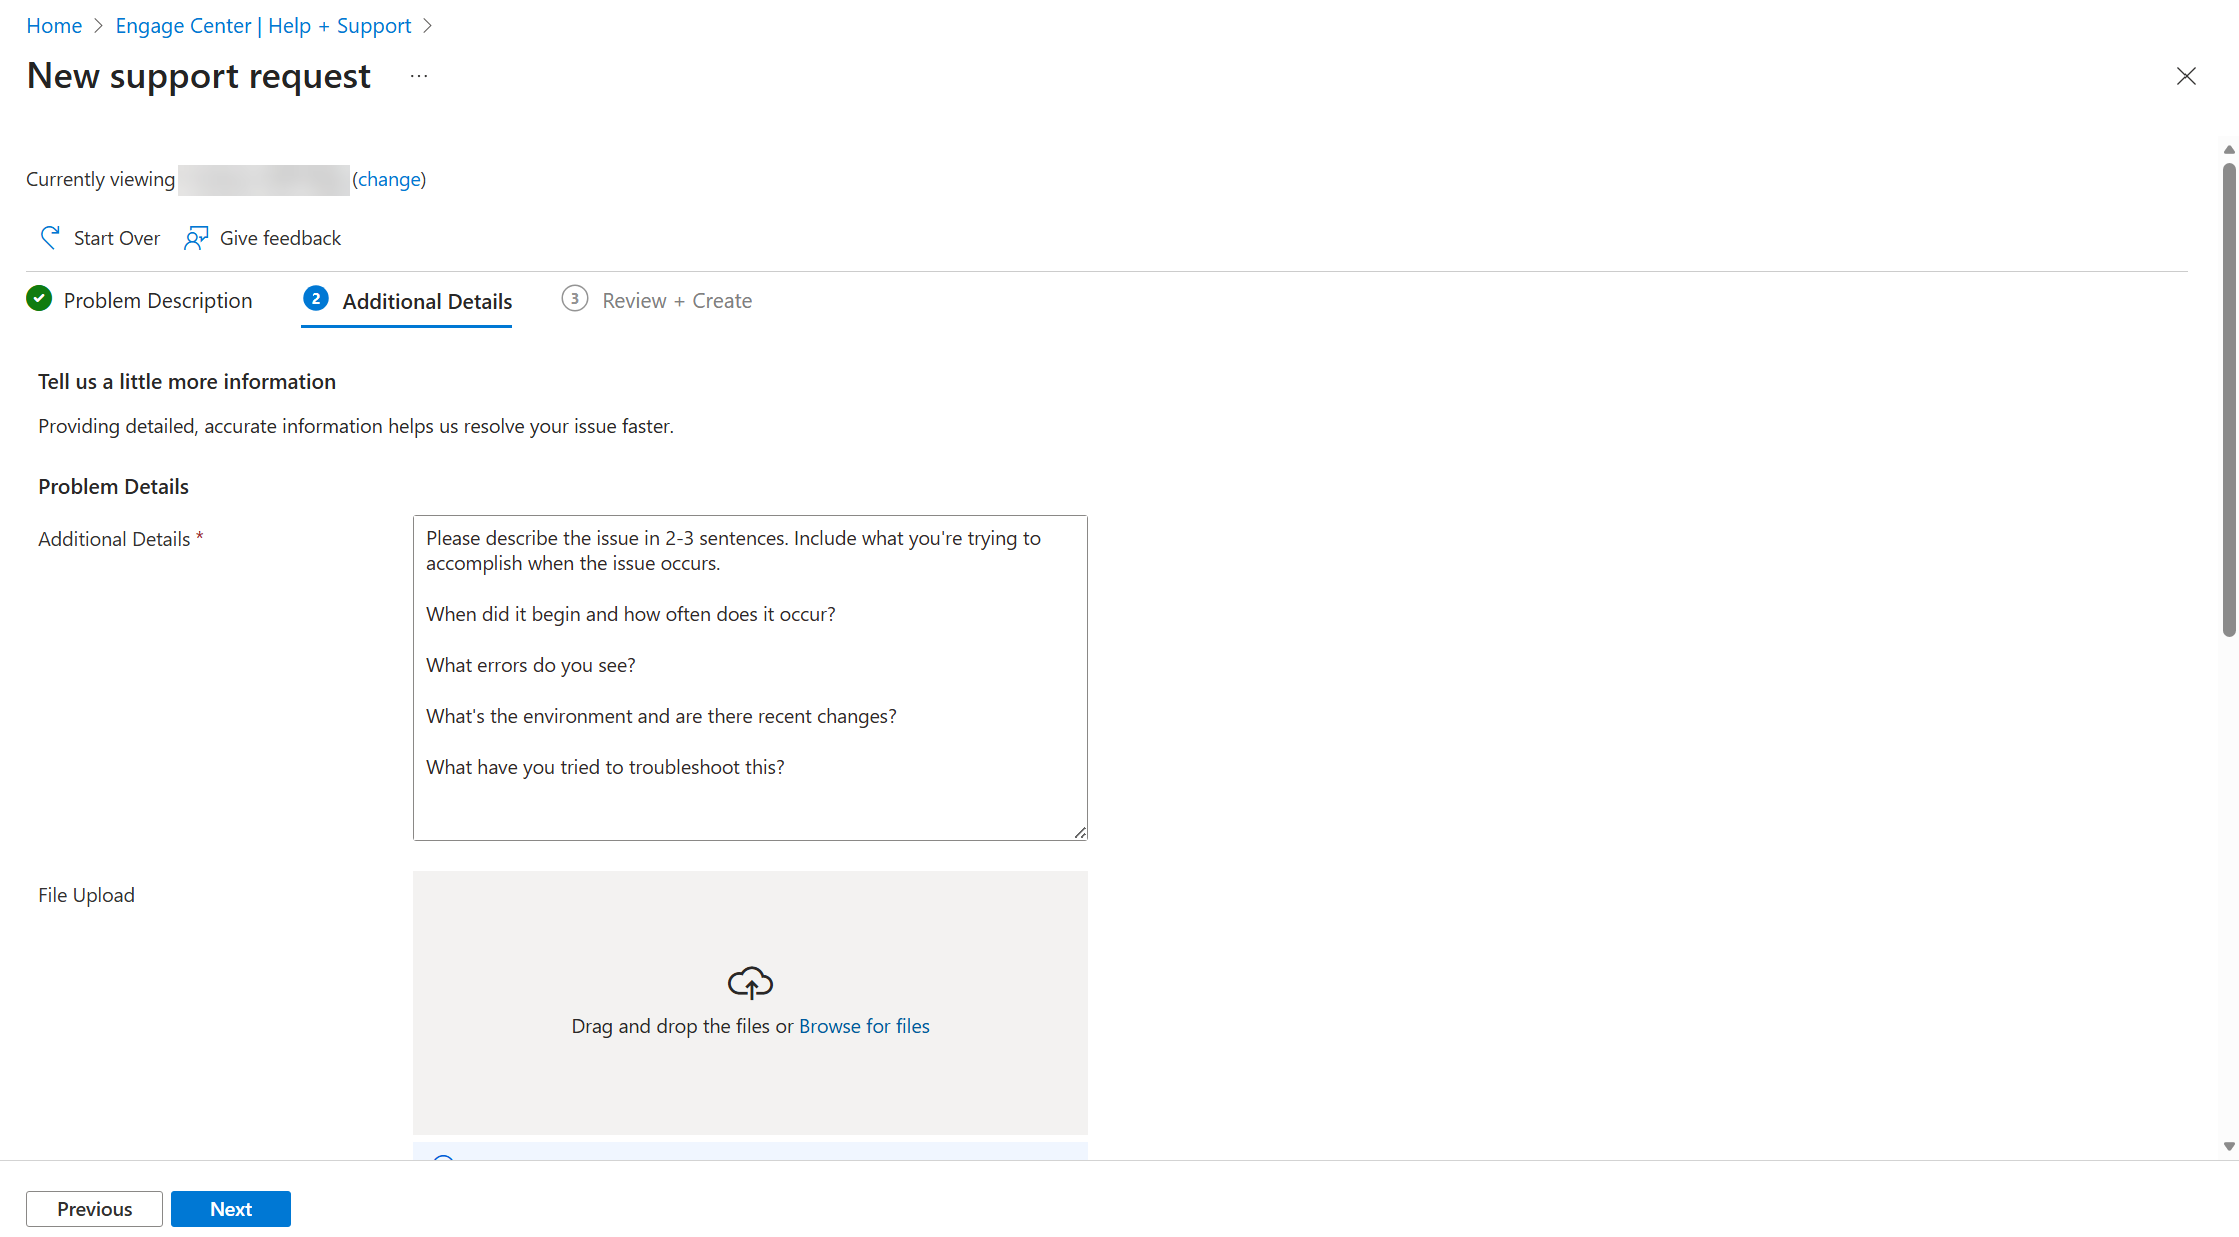
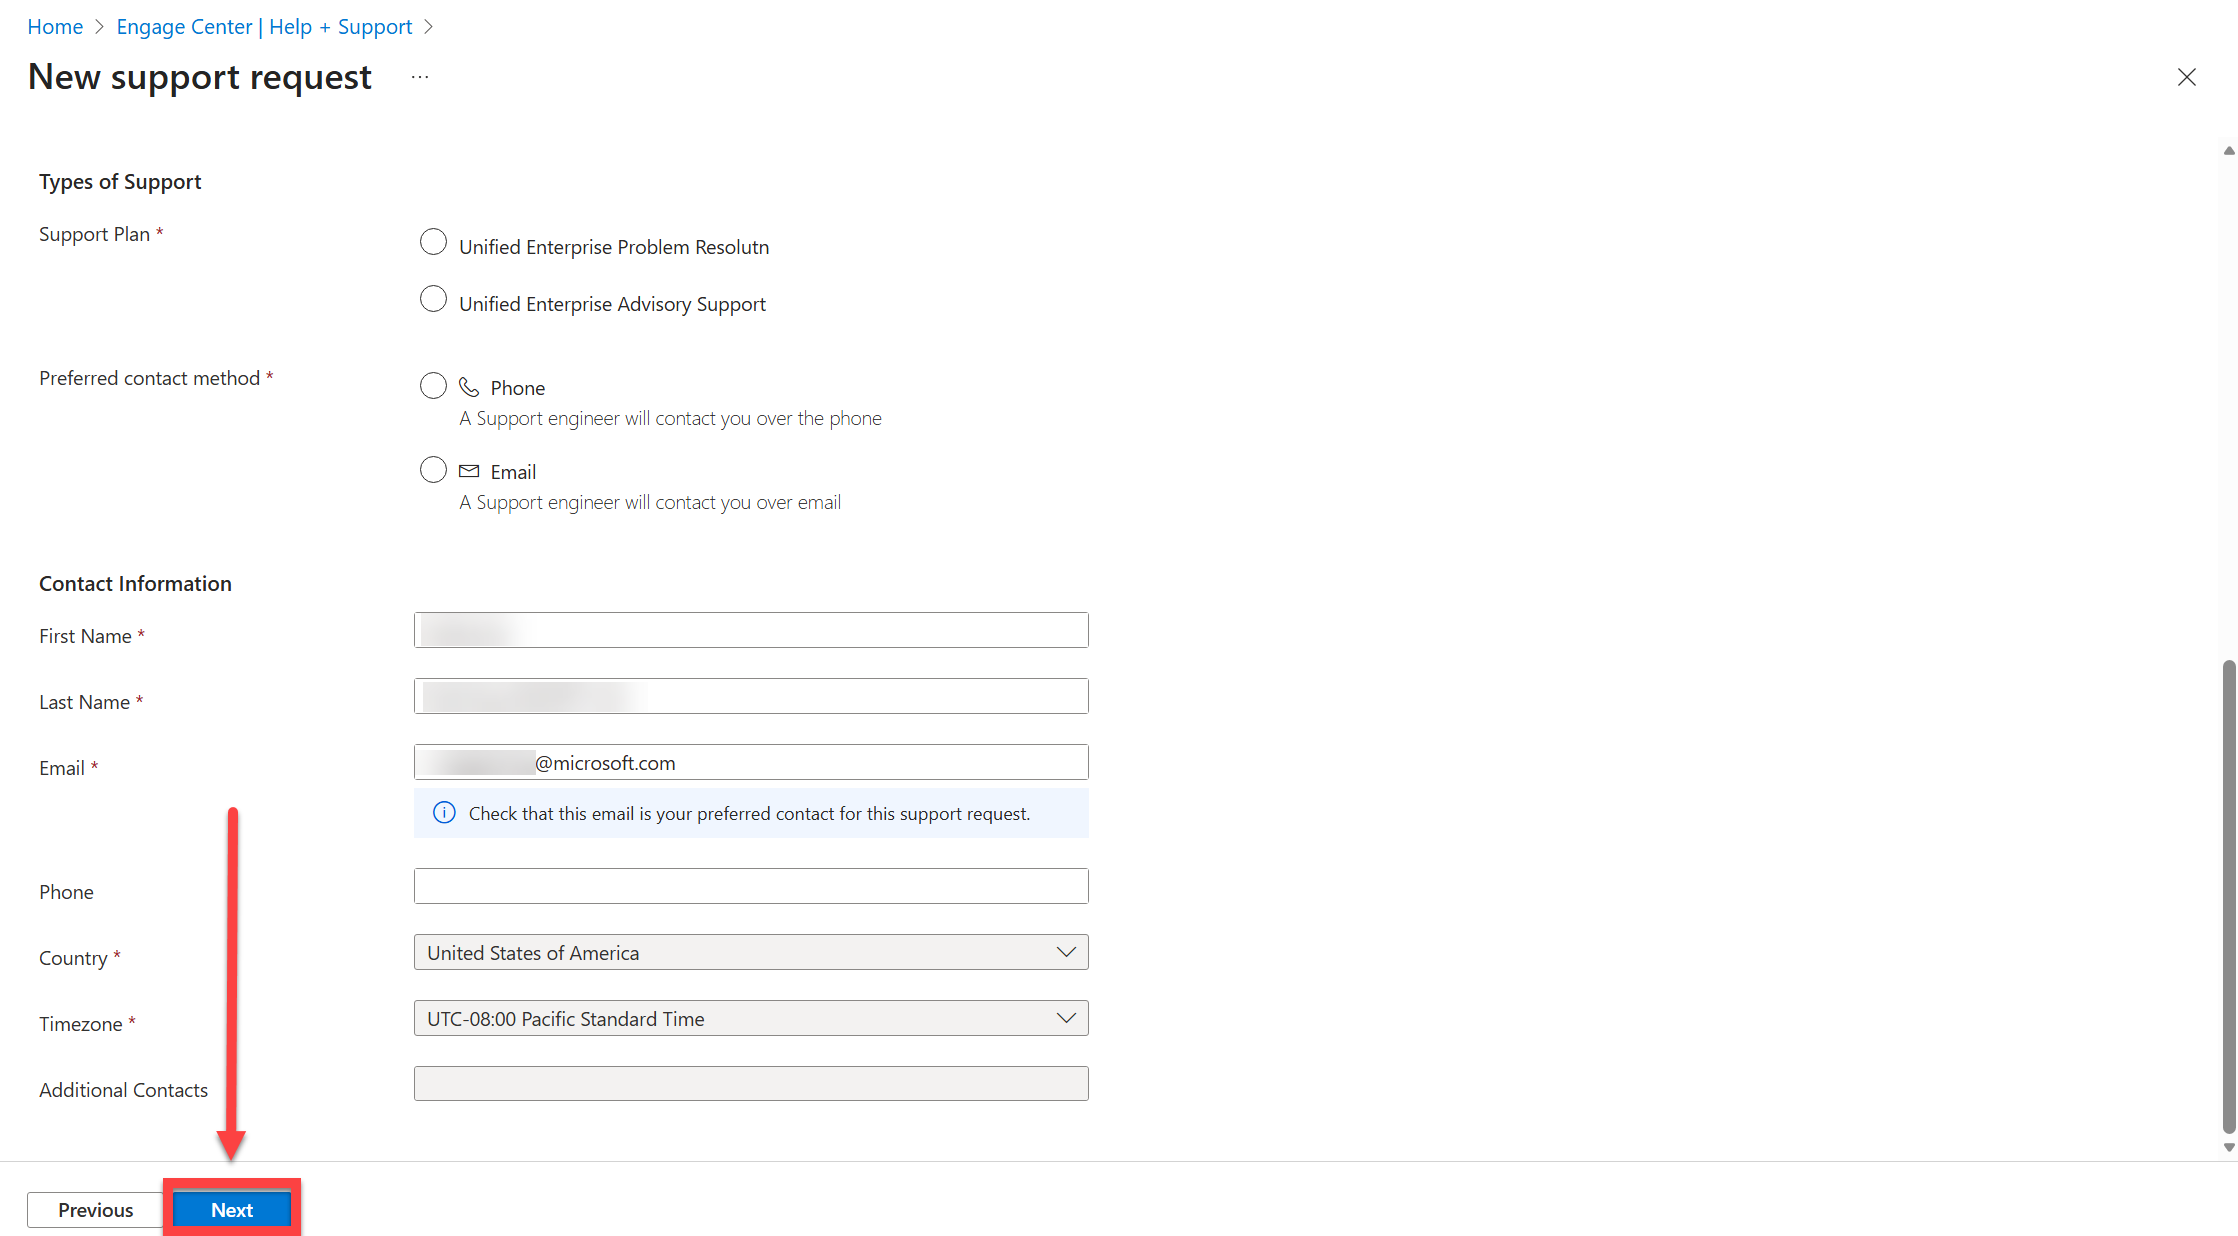
Select "Next".
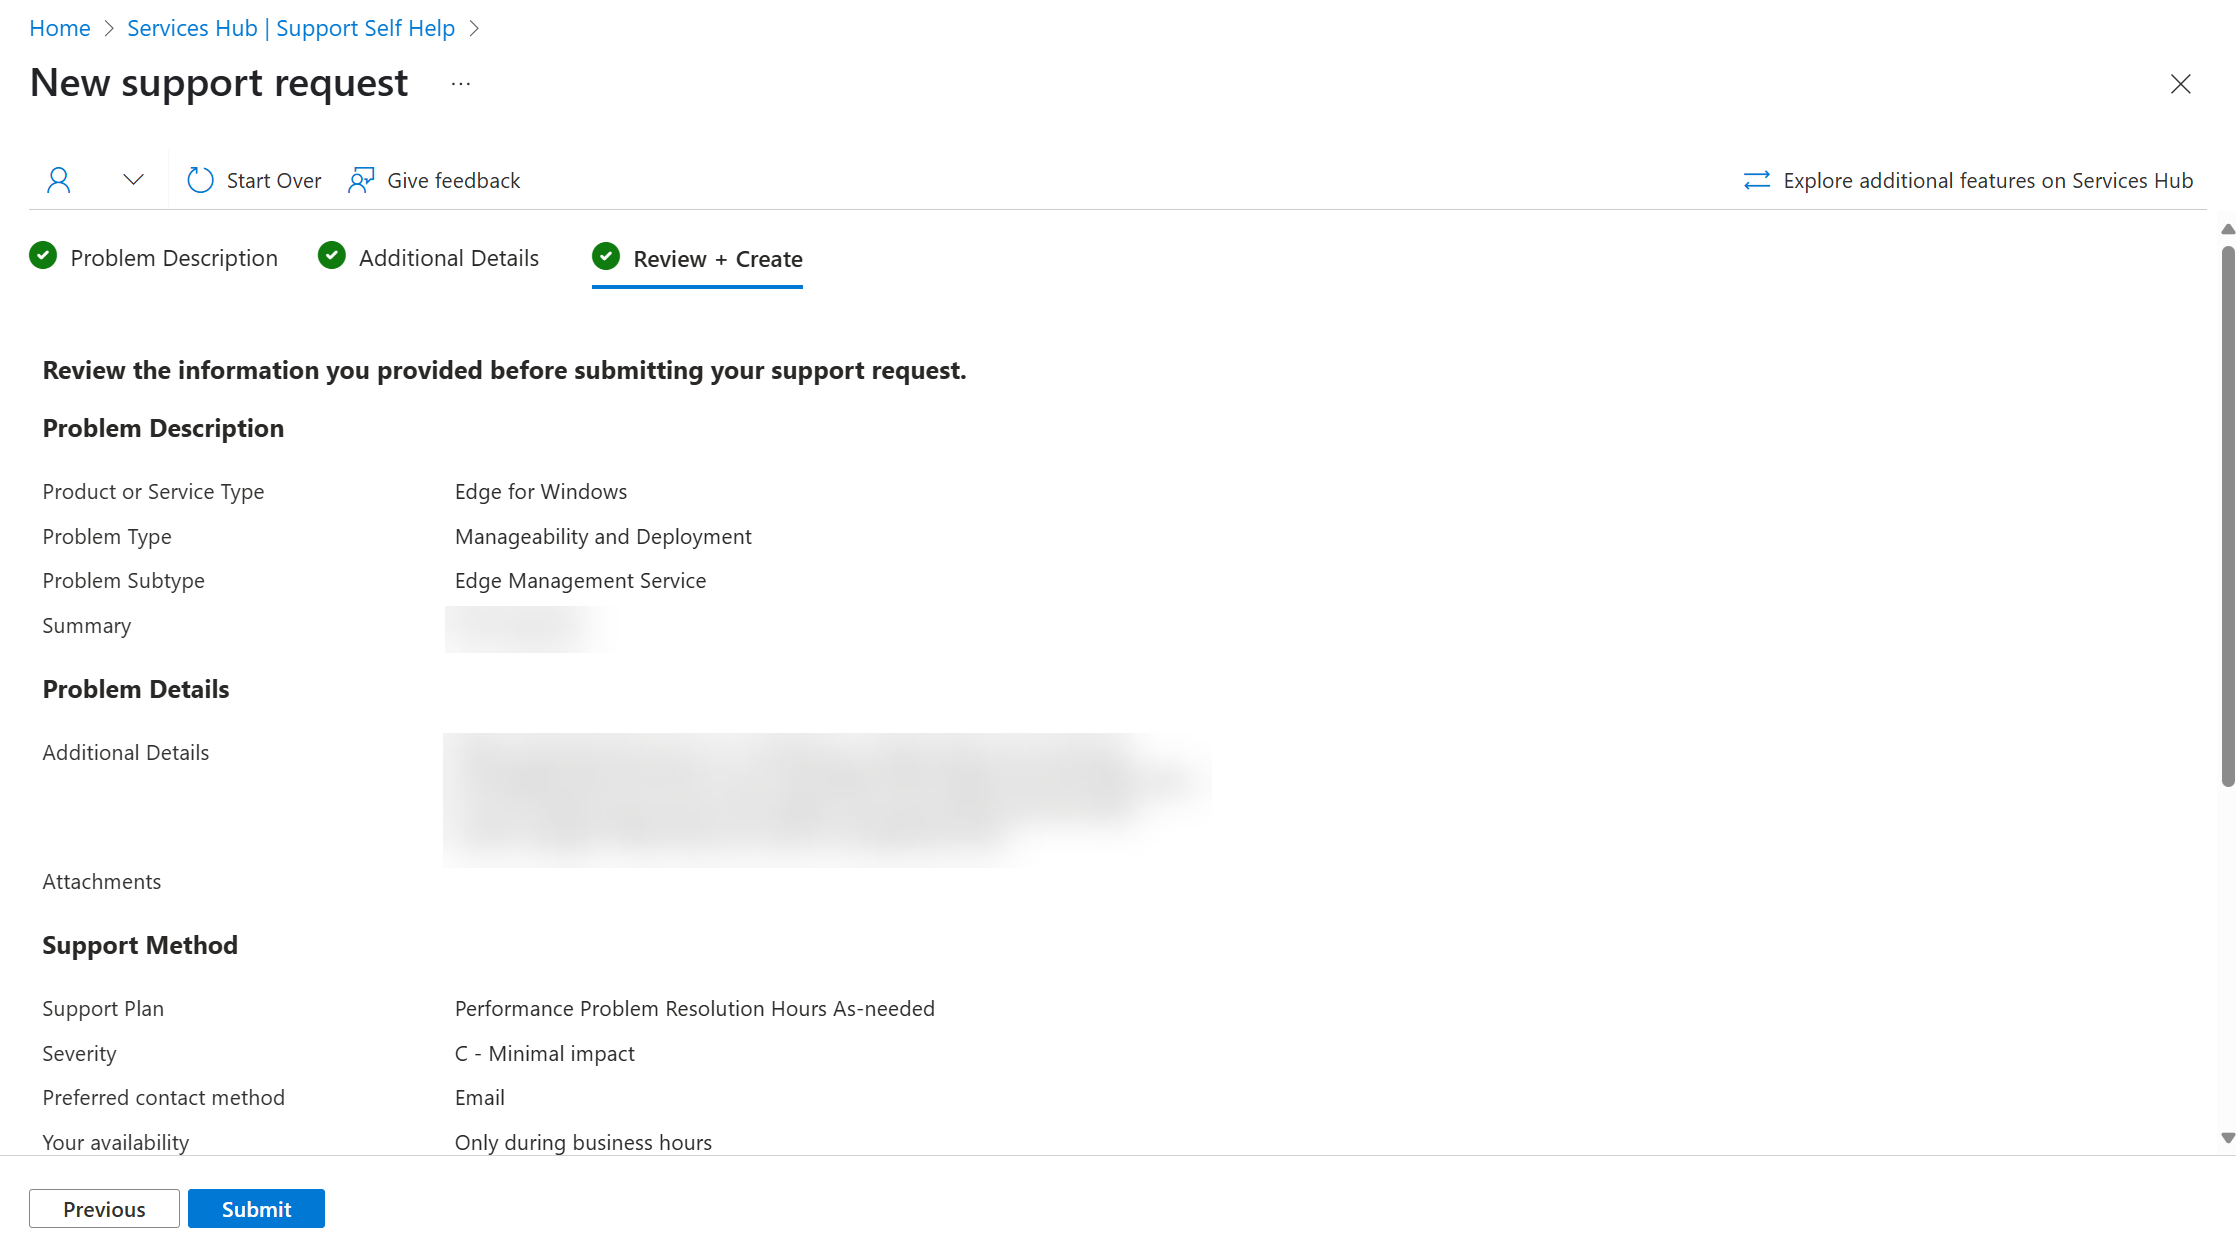
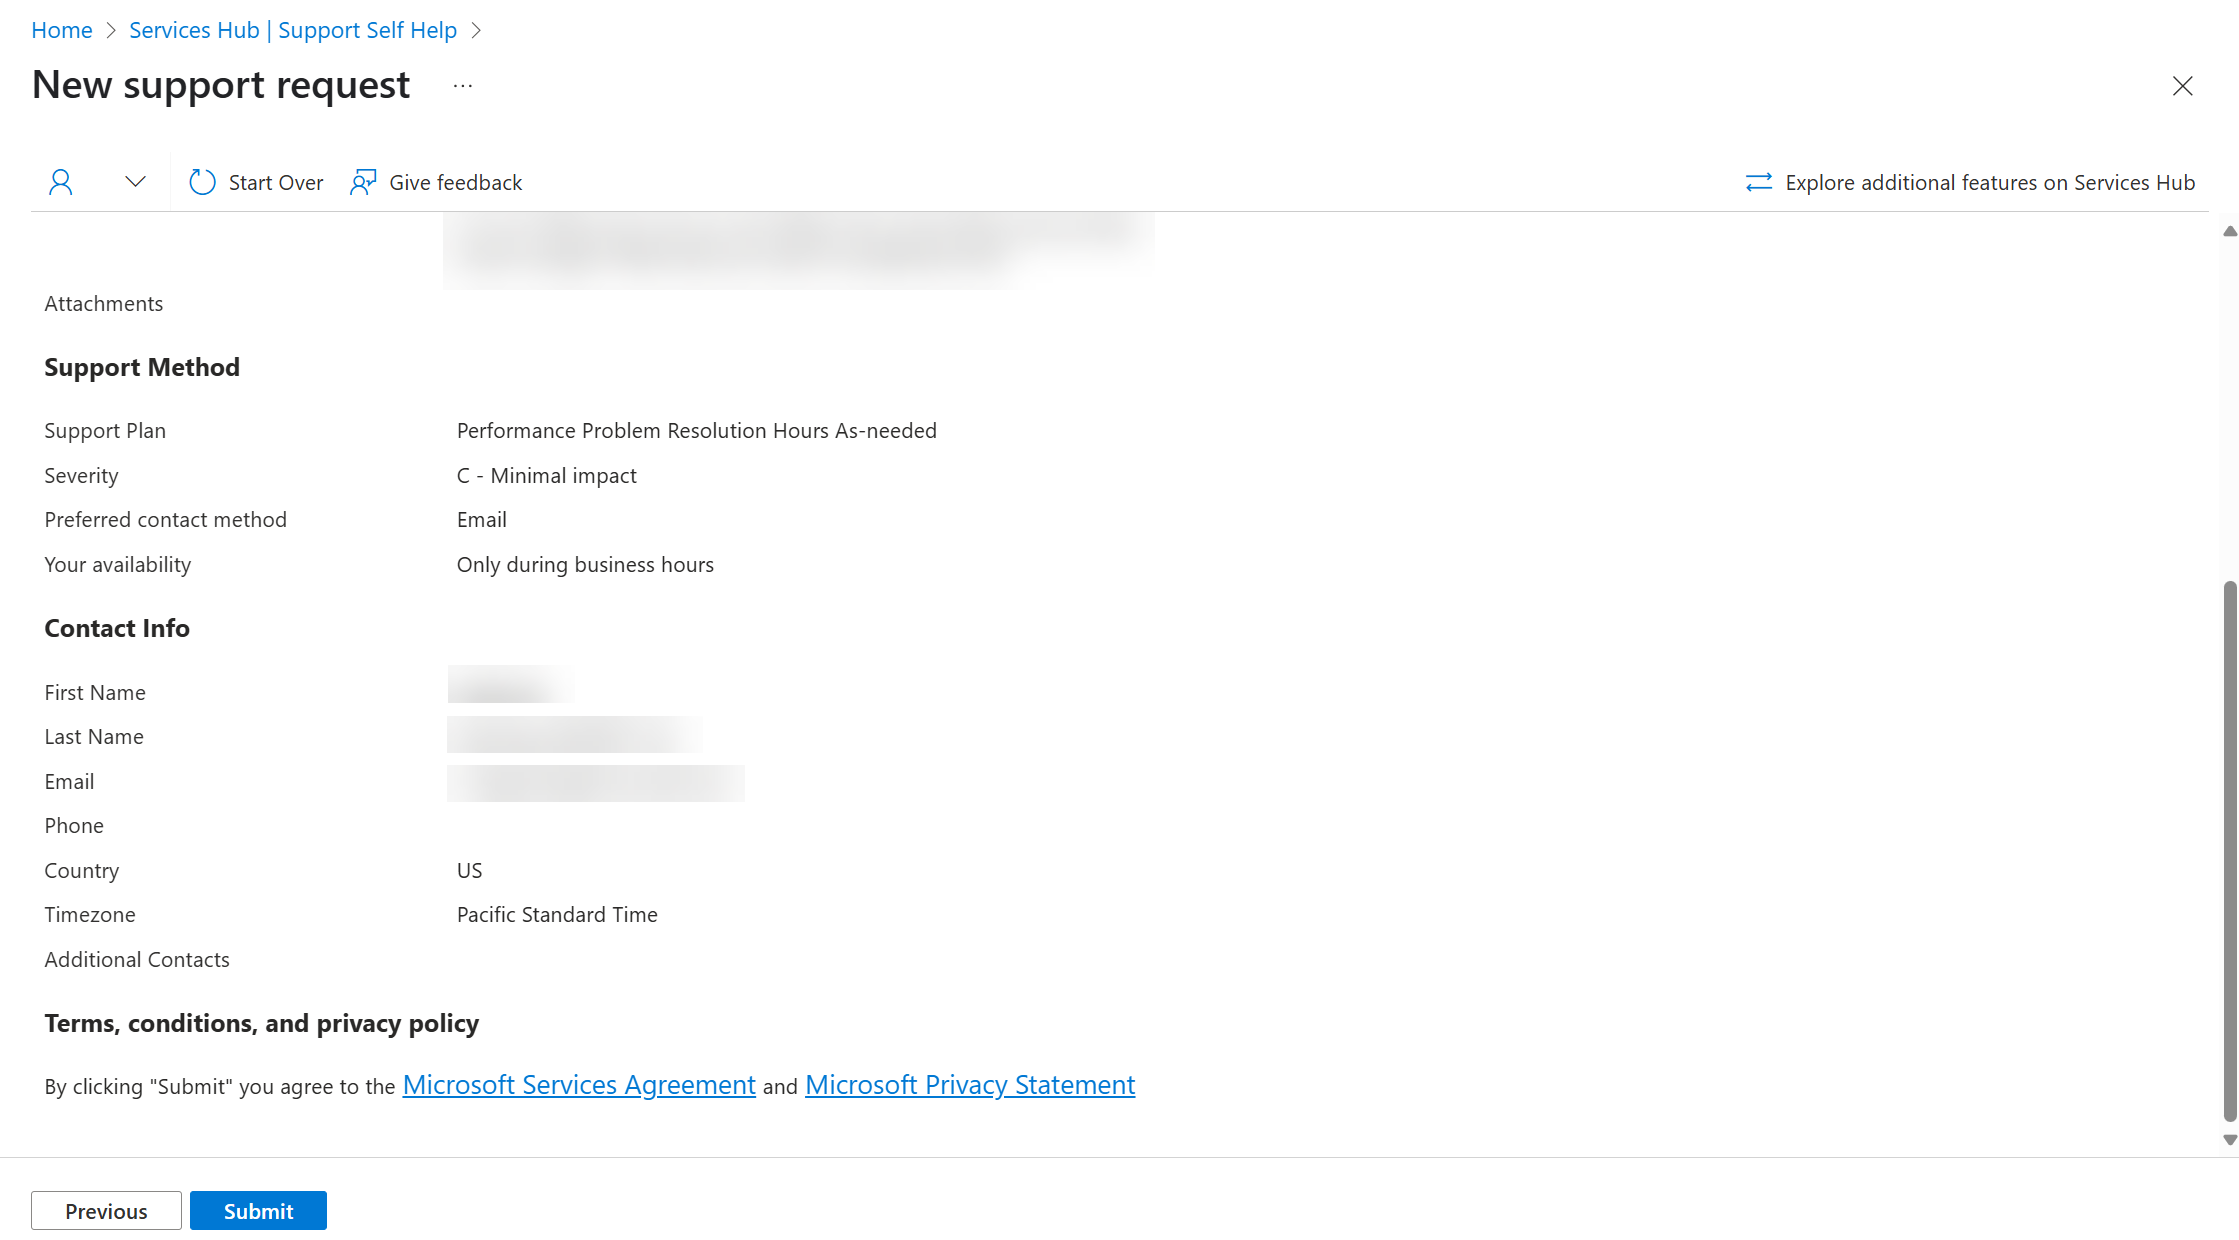
In the Review + Create section, review all the information you've provided.
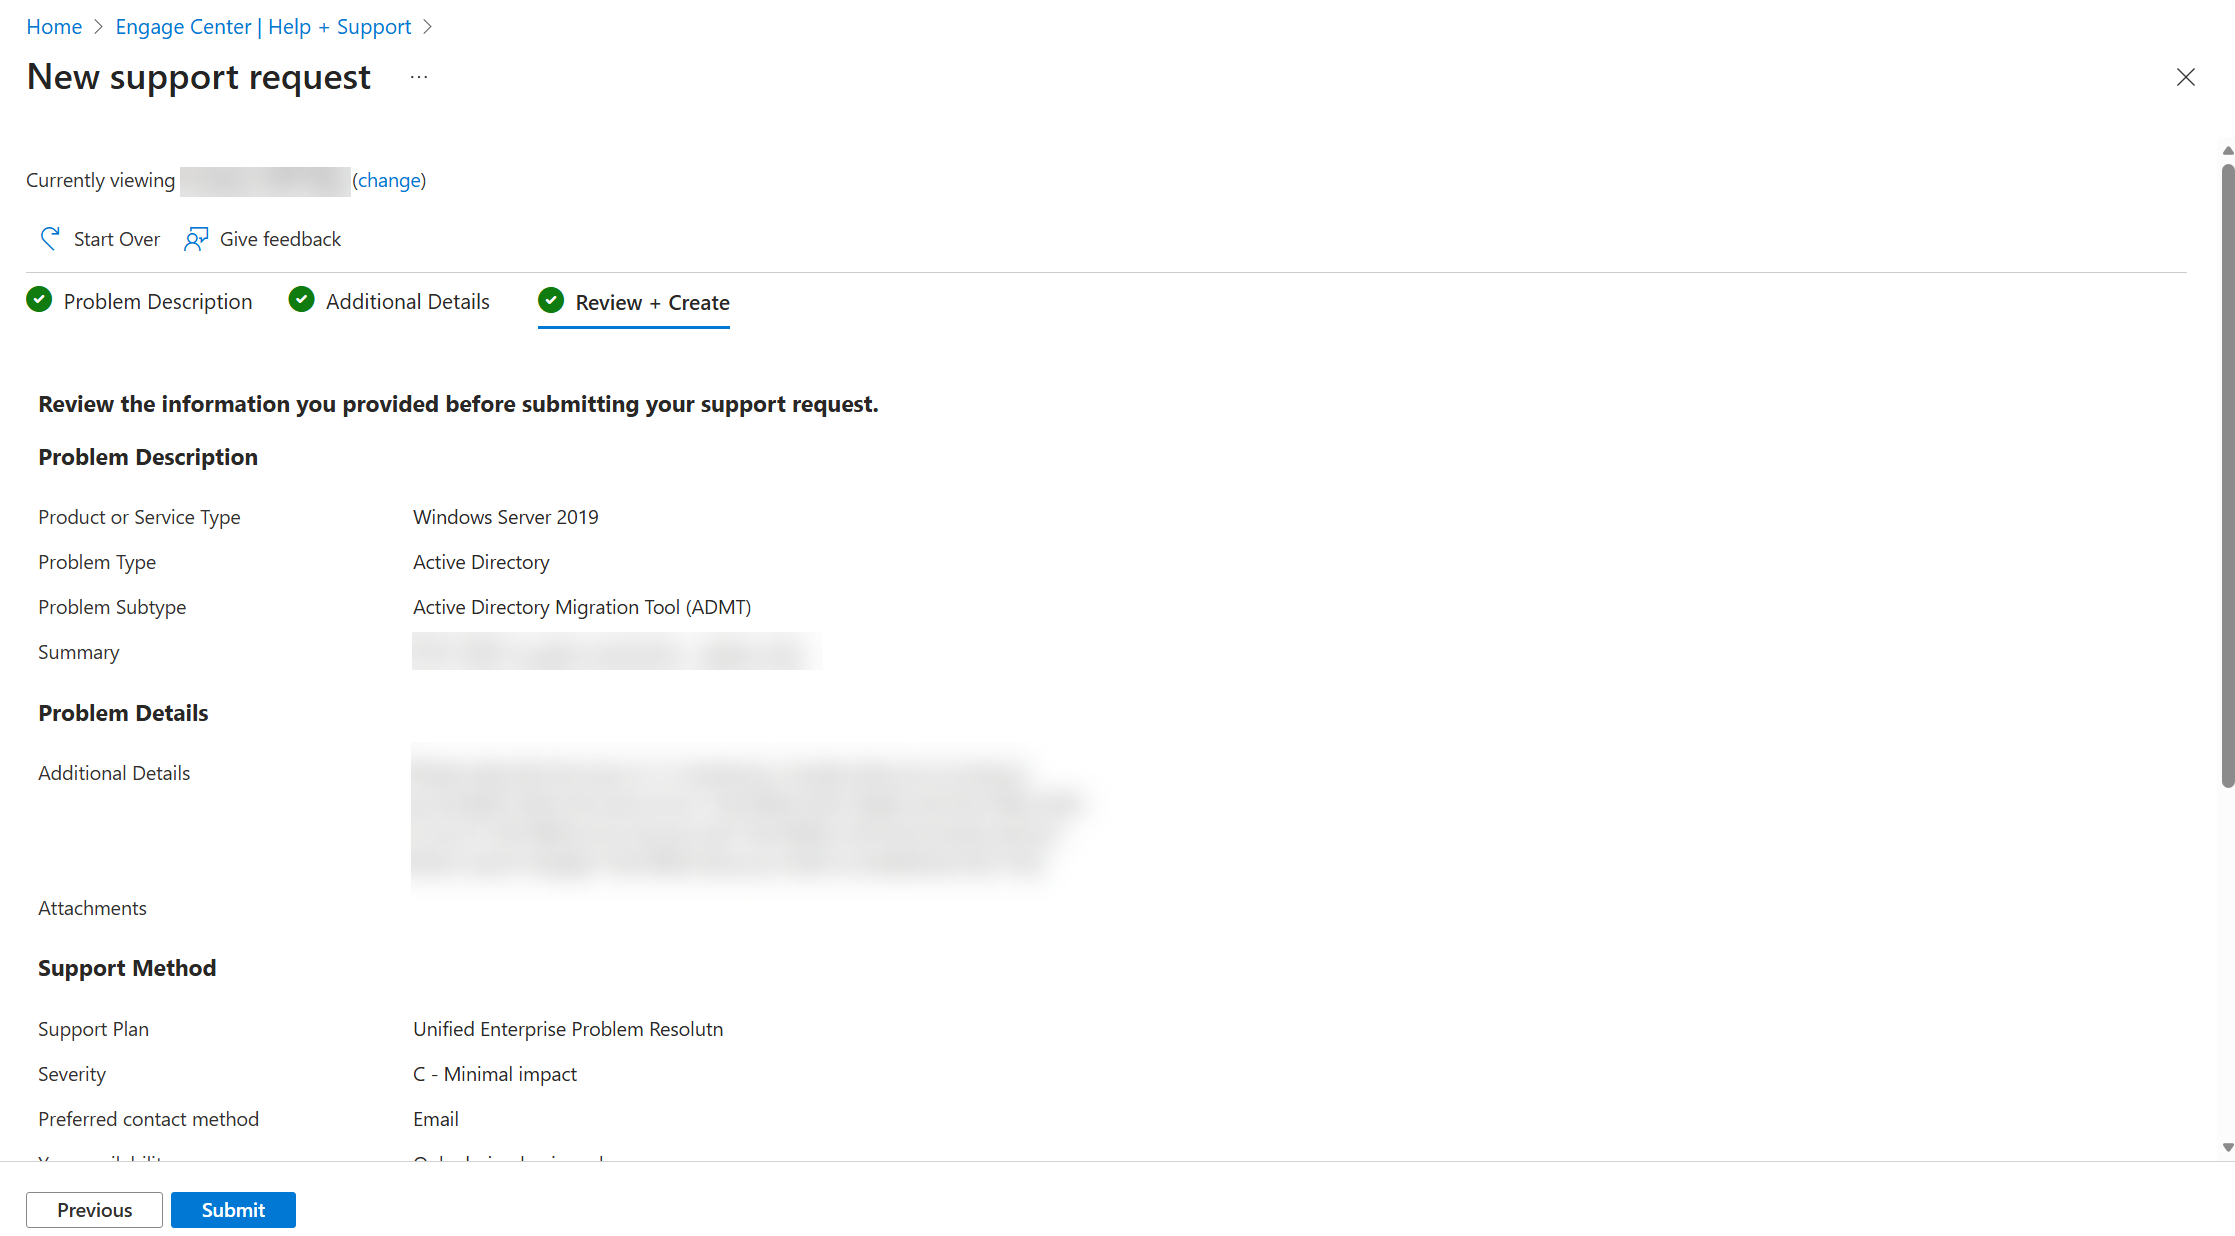

If everything is correct, select "Submit".
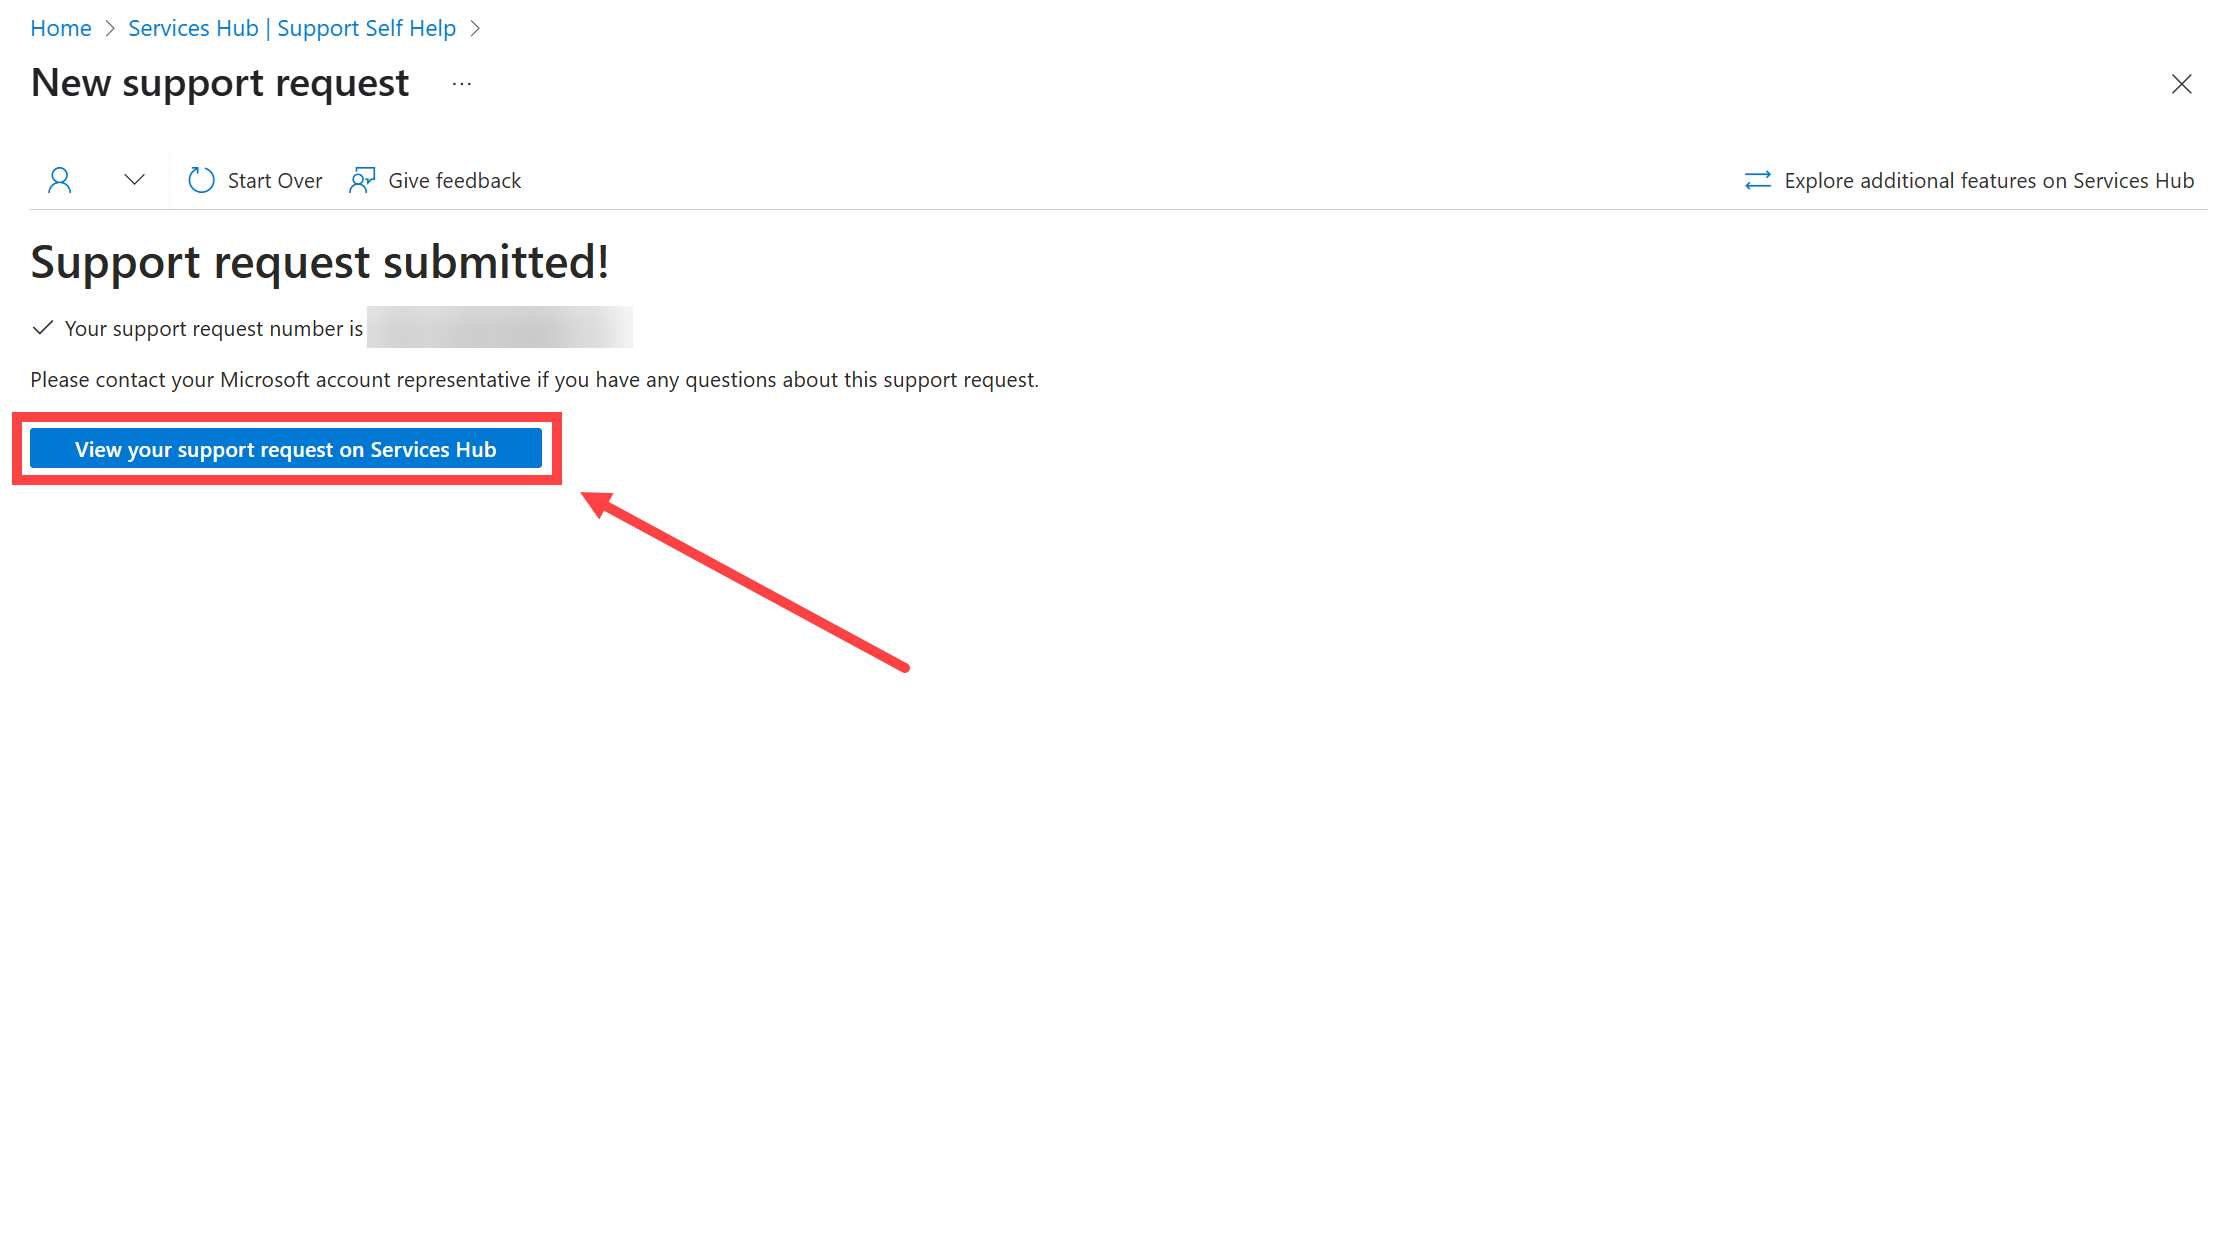
After your request is submitted, the site shows you a confirmation screen for the new support request.
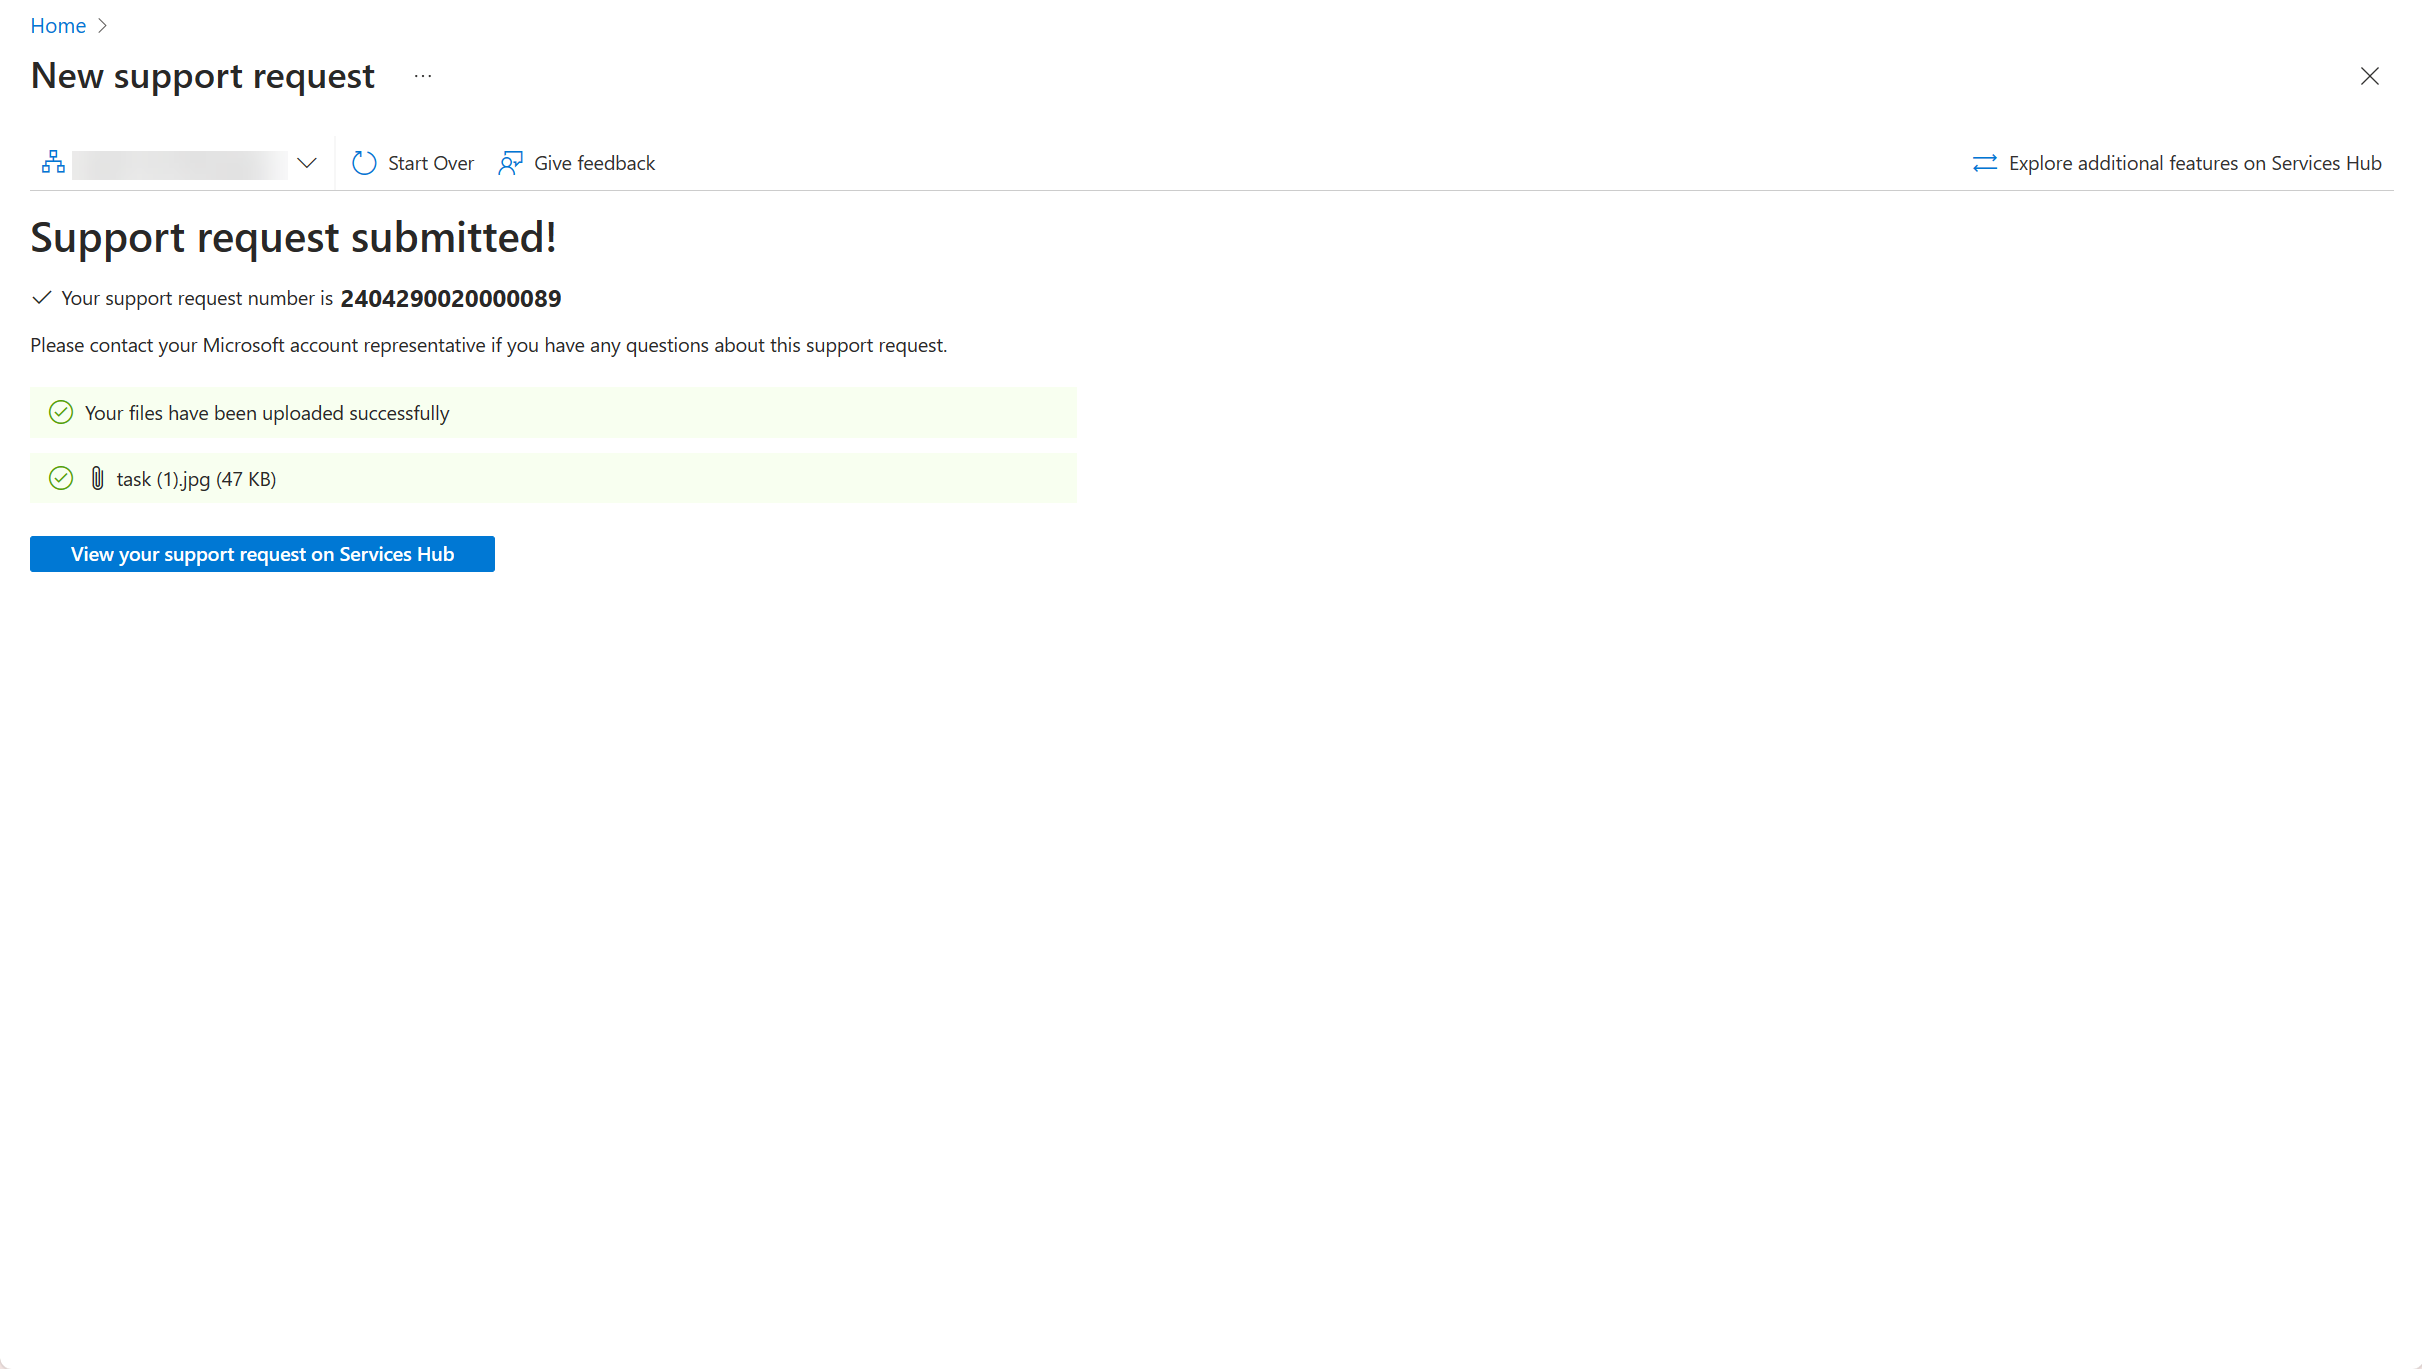
On the confirmation screen, select "View your support request on Services Hub".
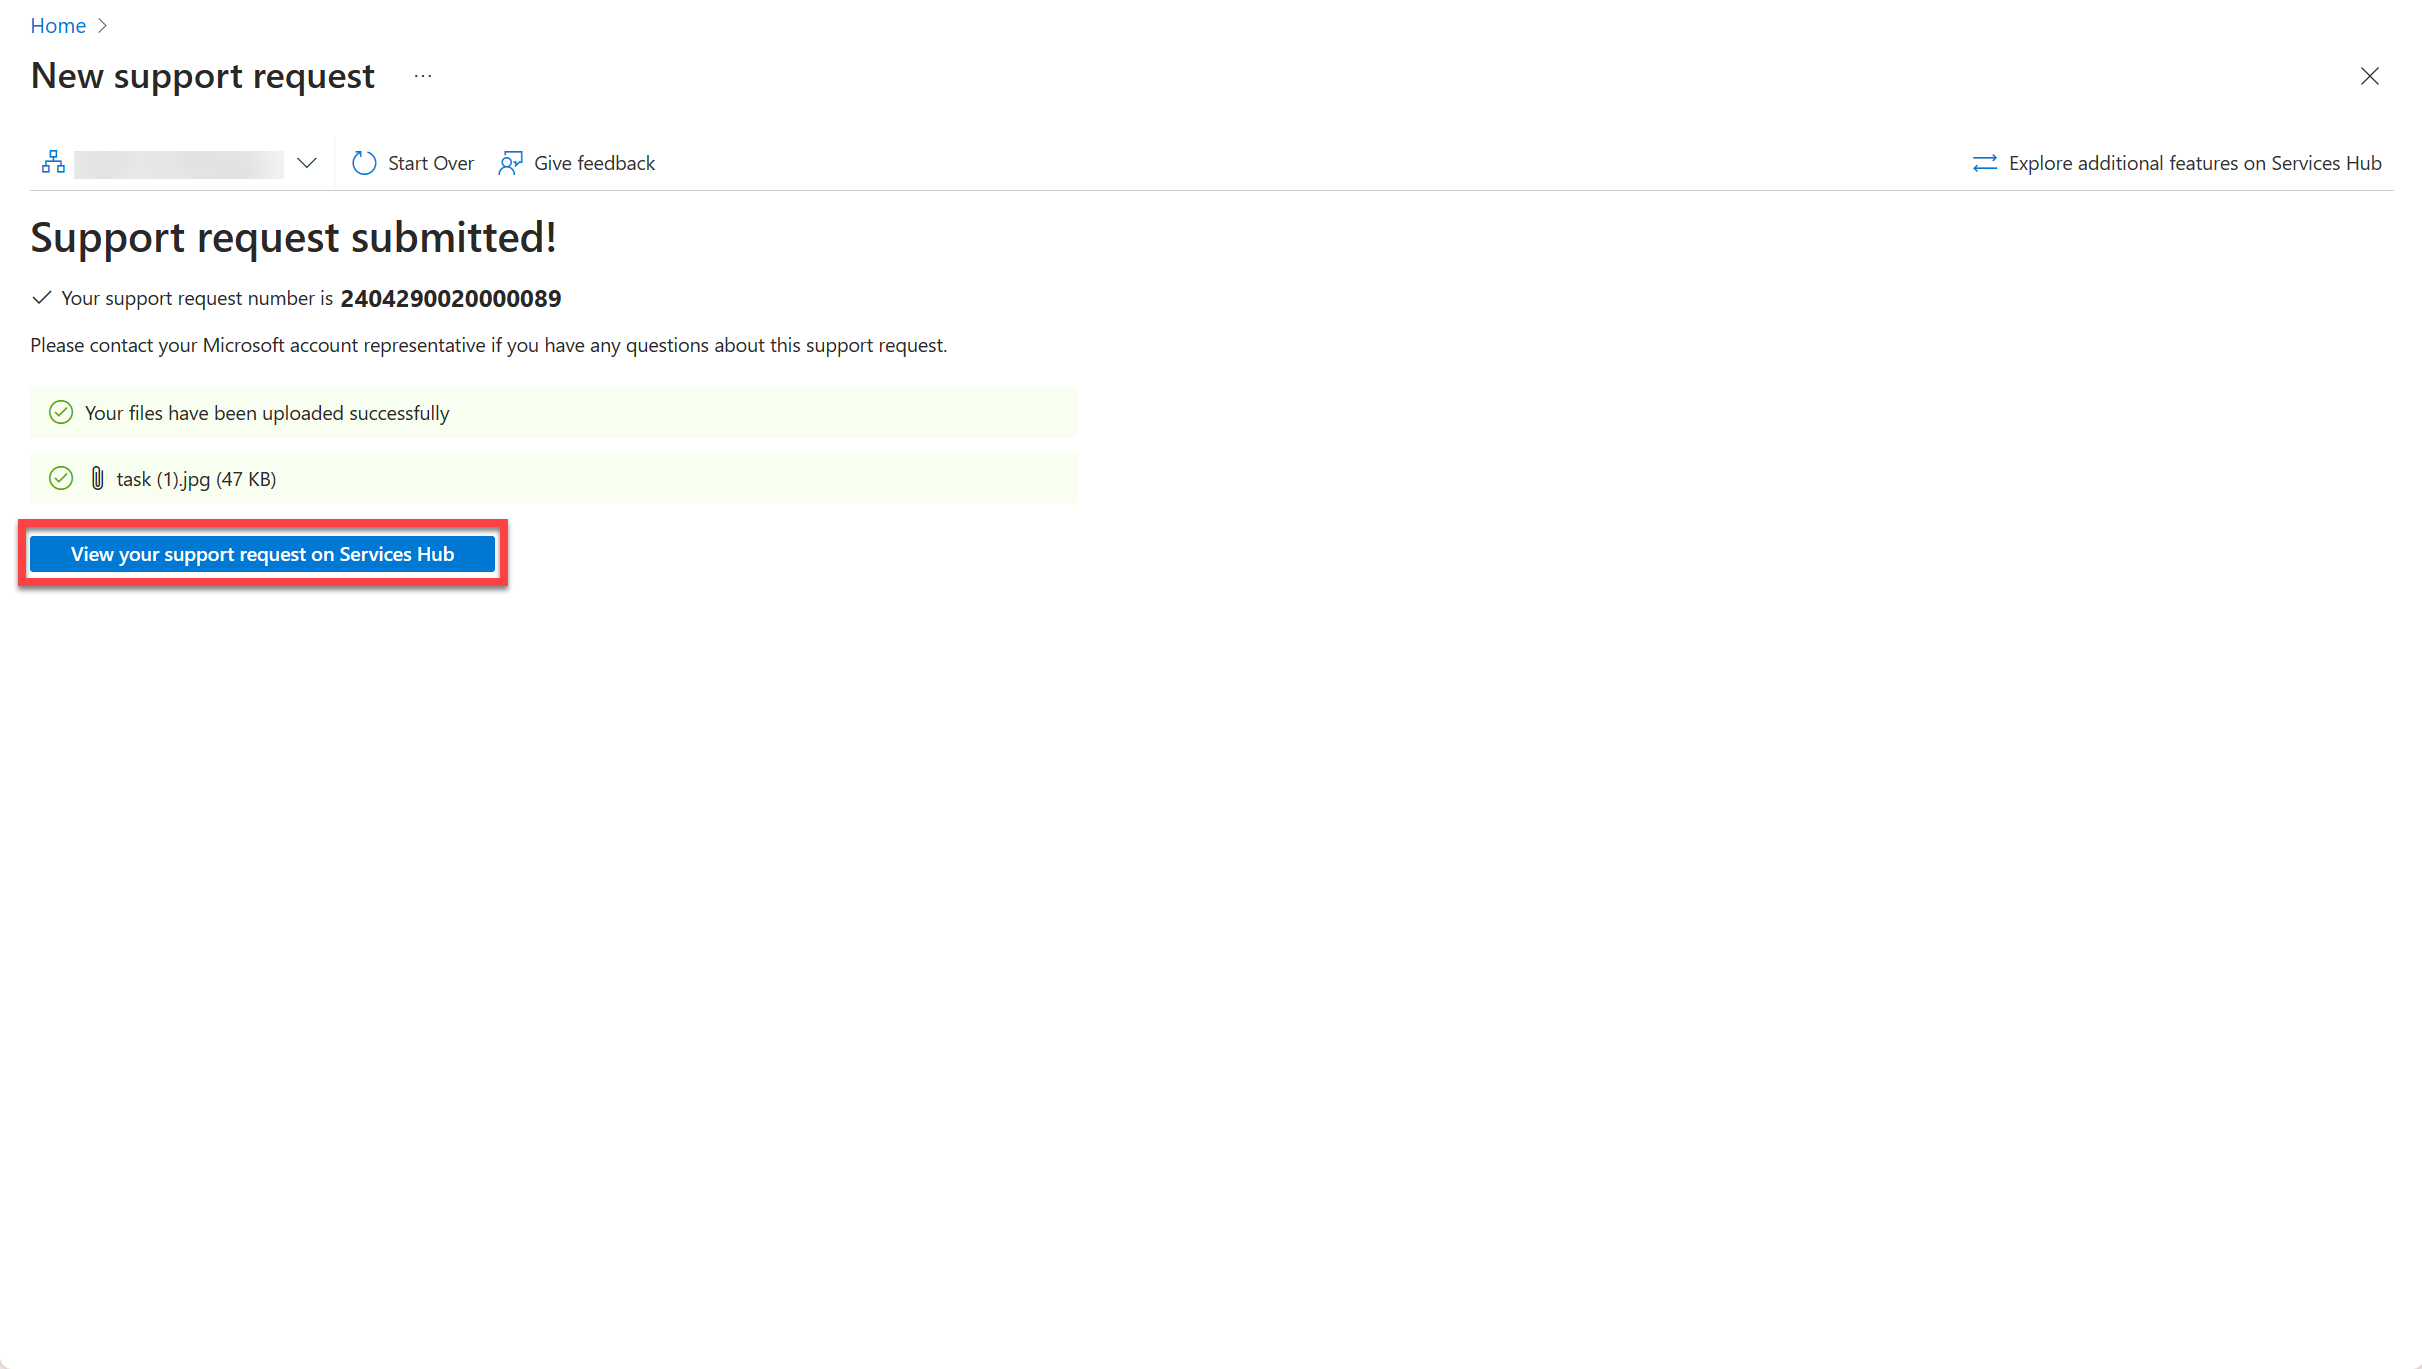
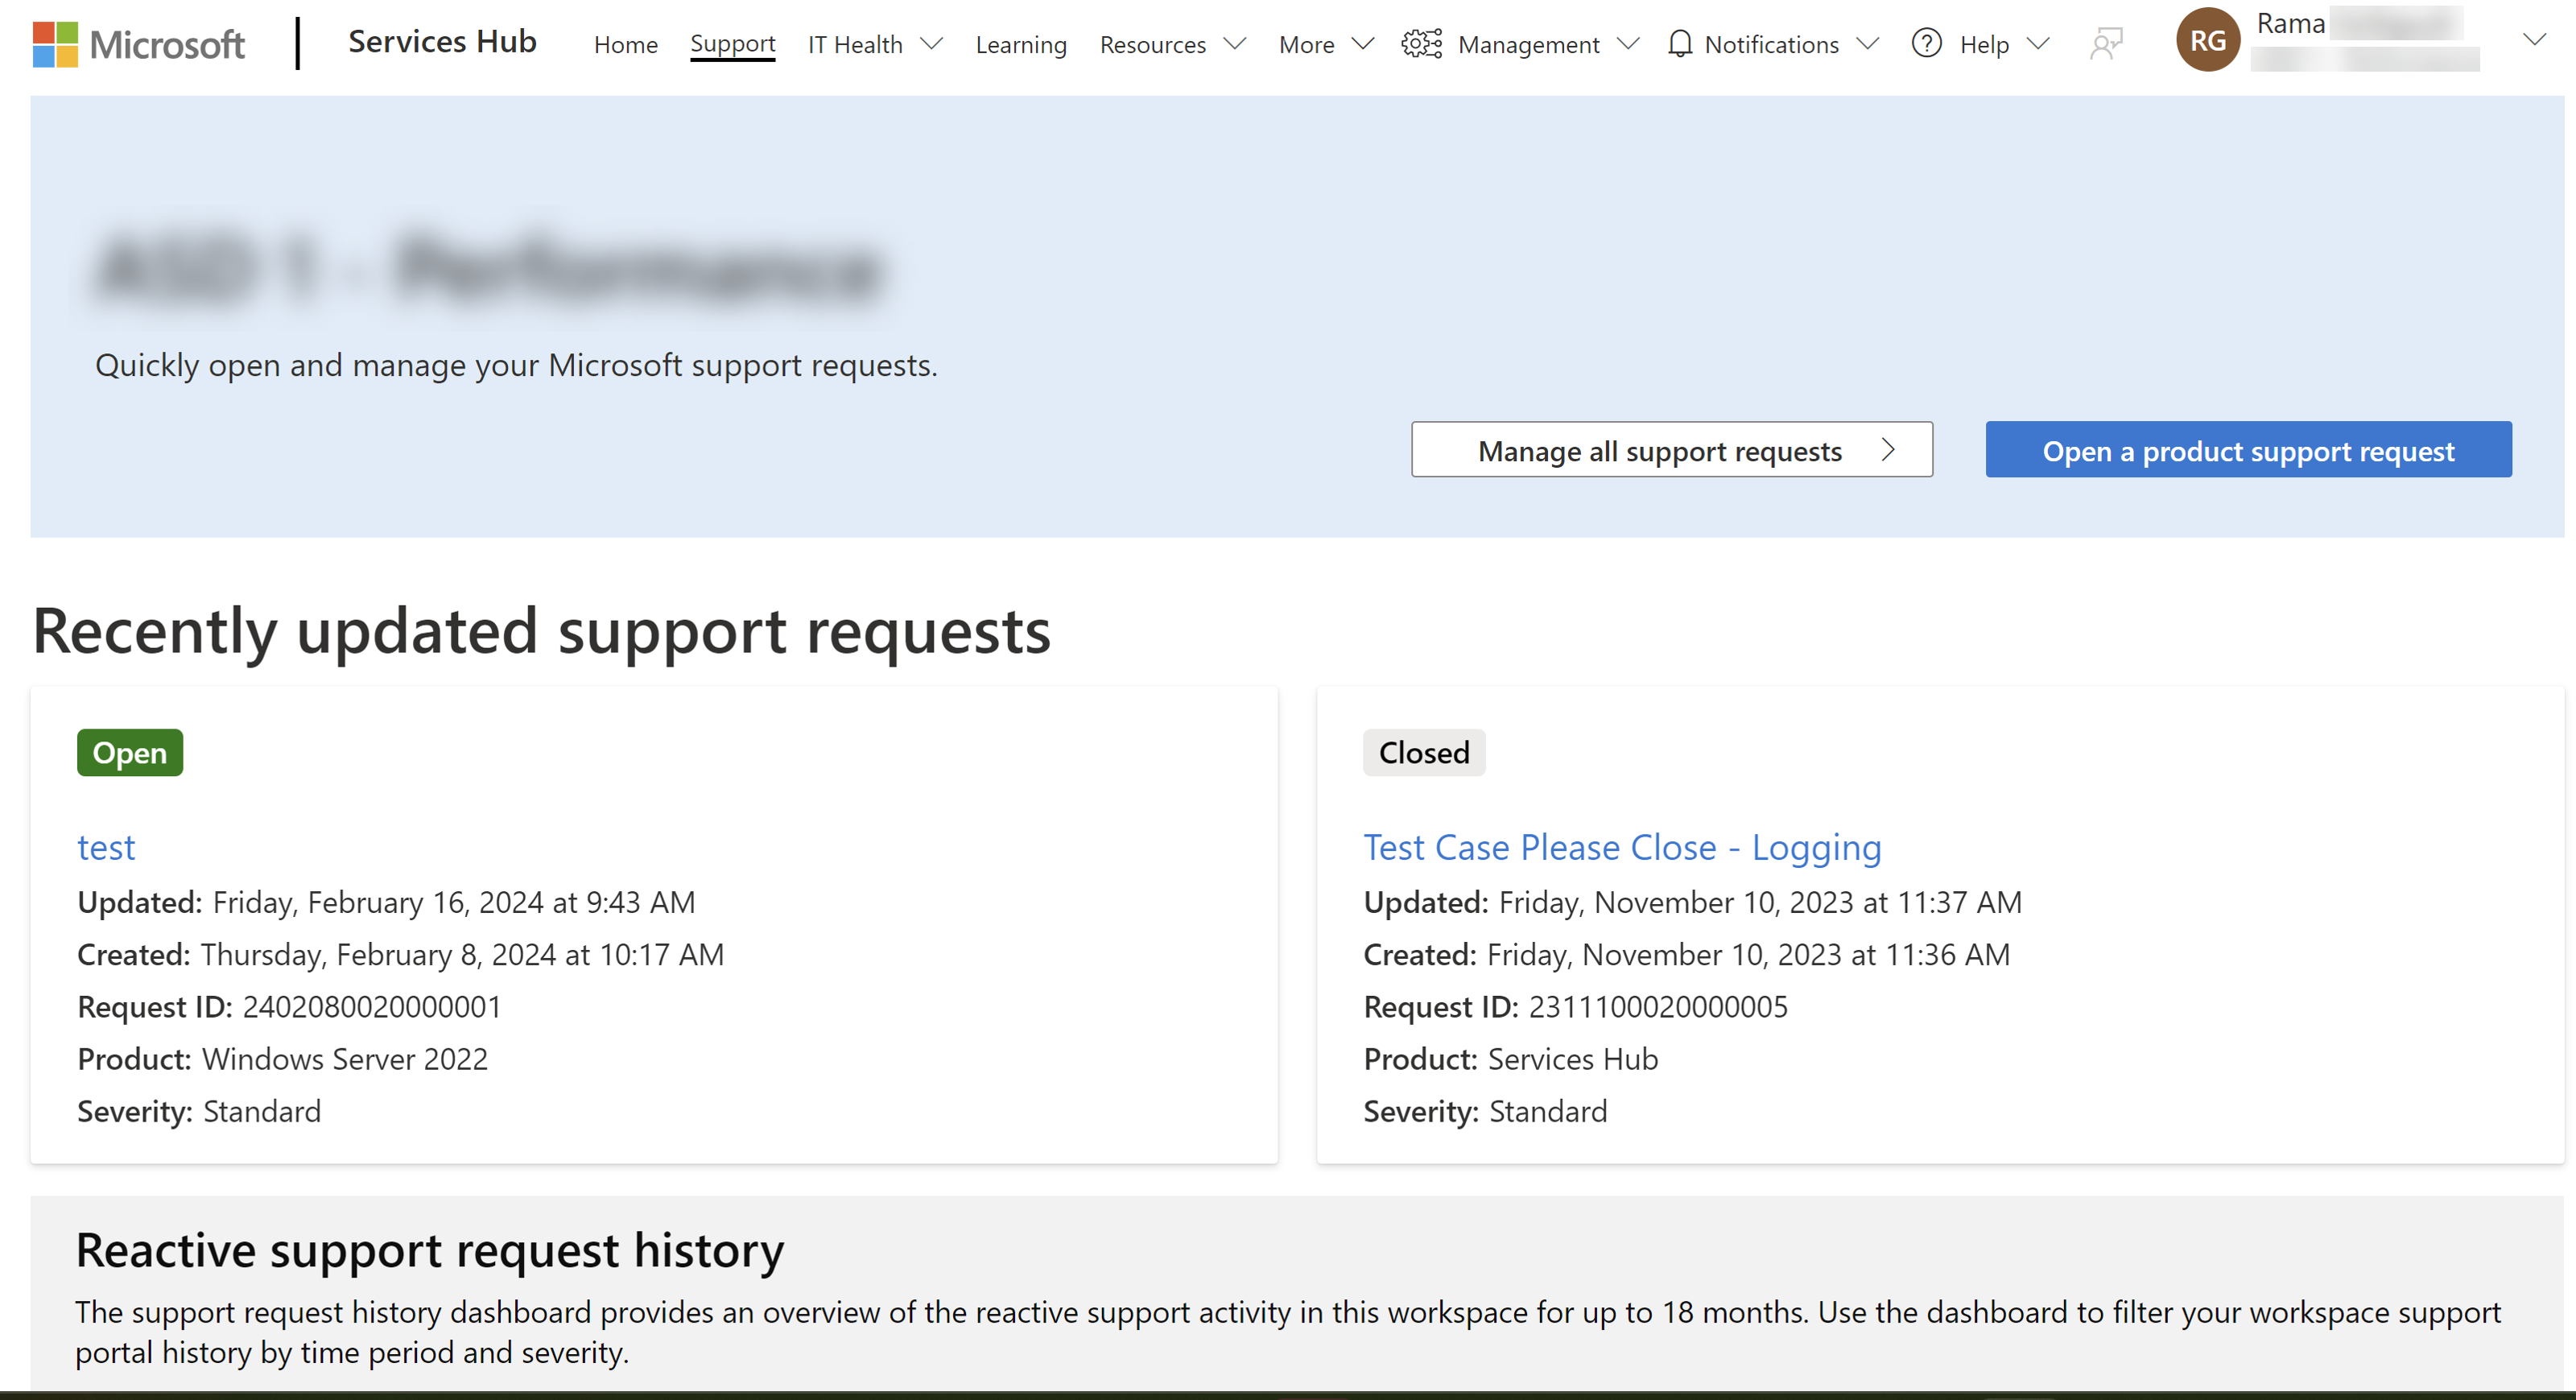
Selecting this redirects you back to Services Hub 1.0 experience.


Contact Services Hub
You can also visit our Get Help page to contact us for help with Services Hub website.
Support Contacts
Only a Support Contact can open a support request. For more information about Support Contacts, please see the Support Contact Overview.
Allowlist websites
Depending on your company network configuration, you may need to add certain URLs to your allowlist to use the new platform. For more information, see Microsoft Engage Center (Services Hub) connectivity guide.
Begin the process for the Support AI Assistant
To open a new support request:
-
Select "Support" from the primary navigation ribbon along the top of the page.
Select the blue “Open a support request" button.
Enter the new experience
Select "Use the new Support Experience".
This leads you to the new Support AI Assistant support request process. The following section provides instructions for you to follow once you arrive there.
Follow the new process
The new Support AI Assistant provides access to solutions and support by using publicly available information to help you:
- Troubleshoot issues
- Integrate MS learn solutions
- Create support requests
Use the dropdown selector to begin filling out the "How can we help you?" section with information on your current issue.
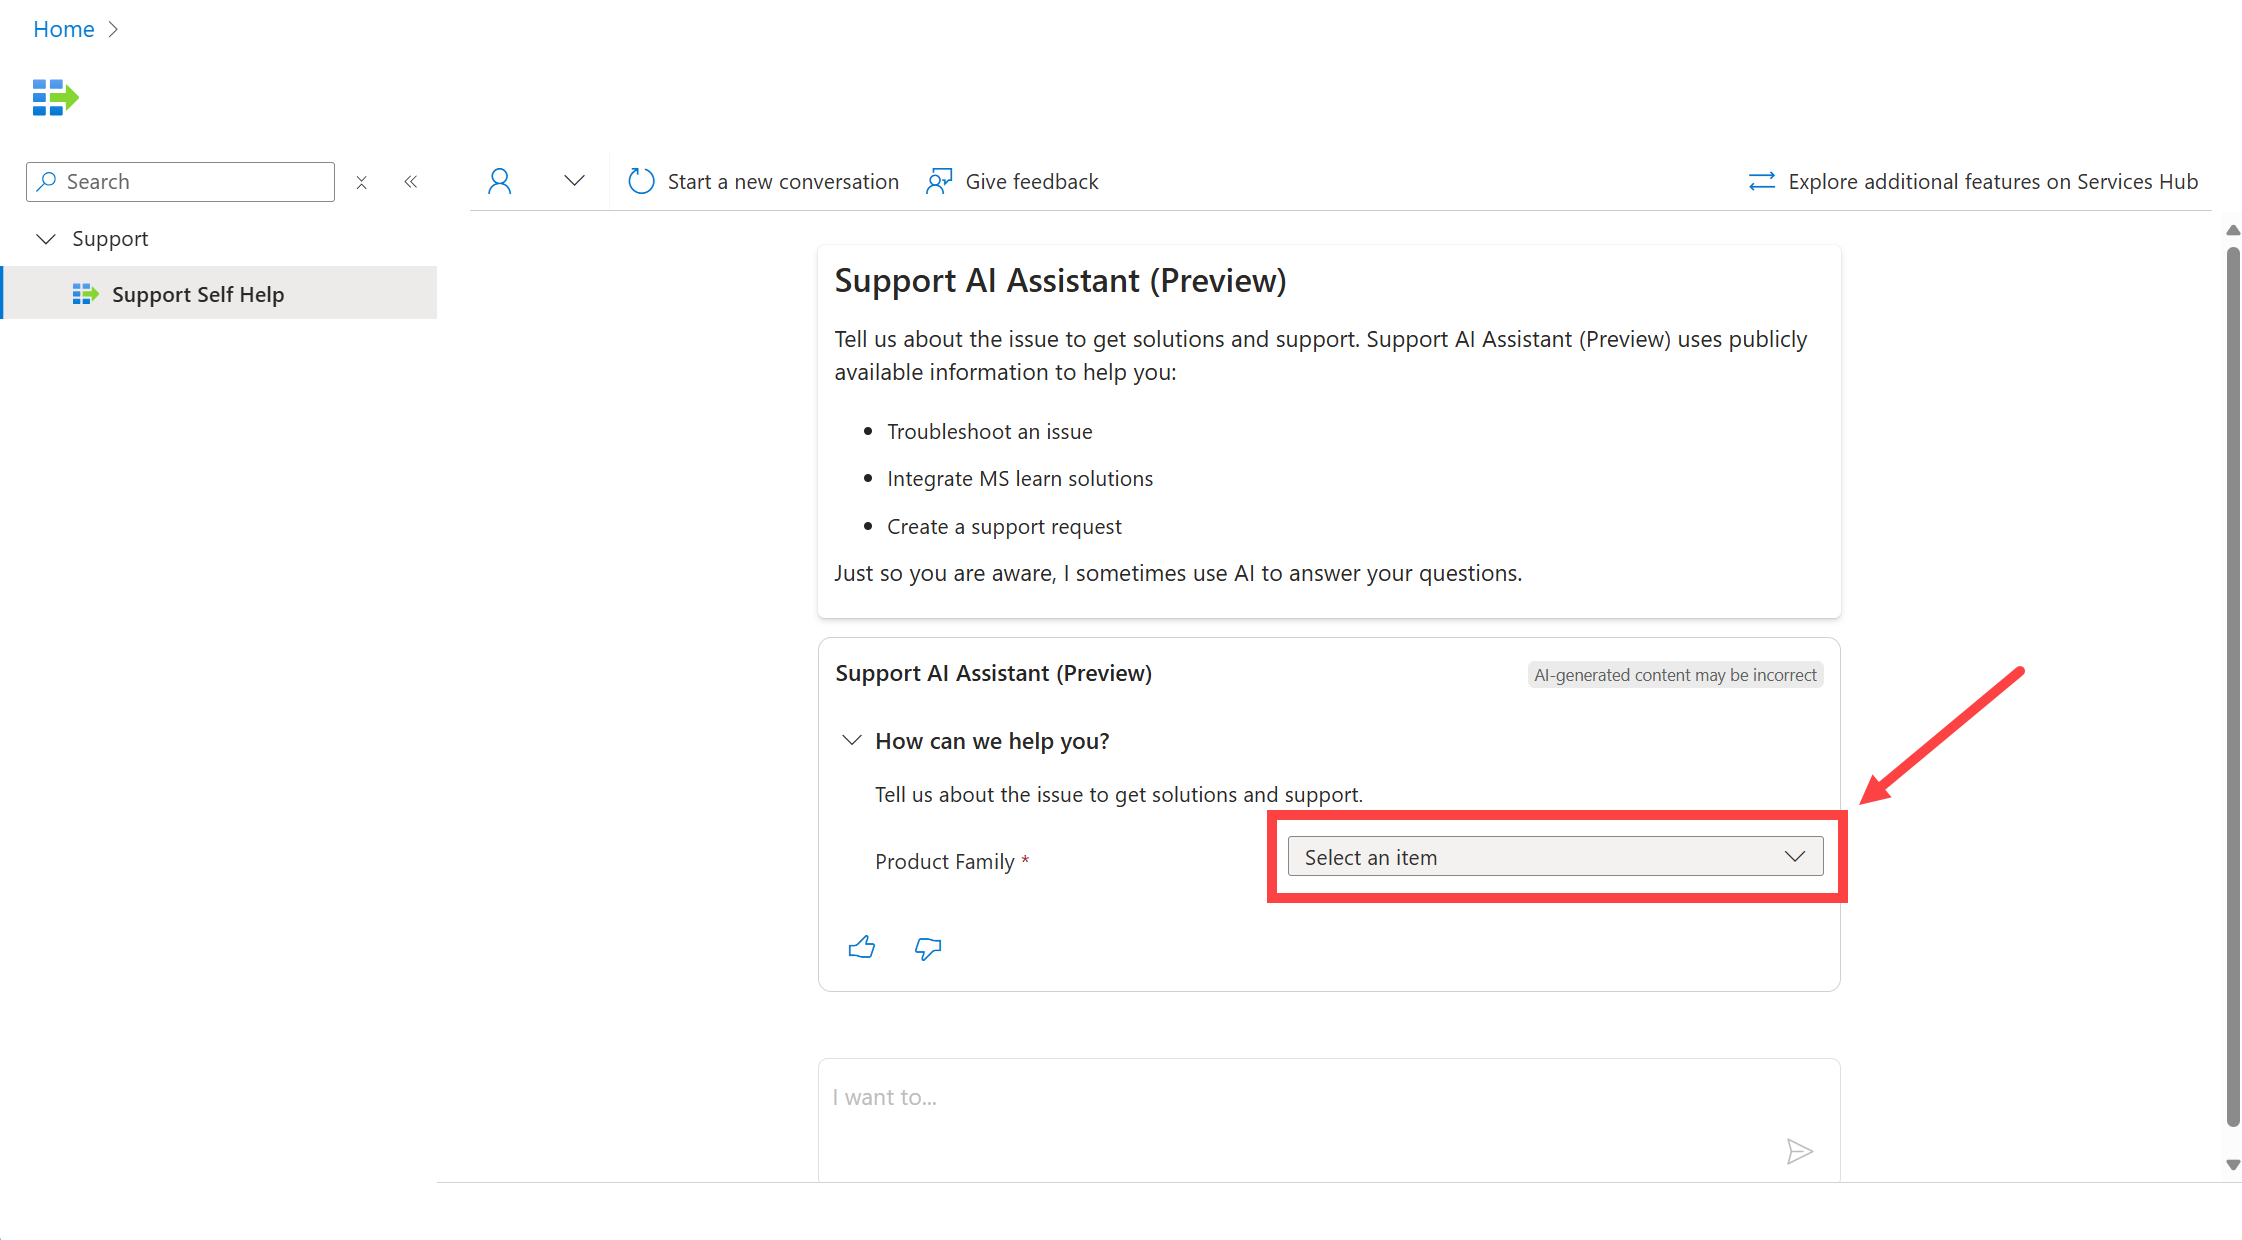
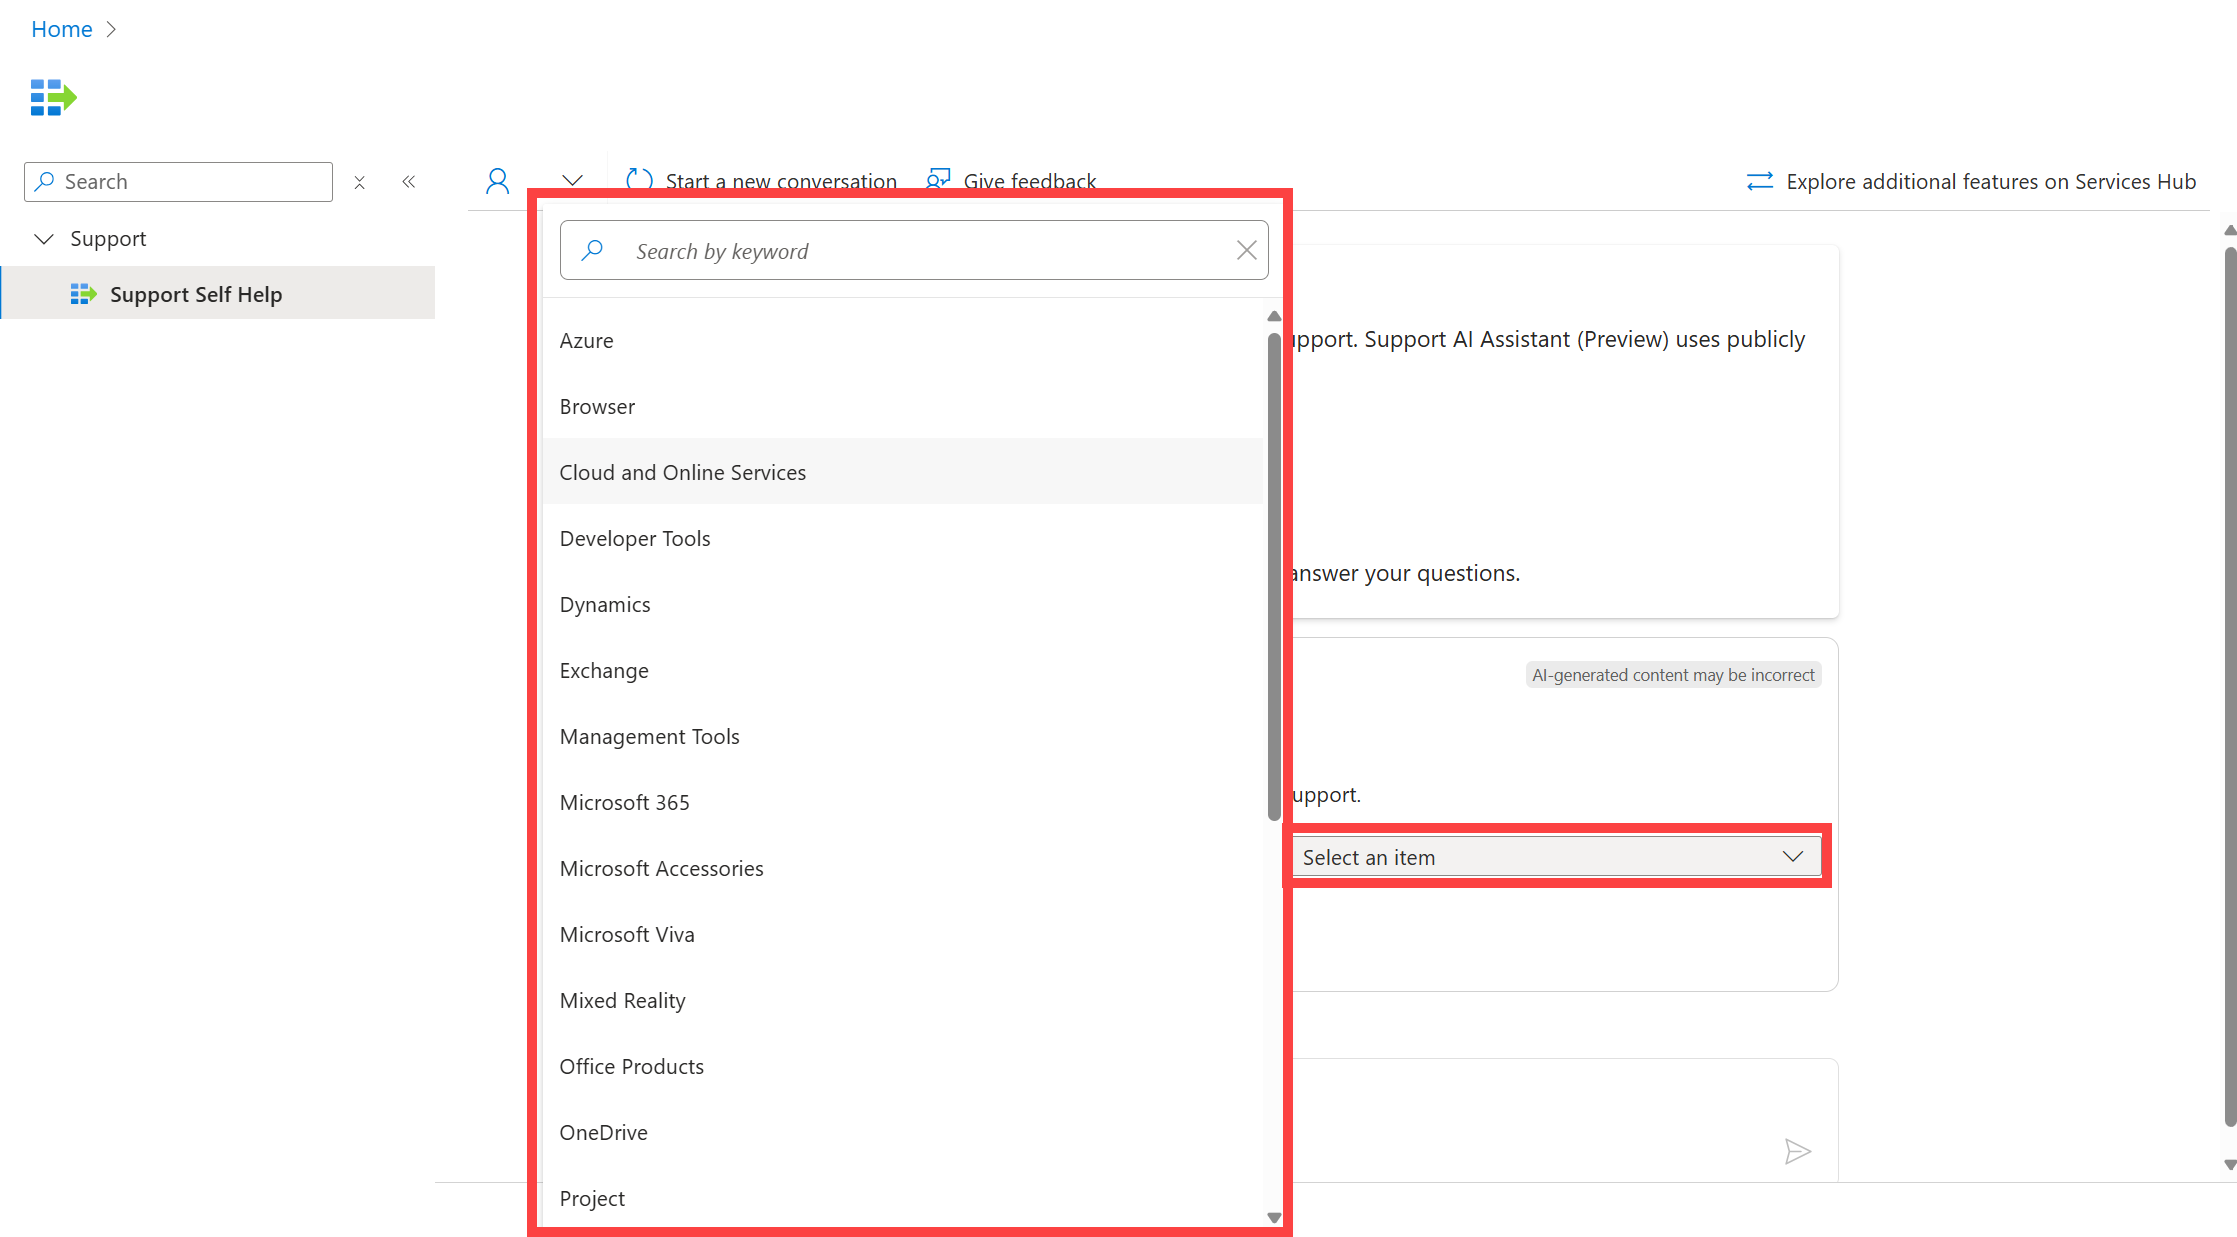
Use the rest of the dropdown selectors that appear after the first one to provide more information about your issue.
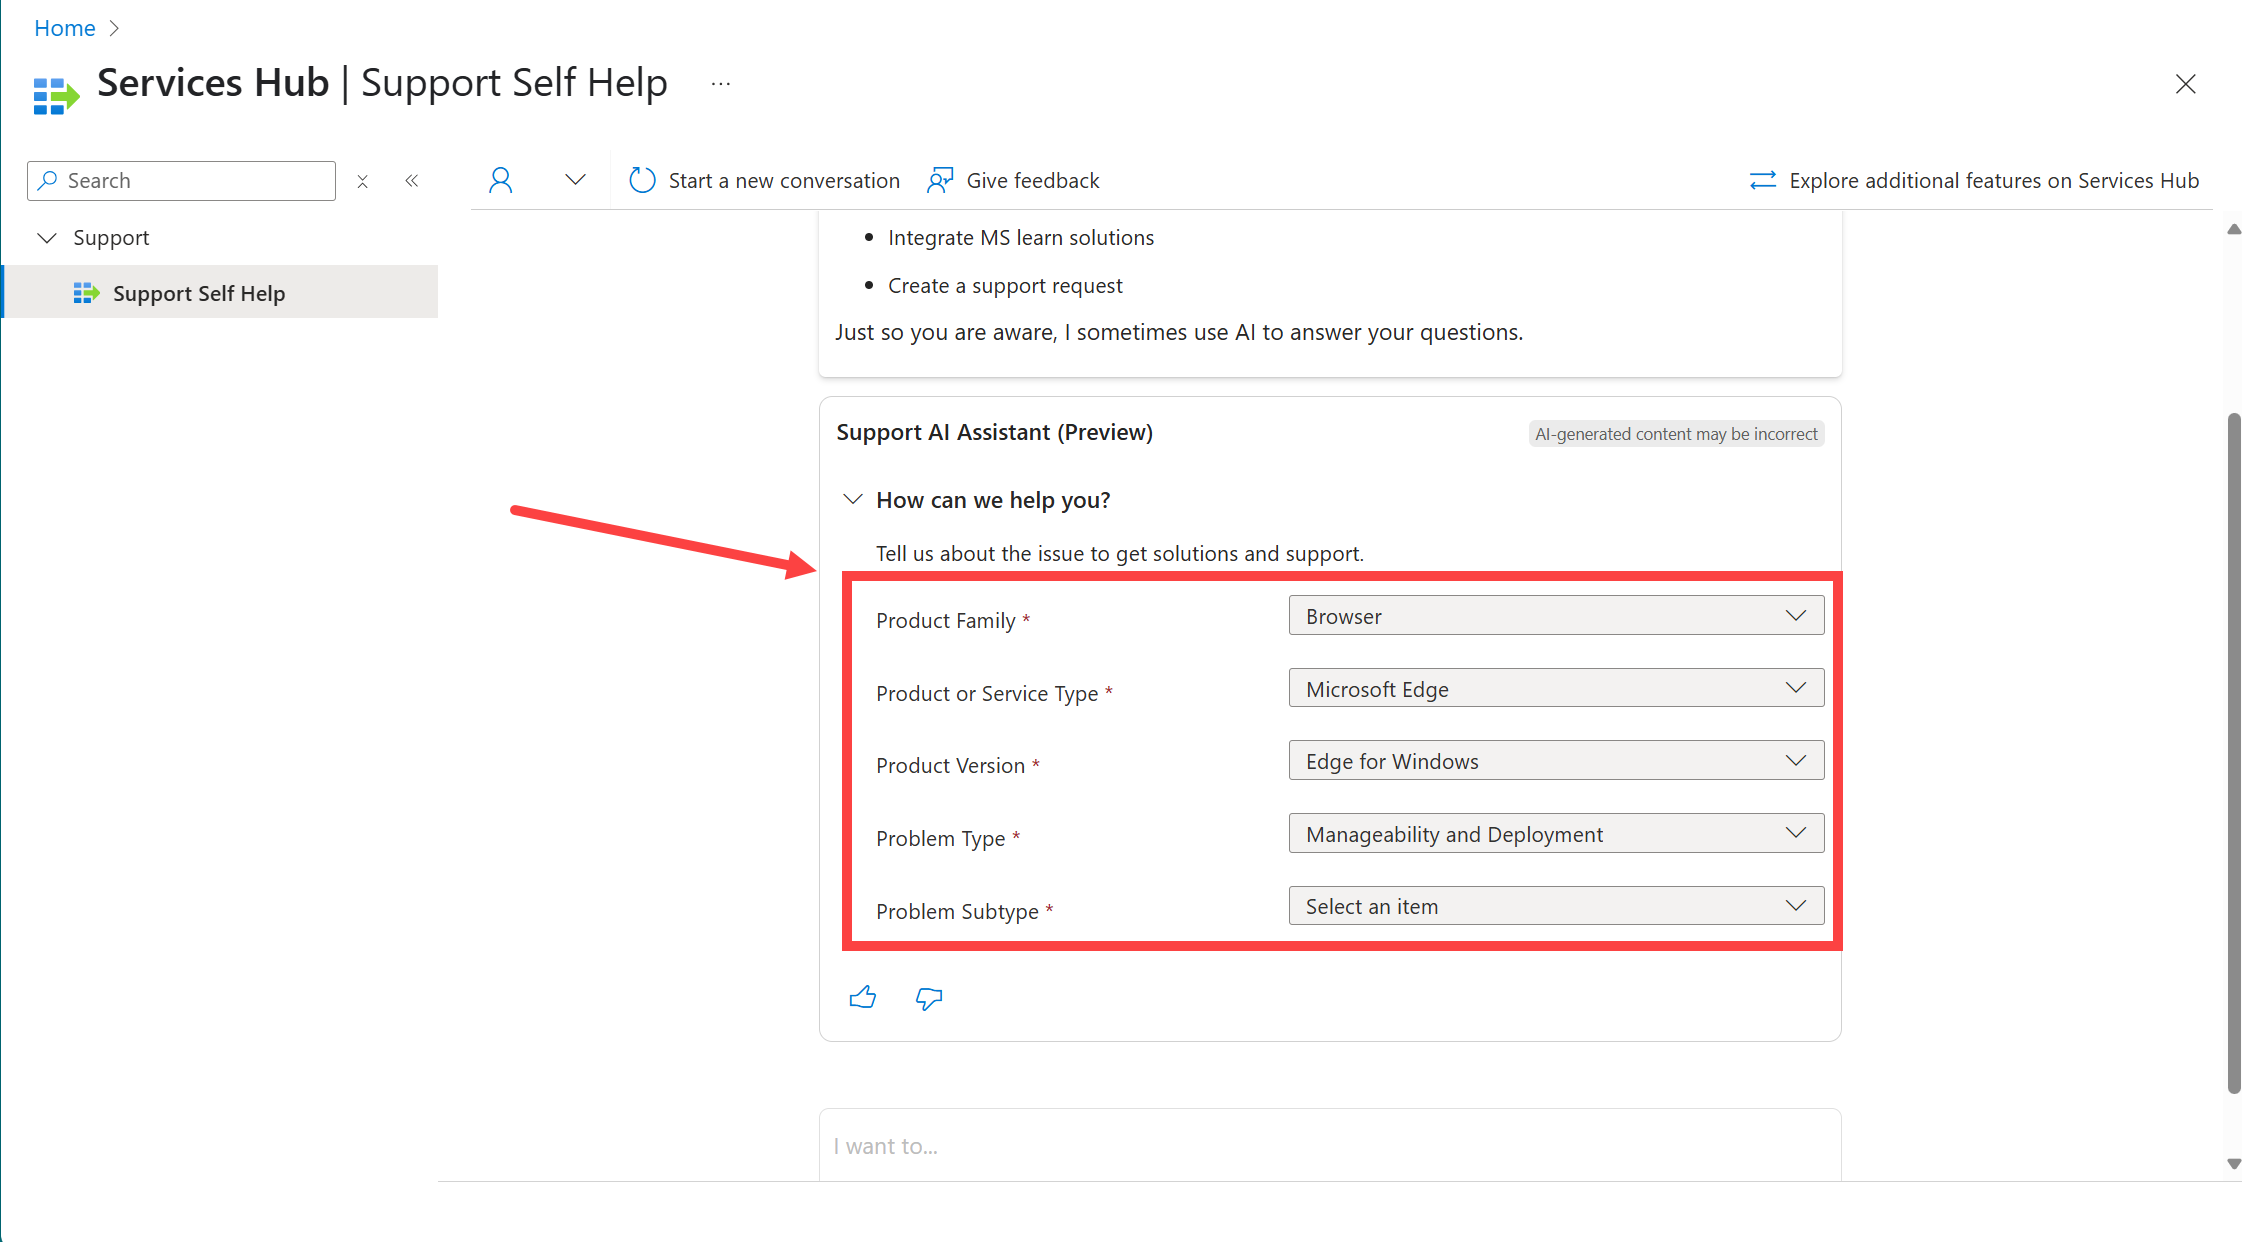
If we have recommended troubleshooting steps for your issue, the Support AI Assistant recommends them after you fill in the last dropdown selector.
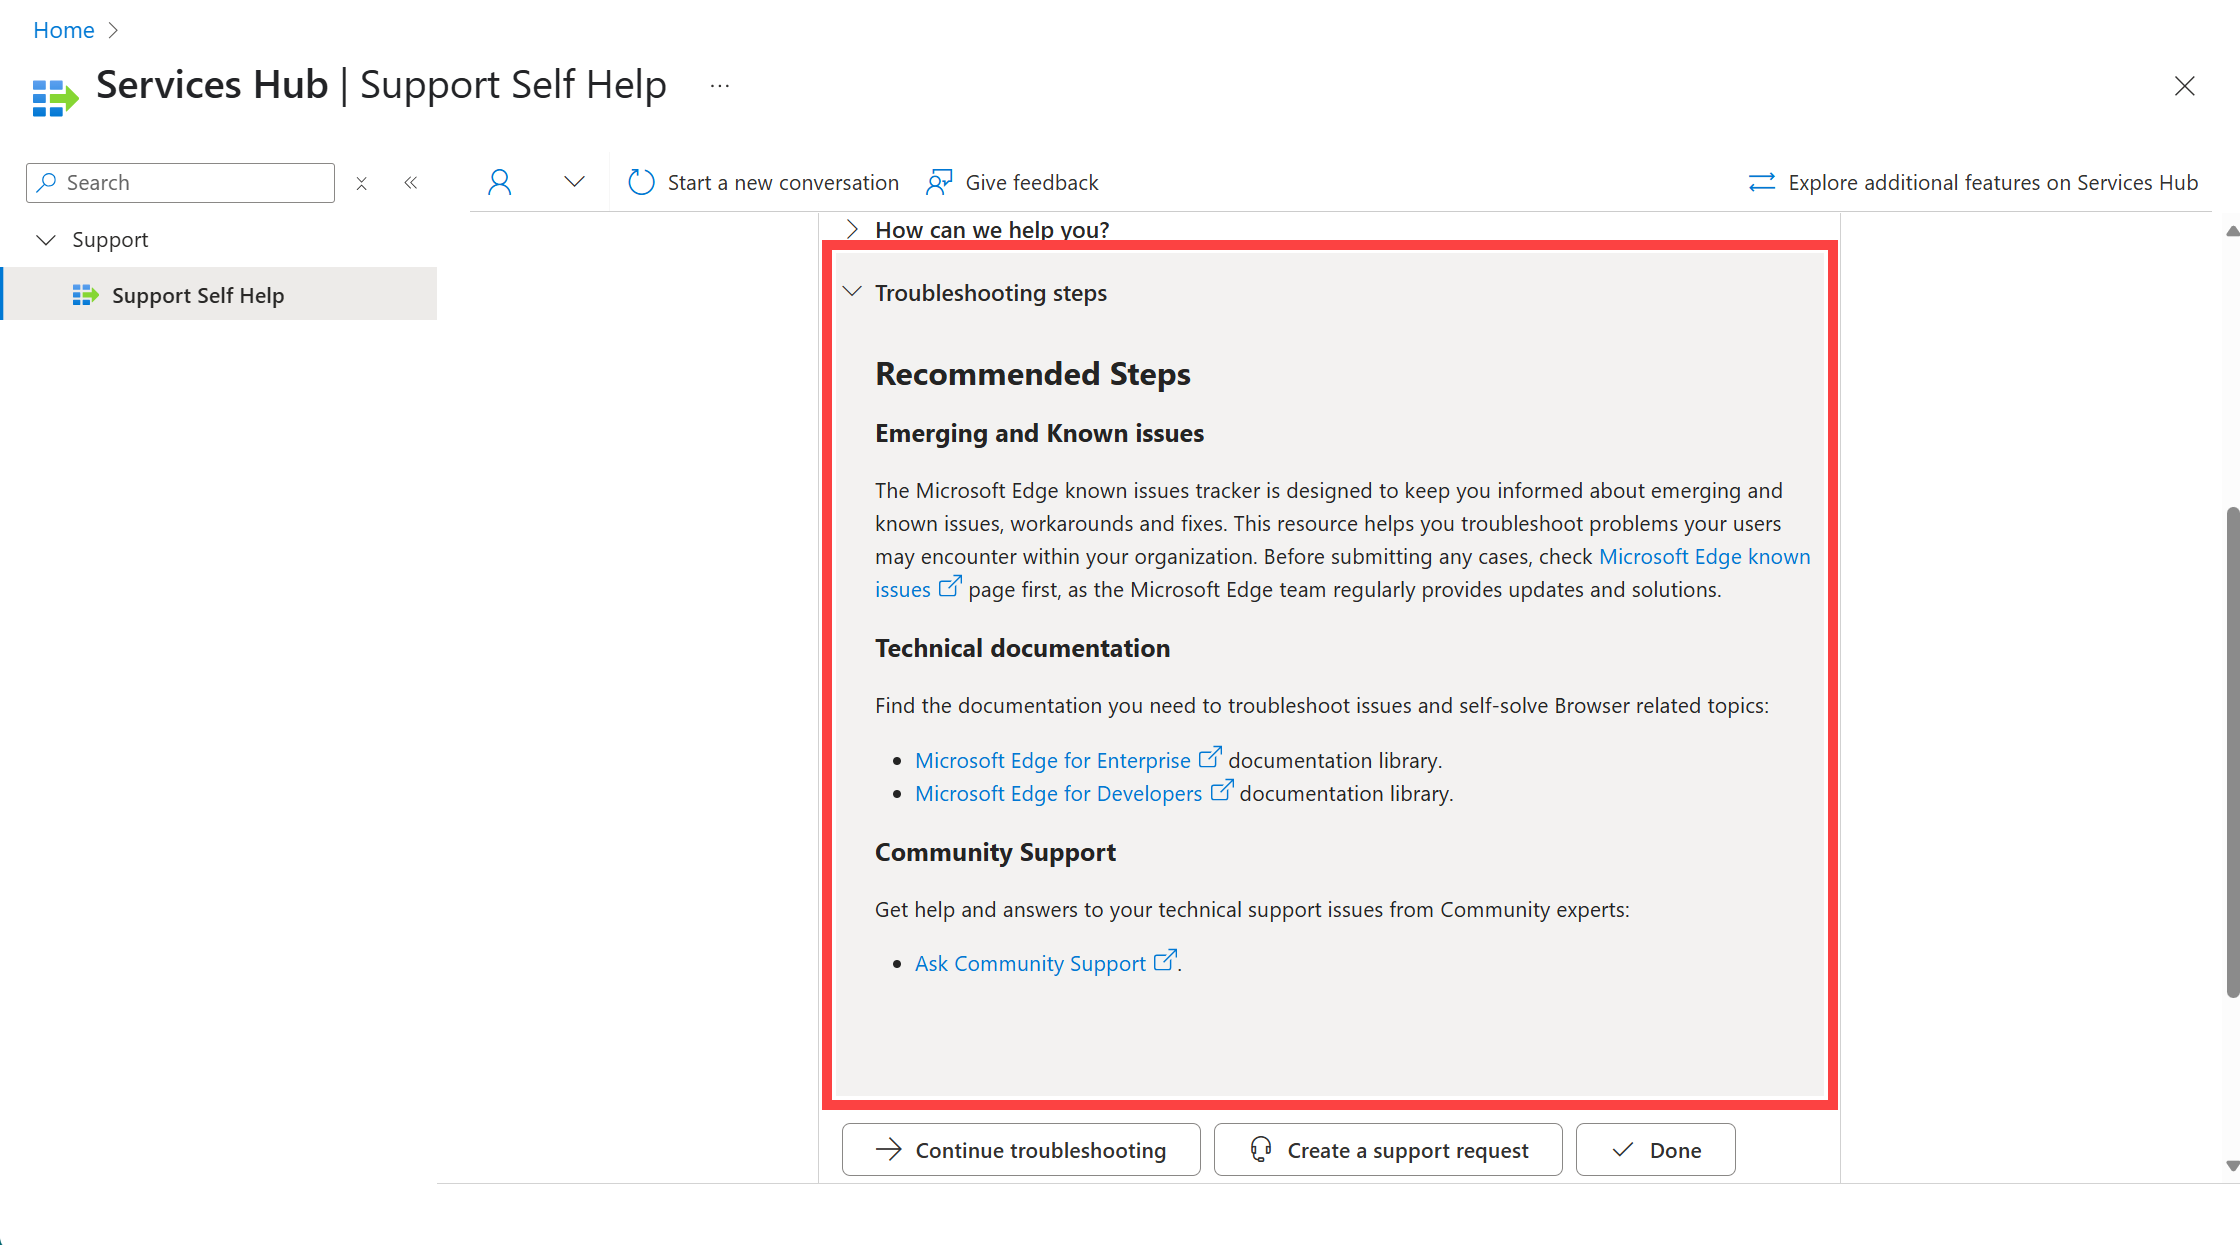
If we don't have recommended troubleshooting steps for your issue, the Support AI Assistant provides a message stating this, followed by options for you to select either "Continue Troubleshooting," "Create a support request," or "Done".
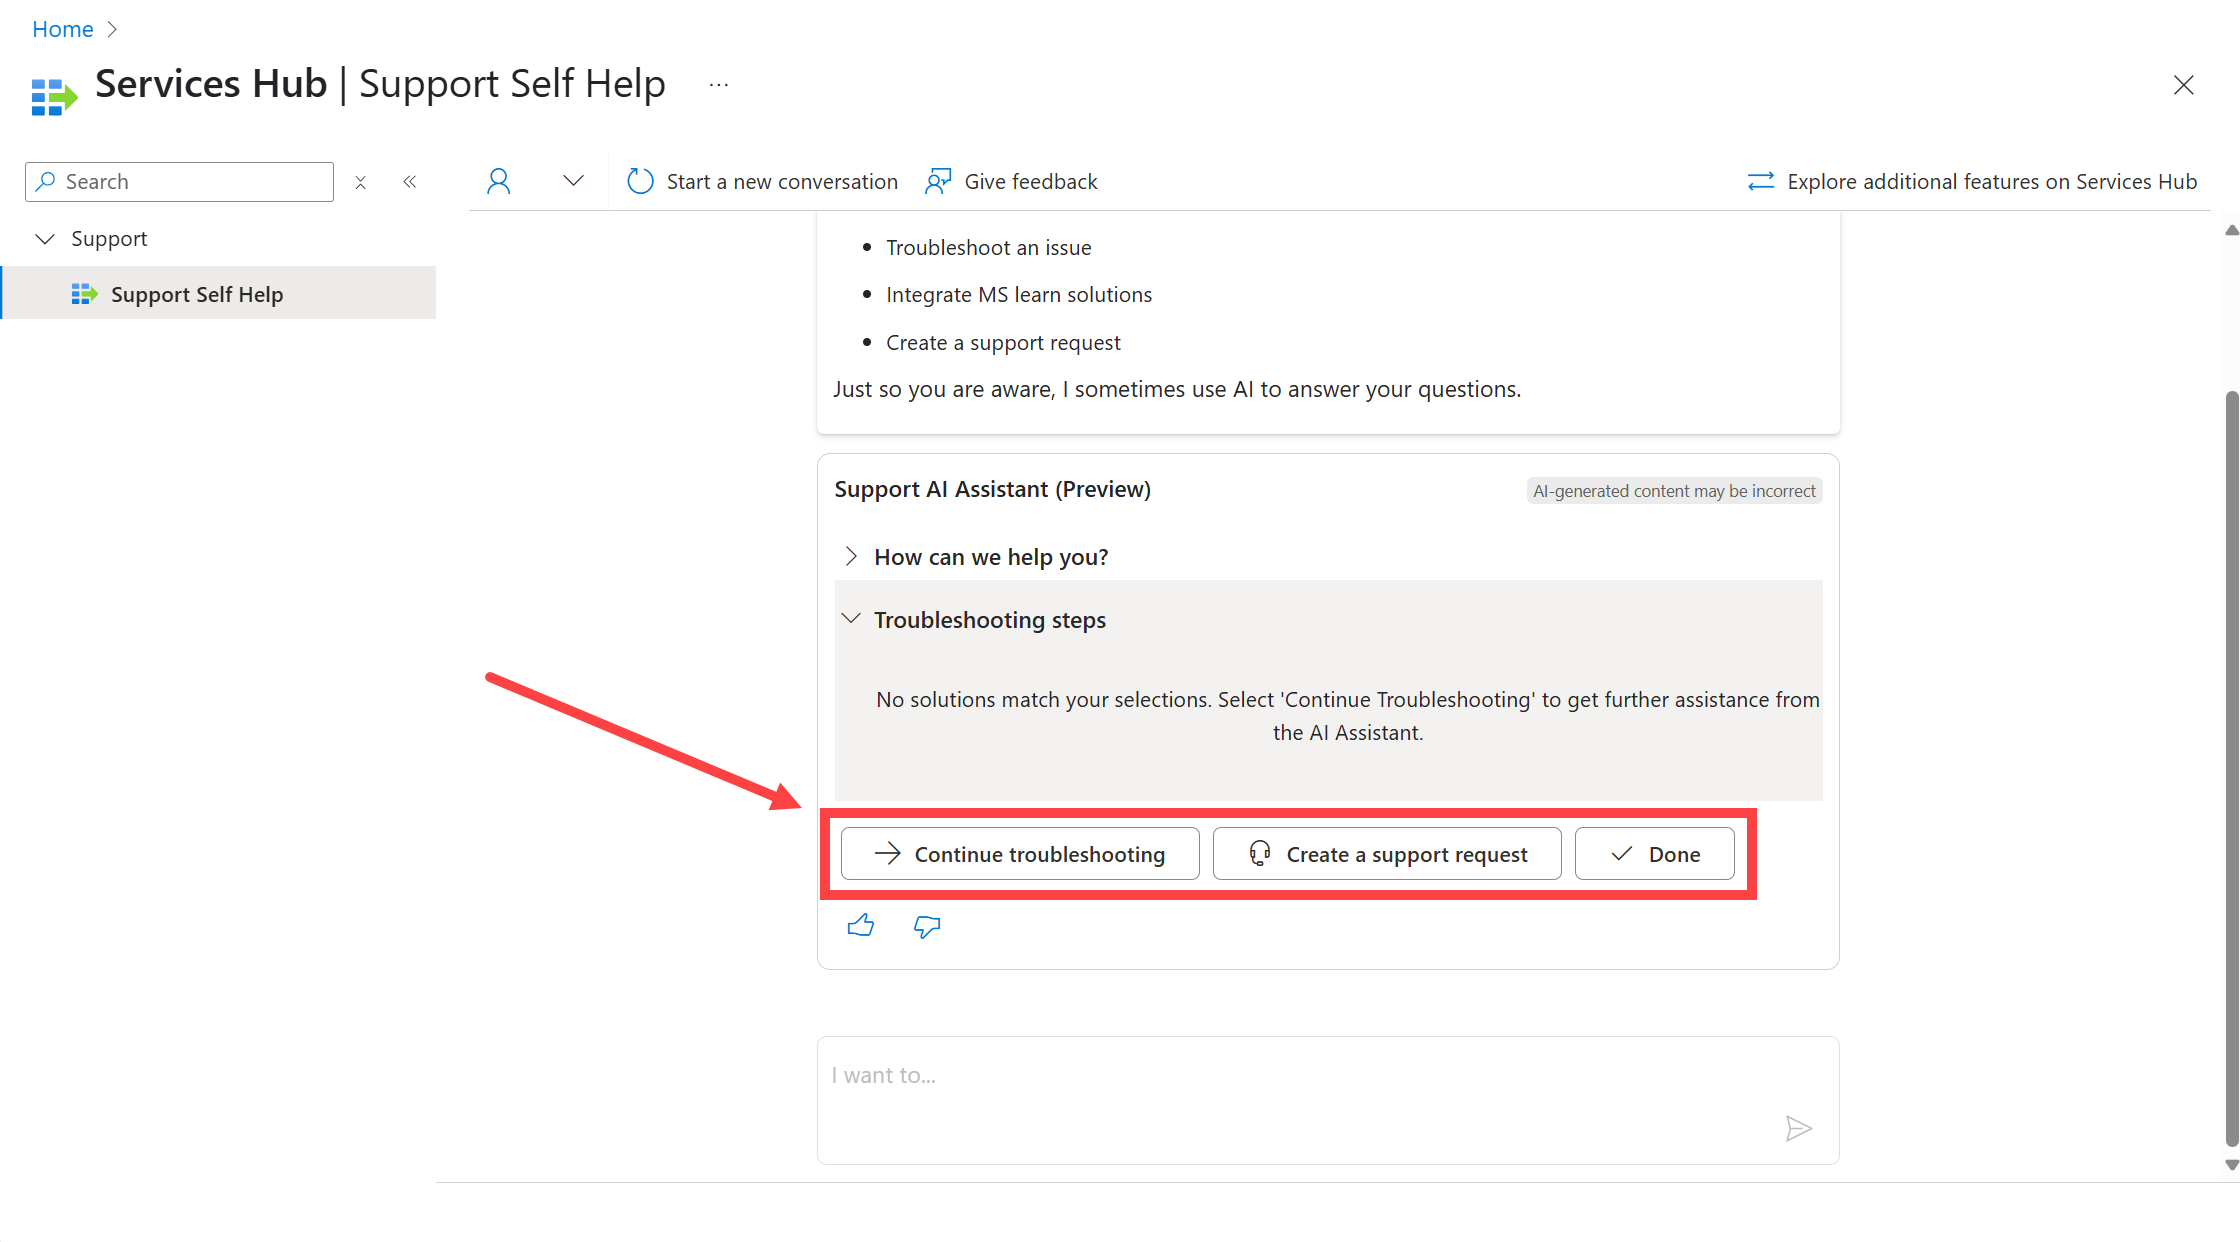
If the recommended steps and/or documentation solve your issue, select "Done".
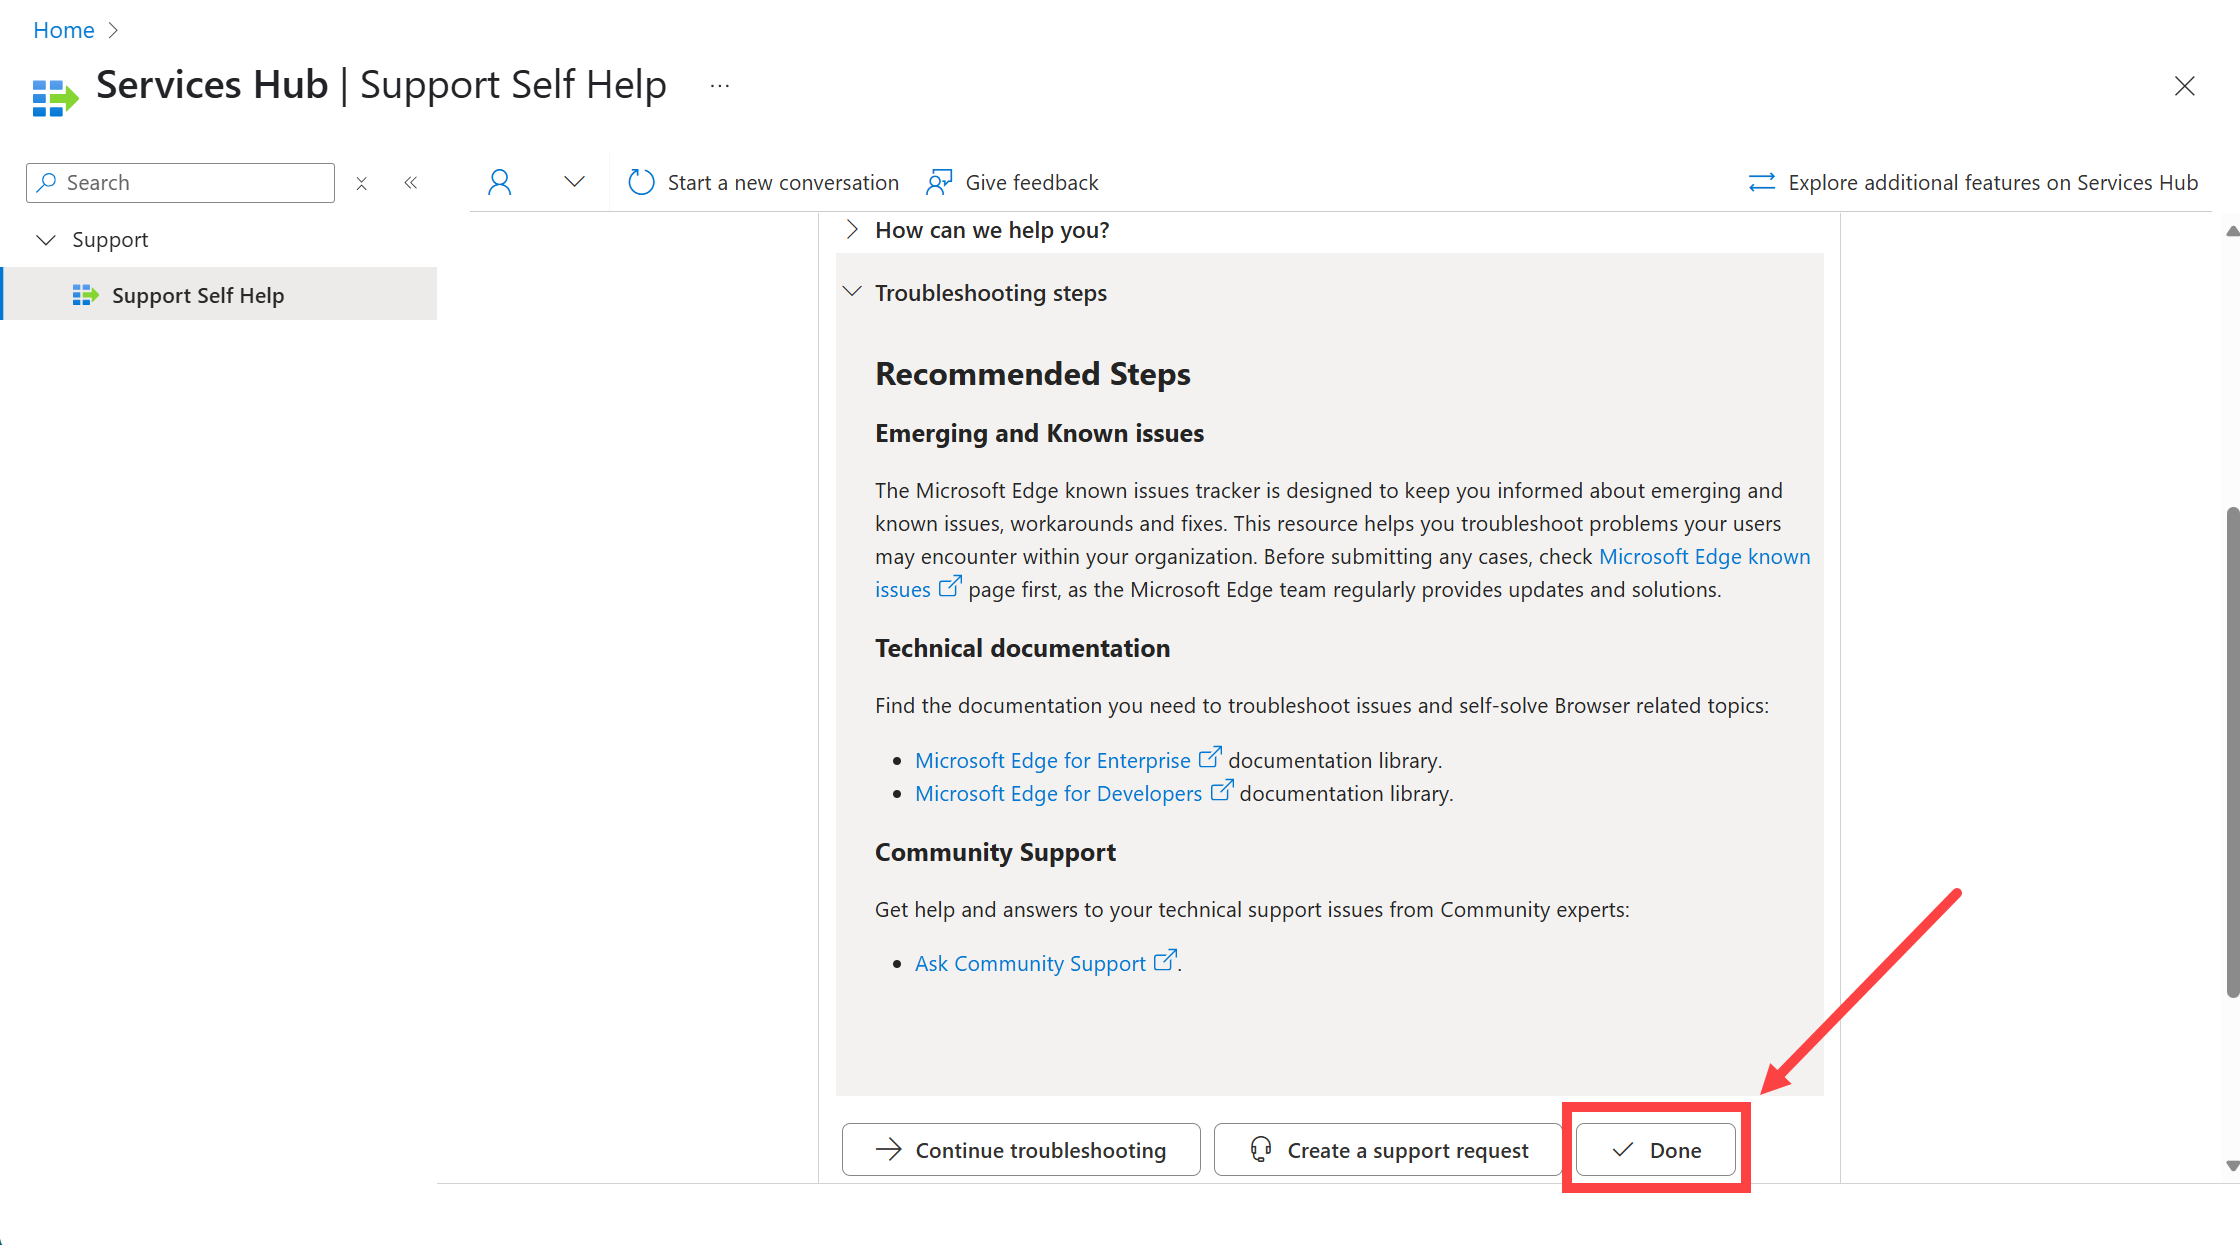
If you still need more help, you can select "Continue Troubleshooting" or "Create a support request."
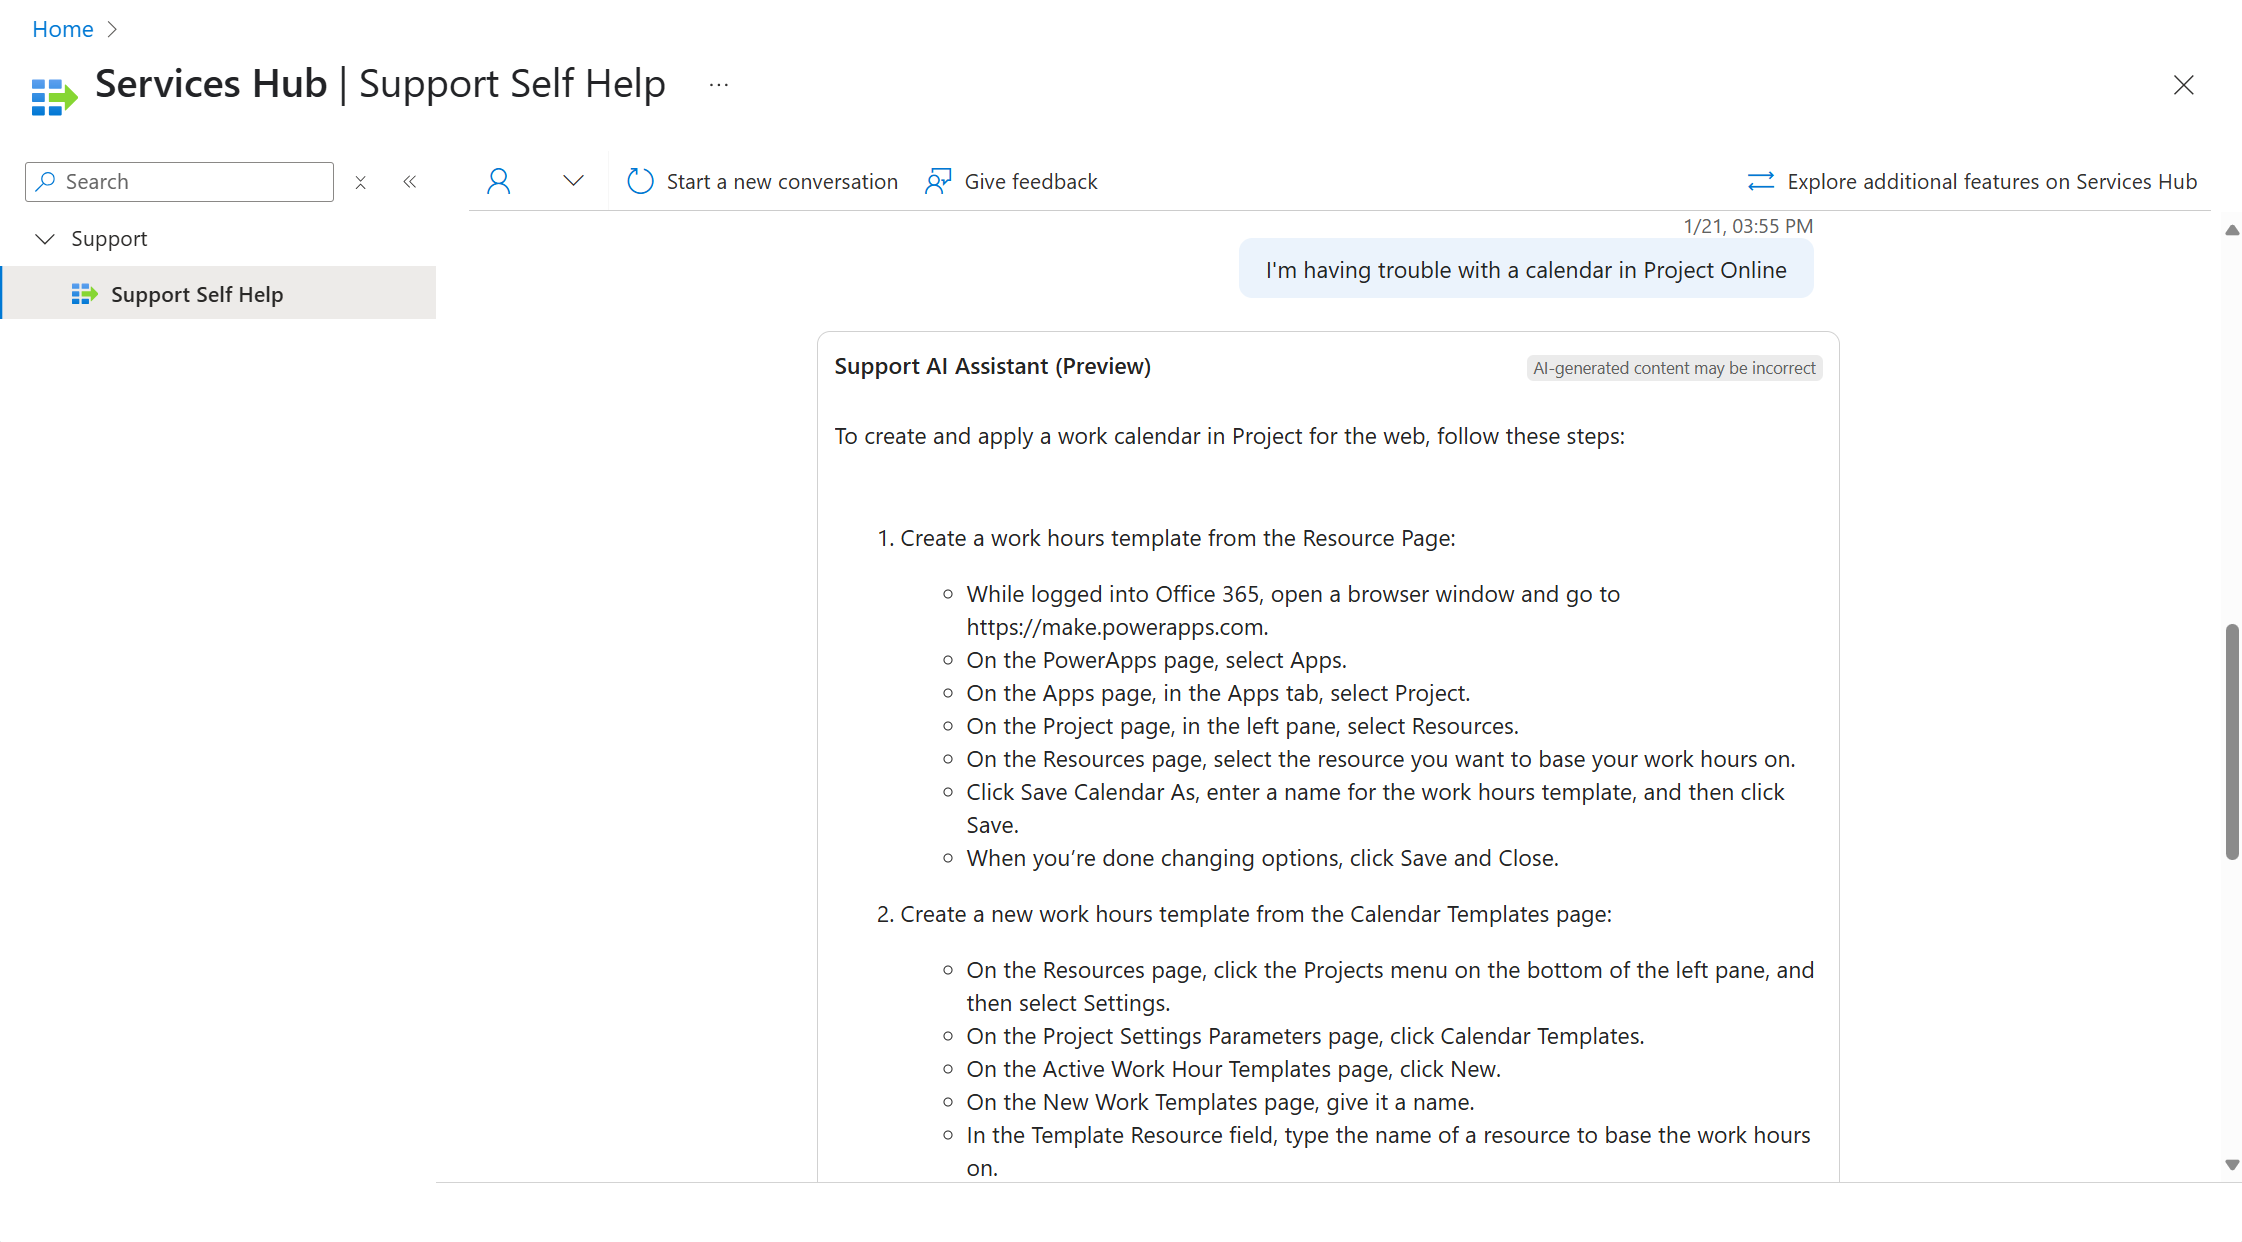
If you select "Continue Troubleshooting", the Support AI Assistant prompts you to provide more information through a text box.
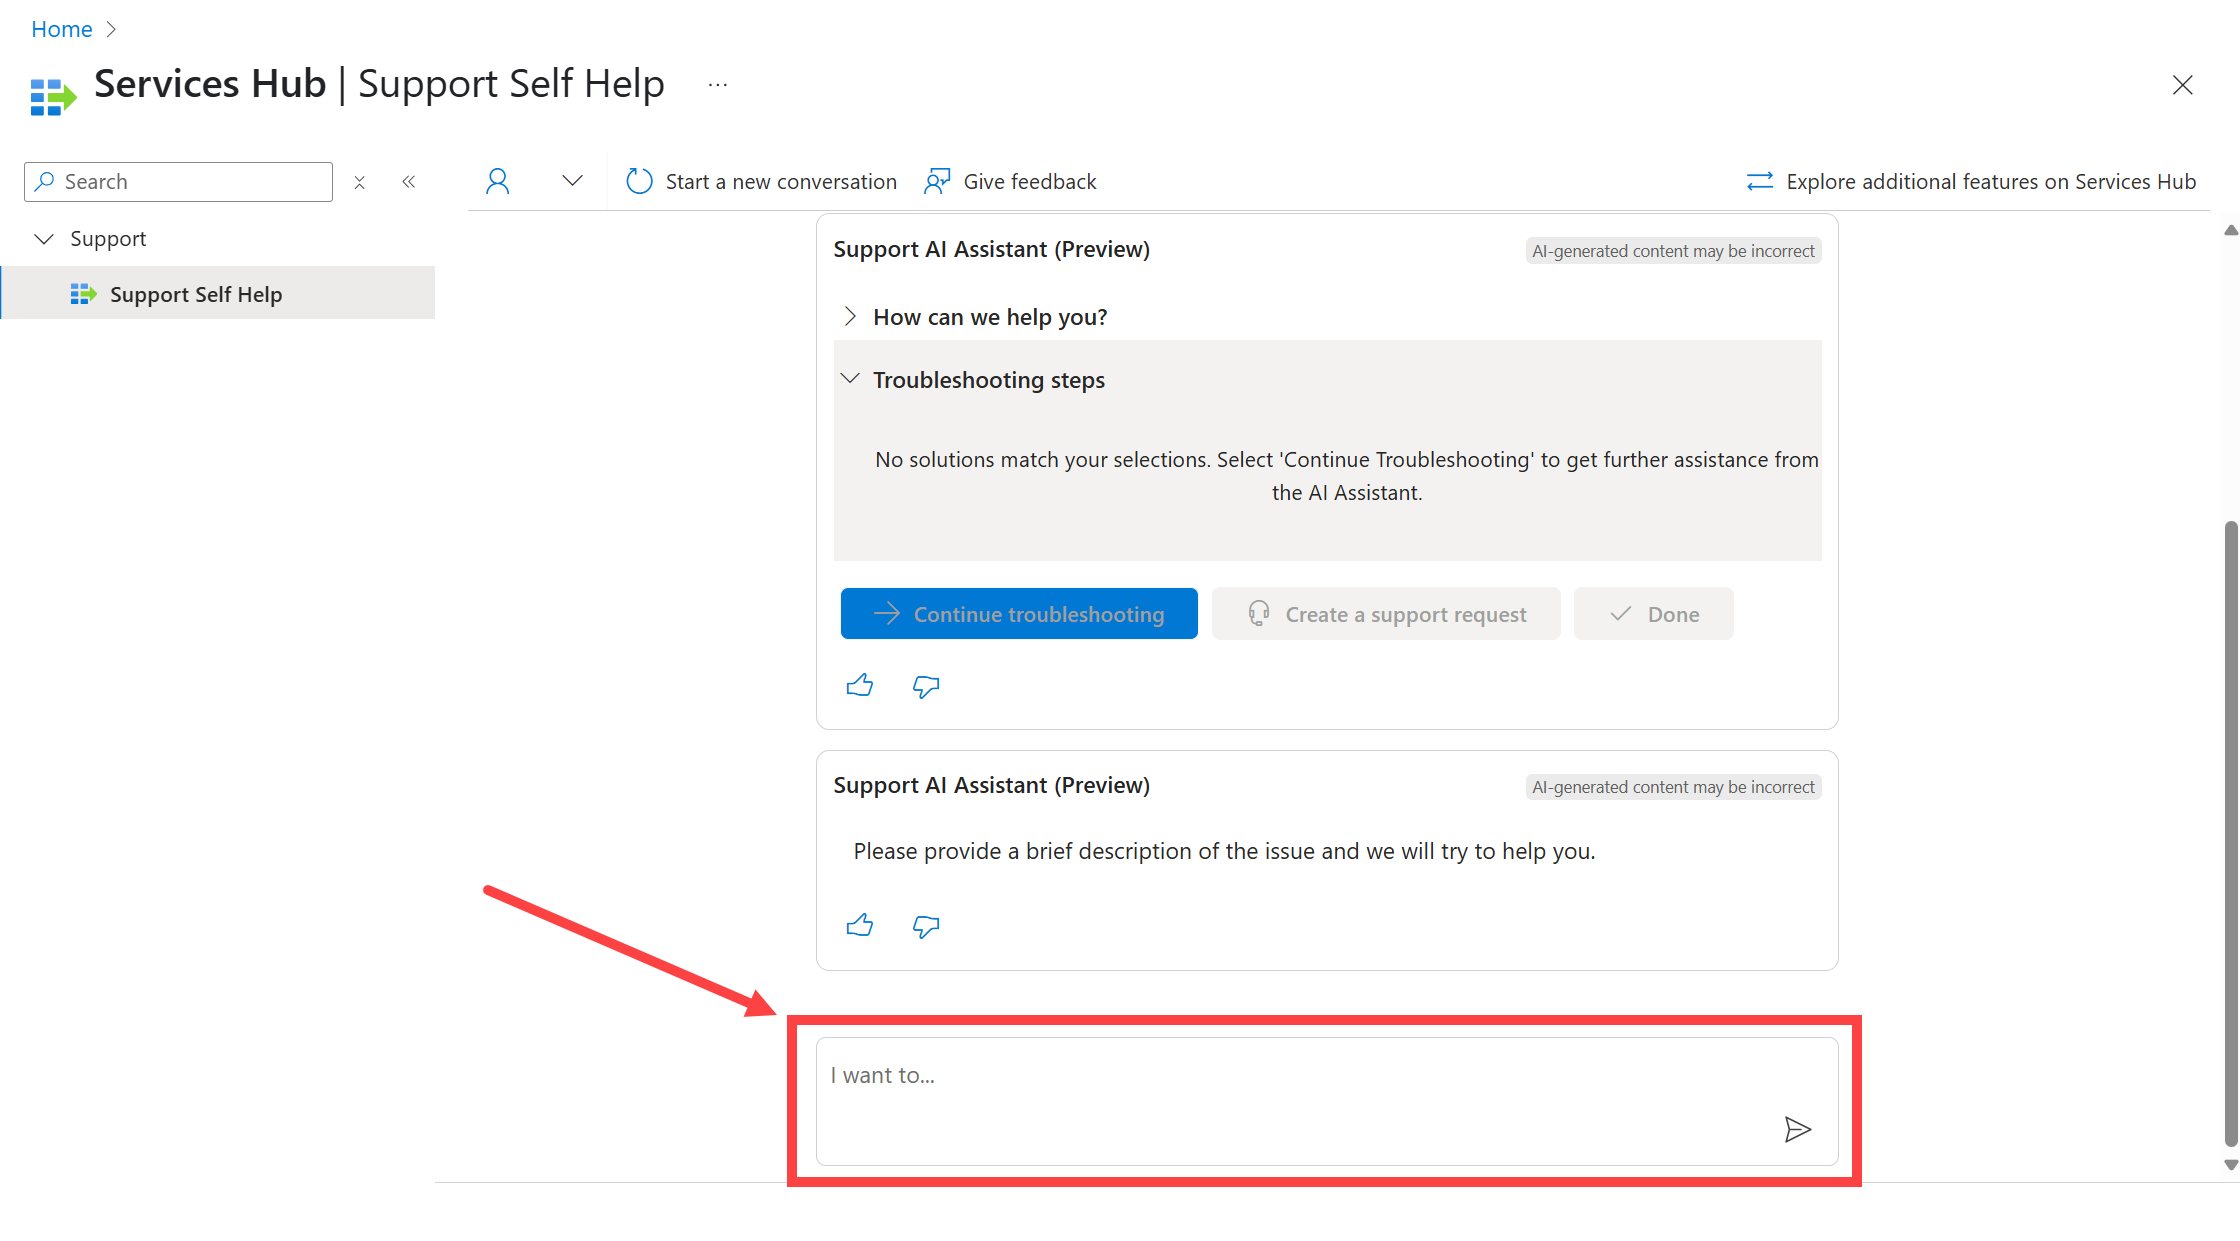
The Support AI Assistant then provides any information and help it can for your stated issue:
After the Support AI Assistant responds with its attempt to help, you can once again choose between "Create a support request" and "Done".
Select "Done" if the latest information solved your issue. Select "Create a support request" if you still need more assistance (go to step five for instructions).
If you select "Create a support request," the Support AI Assistant sends you to the "New support request" page, and you can fill out and submit the form there to open a new support request for your issue.
The system automatically fills in some of the information you already provided the Support AI Assistant with about your issue to get you started with the new support request form.


Fill in your new support request form
The new support request form has three main sections:
- Problem Description
- Additional Details
- Review + Create
In the Problem Description section, your Service type, Problem type, and Problem subtype should already be selected from the dropdown lists. This is pulled from the information you provided to the Support AI Assistant already.
In the text box labeled "Summary", fill in whatever explanation and background you want to provide about your current issue.
Note
Depending on your screen settings, you might need to scroll down to see and select "Next".
Select "Next".
In the Additional Details section, fill in all the required boxes to provide additional details related to your problem support request.

Select "Next".
In the Review + Create section, review all the information you've provided.
If everything is correct, select "Submit".
After your request is submitted, the site shows you a confirmation screen.
On the confirmation screen, select "View your support request on Services Hub".
Selecting this redirects you back to Services Hub 1.0 experience.


Contact Services Hub
You can also visit our Get Help page to contact us for help with Services Hub website.
Support Contacts
Only a Support Contact can open a support request. For more information about Support Contacts, please see the Support Contact Overview.